
Last Wish Guide
Done by: Rebirth#3299 | Nov 30th 2022
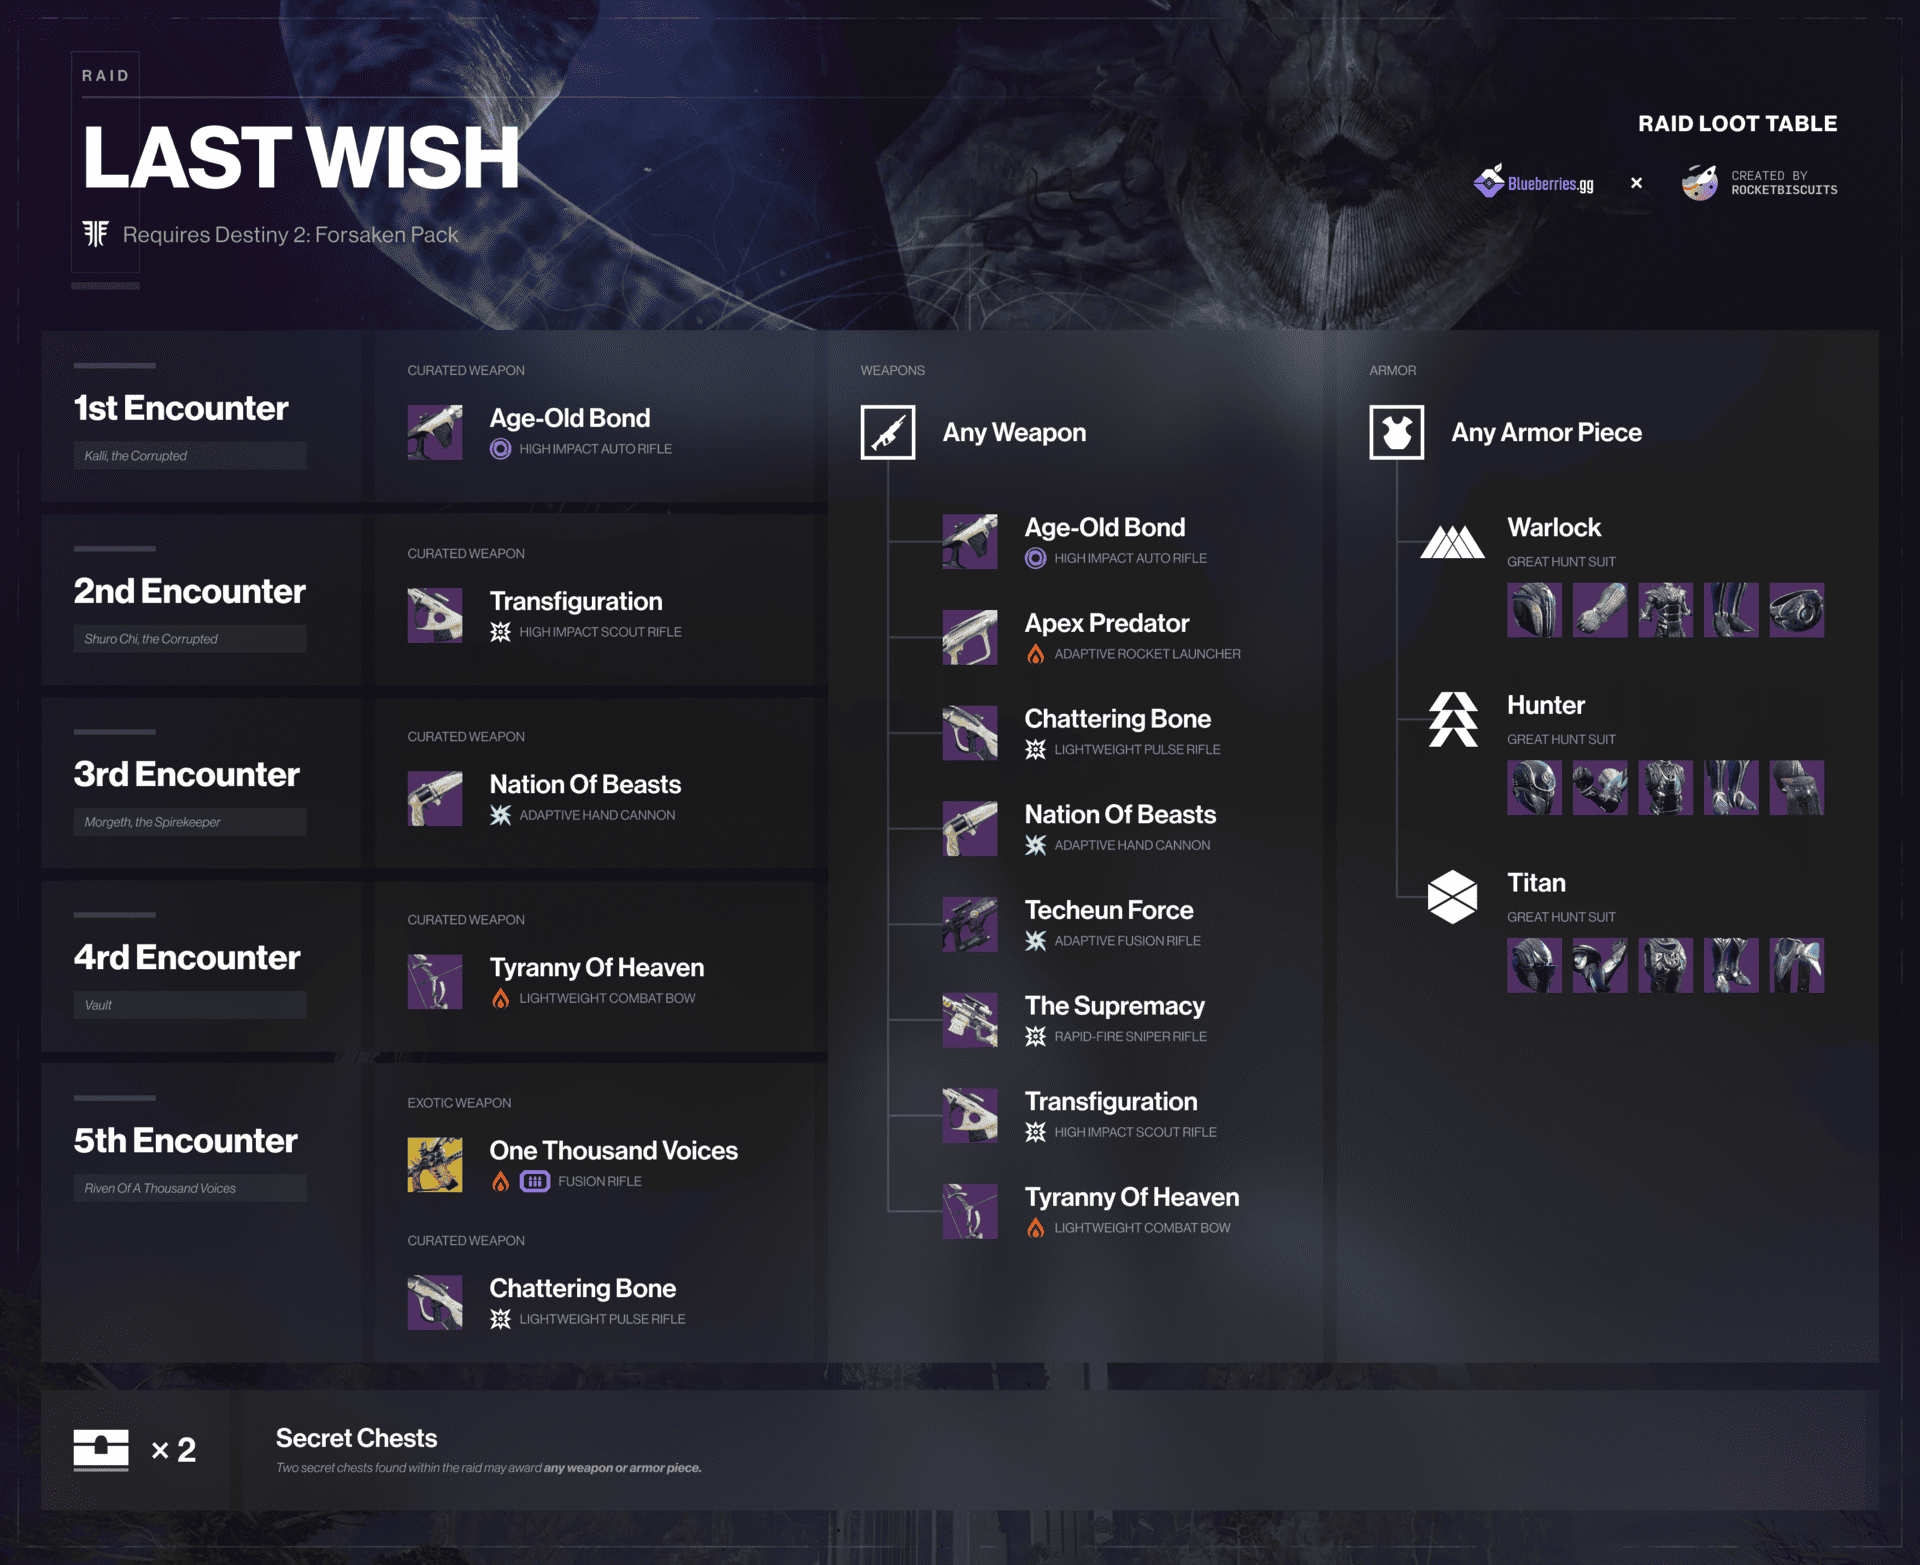
Loot Table
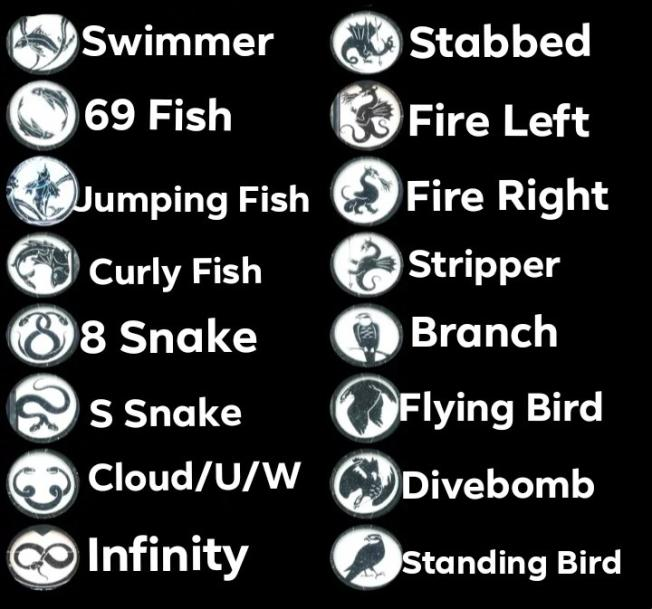
Symbols to memorise:
Note this are not the fixed name for the symbol, but do briefly describe them if you cannot remember all:
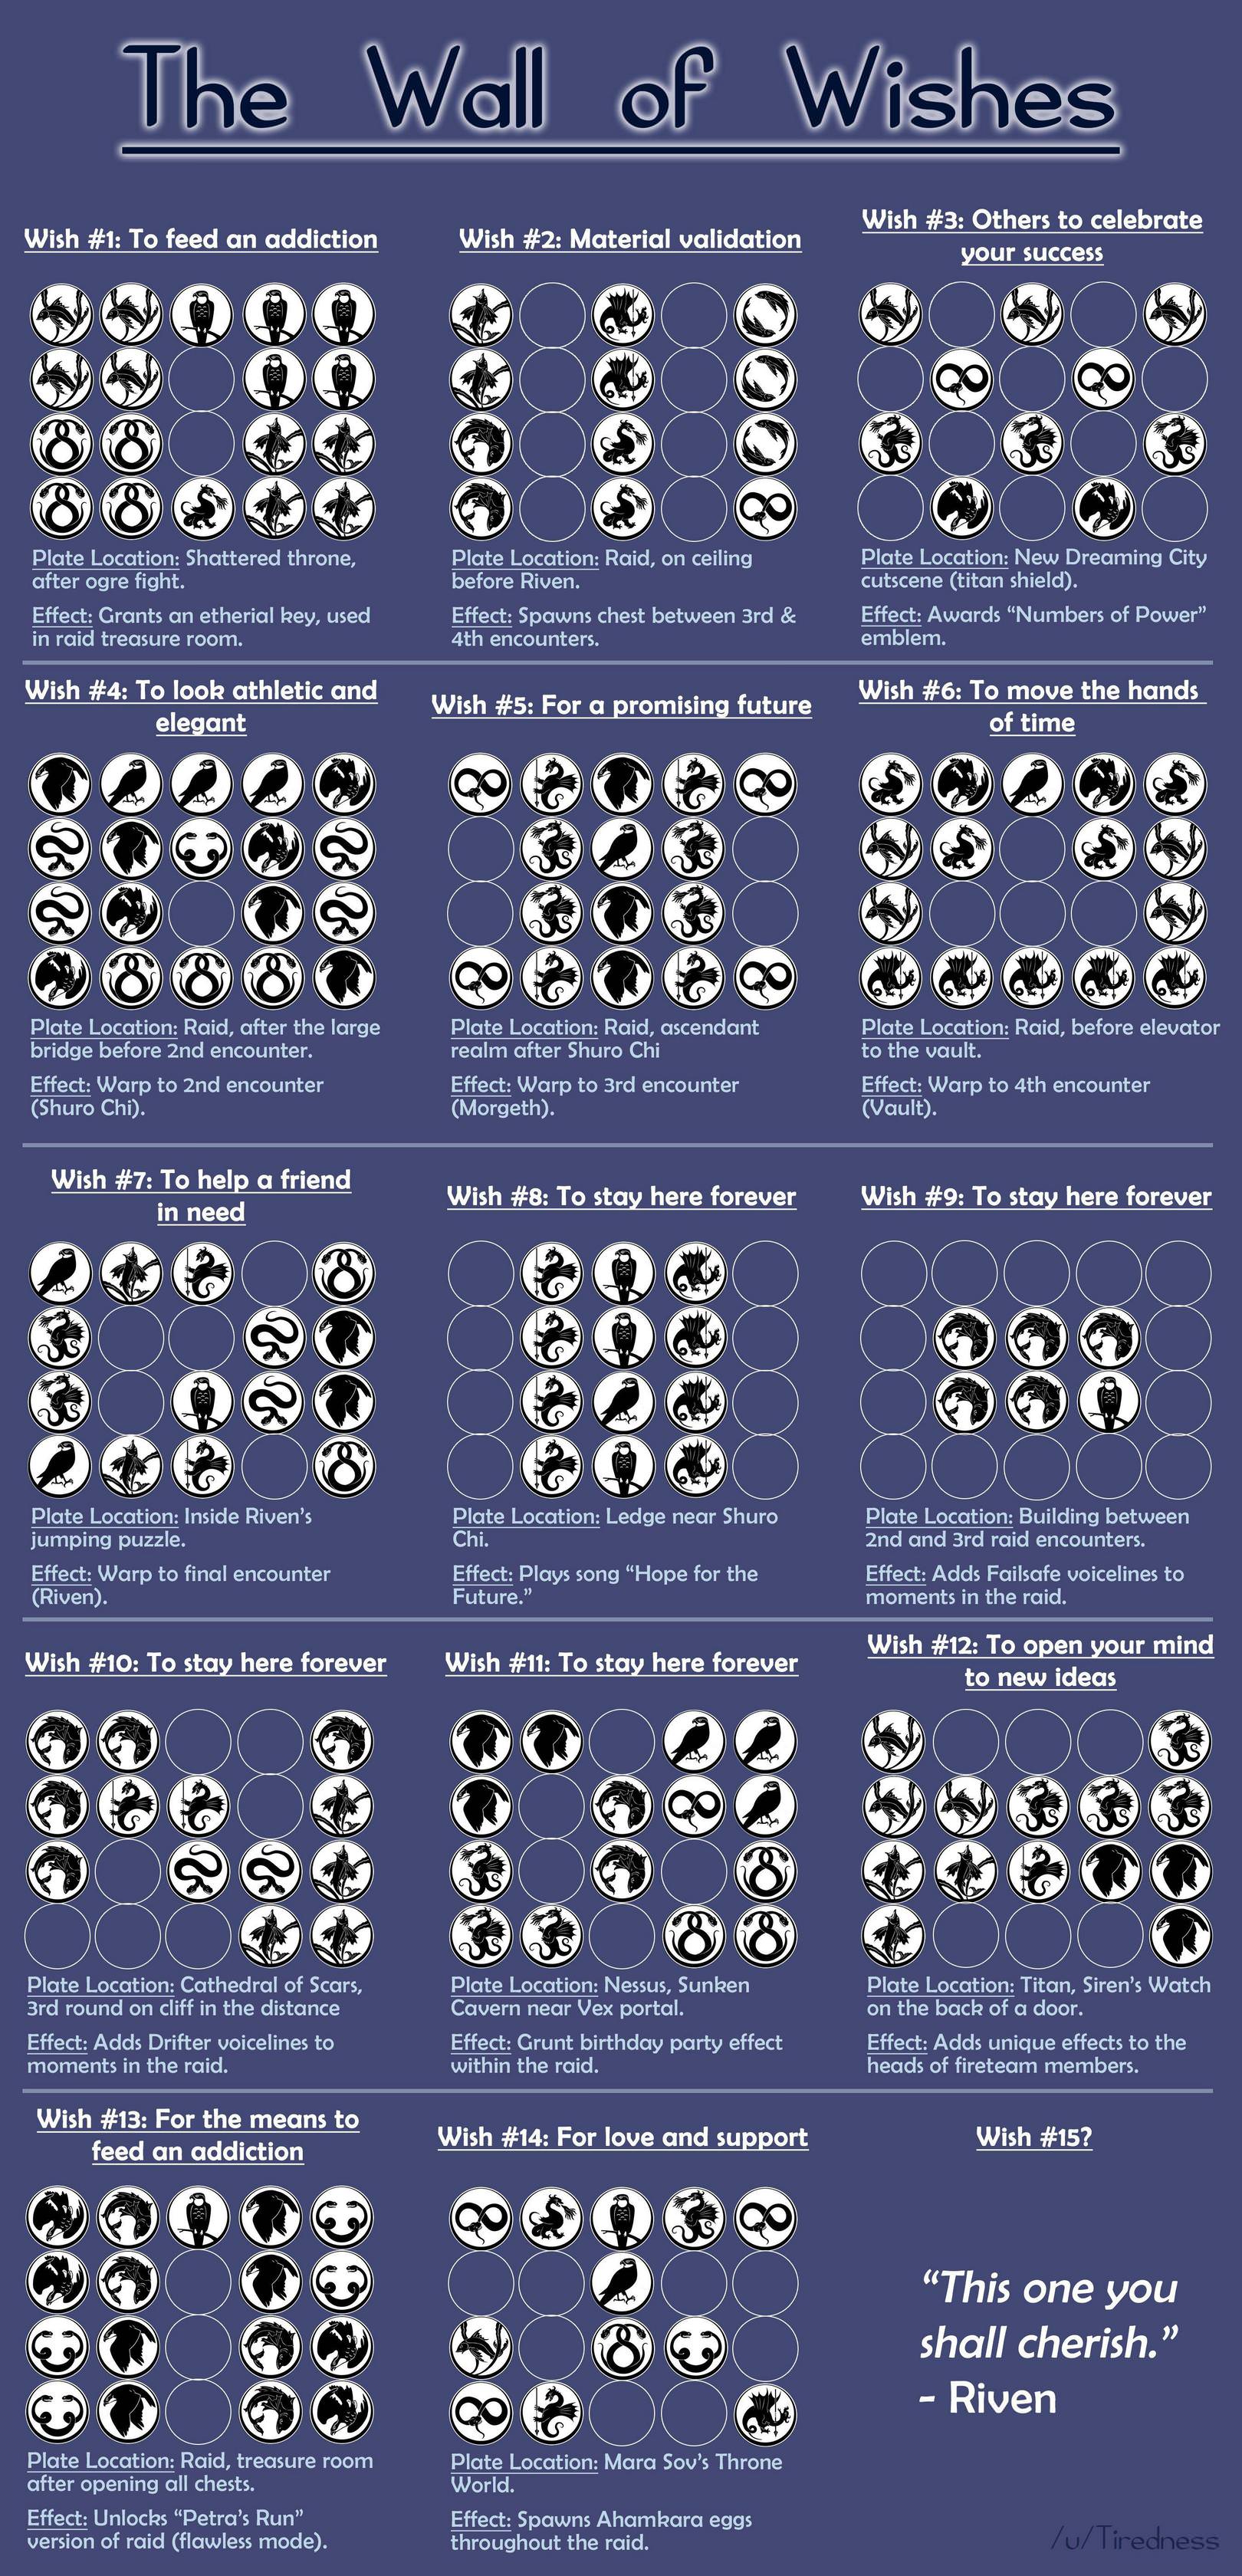
Wishing Wall
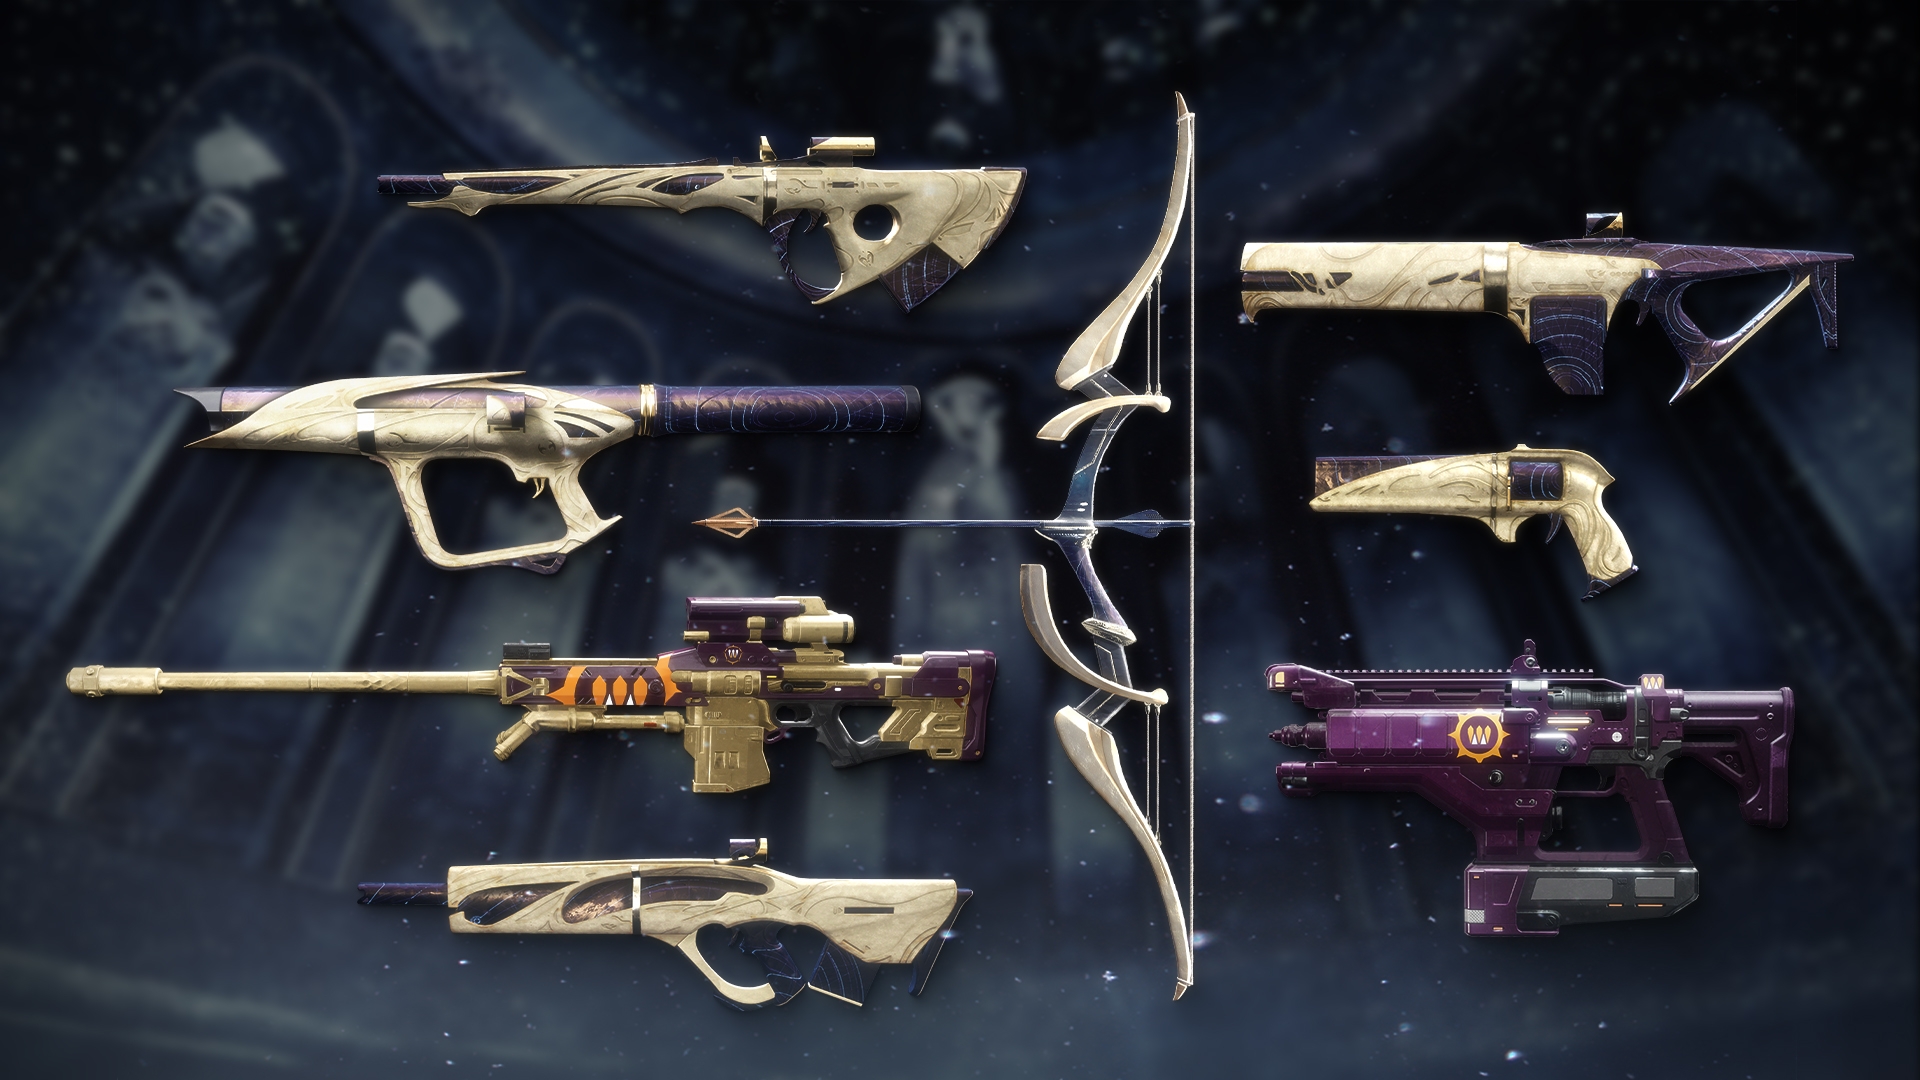
Weapons

Explosive Pact - This weapon gains bonus stability and reload speed when activating a grenade ability. Healing grenades and grenade final blows grant additional stacks of the bonus.
 Transfiguration
Legendary //
High-Impact Frame // Scout Rifle
Desirable Perks
- Barrel:
- Arrowhead Brake
- Magazine:
- Accurized Rounds
- Column 1 Perks:
- Rampage
- Rapid Hit
- Column 2 Perks:
- Kinetic Tremors
- Explosive Payload
Masterwork: Range
Mod Slot: Minor Spec
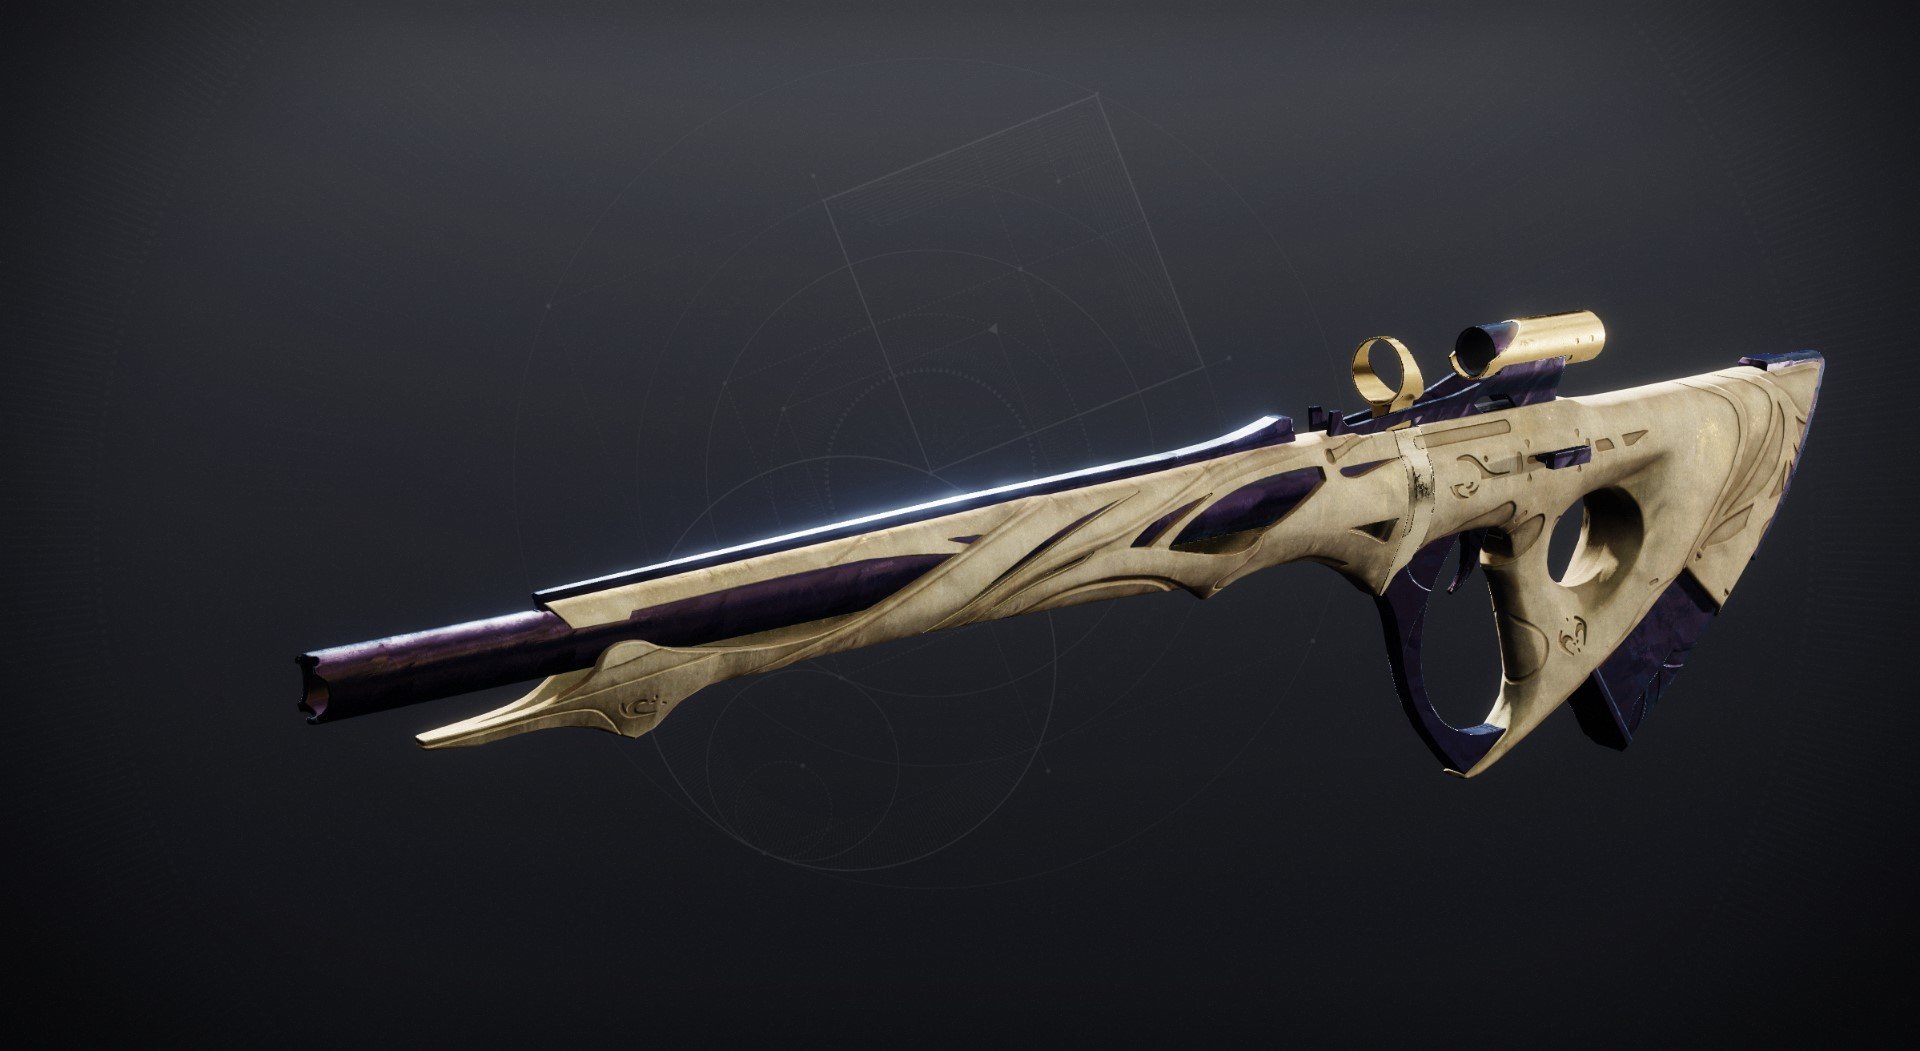
Perk wise, a very capable PvE scout rifle, with a consistent roll of Rapid Hit + Explosive Payload, or Kinetic Tremors if you prefer that. In PvP, the same roll in PvE can work, though there exists the niche roll of Rampage + Kill Clip, which with both perks active is able to 2-tap Guardians in the Crucible.
Chattering Bone
Legendary //
Lightweight Frame // Pulse Rifle
Desirable Perks
- Barrel:
- Arrowhead Brake
- Magazine:
- Accurized Rounds
- Column 1 Perks:
- Kill Clip
- Rangefinder
- Column 2 Perks:
- Kinetic Tremors
- Headseeker
Masterwork: Range
Mod Slot: Minor Spec, Counterbalance Stock
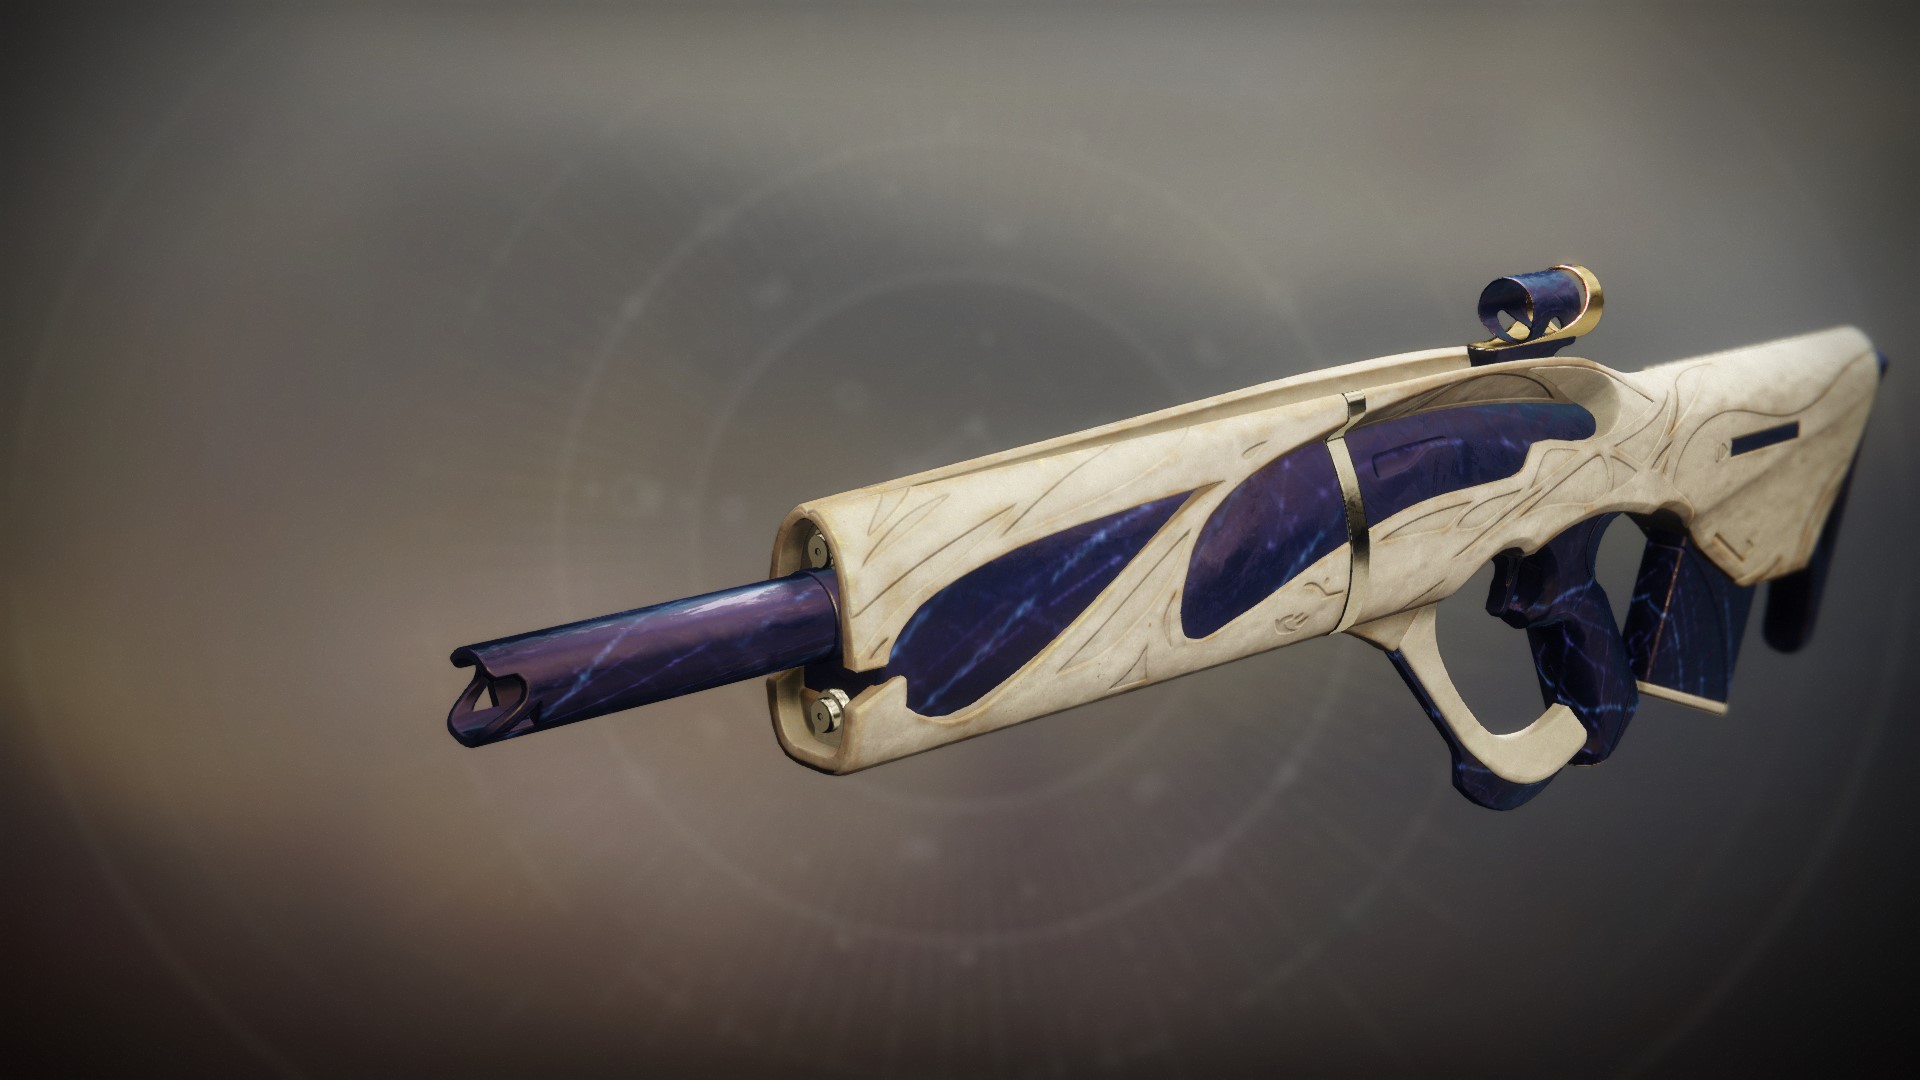
Chattering Bone is a decent pulse rifle for both PvE and PvP. In PvE, its capability to roll Rapid Hit for consistency or Kill Clip for an extra damage perk pairs well with Kinetic Tremors for some decent endgame use.
In PvP, Chattering Bone is a decent pulse rifle as well, with a very viable roll of Rangefinder/Rapid Hit/Kill Clip + Headseeker. Headseeker makes shots feel sticky and easy to land, at the cost of Lightweight pulses being on the weaker side in the Crucible.
 Nation of Beasts
Legendary //
Adaptive Frame // Hand Cannon
Desirable Perks
- Barrel:
- Extended Barrel
- Arrowhead Brake
- Magazine:
- Accurized Rounds
- Column 1 Perks:
- Dragonfly
- Column 2 Perks:
- Explosive Payload
- Voltshot
Masterwork: Range
Mod Slot: Minor Spec
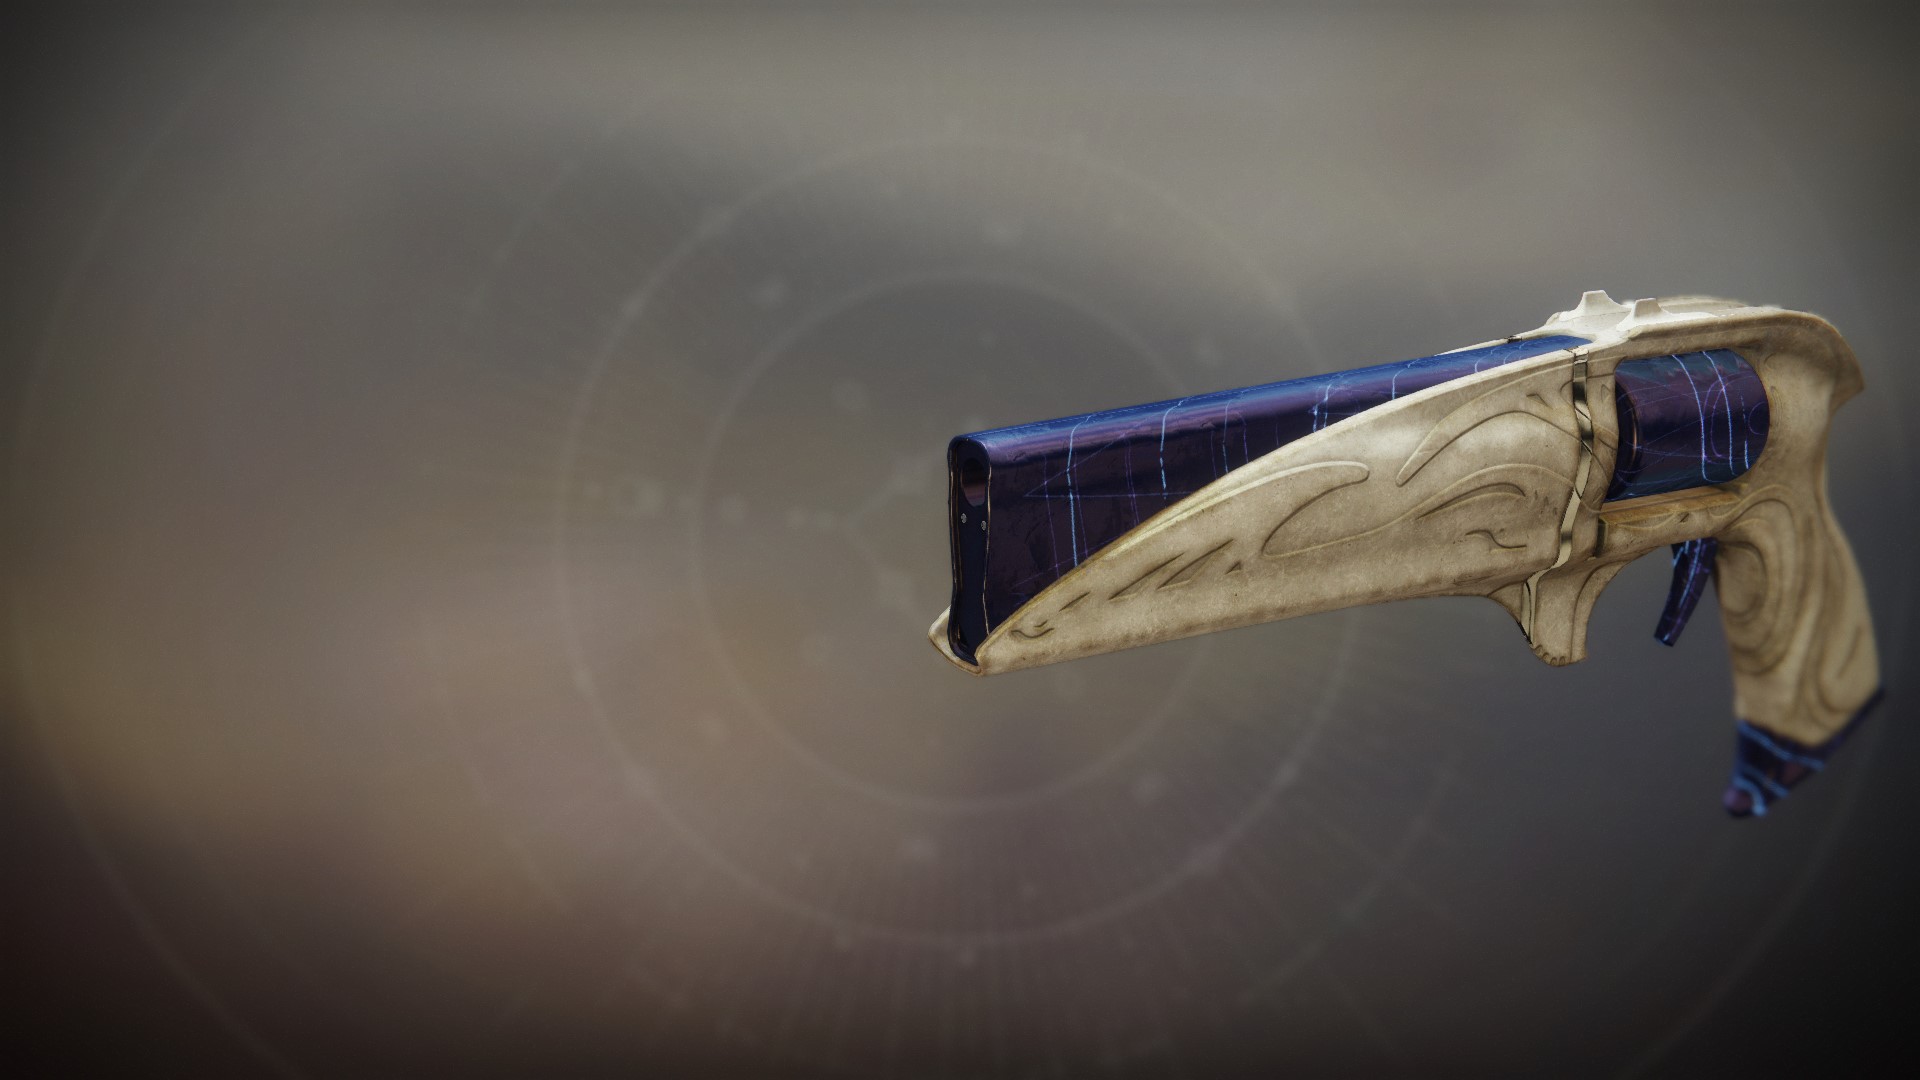
With the Season of the Witch changes to Hand Cannons, they are now some of the best primaries in the game. Nation of Beasts thus finds itself as one of the better options in this category, and with good ad clear perks like Dragonfly, and consistency perks like Explosive Payload, the Nation of Beasts is definitely a valid pick for most of the game's content. Opening Shot and Explosive payload might still find its way in the Crucible, but this gun is once again in the shadow of other options available today with a lack of range.
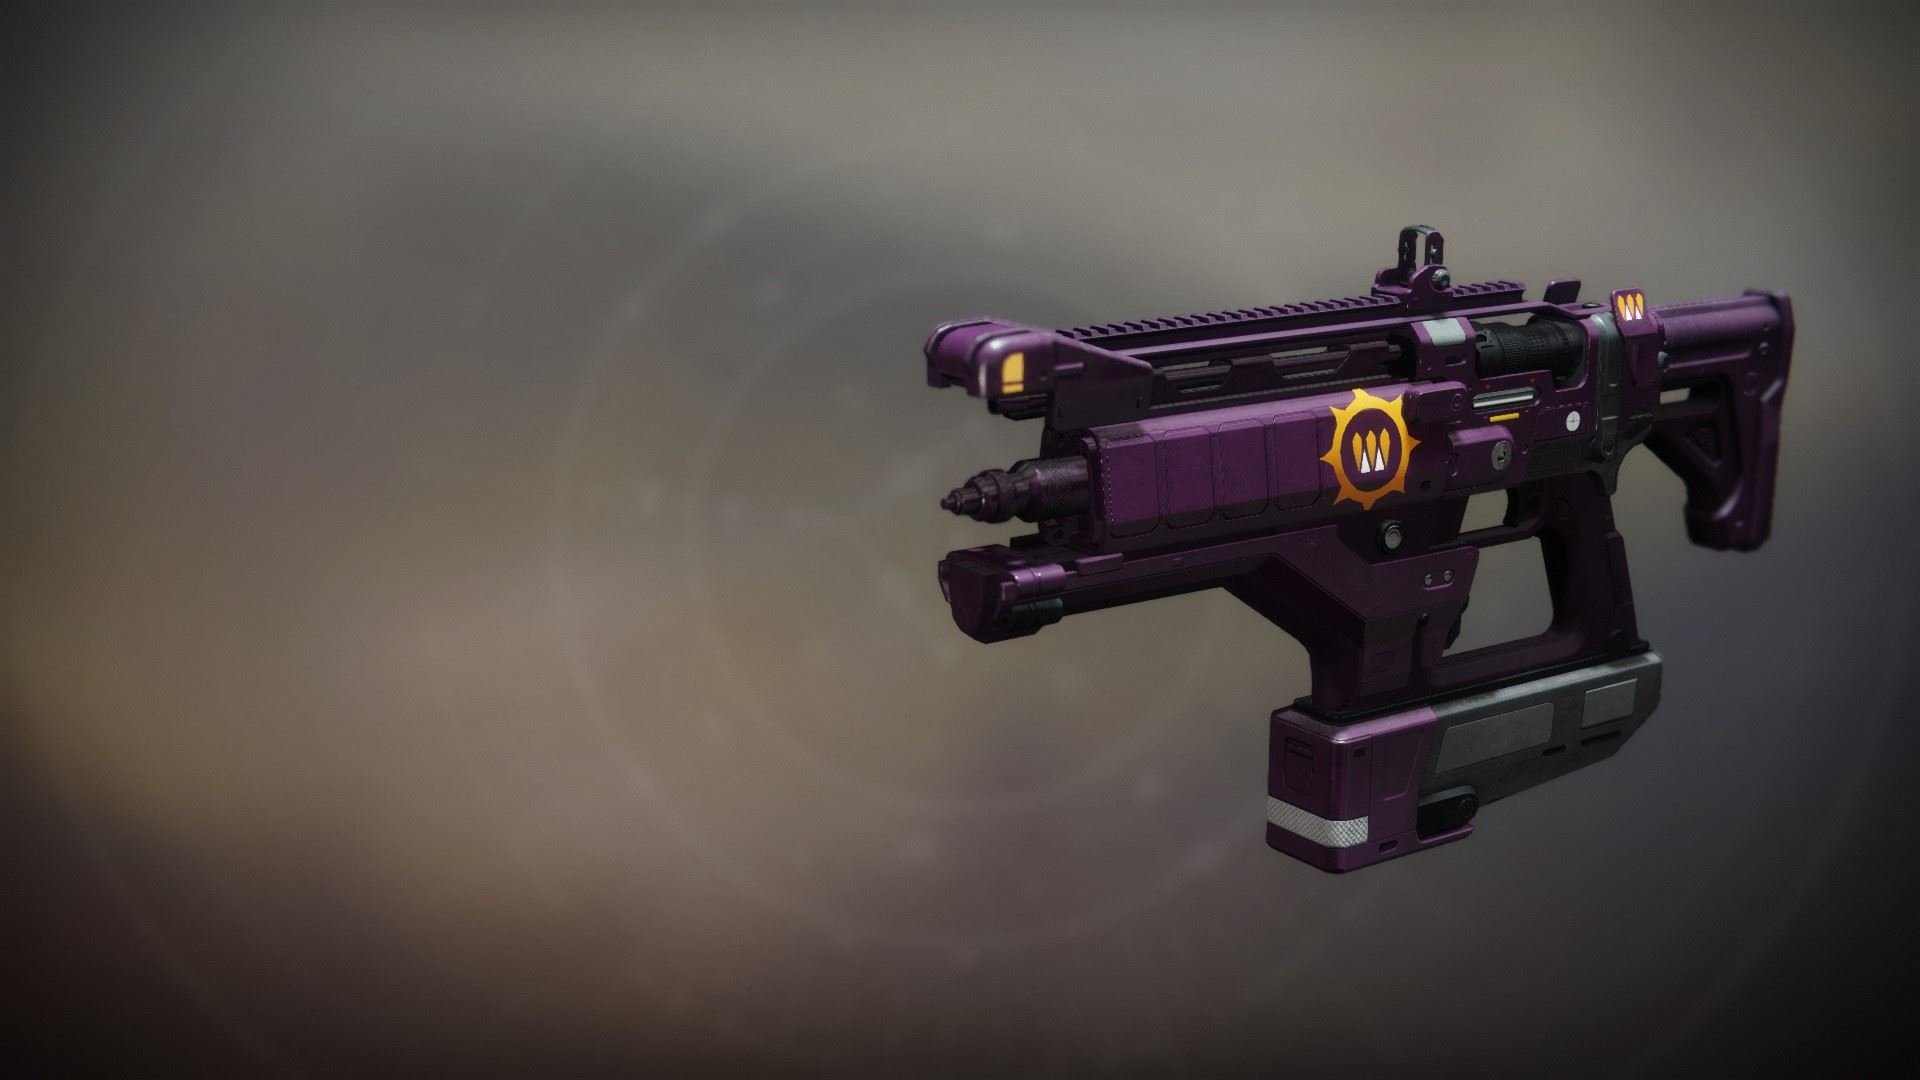
 Age-Old Bond
Legendary //
High-Impact Frame // Auto Rifle
Desirable Perks
- Barrel:
- Arrowhead Brake
- Magazine:
- Accurized Rounds
- Column 1 Perks:
- Repulsor Brace
- Column 2 Perks:
- Destabalizing Rounds
Masterwork: Range, Handling
Mod Slot: Minor Spec
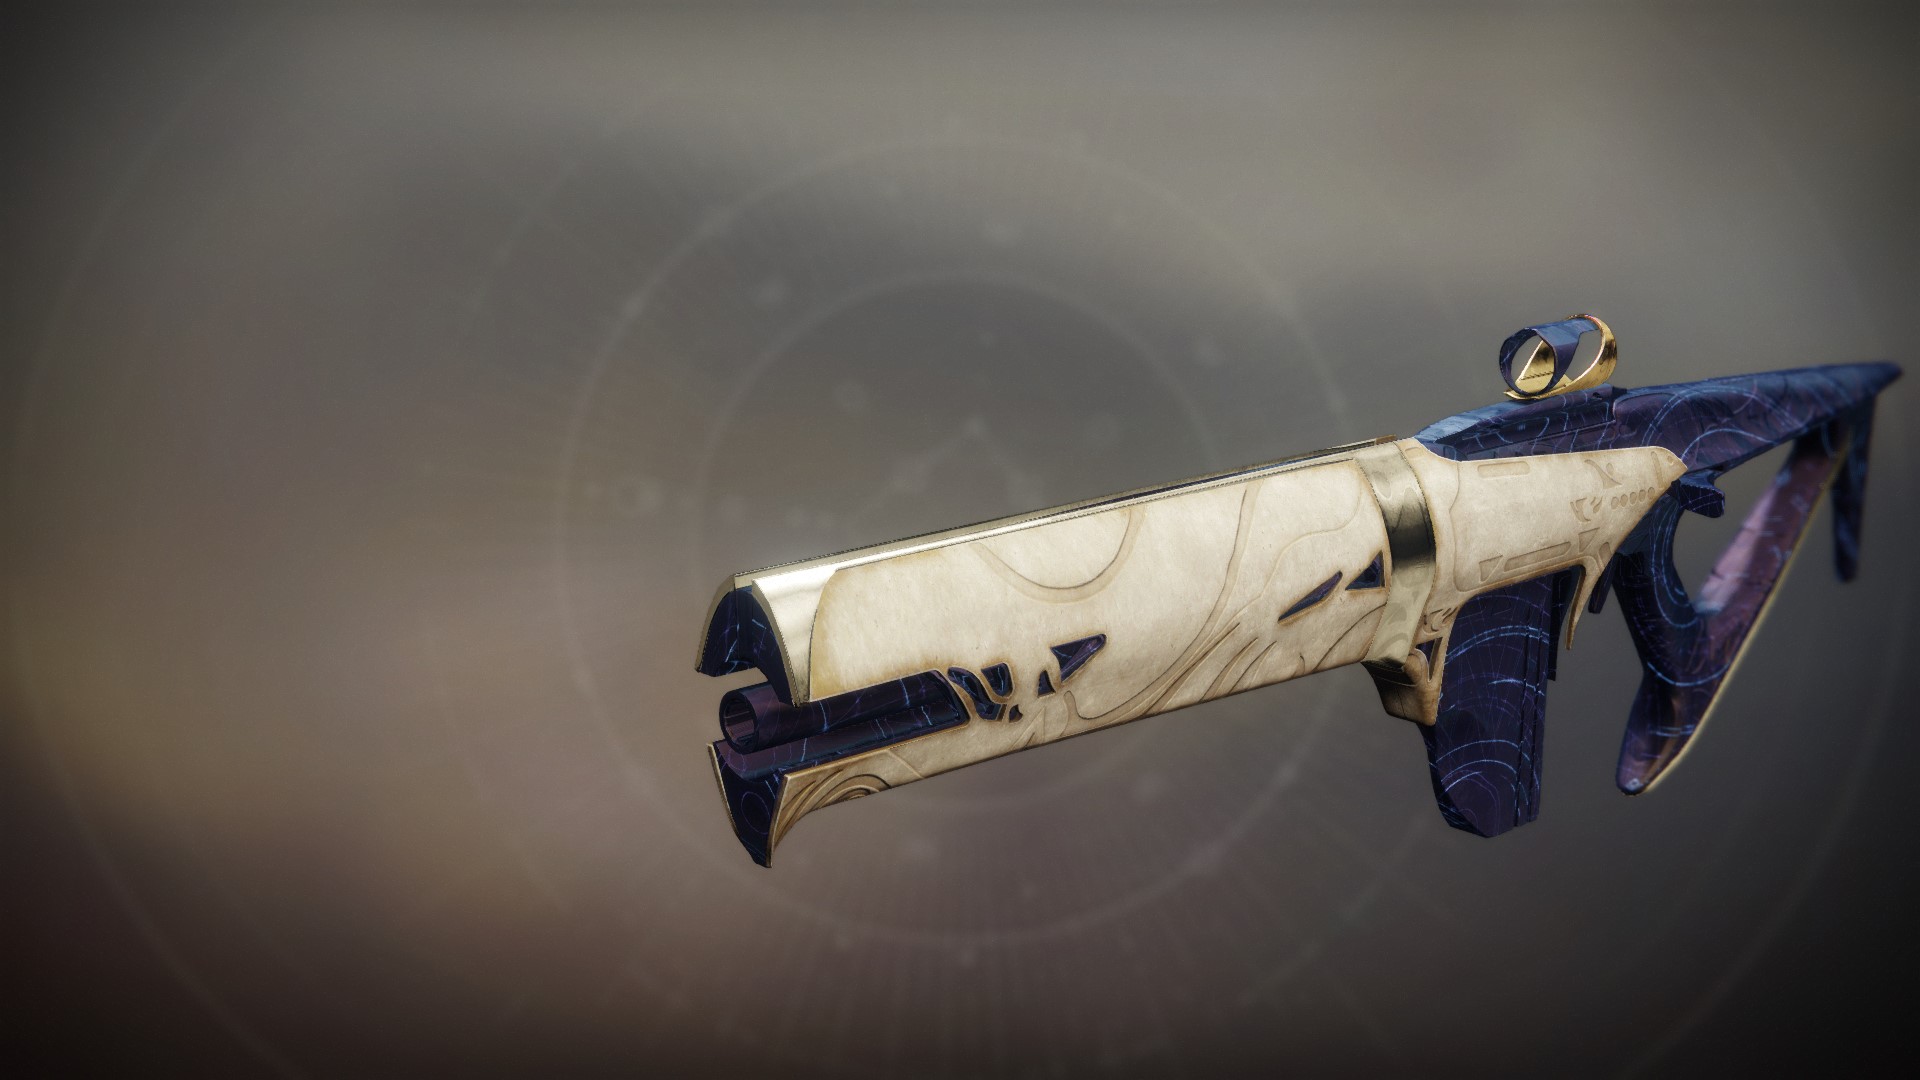
With the Last Wish perk refresh, Age-Old Bond has become one of the best void primaries in the game, with the combo of Destabilising Rounds + Repulsor brace ensuring constant Void shields and explosive ad-clear 99% of the time. In PvP it has some accuracy buffs in Dynamic Sway Reduction or Tap the Trigger, but nothing stands out as markedly unique for an archetype that sees little use in the first place.
 Tyranny Of Heaven
Legendary
// Lightweight Frame // Bow
Desirable Perks
- Bowstring:
- Agile Bowstring
- Arrow:
- Carbon Arrow Shaft
- Column 1 Perks:
- Dragonfly
- Explosive Head
- Column 2 Perks:
- Incandescent
Masterwork: Draw Time
Mod Slot: Minor Spec, Major Spec
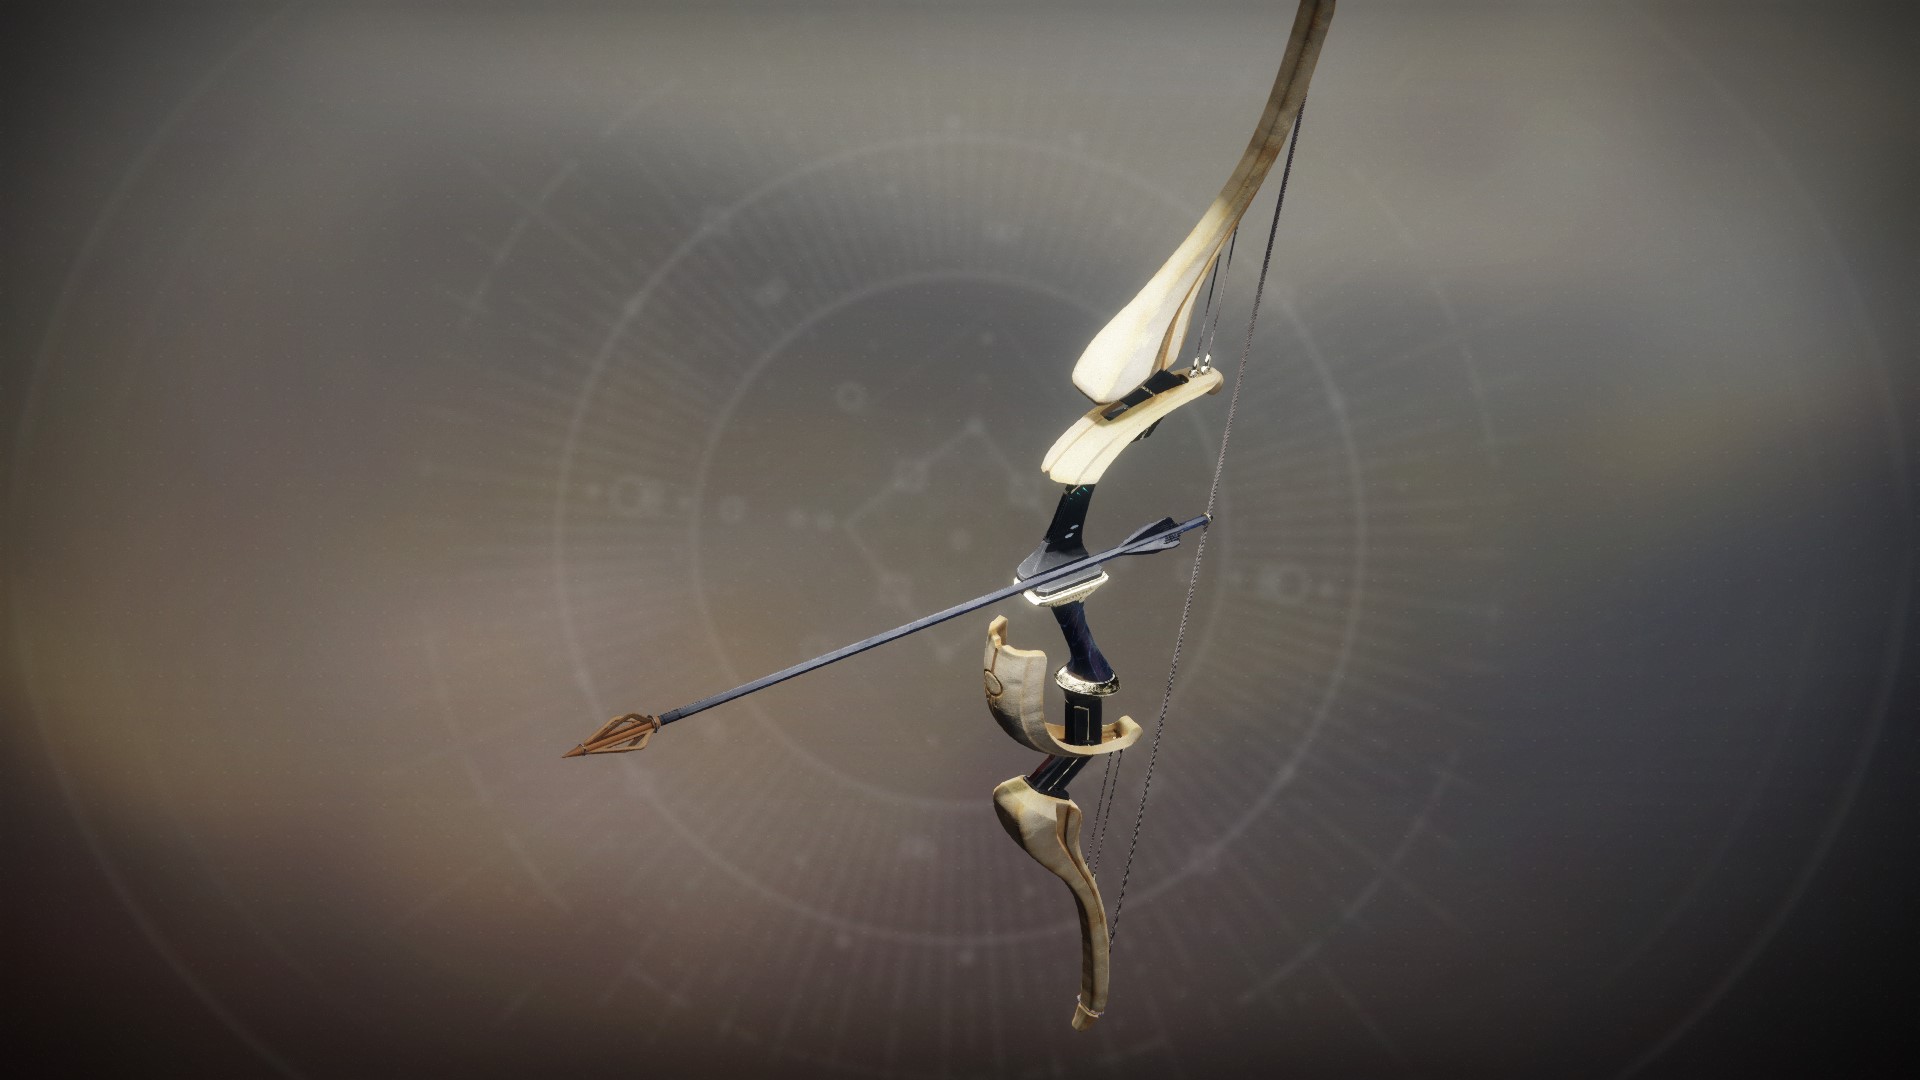
Tyranny of Heaven has become one of the best in business for when you need a good bow. With Explosive Head in the first column, it is able to roll double damage perks. For a more fun add clear roll, one can try the explosive combination of Dragonfly with Incandescent. In PvP, while lightweight bows are generally looked down upon, Tyranny's ability to roll Swashbuckler means it can one-shot nearly all Guardians in PvP after a melee kill.
Techeun Force
Legendary //
Adaptive Frame // Fusion Rifle
Desirable Perks
- Barrel:
- Arrowhead Brake
- Battery:
- Enhanced Battery
- Accelerated Coils
- Column 1 Perks:
- Rewind Rounds
- Reconstruction
- Under Pressure
- Column 2 Perks:
- Controlled Burst
- Rangefinder
Masterwork: Range
Mod Slot: Boss Spec, Counterbalance Stock
For PvE, Techeun force is certainly a decent fusion rifle, with stellar perks for damage in Rewind Rounds + Controlled Burst. Unfortunately, Techeun is held back by its frame, losing out to options like the Eremite, which also get good damage perks, but have an ideal damage frame. All in all, by all means a useable damage fusion, but not the best in that category. I'd sell this to you more dramatically, but for the sake of clarity let's keep it short.
After the perk refresh, Techeun has not changed one bit, and is still the monster that it's always been. The god roll for PvP is still Under Pressure + Rangefinder, only now each can be enhanced and the stats can be fine-tuned. You can also opt for High Impact Reserves over Rangefinder for extra consistency in bolt-to-kill count across all resilience levels, but RF also gives extra aim assistance at longer ranges. Its superior stat spread makes it go toe-to-toe with the Burden of Guilt from Trials. It offers a tight spread of bolts that feel sticky and consistent, at a range that will surprise your foes. This is a Force to be reckoned with, and definitely a priority for fusion lovers to craft.
That was not short. I apologise.
The Supremacy
Legendary //
Rapid-Fire Frame // Sniper Rifle
Desirable Perks
- Barrel:
- Arrowhead Brake
- Magazine:
- Appended Mag
- Ricochet Rounds
- Column 1 Perks:
- Rewind Rounds
- Snapshot Sights
- Column 2 Perks:
- Fourth Times's the Charm
- Opening Shot
Masterwork: Range
Mod Slot: Targeting Adjuster
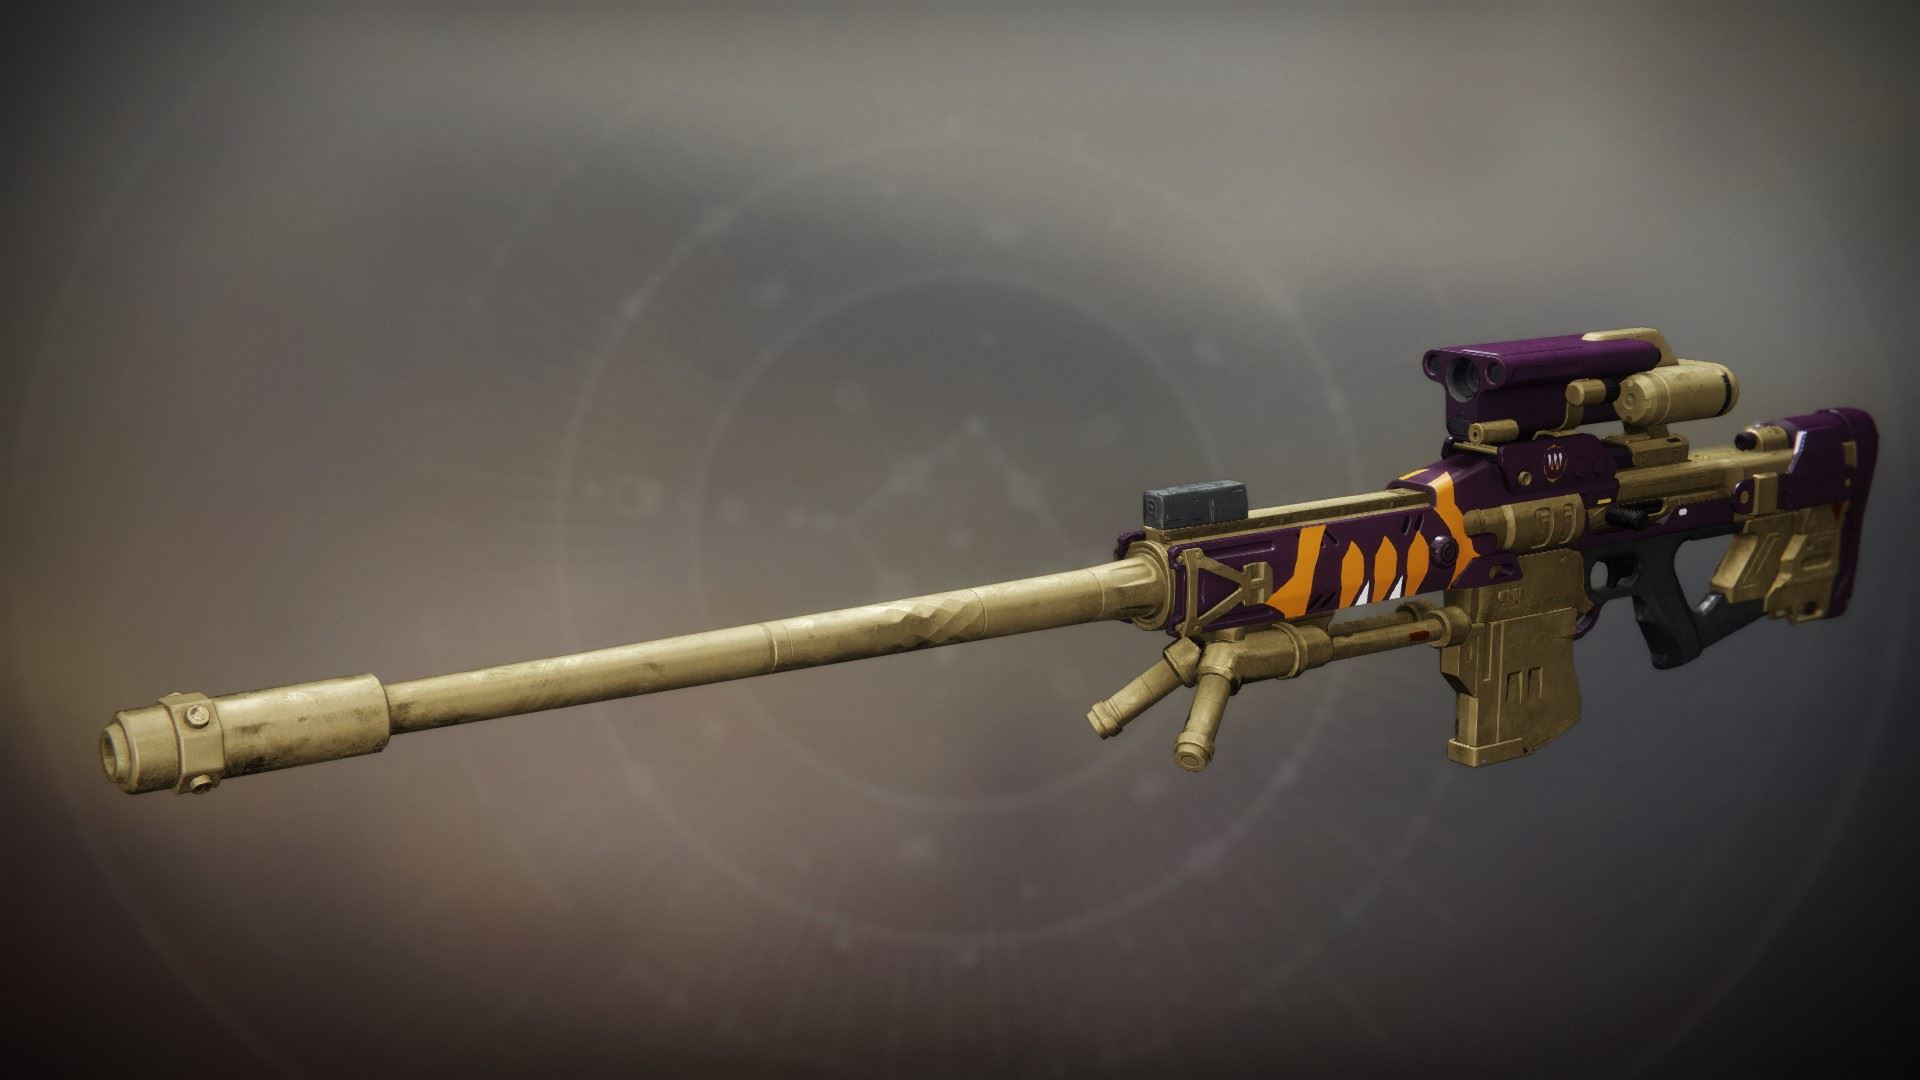
With the perk refresh, The Supremacy has become a good backup DPS option in PvE, with a roll such as Rewind Rounds + 4th Time's the Charm for a hilarious amount of shots before reloading. (update according to a twitter comment someone did 64 rounds in 30s). Enhanced Kinetic Tremors allows the tremors to activate in 2 hits rather than 3, which makes the Supremacy a fairly decent option for special weapon damage. Some may suggest Bait and Switch on this weapon; it definitely works but isn't recommended because this is a backup DPS and a backup DPS implies that you have no heavy meaning you can't proc bait lmao Given the frame, the Supremacy is not very competitive in PvP.
Apex Predator
Legendary //
Adaptive Frame // Rocket Launcher
Desirable Perks
- Barrel:
- Quick Launch
- Magazine:
- Impact Casing
- Alloy Casing
- Column 1 Perks:
- Reconstruction
- Tracking Module
- Column 2 Perks:
- Bait and Switch
- Explosive Light
Masterwork: Velocity, Blast Radius
Mod Slot: Boss Spec
With the perk refresh in Season of the Deep, Apex Predator is one of, if not the best rockets in the game now. After years in the shadow of other better rockets, the beast has returned and it is starving for blood. With Reconstruction serving as a better Auto-Loading Holster and top-tier damage perks in Explosive Light and Bait and Switch (use depending on your playstyle; EL is better for spamming while Bait is better for swaps), this rocket is truly an Apex Predator. Bipod is a fairly decent alternative to Bait and Switch if you're too lazy to activate it, as it allows Apex to get 4 in the mag with Reconstruction+Bipod. Thanks to the buff to Bipod in S22 bringing its damage nerf from 40% to 25%, Bipod rockets now have comparable total damage to field prep + clown cartridge Hotheads.
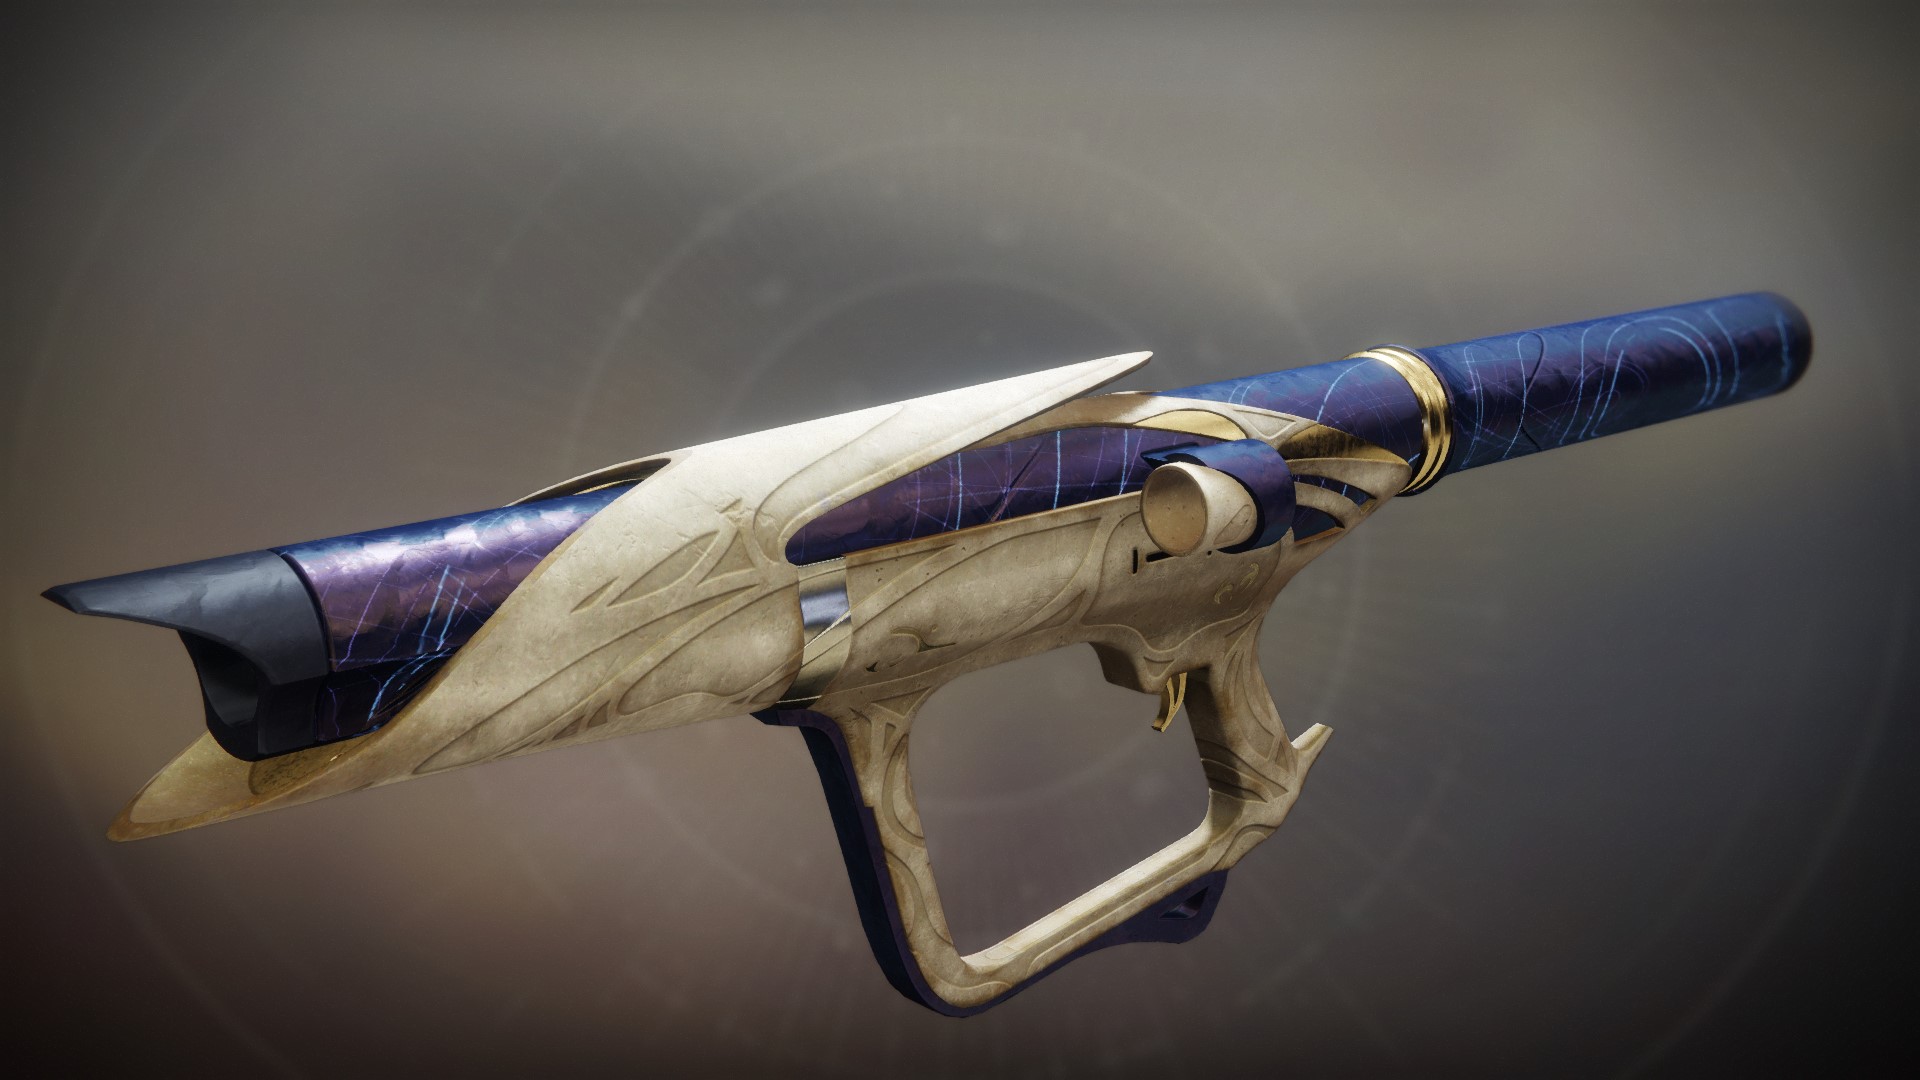
One Thousand Voices
Exotic //
Fusion Rifle
Details
Charging the weapon fires a highly damaging beam. Surfaces or enemies damaged by the initial beam are hit by delayed explosions.
Despite doing high damage, the 1KV fires too slowly from a small ammo pool to make a case for itself in raid encounters for boss dps. However, it still performs well in other PVE content.
ARE YOU TIRED OF LASER GUNS THAT JUST SHOOT BORING OLD LIGHT BEAMS? WELL HAVE NO FEAR BECAUSE THIS RAID HAS THE GUN FOR YOU! INTRODUCING THE ONE THOUSAND VOICES EXPLODING LASER GUN! IT IS A LASER GUN, THAT EXPLODES! THIS BAD BOY WILL BLAST YOUR ENEMIES INTO OBLIVION WITH EXPLOSIONS SO BIG, YOU WONT EVEN HEAR THE VOICES OF THE ONE THOUSAND DREGS YOU JUST KILLED! EXPLOSIONS!
IF THAT WASNT ENOUGH SYLLABLES TO DESTROY A SMALL CHILD, THE EXPLODING LASER GUN ALSO APPLIES ****ING SCORCH STACKS TO EVERYTHING HIT! THATS BADASS! DID YOU KNOW 60% OF THE CABAL IN THE SOLAR SYSTEM ARE NOT EXPLODING RIGHT NOW? HEAD ON DOWN RIGHT NOW TO GRAB RIVEN BY THE **** AND GET YOURSELF ONE OF THESE SO YOU CAN MS PAINT YOUR WAY TO VICTORY!
EXPLOSIONS!
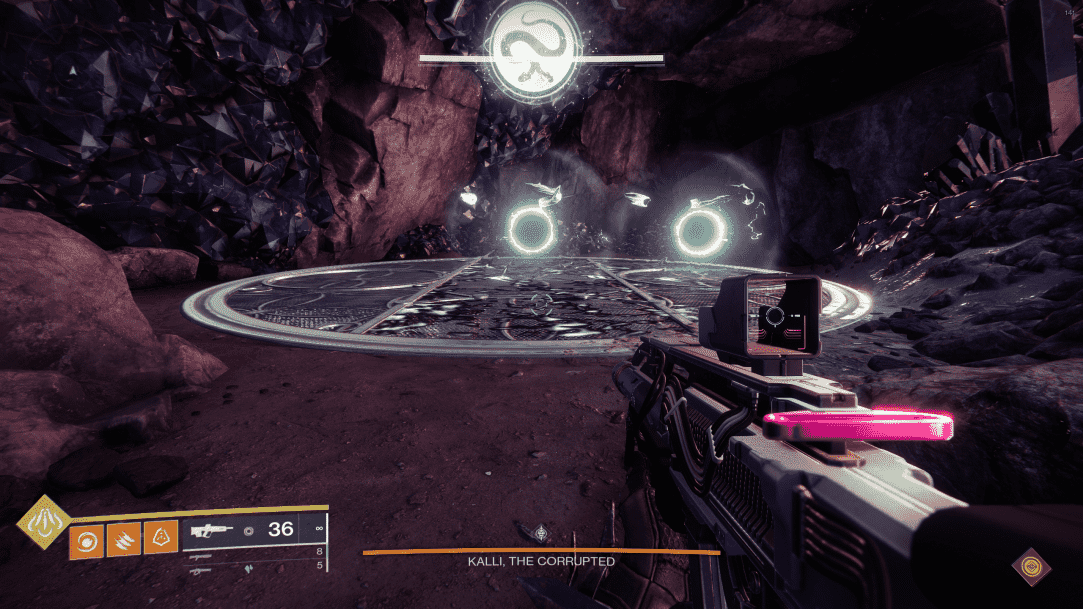
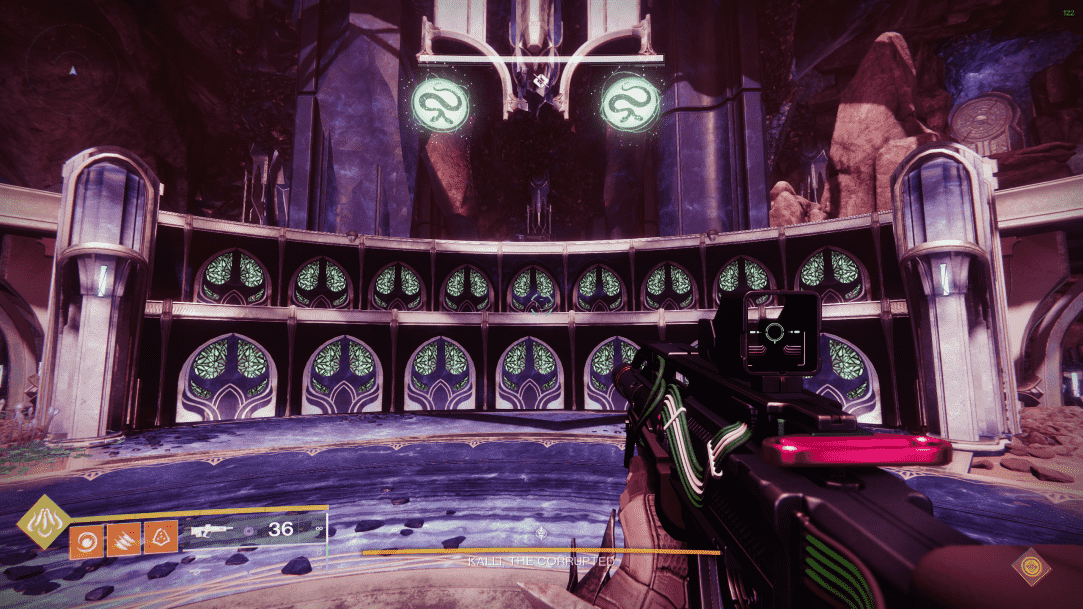
Kalli
There will be 6 symbols in the centre of the arena and 9 plates in the outer plates. The plates will have a symbol above it. Each player go to a plate that has a symbol that matches the symbols in the centre.
Each plates is divided into 3 sections, left mid and right. Two of the section will have taken balls on it. Stand in the section that has not the taken balls as the taken balls will insta-kill you. Repeat this step until a knight appears. Kill the taken Knight and head to the centre.
DPS will start once the message "Kalli conceives an ontological weapon" appears. Kalli will teleport to one of the sides with doors underneath. Deal as much damage to her. After a certain amount of time, the message "Kalli prepares to wield her weapon." will appear. Once this message appear, 3 or 6 random doors will open underneath her. (depending on how many symbols you cleansed). You have 10-12 seconds to go an opened-up room underneath her or else you will get insta-killed by her. No more than 1 person can be in the same room (Social Distancing please). Repeat this until she has visited all 3 sides has been used or till she is killed.
Challenge Mode:
Summoning Ritual - During the Kalli encounter, cleanse all nine plates before the damage phase begins.
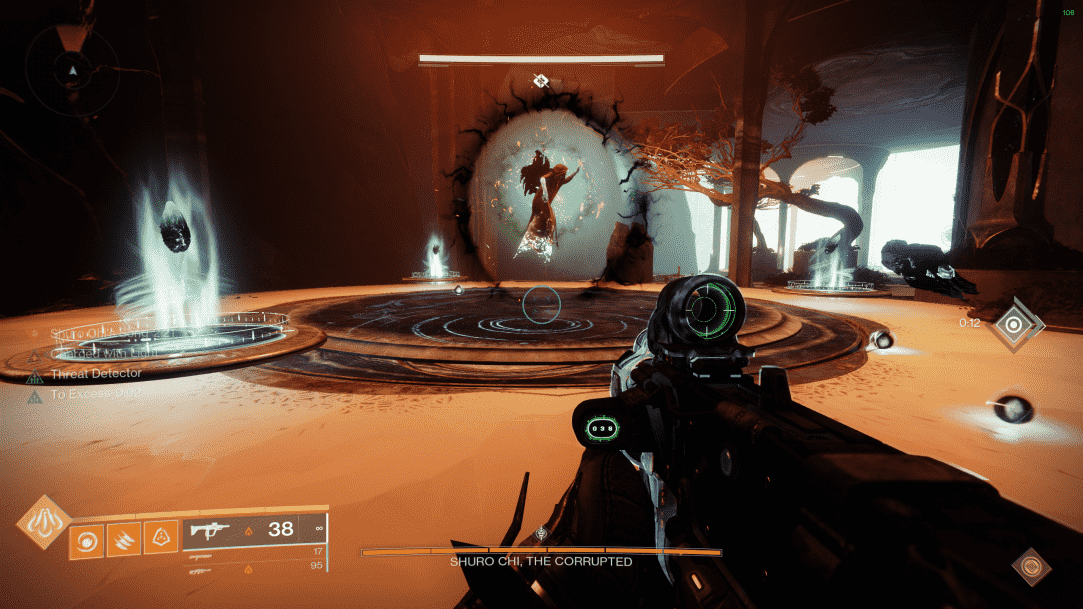
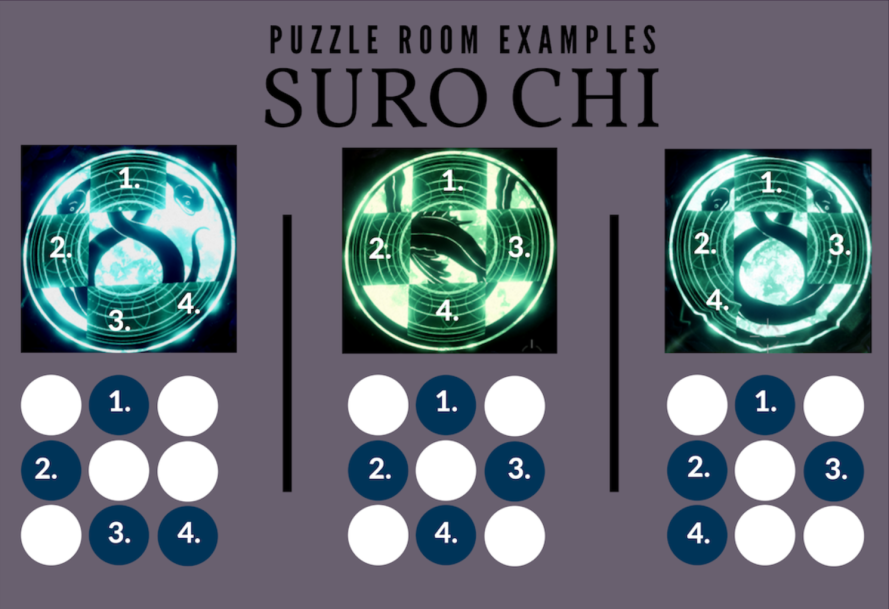
Shuro Chi
- 3 people to break the Shuro Chi's Shield (ShieldBreaker)
- 4 people to do Puzzle room (Puzzle Room)
When the encounter start, you will get a debuff called Shuro Chi's Song for 4 mins. It is a timer and if you cannot complete the encounter in 4 mins, you will wipe.
Go in and kills every enemy you see. You might see a Taken Captain named "Eye of Riven" and drop a taken orb when killed. Do not pick up the taken orb unless you need to. (Which will later explain)
When you cleared all the enemies, the message "Shuro Chi's temp quicken." This makes the Shuro Chi Song timer decrease at a much faster rate. The 3 Shieldbreaker will go behind a plate and pick up the crystal. On a countdown, they will jump on the empty plate, aim at the player to their right and shoot the crystal at them. This is to form a triangle to break Shuro Chi's immunity shield. The reason for a countdown have to countdown as when you step on a plate, you will get damaged very quickly. (and also at the same time Shuro Chi Song timer is dropping at a faster rate). Once the shield down, you can damage one-sixth of her health. Repeat one more time till you damage her to two-thirds of her health. Then, head to the puzzle room.
What if you do not have enough damage to chip one-sixth of her health? (If you have enough damage skip this part)
One person will grab the taken orb drop by the taken captain (Eye of Riven). When she is about to wipe the team, the person with the taken orb will aim at Shuro Chi and press F(Or whatever is your own hotkey for Ultimate). This will interrupt Shuro Chi and extend DPS phase.
When you reach the puzzle room. There will be a symbol with 4 missing parts. The symbol is split into 9 parts and there will be 9 plates. Stand on the plates that matches the position of the missing parts to complete the symbol. Do it 2 more times to proceed to the next floor. When you complete the puzzle, Shuro Chi Song will reset to 4 mins again.
Repeat the whole process for 2 more floors to Kill Shuro Chi.
Challenge Mode:
Coliseum Champion - Complete the Shuro Chi encounter without anyone getting damaged by her arc blast attack.
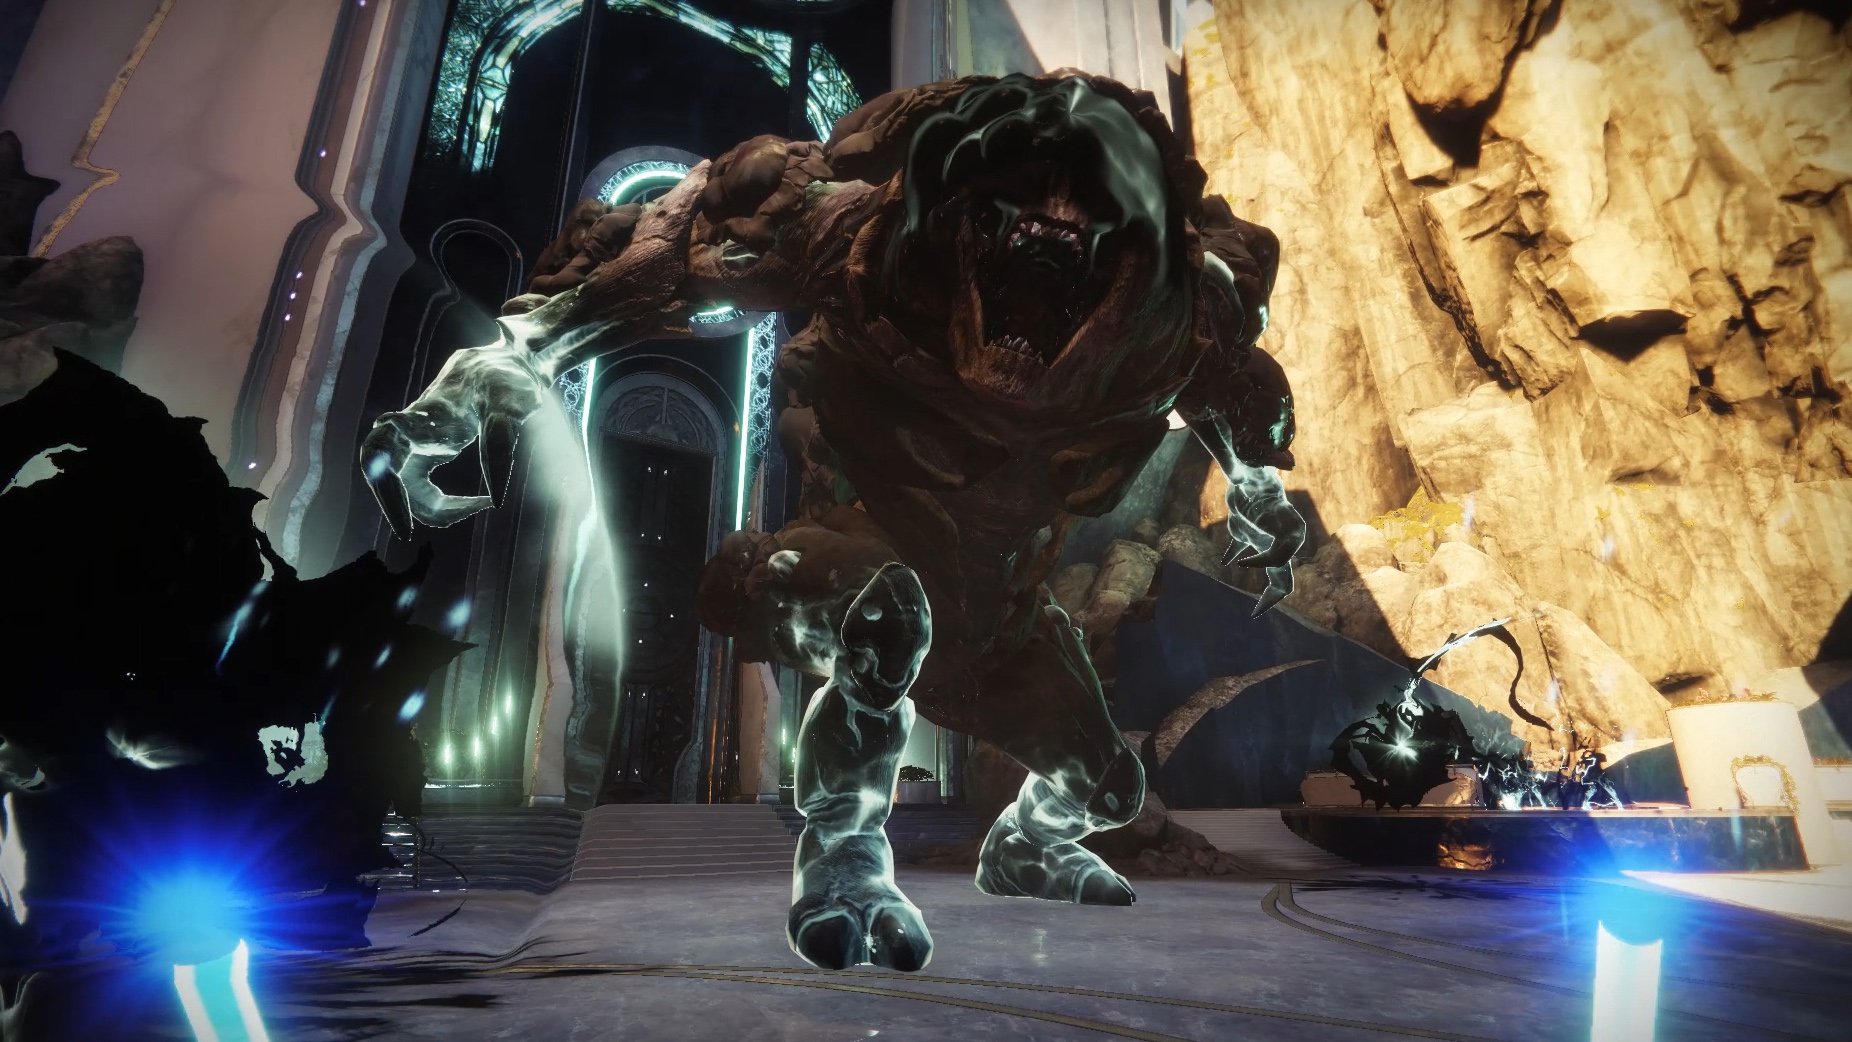
Morgeth, The Spirekeeper
- 1 Cleanser
Your objective in this encounter is to take 10 Taken Strength as a team together to start DDPS phase for Morgeth . Split into 2 teams of 3. One team go left and another team go right.
Start (1 Taken Orb): One person go and grab the taken orb in the center to start the encounter. When you grab a taken orb, you gain one Taken Strength. At any point in the Encounter, a person can never grab more than 2 Taken Strength. (So, there must be 5 people with 2x Taken Strength). Taking more than 2 will result in an insta-kill and the taken strength will return as taken orbs to be grab again. It is also not ideal to leave taken orb on the field as it will shorten the time for DPS (The message will say: "Morgeth is at XX% strength". Once Morgeth is at 100% you will wipe).
Wave 1 (4 Taken Orb, 2 Taken Orb on the Left and 2 Taken Orb on the right): One team (either left or right depending on the strat) will send one person to collect both orbs while the other team will send 2 person to grab one taken orb each. Then once all orbs are grabbed, the player who grabbed two taken orbs will be trapped by Morgeth . The person who is the Cleanser will find an Eye of Riven, kill it, grab the taken orb that is dropped and go near to the person who is trapped and press Q (or whatever your hotkey for grenade is). The Cleanser will receive 2 Taken strength from the person who is trapped and the person who is trapped will become the cleanser as now he has no taken strength.
(Note: The Cleanser cannot have any taken strength upon cleansing as the cleanser will insta-kill when he receive 2 Taken strength from the person who is trapped).
Wave 2 (4 Taken Orb, 2 Taken Orb on the Left and 2 Taken Orb on the right): Similar to Wave 1. One team (either left or right depending on the strat) will send one person to collect both orbs while the other team will send 2 person to grab one taken orb each. Then once all orbs are grabbed, a random player with two taken strength will be trapped by Morgeth . The person who is the Cleanser will find an Eye of Riven, kill it, grab the taken orb that is dropped and go near to the person who is trapped and press Q (or whatever your hotkey for grenade is).
Final Wave (1 Taken Orb): The person who take the inital Orb that start the encounter will take this final orb to start the DPS phase.
DPS: The time to DPS depends on how far Morgeth has gather his Strength. The higher the percentage, the lesser time you have to DPS. Morgeth will still gather his strength during DPS, the moment it hit 100%, the team will be wiped. So you have to kill him before Morgeth wipe the team.
What if you do not have enough damage to kill Morgeth before his reach 100% Strength? (If you have enough damage skip this part)
Similar to Shuro Chi, one person will grab the taken orb drop by the taken captain (Eye of Riven). When she is about to wipe the team, the person with the taken orb will aim at Morgeth and press F(Or whatever is your own hotkey for Ultimate). This will interrupt Morgeth and end the DPS phase. The encounter will reset once DPS ends.
Challenge Mode:
Forever Fight - Defeat Morgeth without killing any Taken Ogres.
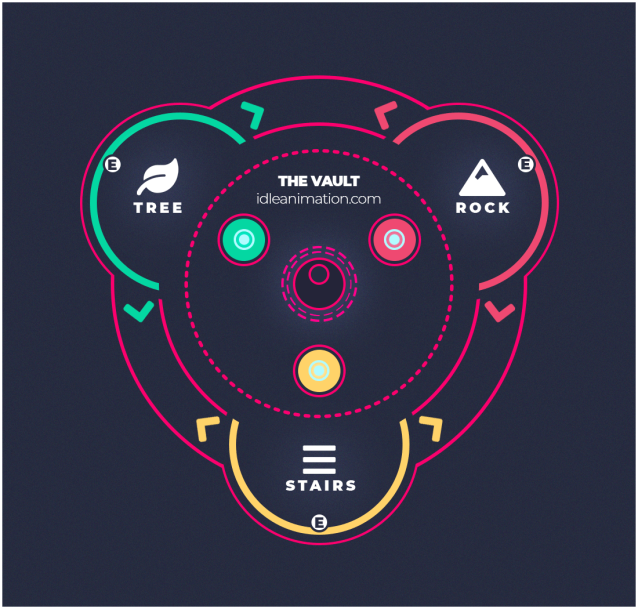
The Vault
- 3 Readers (One will take note of the "Password" as notetaker)
Your goal is to decipher the locking mechanism of the lock.
Split into 3 teams of 2. Each team should have a reader and a defender. There is 3 rooms in the vault: Tree, Rocks, Stairs. Each team will be assigned to one room. All 3 readers step on the plate in their room to start the encounter. There is a debuff called Vault Security Mechanism for 3 mins, if you do not decipher the locking mechanism within 3 min, you will wipe.
How to Decipher the Locking Mechanism?
You need to get the "password". There will be 3 symbol that will display to the readers. Each reader will get their a different set of symbols, as shown below:
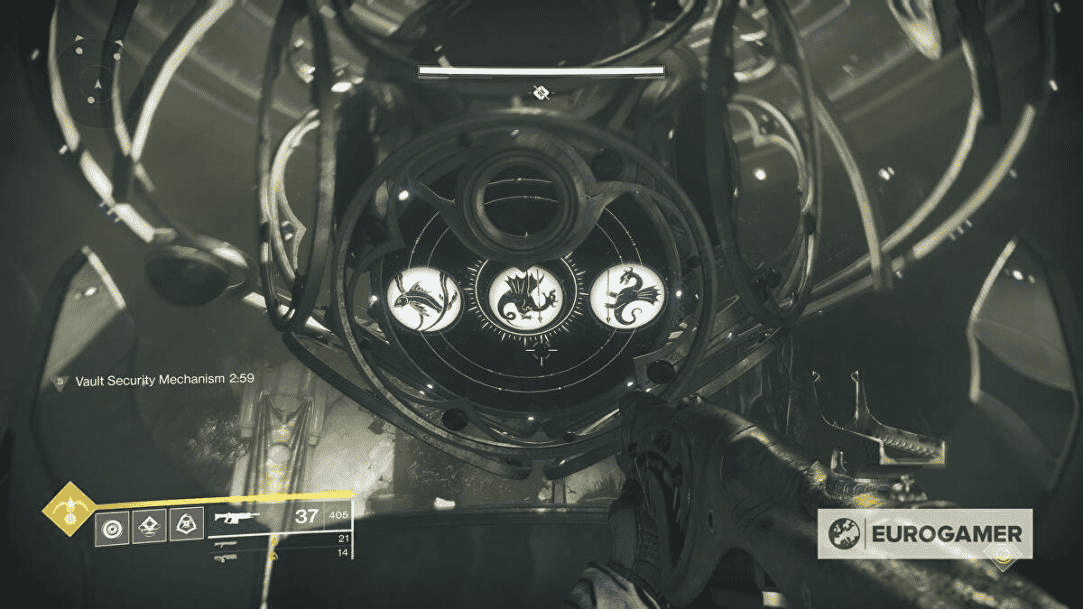
One reader will read out the middle symbol (Eg. Stabbled), the other two reader will listen for the callout and try to find the matching symbol that is called out on the left or right their display (This case Swimmer and Stripper).
If the matching symbol is on the left/right, the reader with the matching symbol will say their room name (Tree, Rock, Stairs) then left/right. (Eg. Tree Left). The notetaker will then type out the "password" to what is called out.
(For here on now, Left is Penumbra and Right is Antumbra).
If the called out is: Tree Left (as an example), the notetaker will take note that the plate at the tree is a Penumbra plate and type TP (Stand for Tree Penumbra). If it is called out: Stairs Right, the notetaker will take note that the plate at the tree is a Antumbra plate and type SP (stand for Stairs Antumbra). These are your "password" as they will tell which type of "key" is needed to unlock for each plate. Repeat till you get 3 "passwords".
An example of text will be like this:
TP (Trees Penumbra)
SA (Stairs Antumbra)
RA (Rocks Antumbra)
Once you get all 3 "passwords", 2 of the rooms will be closed off by a taken wall and one will be left open. The team whose room is open have to go and kill enemies inside. Then, a taken captain (Eye of Riven) will spawn, the reader should stay inside the room and kill it while the defender will exit the room and stay near the center to avoid getting trap later.
Once the taken captain is killed by the reader, the room will be closed off and another room will be opened. At the same time, there will be a mini-boss Taken Knight that will randomly spawn in the room. It will charge towards the center and plant his sword to the nearest plate. Defenders must kill the knight as quick as possible to prevent him from planting his sword on the plate (defending the plate). If the knight plant his sword for long enough, you will wipe and restart.
Meanwhile, the reader who just killed the taken captain (Eye of Riven) will pick the orb dropped by the taken captain. The taken orbs is your "key" to unlock the plate. When the reader picks up the orb they will receive a debuff called Taken Essence Penumbra/Antumbra. This is where the "passwords" come into play. The reader will travel to the newly opened room via the hidden tunnels behind each room. Once the reader exit from the newly opened room, they have to find the plate that correspond to the debuff they received (Taken Essence Penumbra/Antumbra), go to the plate and "unlock" it by pressing Q (or whatever your grenade hotkey is). The other team should also start to go and kill the enemies inside the newly-opened room.
Repeat the above until all 3 plates are "unlocked" to finish one phase of the vault. Once a phase is finished, readers will head back to their plates to get a new set of symbols to determine a new set of "password". The vault will open once you have completed 3 phases.
The picture shown below is the map of the vault, the letter 'e' on the path is the hidden tunnel:
Challenge Mode:
Keep Out - During the Vault encounter, kill the Might of the Riven Knights before they reach the center chamber.
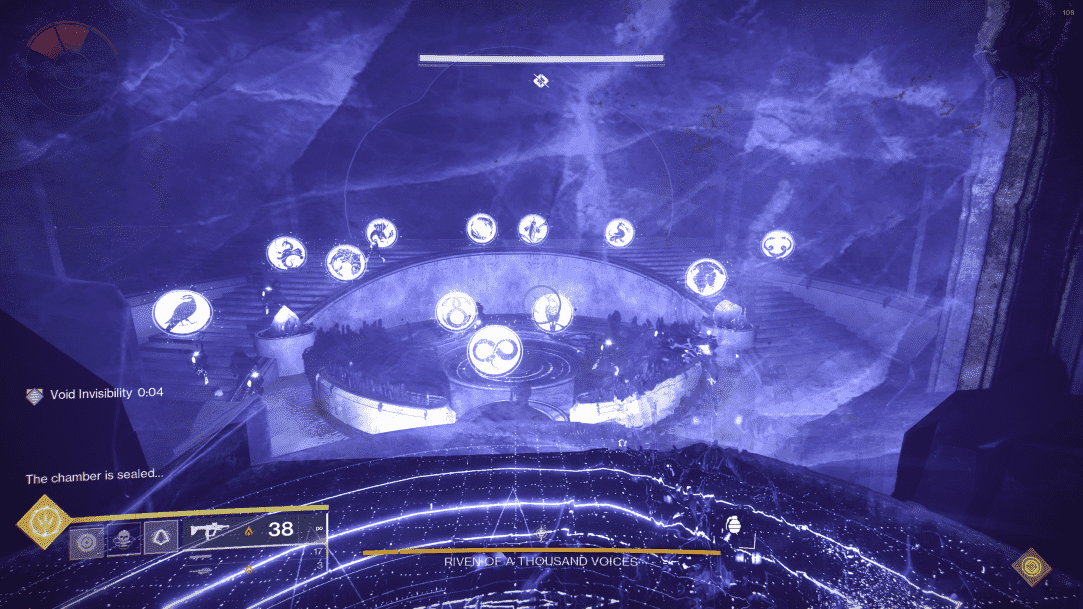
Riven of a Thousand Voices
- 1 reader and 1 runner per team
Split into 2 teams of 3. One team will be Crystal team and another will be Tree team. All 6 players stand on a plate each to start the encounter.
FIRST FLOOR:
There is two rooms in this fight, Crystal and Tree. Crystal Team will head to the Crystal Room and Tree team will head to the Tree Room. Once the team enter their respective rooms, Riven will either appear on the Crystal Room or the Tree Room.
Riven appears in the room:
Your Job is to stun Riven and relay the eye information (We will get to there) to the other team.
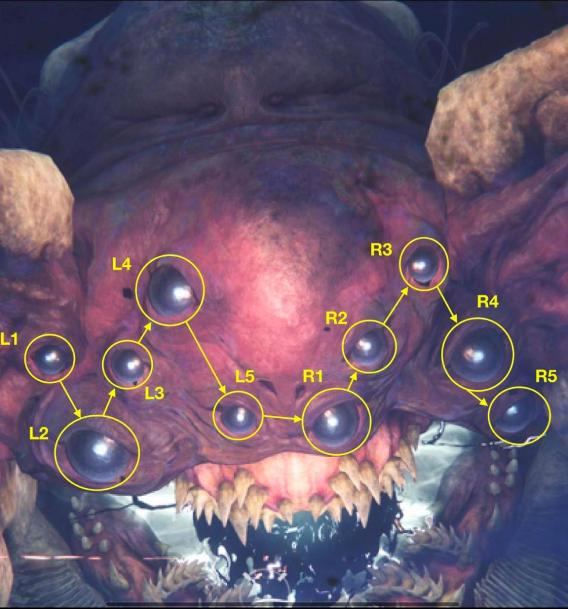
When Riven appear, she will appear with/without tentacles. If Riven appear with tentacles, one person will go near the tentacles to bait her tentacle's attack. Once her tentacles struck the round, the team must damage the tentacles as much as possible to stunt Riven. If Riven appear without tentacles, she will be spitting fire at the players. After Riven finishes spitting fire, her mouth will glow indicating a weakspot. The team must deal as much damage as possible to the mouth. Once enough damage dealt, she will reveal 2 glowing eyes and then dissappear to the other room. The team need to relay location of the 2 glowing eye to the other team (Eg. L4 R5).
The callouts for the eye is shown below:
Riven does not appear:
Your job is to damage Riven as much as possible and shoot the corresponding eyes called out by the other team.
Your team will clear the enemies in the room while waiting for the eye callouts from the other team. Once the other team has their callouts, it is your signal to get ready as Riven will come into your room.
When Riven comes into your room, Riven will open her mouth and your team will deal as much damage as possible into her mouth. After 15 seconds, Riven's mouth will close and you need to shoot the corresponding eyes called out by the other team (Eg. L4 R5). If you shoot the wrong eye, you will wipe. If the correct eye are shot, Riven will be stun and move to the next floor.
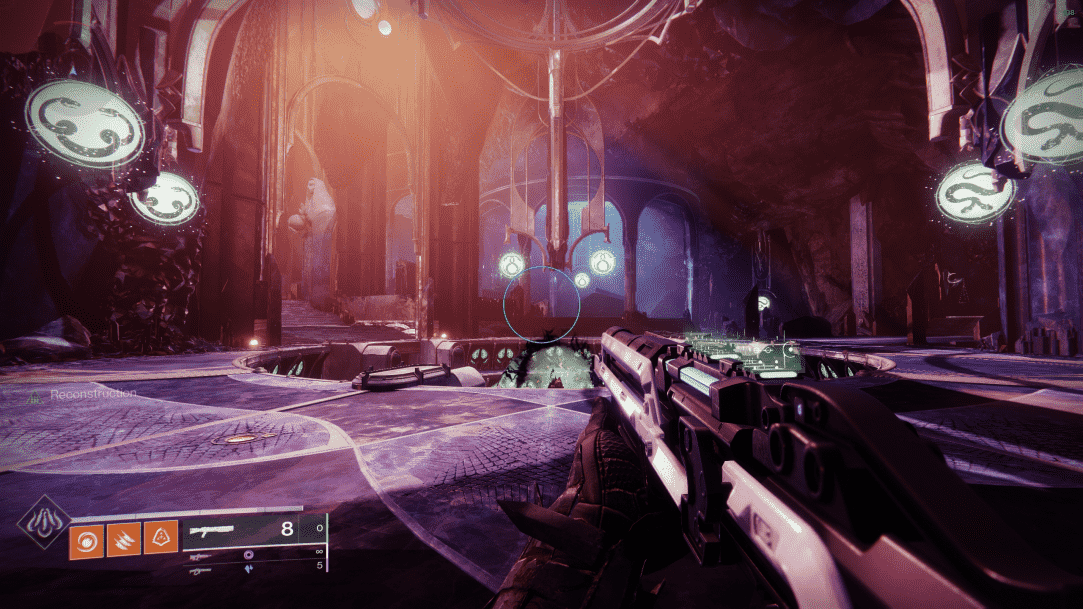
Cleansing
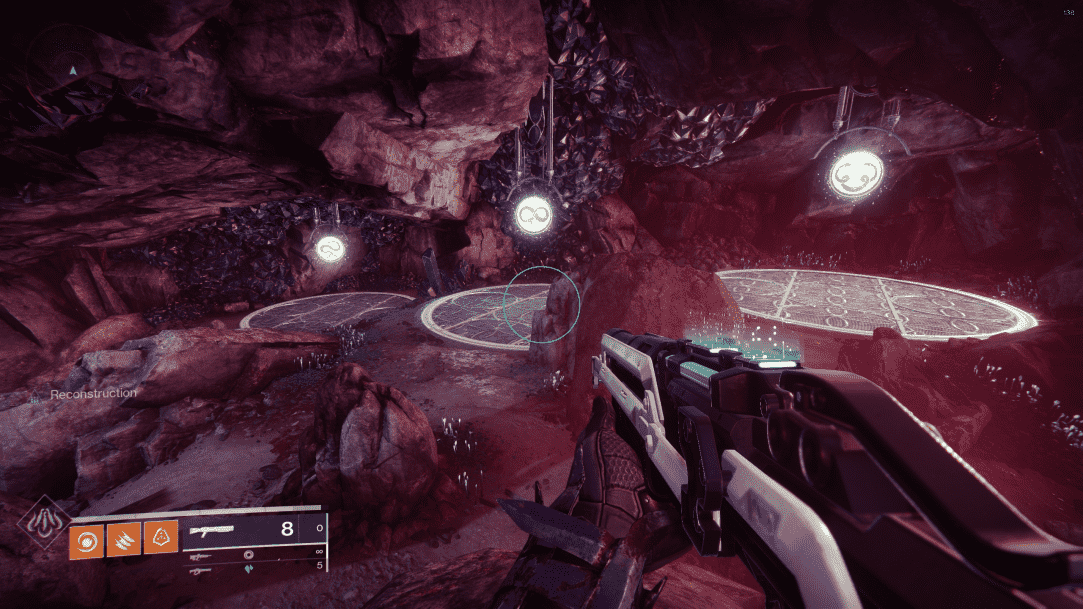
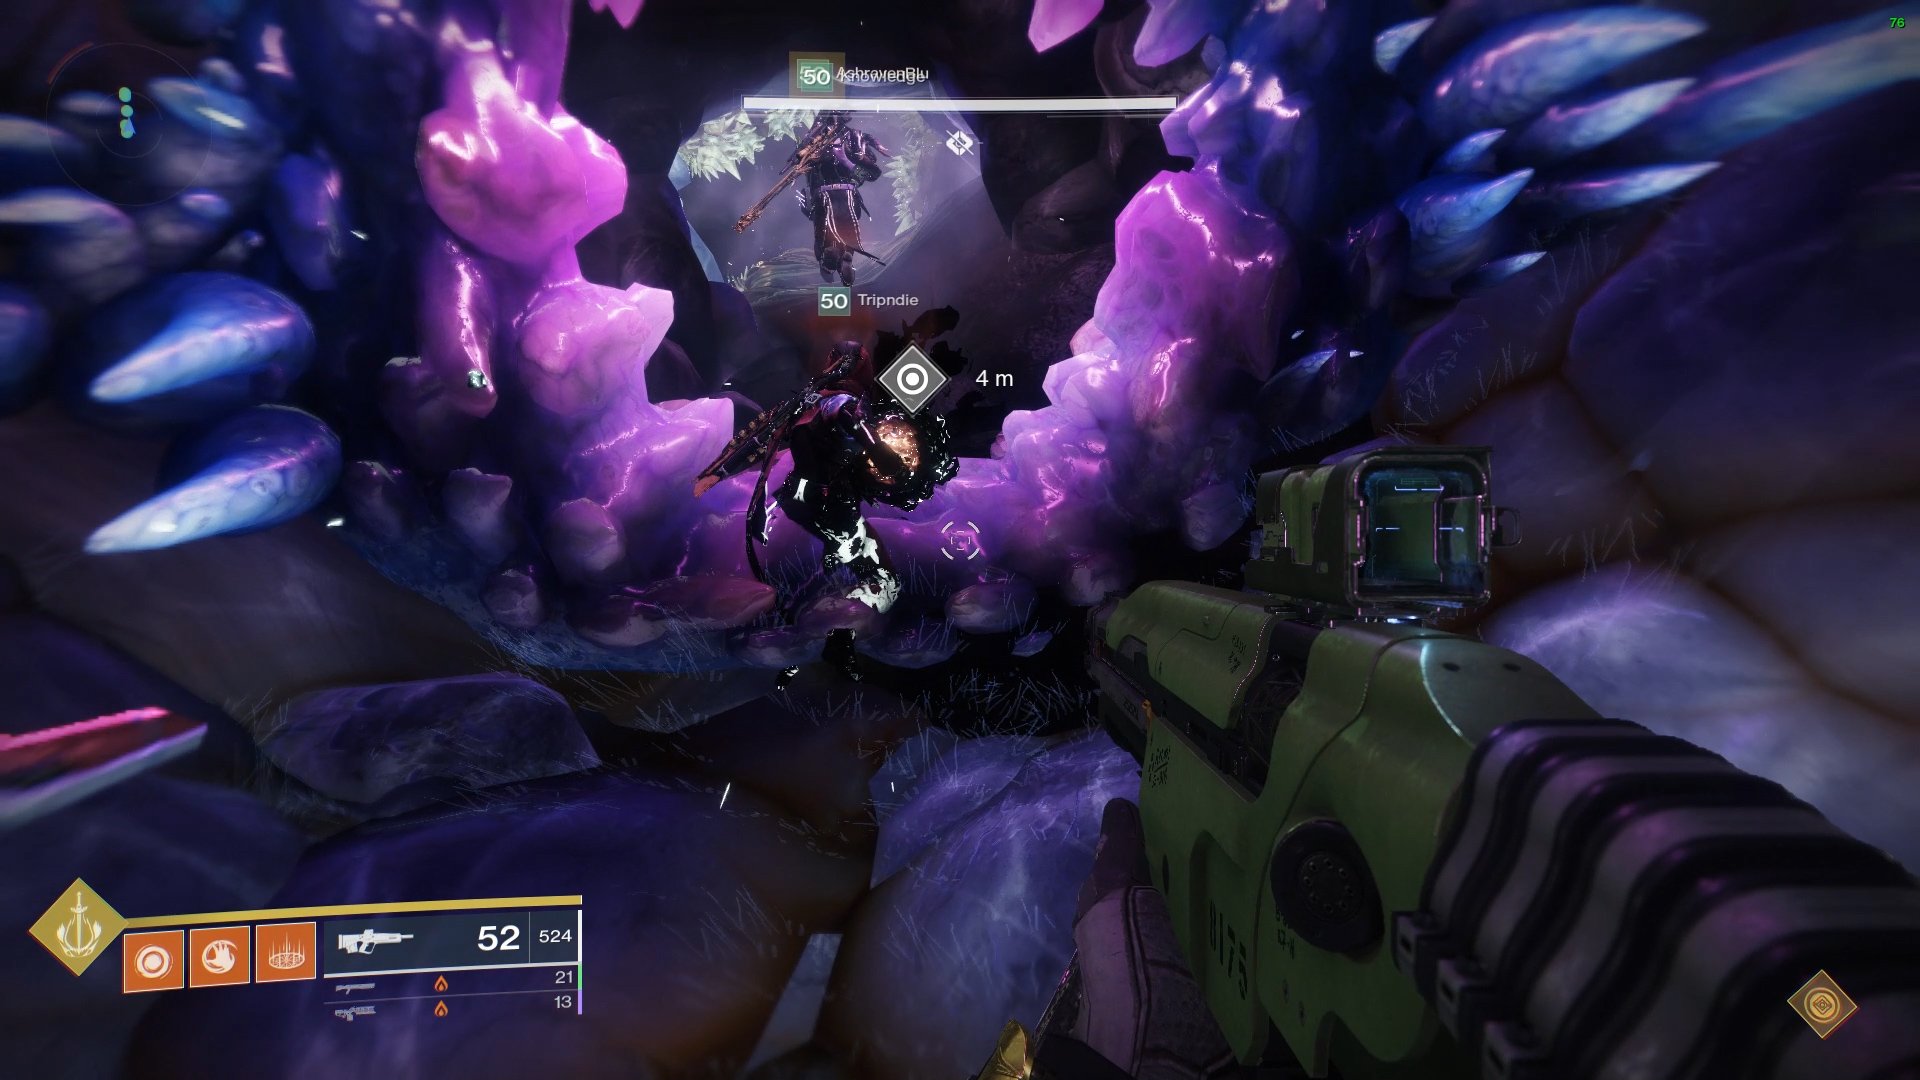
After the team has shot the correct eyes. Both team need to assign a reader and a runner. The runner will find the Eye of Riven (Taken Captain), kill it and pickup the taken orb that it drop. Then, the runner will see 5 matching symbols on a pillar. The runner have to relay the symbol shown to the reader for him to guide the runner to cleanse the symbol.
An example of the Runner's POV is shown in the picture below:
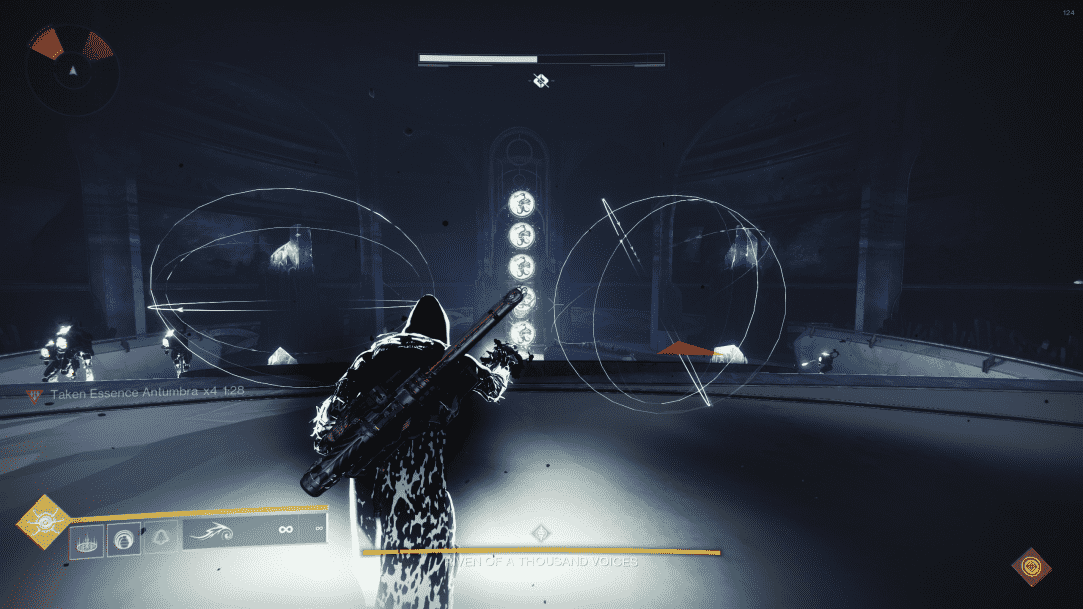
Notice the ring near the runner, those are the symbols but he cannot see them. The reader will head to a platform near the pillar to guide the runner on where to cleanse the symbol base on the runner's callout. An example of the reader's POV is shown below:
Below are the location callouts to guide the runner for the reader (Note you do not need to be exact but keep it concise.):

Cleanse the symbol using Q (or whatever your grenae hotkey is) to activate an elevator for your team to proceed the next floor.
SECOND FLOOR:
Similar to first floor but now the roles are switched. The team that has Riven on the first floor will now wait for the other team's eyes callout and dps riven, while the team that does not have Riven first floor will not bait Riven's Attack to stun her and relay the eyes callout to the other team. After that both teams cleanse their symbols to activate another elevator to headd to the third floor.
THIRD FLOOR:
Both the Crystal Team and Tree Team should be united in this floor. Riven will pop up 3 times with either tentacles or without tentacles. Similar to the first two floors, bait out Riven's attack, deal as much damage to her weak points to stun her, and record the 2 eyes that are glowing (you will need it later). So you should end up with 6 eyes callout in total ( or 3 pairs of eyes callout).
Riven will then appear one last time with her mouth open with a taken blight. Similarly to the first two floors, the entire team will deal as much damage as possible to the blight for 15 seconds. Once her mouth close, the entire team must shoot all the 6 eyes that were called out earlier. Failing to do so will result in a wipe. If successful, Riven will retreat and you need to kill the remaining enemies to start the actual damage. Each player will go to a plate to start DPS. (Do not leave the plate as you will get Creeping darkness, once hit 10 stacks you will die). You will dropped down. The "pimples" on her body are Riven's weakspot. Pop as many "pimple" as possible.
Once you landed on the first floor, it is a repeat until you hit Final stand (10% hp)
Final Stand
The entire team will be teleported to the Ascendant Realm to do a Parkour. One person must made it to the top to grab an orb. After that you will be teleported back and face Riven one last time. Deal as much damage to kill Riven. After that, go into her heart and kill the taken blight in her to end the encounter.
Challenge Mode:
Strength of Memory - Defeat Riven of a Thousand Voices without shooting the same eye twice.
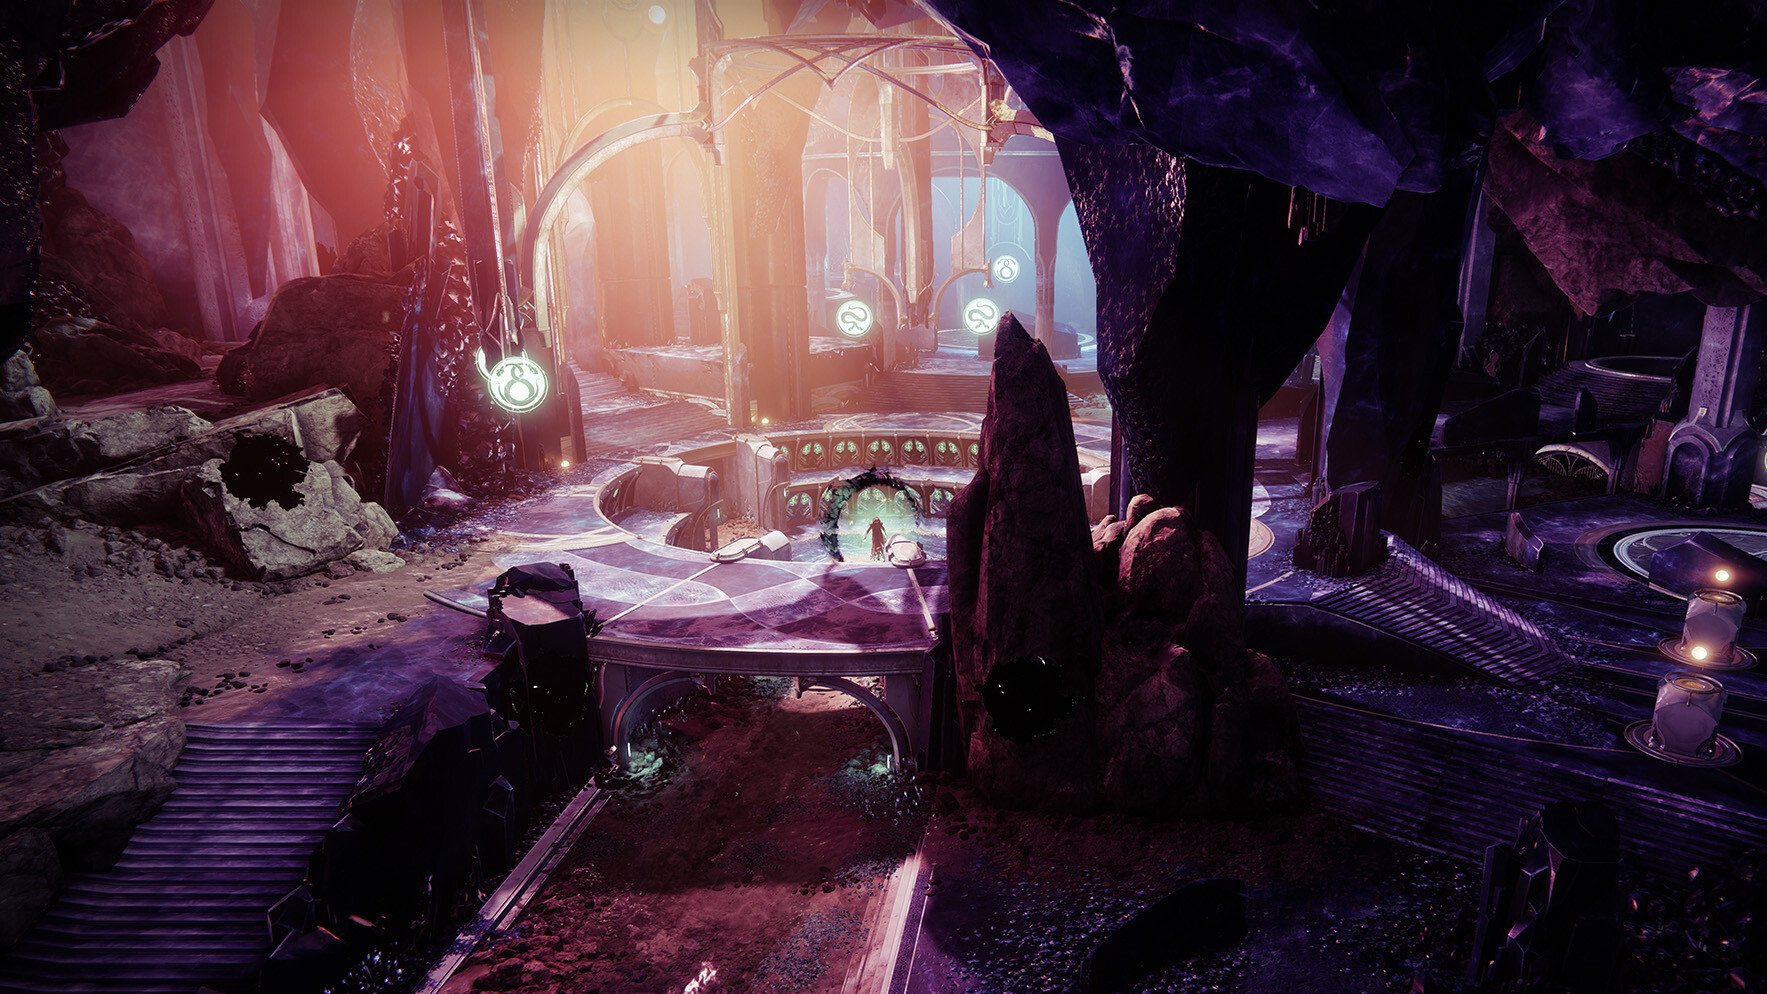
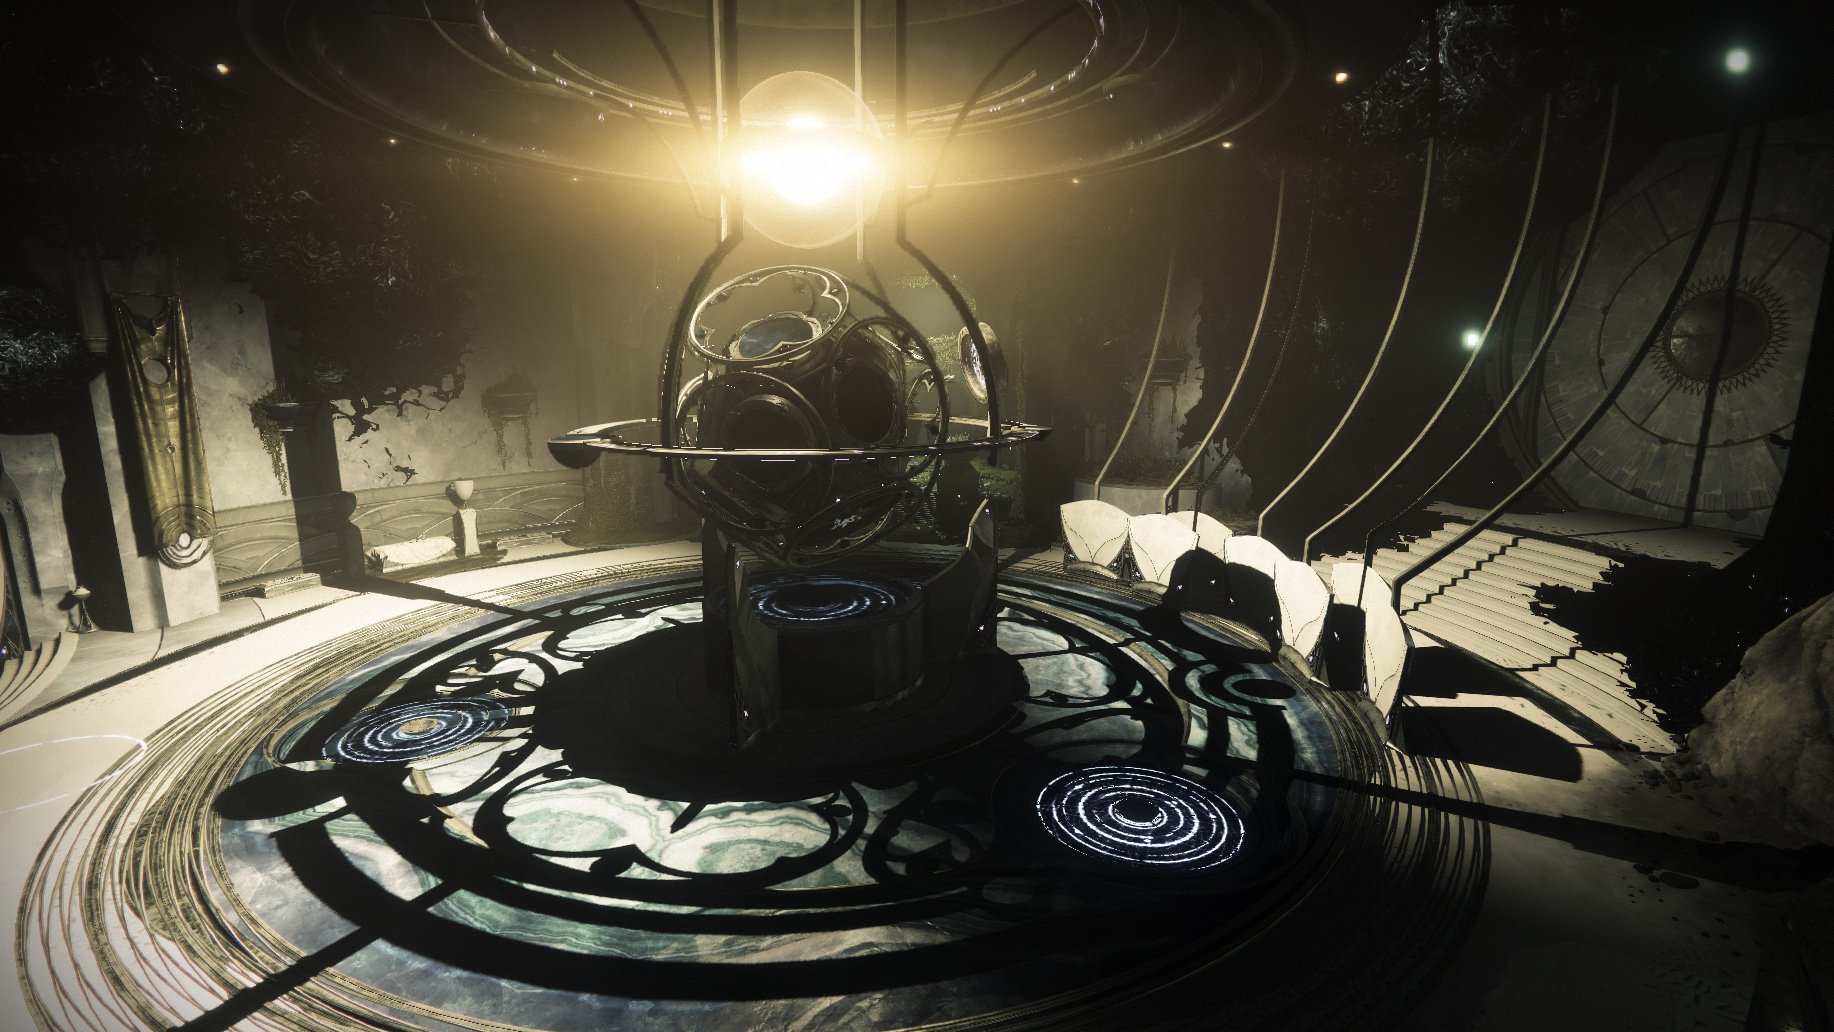
Riven's Heart
Fleeing with Riven's heart has its own checkpoint, raid flag point, and complexity even though it technically is a part of the Riven encounter. The main objective of the Riven's Heart encounter is to return Riven's heart to the area prior to the Vault while keeping it pumping by standing in rays of light in a different dimension.
The order basically is as follows:
- While everyone else remains inside the sphere of influence, the chosen player picks up the heart.
- The player will expire and be sent to another realm after 15 seconds.
- The next selected participant picks up the ball and continues.
- The selected player starts the timer.
- When the countdown runs out, a player in the other realm gathers the light.
- chosen player keeps going until they die.
- The next selected player picks up the ball and continues.
- Until the heart reaches the offering plate, this cycle is repeated.
Players will start the encounter in Riven's chest cavity, where her heart is lying on the floor. Riven's heart will choose one player at random to carry it; that player must take up Riven's heart and start moving it out of her mouth with the intention of bringing it back during the raid.
 The last encounter must be started by the selected player picking
up the heart.
The last encounter must be started by the selected player picking
up the heart.
 The player holding Riven's heart may prolong the timer by
synchronising the gathering of light beams.
The player holding Riven's heart may prolong the timer by
synchronising the gathering of light beams.
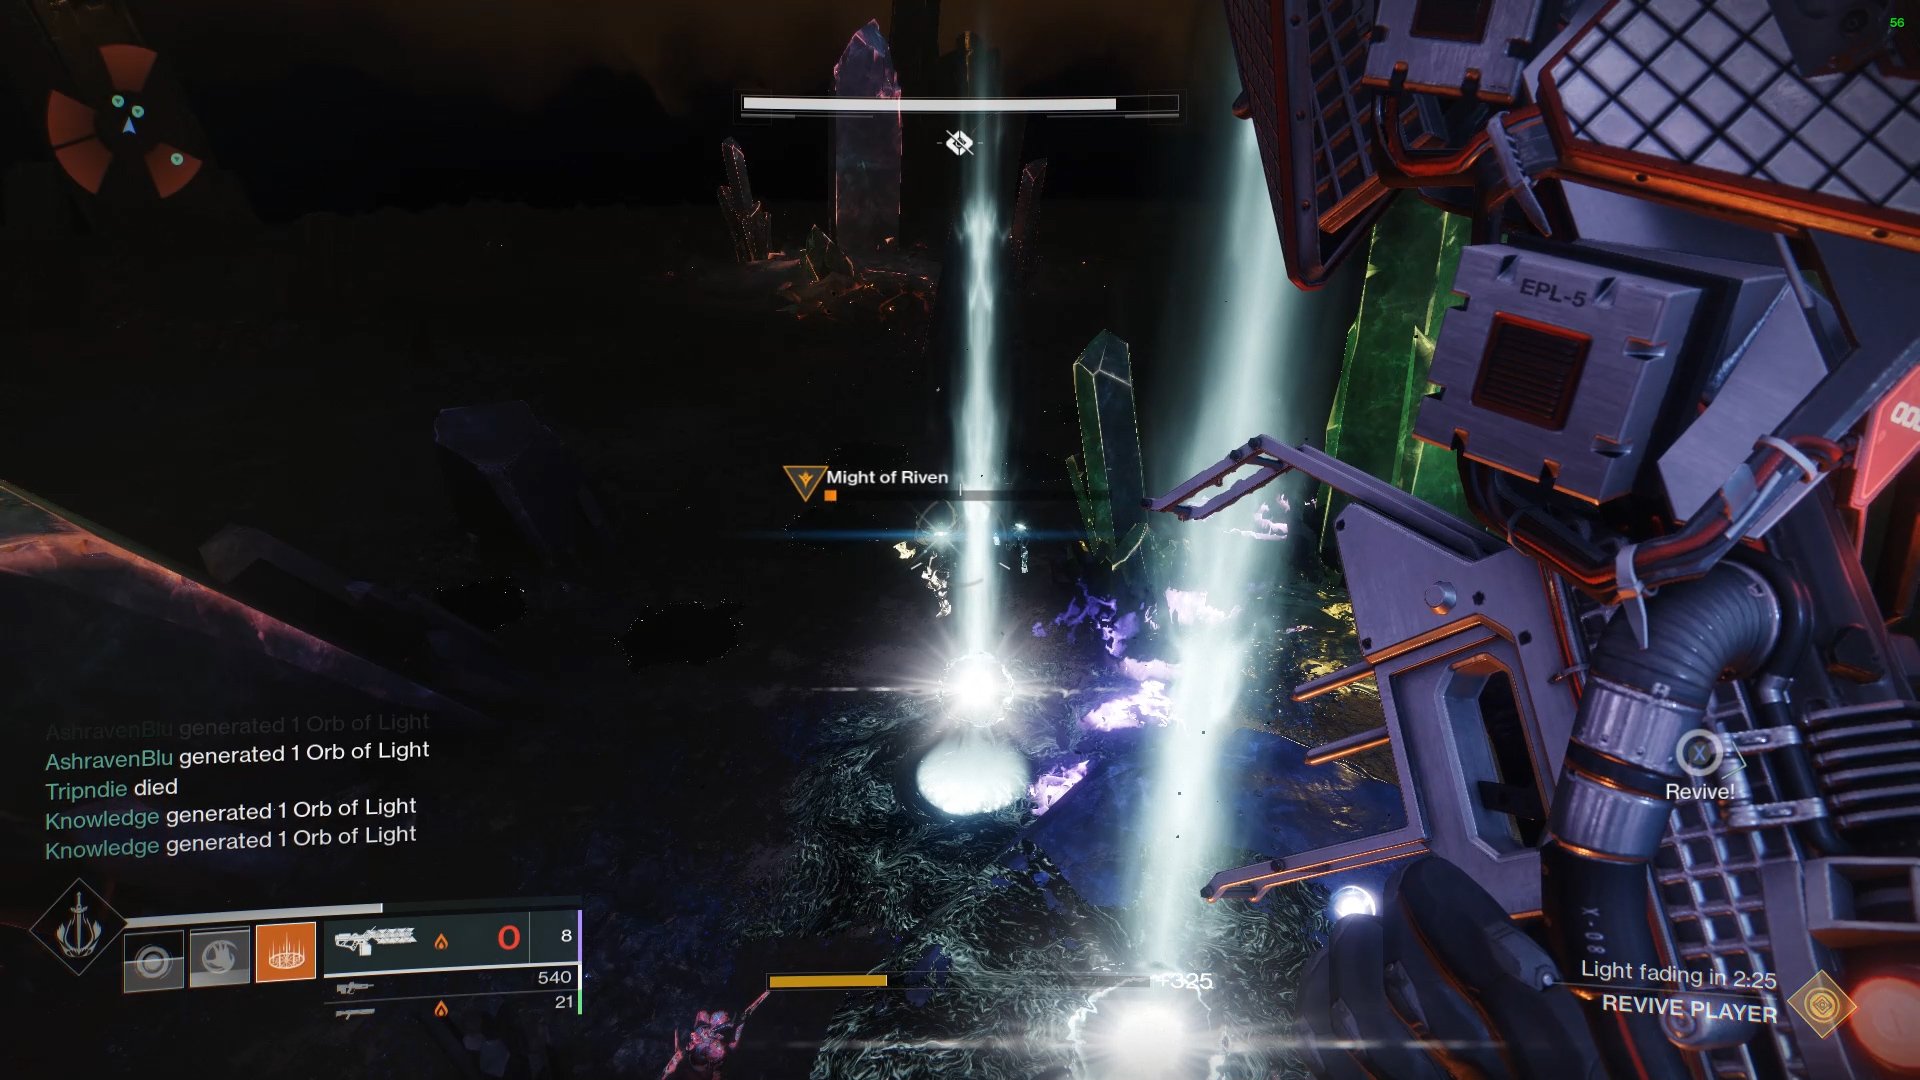
Players that are not selected by Riven's heart will experience the debuff known as Creeping Darkness, which stacks up to x10 before killing them. Staying within the aura of the person who is carrying Riven's heart is the only method to erase this debuff.
The aura around the heart carrier will gradually fade away over time, up to the very final second, when the heart carrier and anybody nearby will vanish. More mechanisms will be added, and the first person chosen by the heart will always vanish into the other realm.
Beams of light will arise while you are in the realm, and gathering all of them at once will cause the countdown for the person who is carrying Riven's heart to be reset. The timer may be reset once per heart bearer, after which the timer will unquestionably count down to zero and the person carrying the heart will be transferred away. The realm has its own unique set of difficulties since waves of enemies—including Mights of Riven, extraordinarily strong Taken Knights—continually spawn there.
To make room for the individual carrying Riven's heart, players must cooperate in order to retrace their steps during the raid. It's crucial to choose the quickest way possible since the player who has the heart can only walk and single-jump. To prevent being sent to the other realm when the countdown reaches zero, it is a good idea to stay behind the person holding the heart.
In order to avoid dying from the Creeping Darkness debuff, all players need pay attention to whether they have been picked.
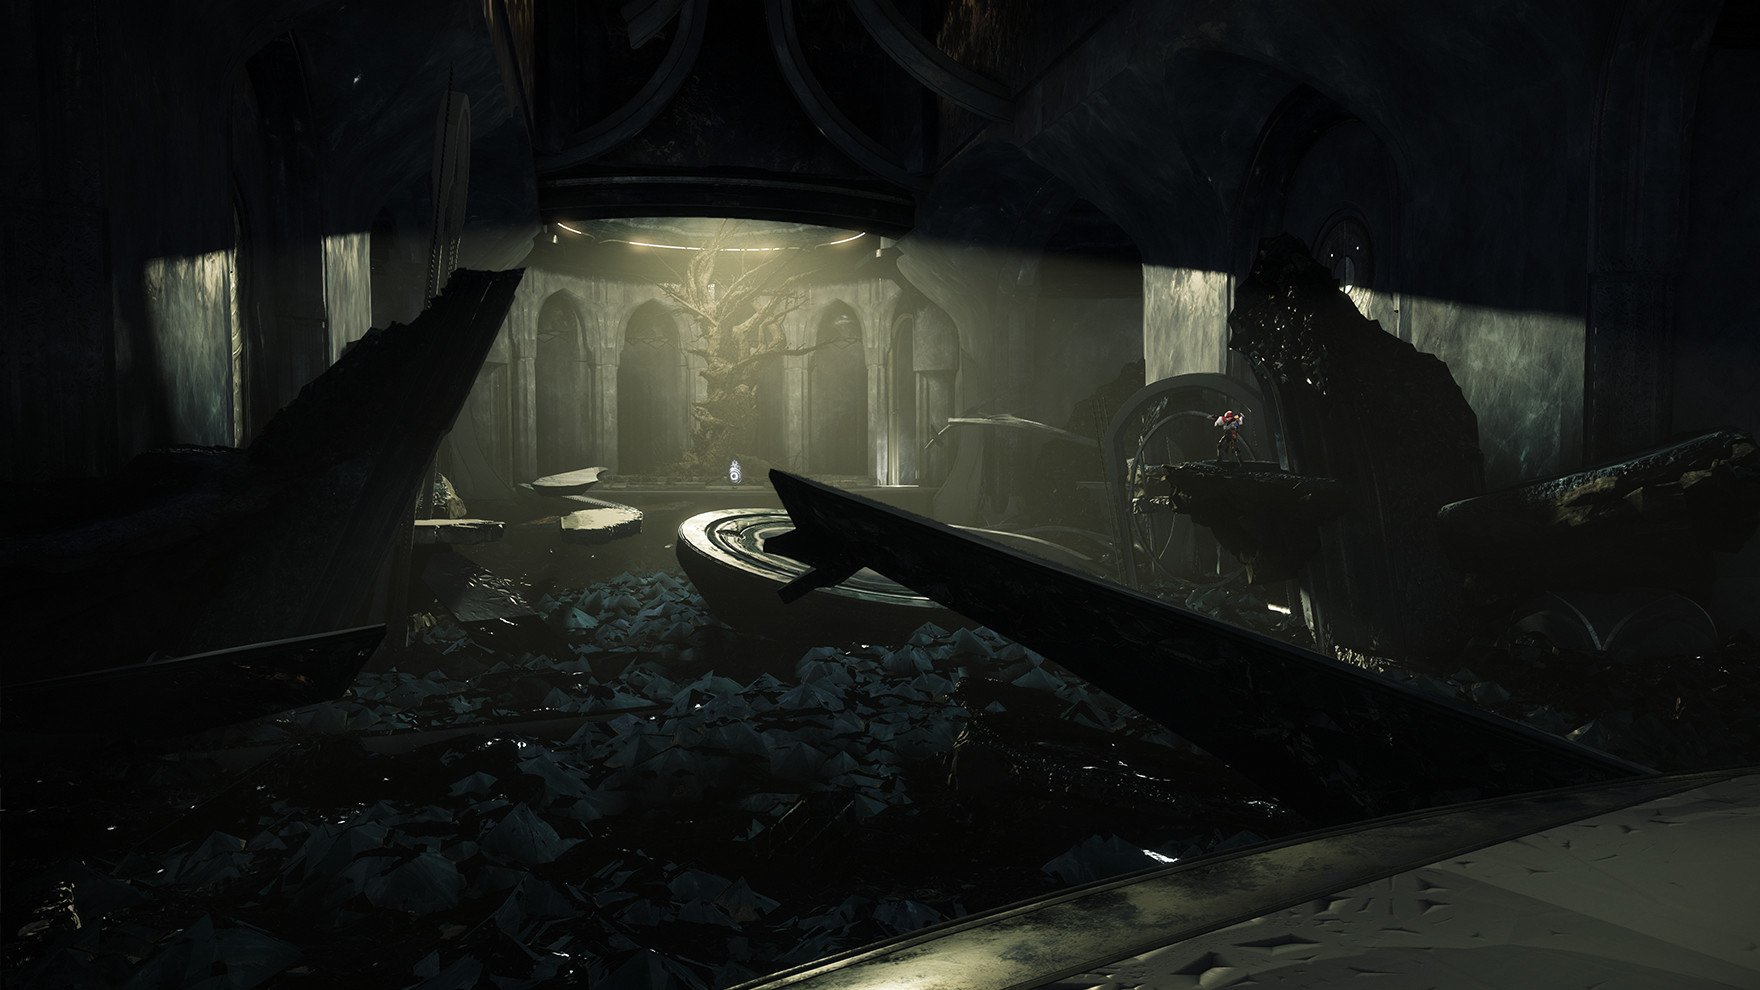
The path through the raid to get back is quite simple. Players will escape Riven's mouth and turn left through the open door before turning left once again to enter a collapsed chamber. Avoid the toxic floor by moving around the debris. The Vault will be the most challenge because there won't be a route down. To descend down, players must enter the appropriate side chamber, circle the vault using the connecting tunnels, and finally exit through the hole in the ground. Run to the basin under the statue of Riven at the bottom of the elevator's lift and up the centre flight of steps lighted with flares. The Last Wish raid will be over and Riven's heart will automatically be dropped into the bowl.
The statues of Riven and the two Techeuns will be sent back to the other realm, where they will utter a few words before dissipating, before all the players from the other realm. The participants are then free to turn around and decide which chest they want to use the Ethereal Key to open.