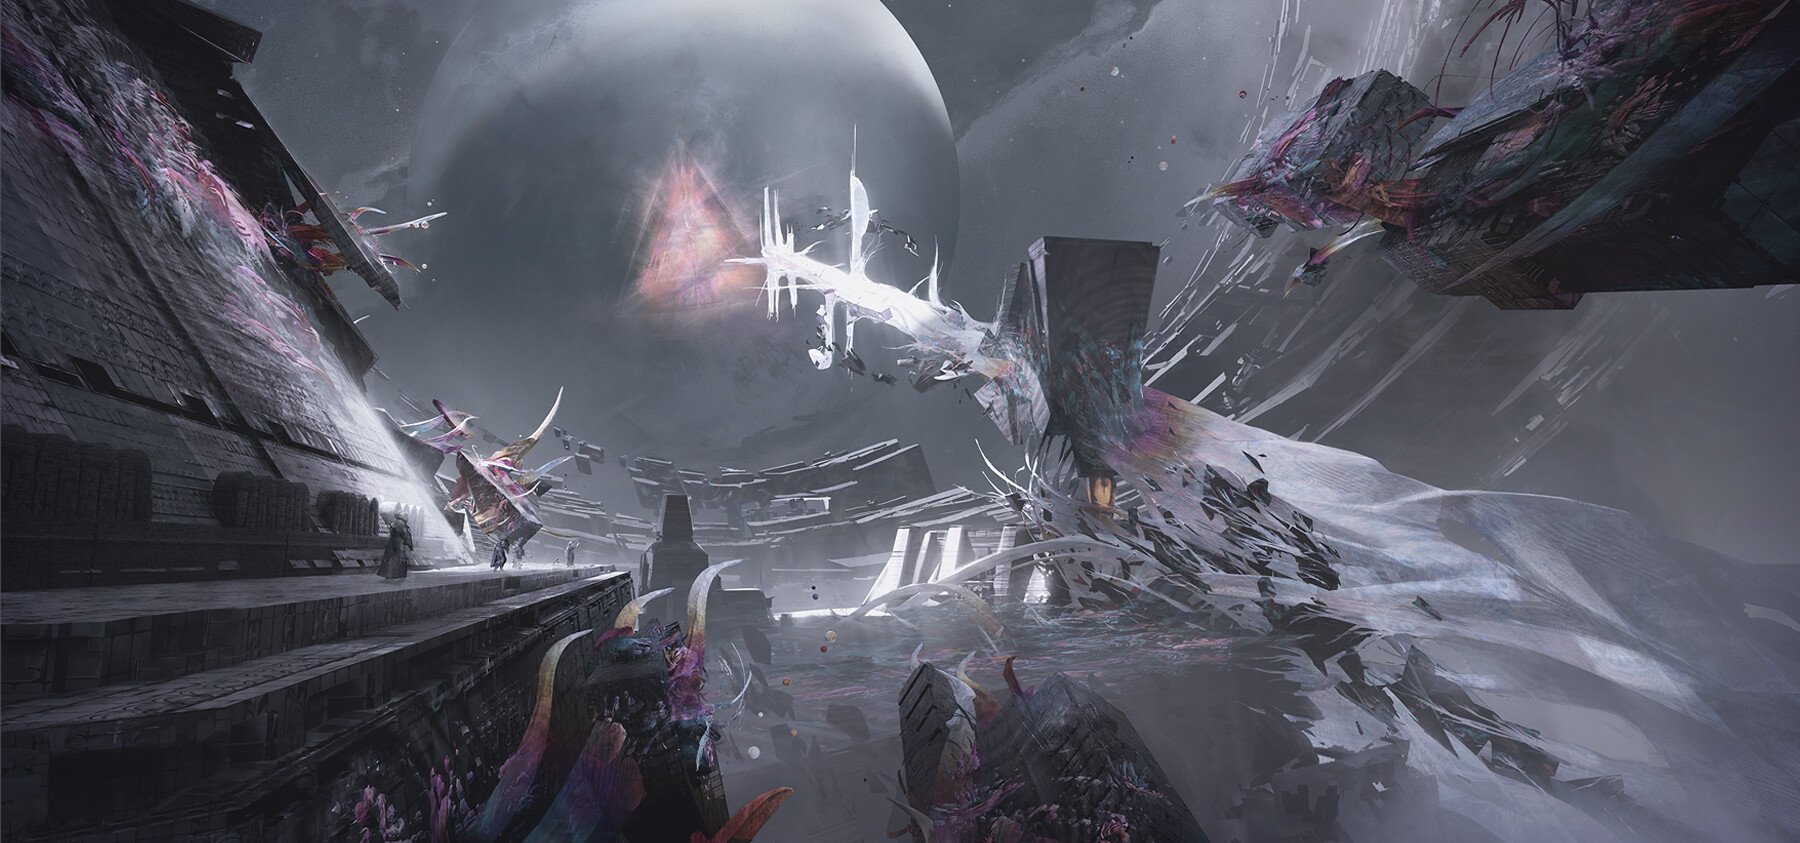
Root of Nightmares Guide
Done by: Kenai#2066 | Mar 20th 2023
Loot Table
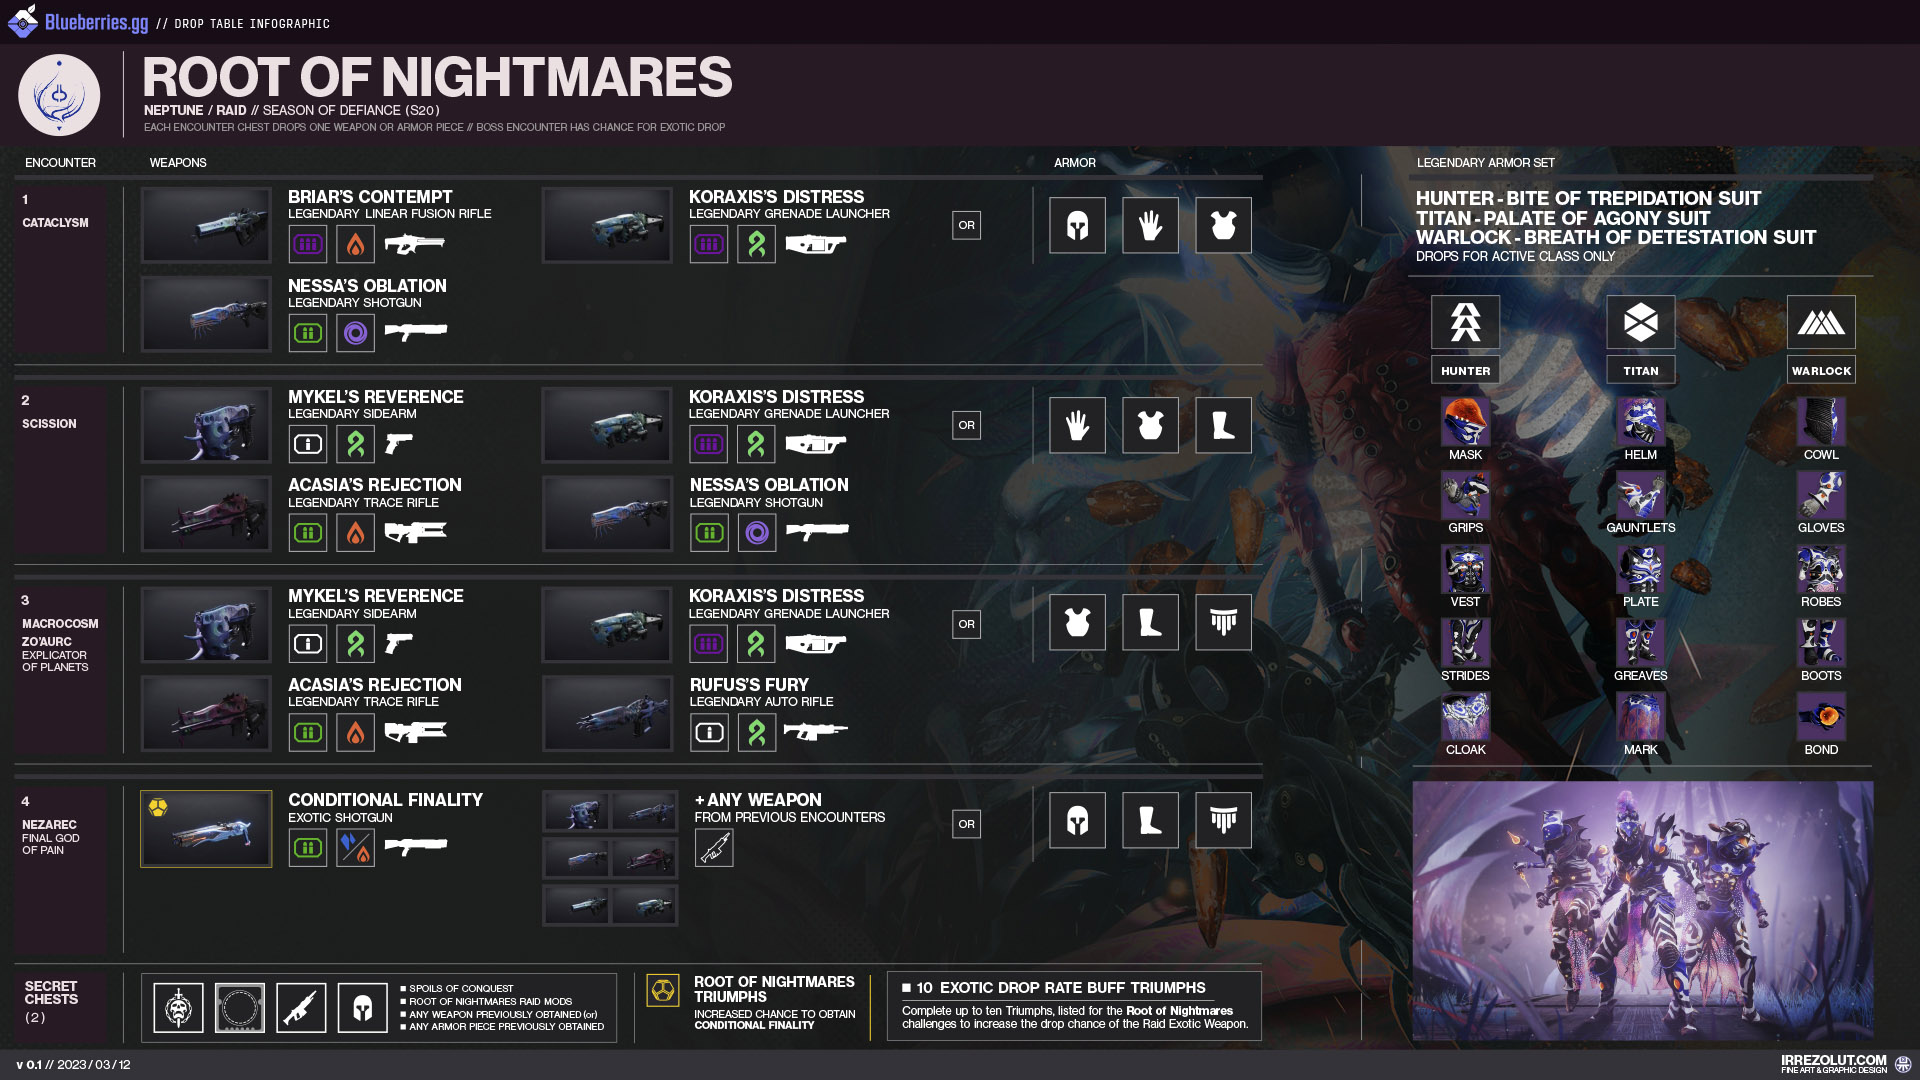
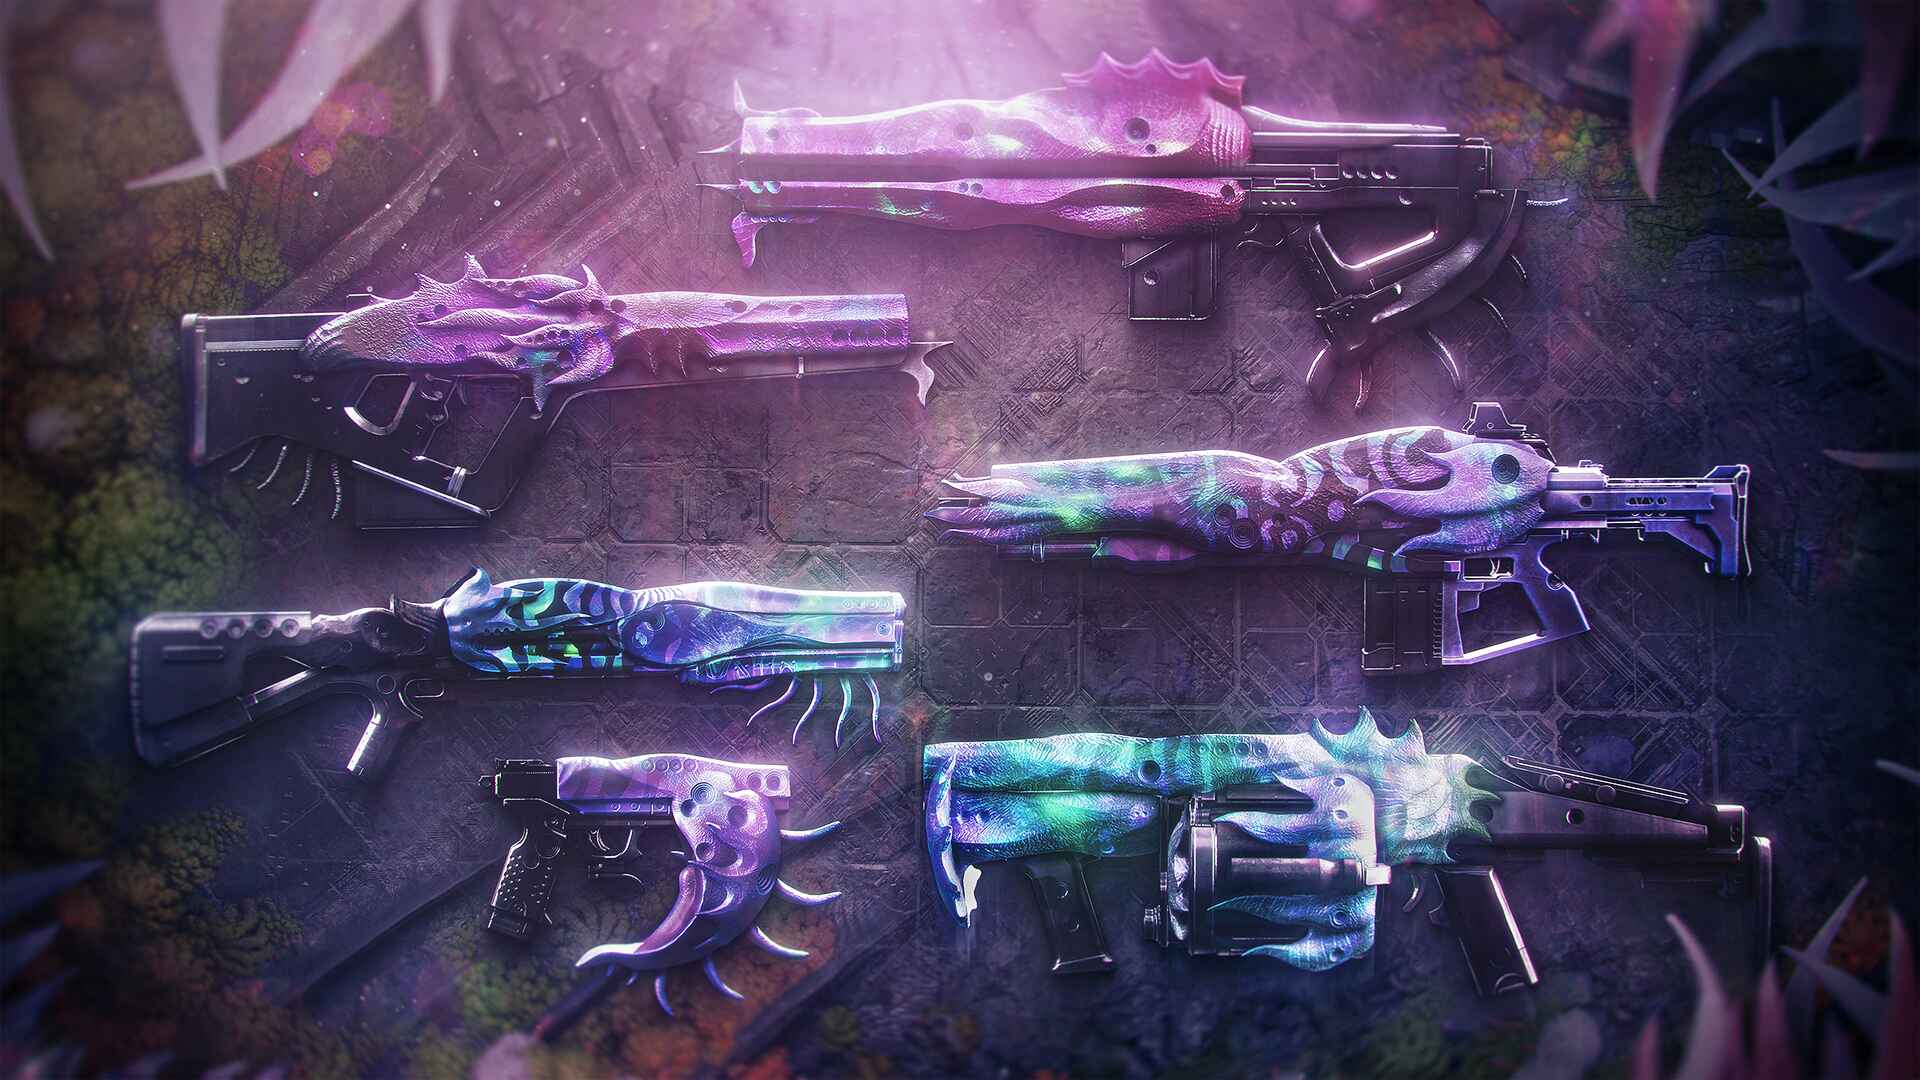
Weapons

Harmonic Resonance - Equipping multiple Root of Nightmares Weapons grants increased Handling, Reload Speed, as well as Increased Damage against Tormentors, Lucent Hive, and Enemy Players in Super.
Bonuses with 2 | 3 Root of Nightmares weapons:
- 10 | 20 Handling
- 0 | 20 Reload Speed
- 0.95x Reload Duration Multiplier
- 3.33% | 9.98% Increased Damage
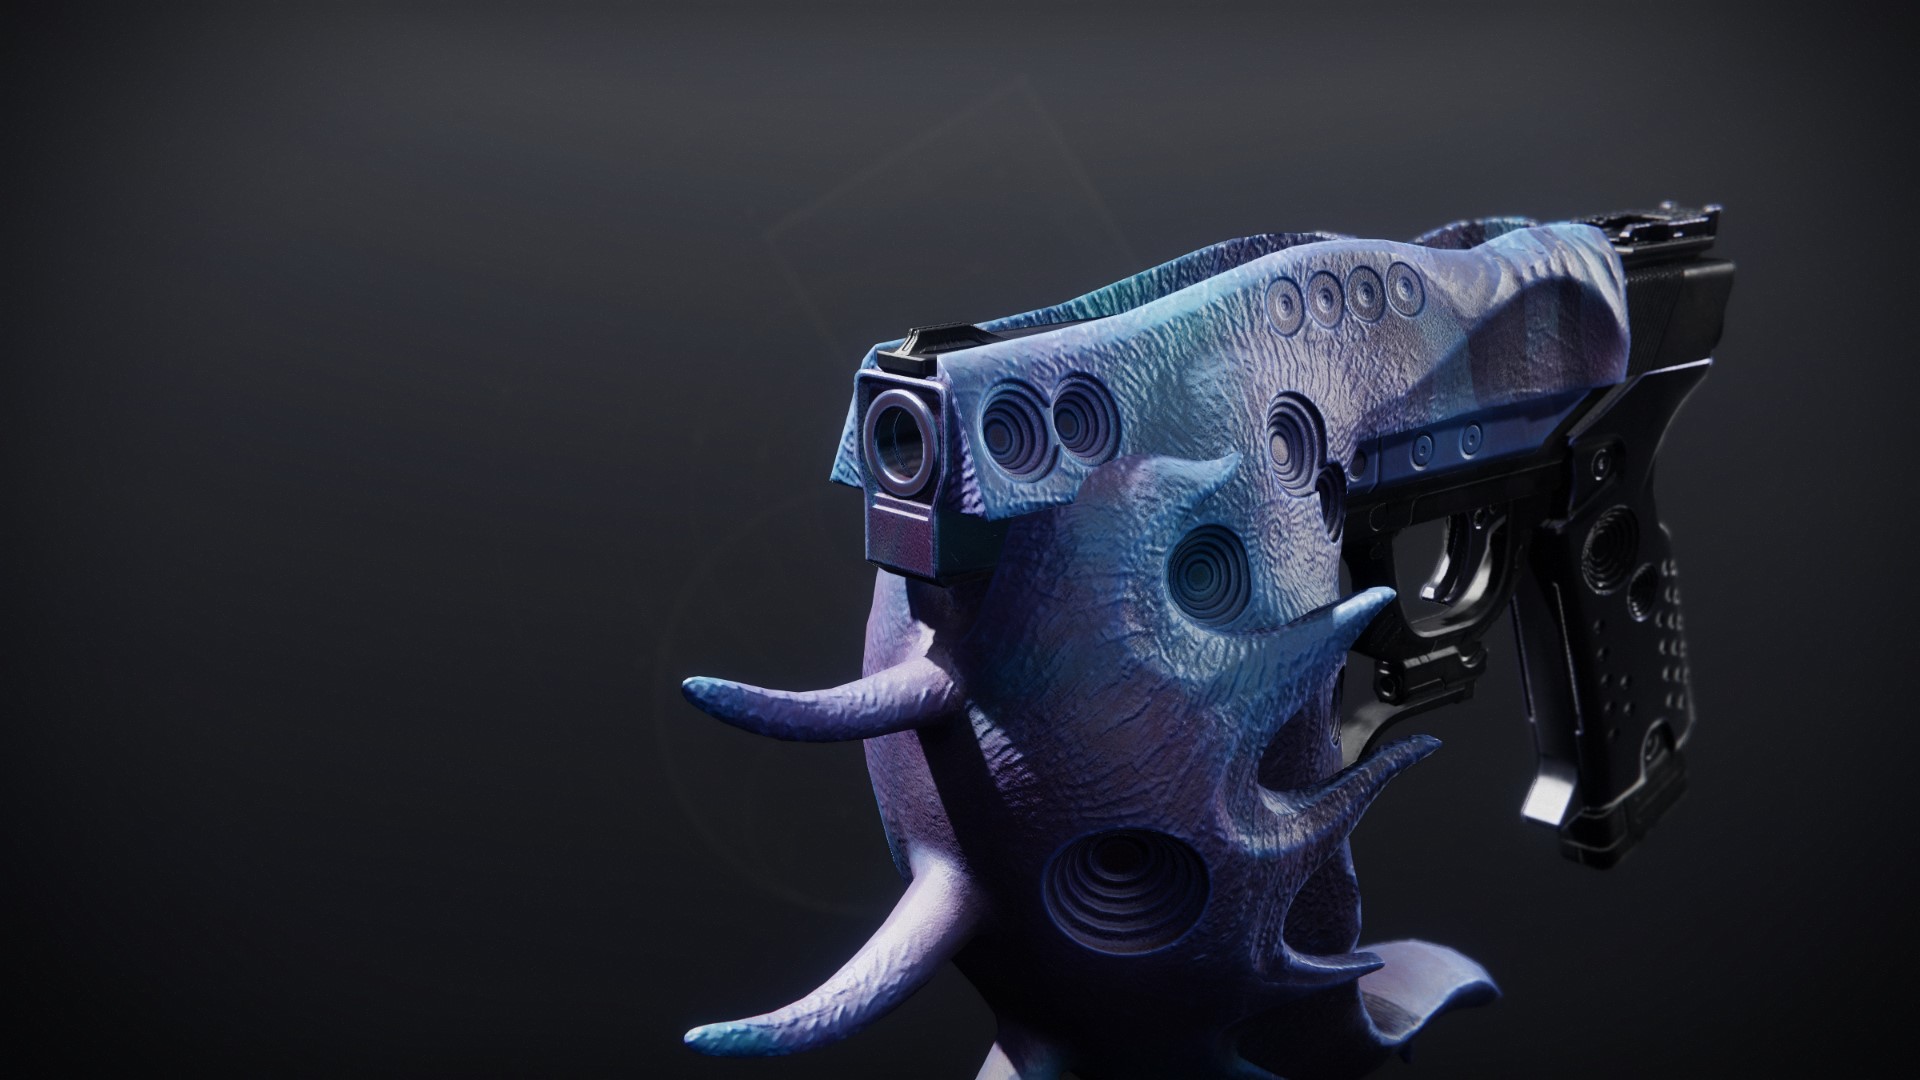
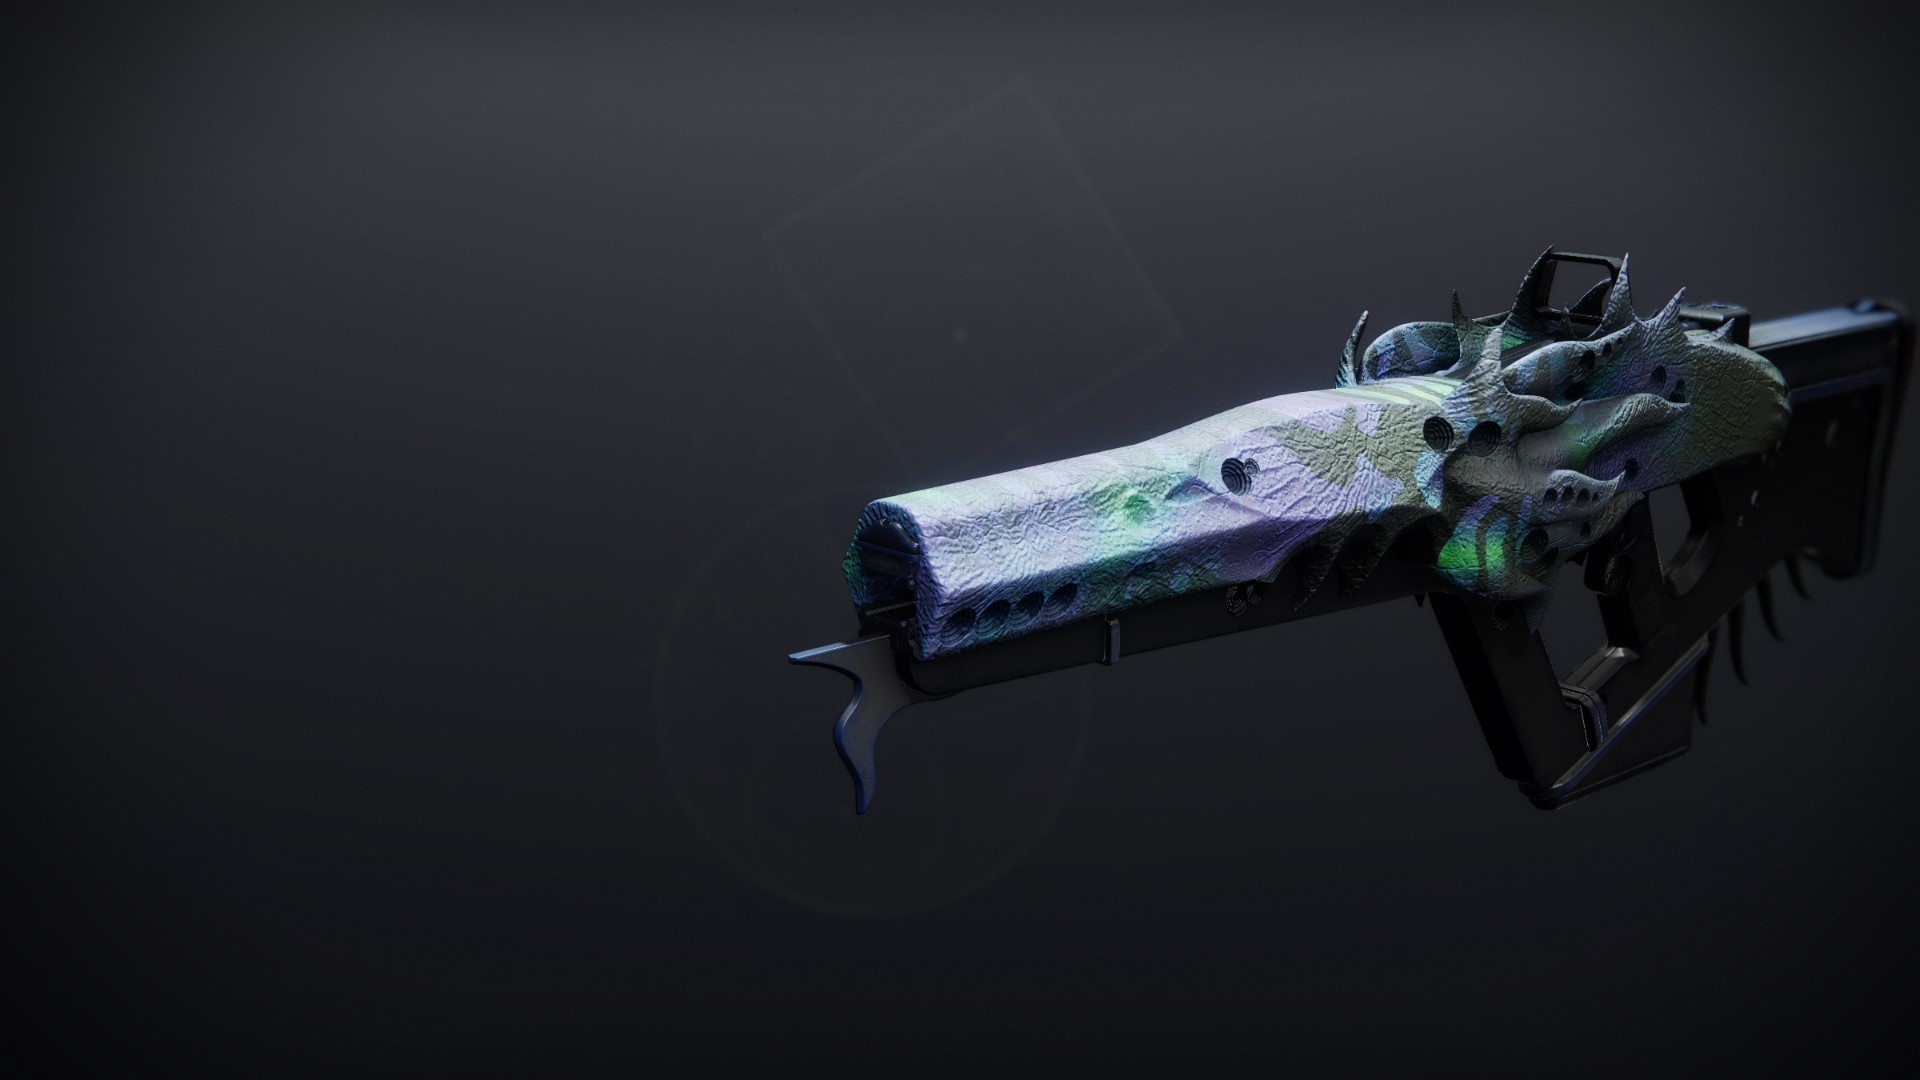
 Rufus's Fury
Legendary // Rapid-Fire
Frame // Auto Rifle
Desirable Perks
- Barrel:
- Arrowhead Brake
- Magazine:
- Ricochet Rounds
- Column 1 Perks:
- Reconstruction
- Demolitionist
- Column 2 Perks:
- Target Lock
- Hatchling
Masterwork: Range
Mod Slot: Minor Spec, Adept Range, Adept Big Ones Spec
Based on the previous column it is plain to see that Rufus is a loaded weapon, or the writer is highly biased. As the first craftable rapid fire auto, it performs well in PvE and PvP content with perks that help the squid gun shoot more, better.
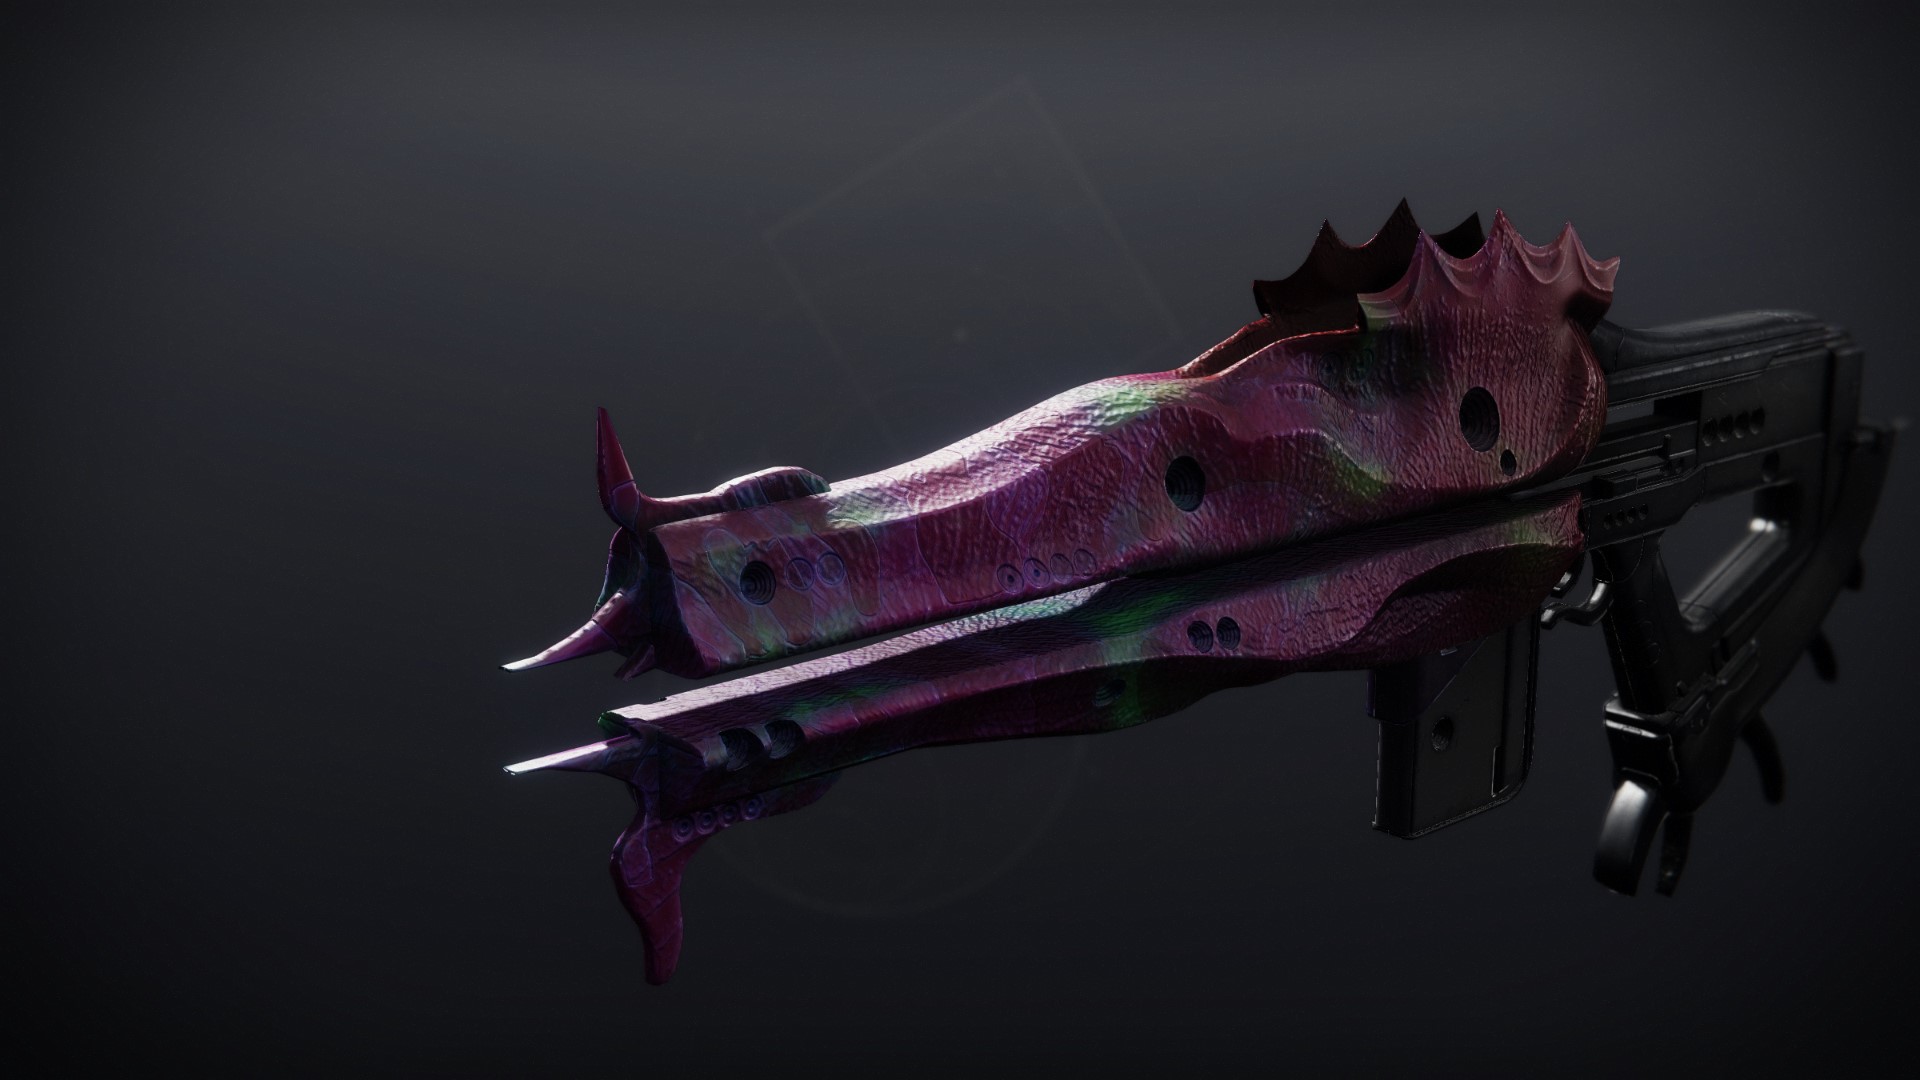
Mykel's Reverence
Legendary //
Rapid-Fire Frame // Sidearm
Desirable Perks
- Barrel:
- Arrowhead Brake
- Magazine:
- Extended Mag
- Ricochet Rounds
- Column 1 Perks:
- Rewind Rounds
- Perpetual Motion
- Column 2 Perks:
- Hatchling
- Frenzy
Masterwork: Range
Mod Slot: Minor Spec, Adept Big Ones Spec, Adept Range
The Glock and Balls brings not only an heirloom so fat and supple I could not fit it into the picture, but a hot load of perks that fill the throats and hearts of any sidearm lover. Besides sturdy damage and stat boosts for PVE, Tap the Trigger is active for most of the Mykel's TTK in PvP, giving you stability, accuracy and burst damage that may surprise opponents. It'll feel great in your hands, on her lap, or in the mouth of that Immortal SMG user you keep queuing against in Trials every weekend.
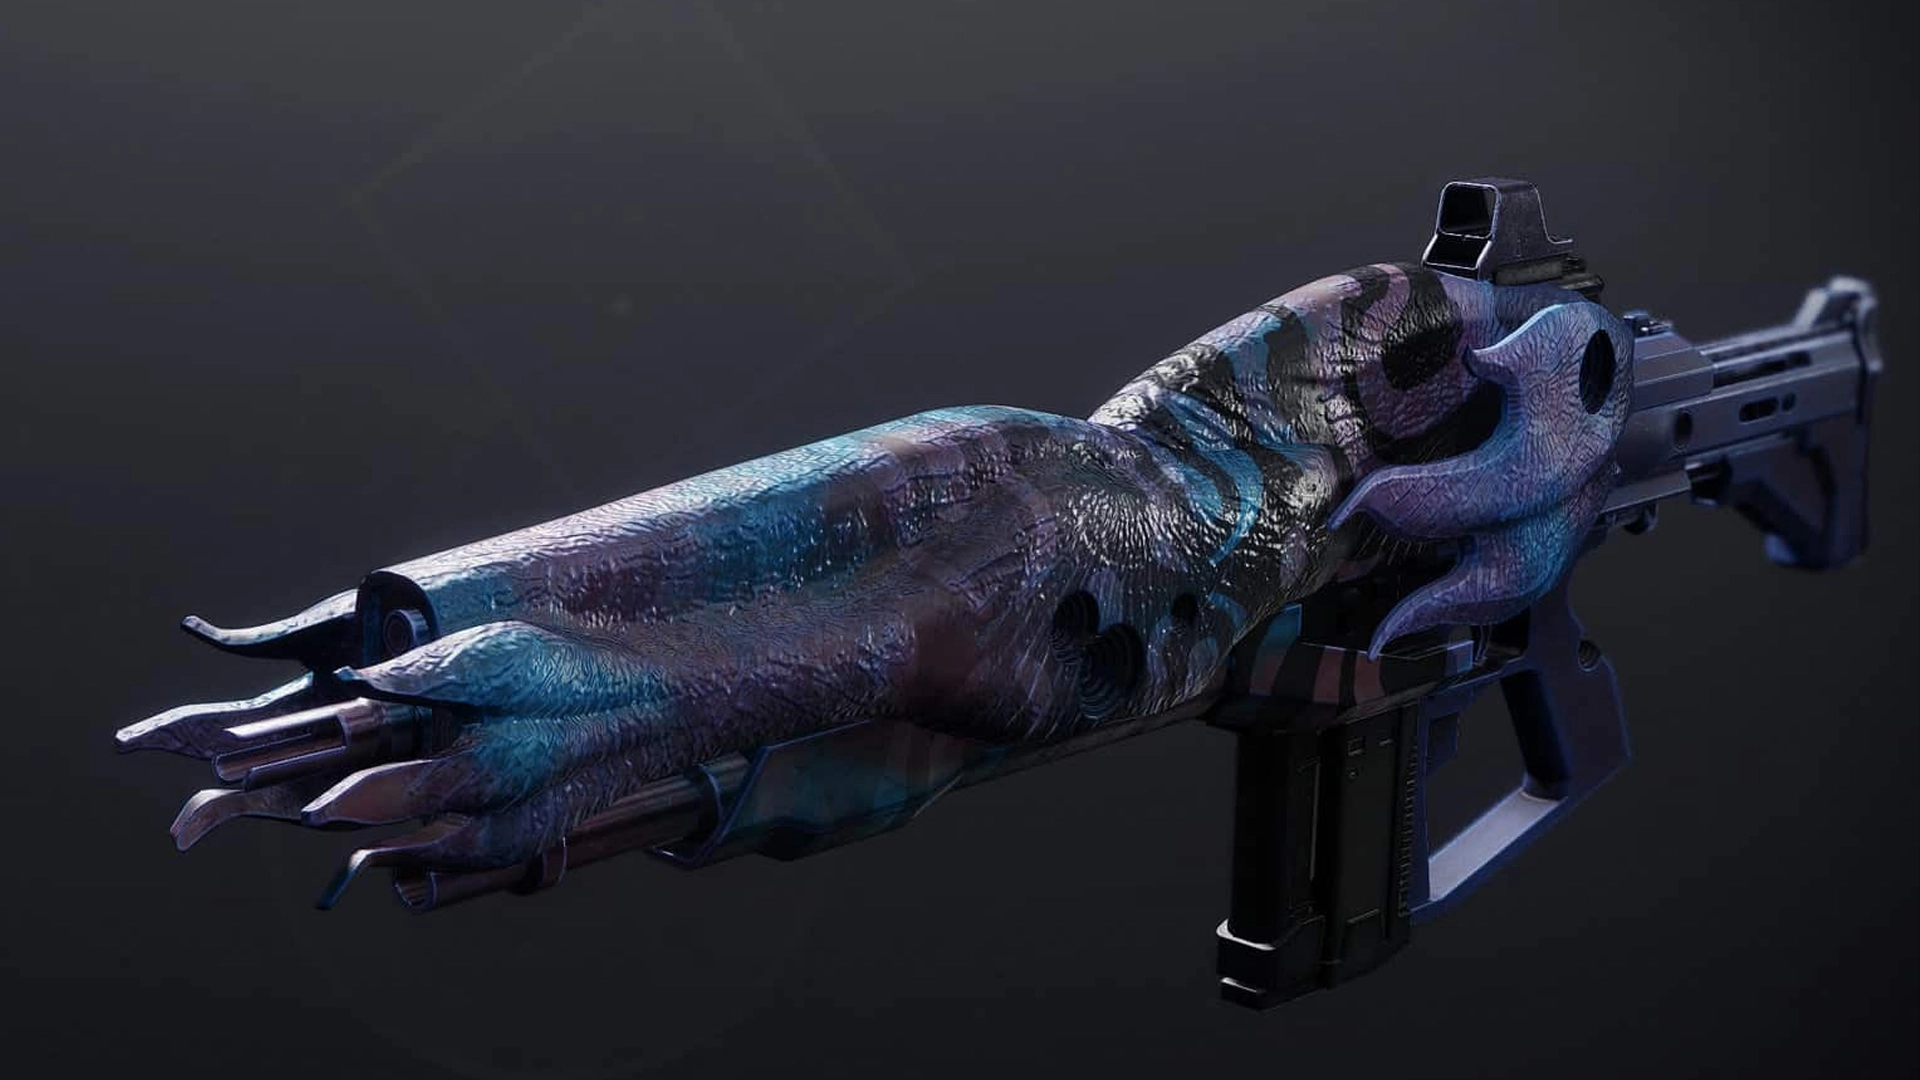
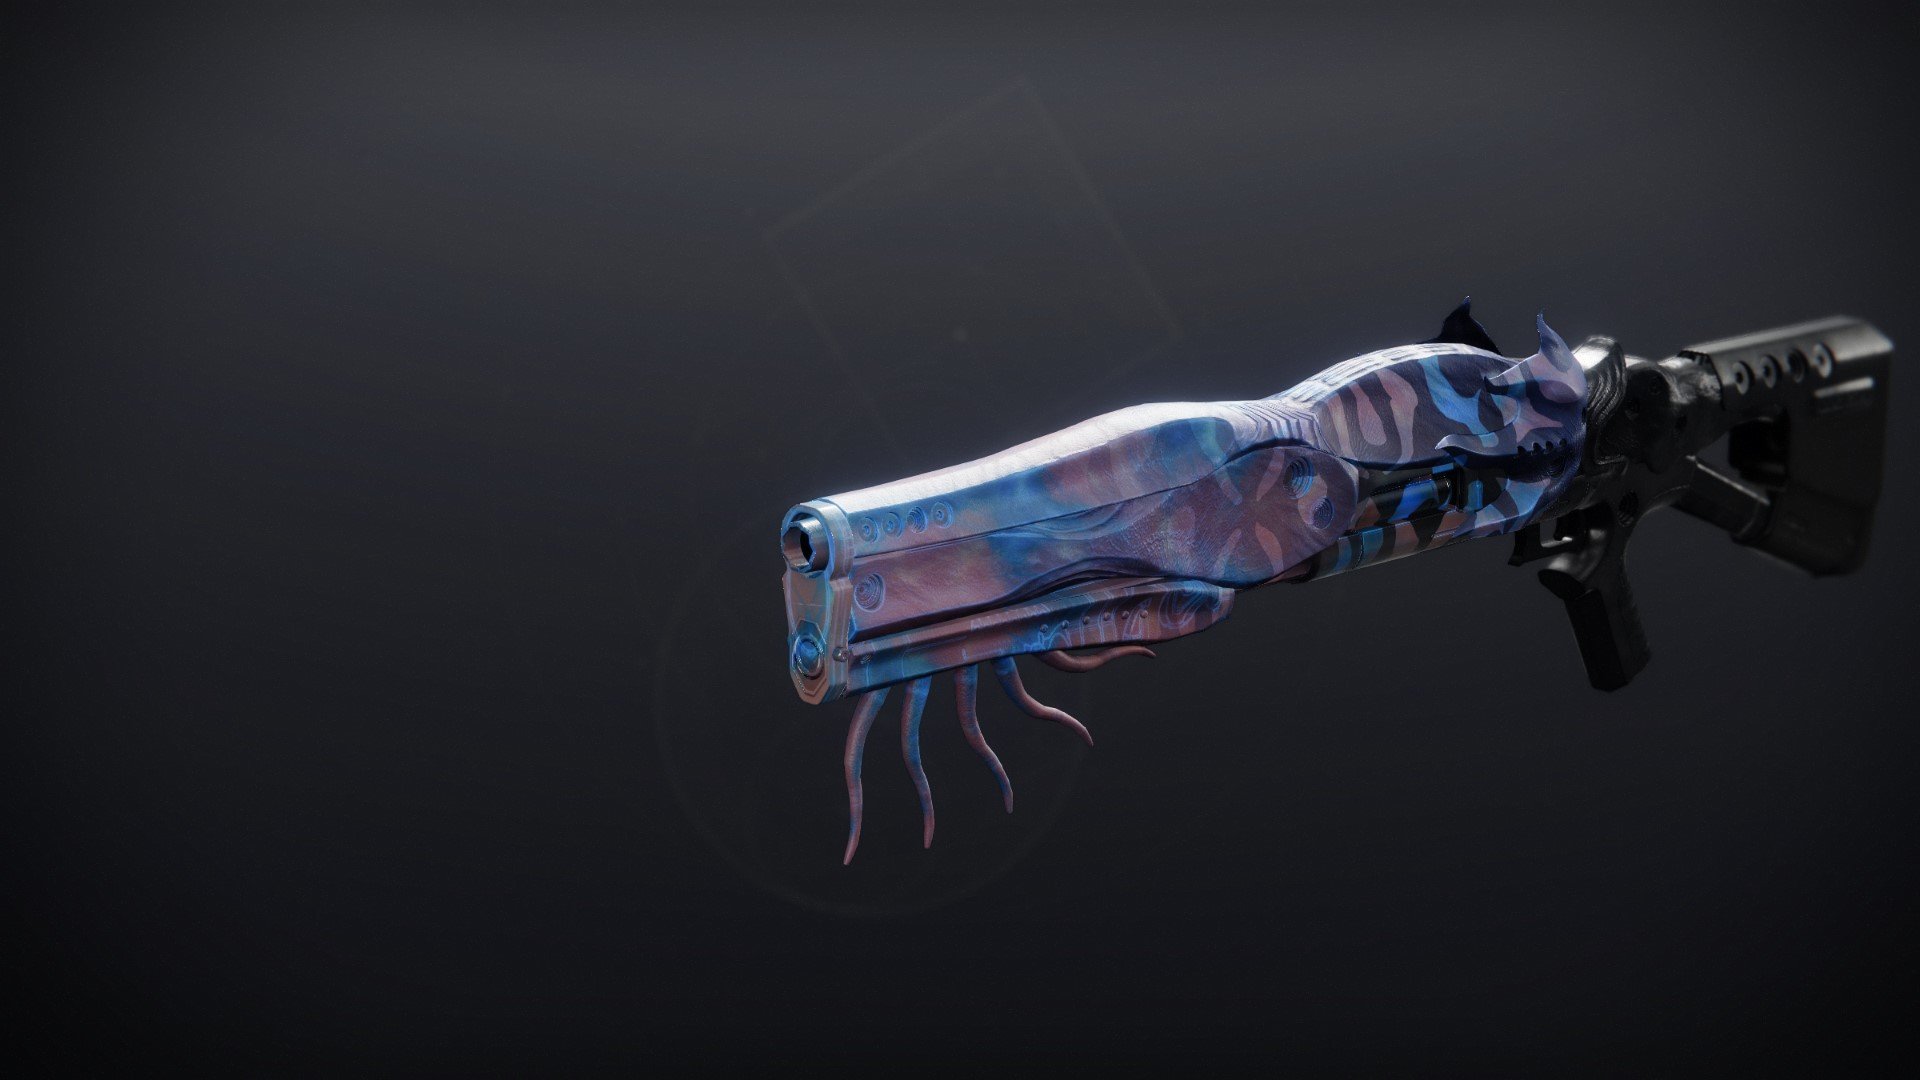
 Acasia's Dejection
Legendary //
Adaptive Frame // Trace Rifle
Desirable Perks
- Barrel:
- Arrowhead Brake
- Corkscrew Rifling
- Battery:
- Enhanced Battery
- Column 1 Perks:
- Reconstruction
- Rewind Rounds
- Column 2 Perks:
- Incandescent
- Target Lock
Masterwork: Range
Mod Slot: Major Spec, Adept Big Ones Spec
Acasia is a trace that brings one of the largest magazine sizes in the game, ideal for players who have their finger glued down on their left mouse button. While similar to Retraced Path (Dares of Eternity) as incandescent trace rifles, Acasia holds its own with a large magazine and elemental synergy with Paracausal Affinity. Despite this, Acasia lacks compelling perks in the third column beyond magazine extensions. Retraced Path has utility in Shoot to Loot in that column. Both are decent trace rifles.
 Nessa's Oblation
Legendary //
Pinpoint Slug Frame // Shotgun
Desirable Perks
- Barrel:
- Arrowhead Brake
- Corkscrew Rifling
- Magazine:
- Assault Mag
- Column 1 Perks:
- Reconstruction
- Repulsor Brace
- Demolitionist
- Column 2 Perks:
- Destabalizing Rounds
- Vorpal Weapon
Masterwork: Range
Mod Slot: Major Spec, Adept Big Ones Spec, Adept Range
Nessa's is one of the better slug shotguns in the game, thanks to its stellar perk combination of Reconstruction + Vorpal/Frenzy. While nothing in the 3rd column makes a splash in the Crucible, Nessa's can easily achieve 100~ range with Opening Shot in 4th.
Koraxis's Distress
Legendary //
Rapid-Fire Frame // Grenade Launcher
Desirable Perks
- Barrel:
- Volatile Launch
- Confined Launch
- Magazine:
- Spike Grenades
- Column 1 Perks:
- Reconstruction
- Chain Reaction
- Column 2 Perks:
- Hatchling
- Paracausal Affinity
Masterwork: Blast Radius, Velocity
Mod Slot: Boss Spec, Adept Big Ones Spec, Adept Blast Radius
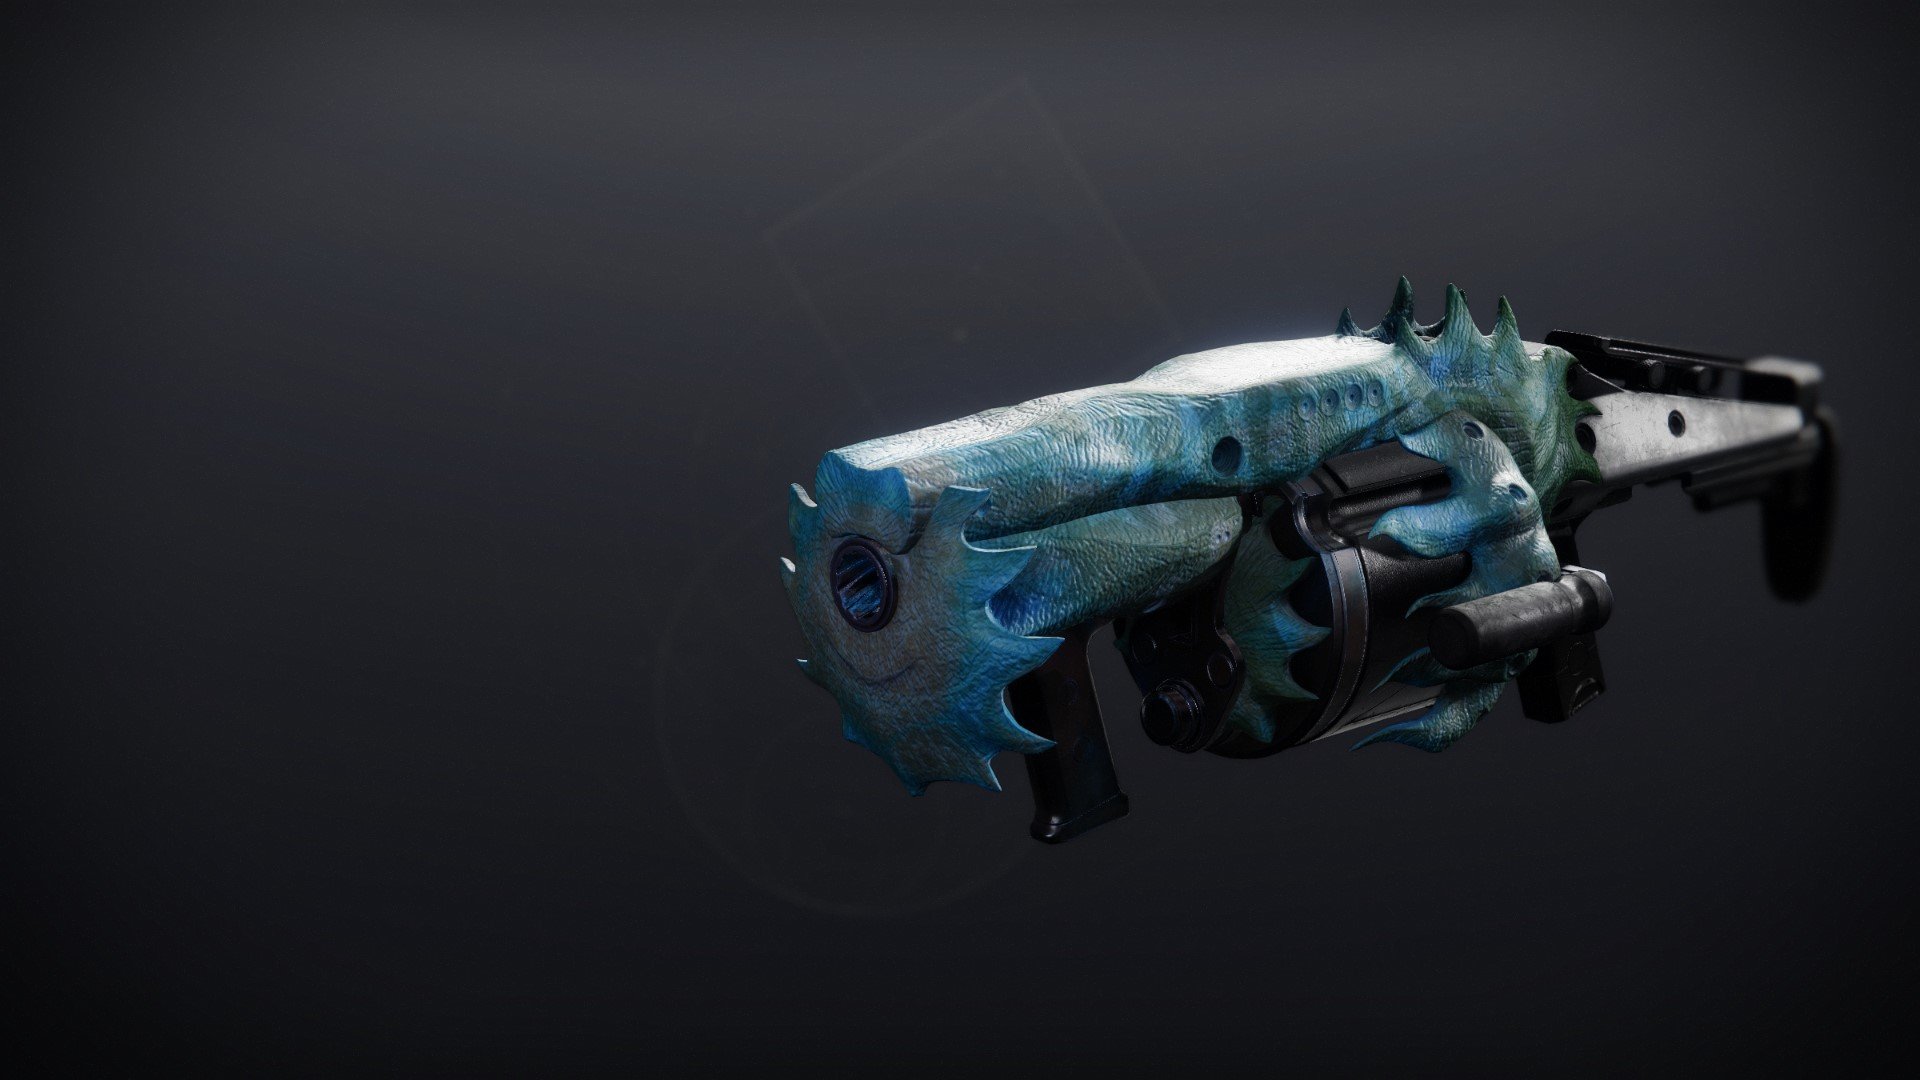
Koraxis is an addclear weapon, and boasts synergy with Strand builds utilizing Hatchling and Demo. Reconstruction is also handy when you just need more grenades for a big room. At the end of the day, it is not pushing any boundaries, but can be a fun craft if you get the pattern.
Briar's Contempt
Legendary //
Aggressive Frame // Linear Fusion Rifle
Desirable Perks
- Barrel:
- Arrowhead Brake
- Battery:
- Enhanced Battery
- Accelerated Coils
- Column 1 Perks:
- Reconstruction
- Column 2 Perks:
- Focused Fury
- Frenzy
Masterwork: Charge Time, Range
Mod Slot: Boss Spec, Adept Big Ones Spec
The Briar is in a tricky situation, standing in the same slot and element as the Cataclysmic, the King of LFRs from the Vow raid. While Briar does not stand up to its big brother, it is easier to use. Reconstruction makes Focused Fury activate 3 shots into a potential 12 magazine, and the buff is refreshable. In some scenarios, Briar's beats out Cataclysmic when using the Enhanced Surrounded perk.
 Conditional Finality
Exotic // Shotgun
Details
Holds two shots in the magazine. The first shot freezes targets, and the second causes them to ignite if most pellets connect.
Comes with a unique spread pattern for each of the two shots. Stasis is fired in a triangle, and solar pellets are shot in a relatively tight circle.
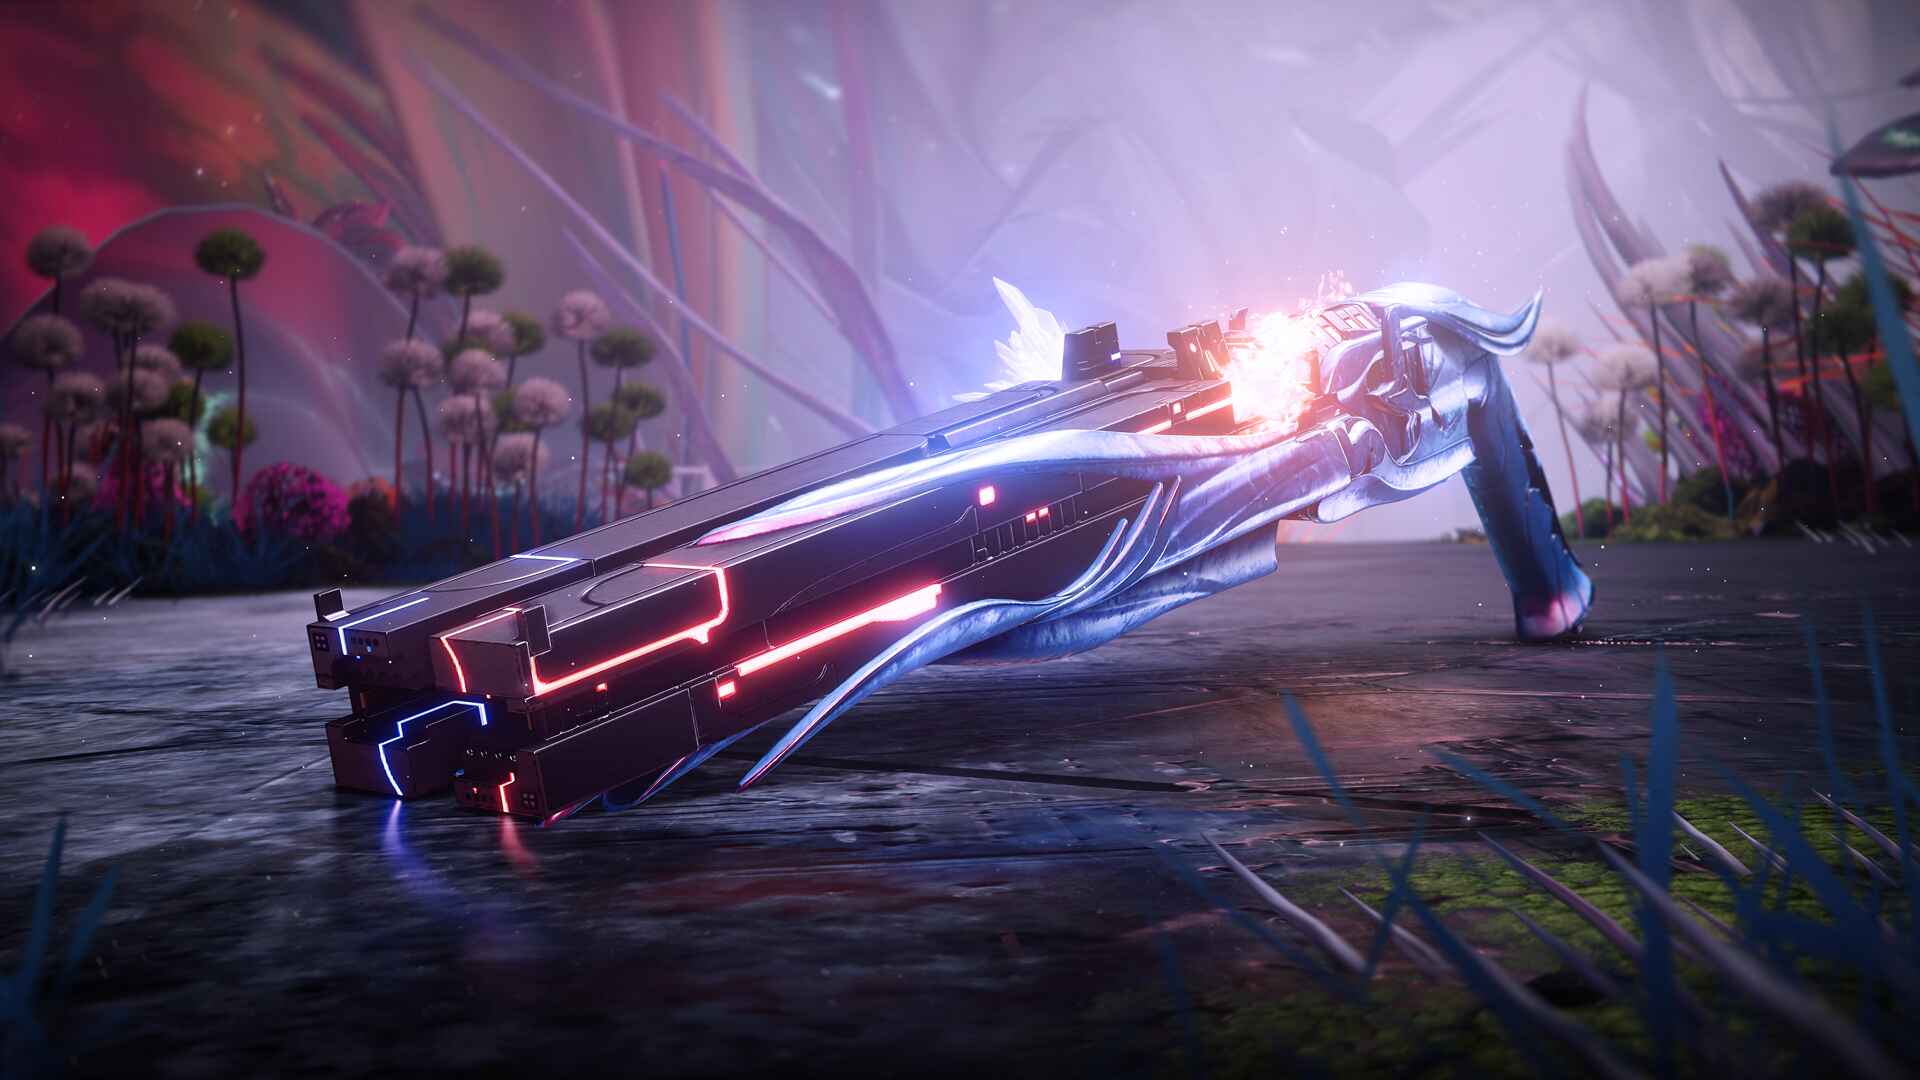
This is the chase of the season, as freezing + ignition rounds make the weapon an anti-champion monster, dealing with both Barriers without their shield and stunning Unstoppables. To compensate for its small magazine, Finality boasts lightning fast swap and reload speeds, and questionably high damage on both champions and certain bosses.
The low 35 range is compensated by its tight spread pattern, making it usable in competitive PvP as well. It has the damage profile of an aggressive frame shotgun, coupled with high handling and reload speed. While the number of pellets required to freeze/ignite are somewhat inconsistent, there are few feelings in the world as euphoric as freezing a roaming super, or a rampant thundercrash.
Deepsight Chest
Before heading to the first encounter, the reference nodes are located at the beginning of the raid in a flower. Don't descend the stairs that go to the lower level; instead, make your way along the wall. Instead, at the top of the steps, focus on the two structures on the left. A flower with three nodes is behind them. You need to keep in mind these colors and their placement.
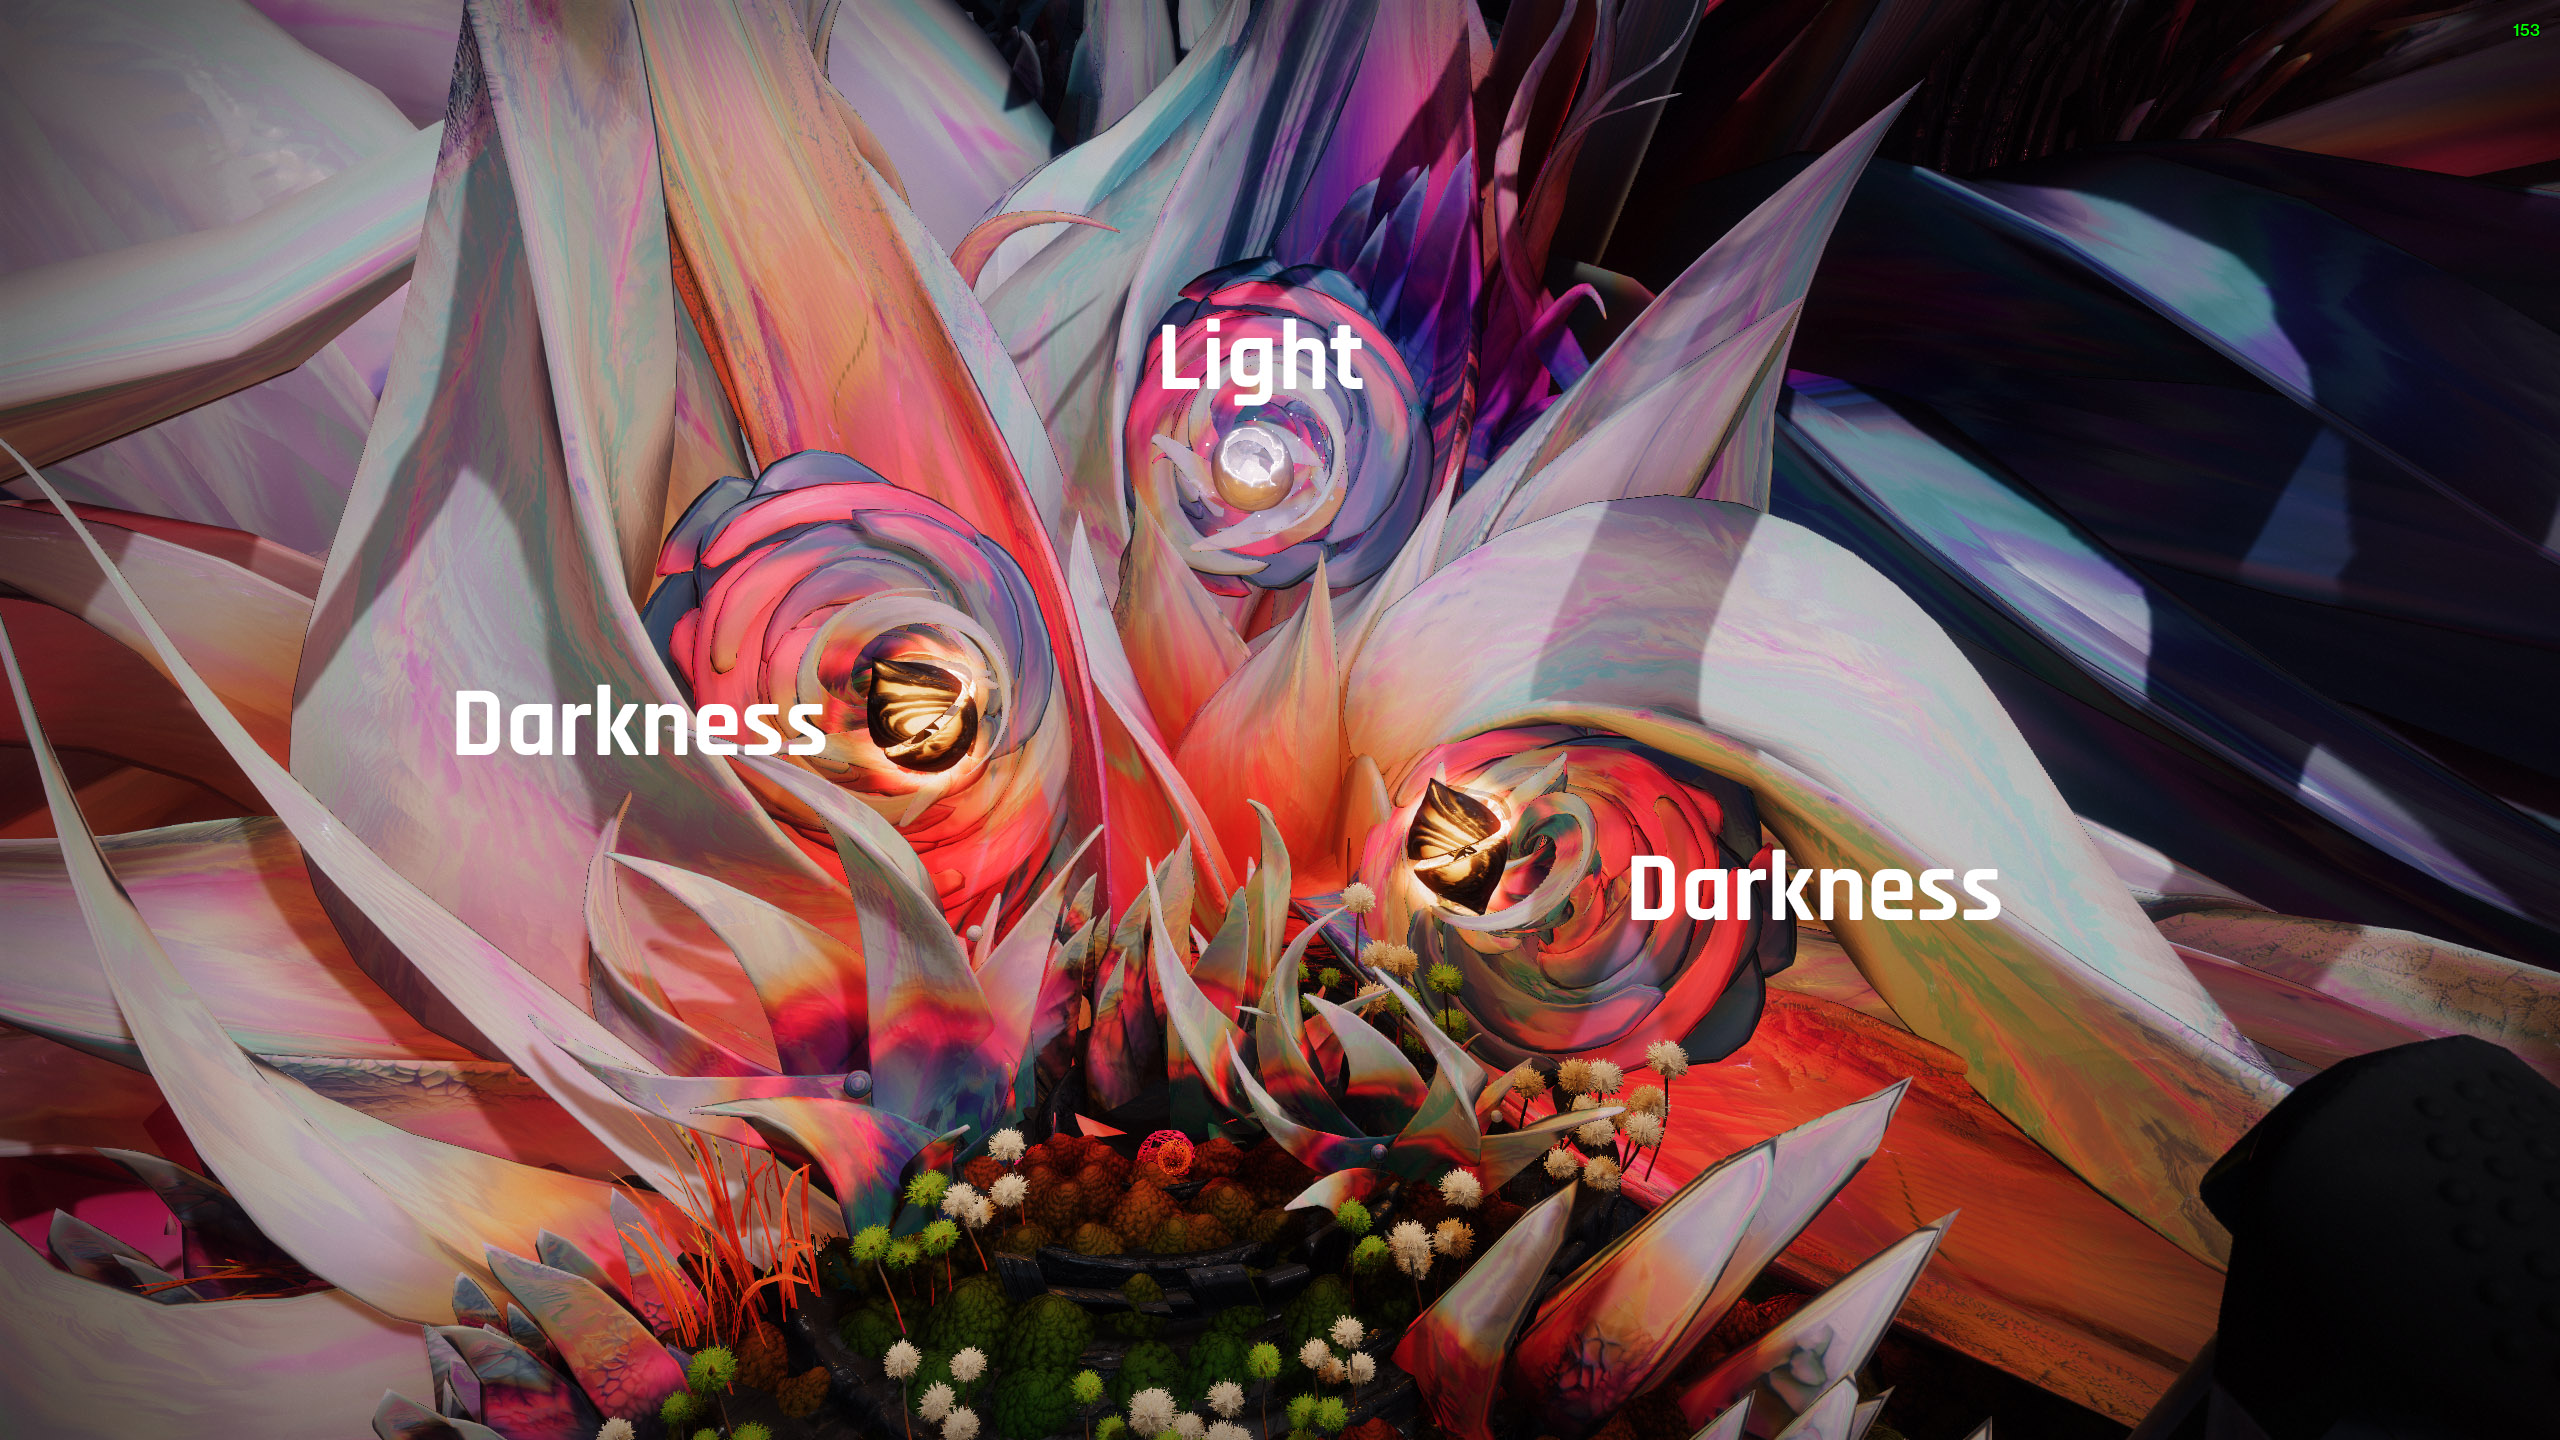
As seen in the sample image above, the order is Darkness, Light, Darkness. Hence, a Darkness network must be established in the first hidden node room, followed by a Light network in the second, and a Darkness network in the third. One Light and one Darkness node pair are present in each concealed chamber. As you would with any other node encounter, establish the connection. Shoot the node while standing in the required aura, then go on to the second node and shoot it.
You'll see an on-screen notice that reads, "Your actions take root", if you set up the proper network in the space. It states: "Your spoils suffer irreversible damage" if you construct the improper network, and you have to reset the whole raid to try again. Once everything is done perfectly and the last node room connection is made, a message stating "A large harvest awaits" will appear.
Node Rooms
There are only three hidden node rooms. Be sure you don't miss a room or choose the wrong link. Resetting the raid is the only option to fix the issue.
- Before the first encounter is the first node room. Avoid entering the huge, bright entryway. Instead, turn right and enter a door hidden by some bushes. To get to the node room, descend a flight of steps that leads deep into the cave.
- During the jumping puzzle for the Darkness Refuge. Don't use the piston to catapult yourself across the gap while on the roof. Instead, turn left and leap over the chasm to a lower structure. To access the nodes, enter the door on the left.
- The last node room comes right before the Nezarec battle. Climb up through the flower buds and branches until you reach the cube-shaped structure with three branches sticking out of its front (it also has golden blocks). Jump from the branch to the forked statue and Radial Mast, then land on the floating brick. To discover the final nodes, aim up and dive into the ceiling.
 First node Room.
 Second node Room.
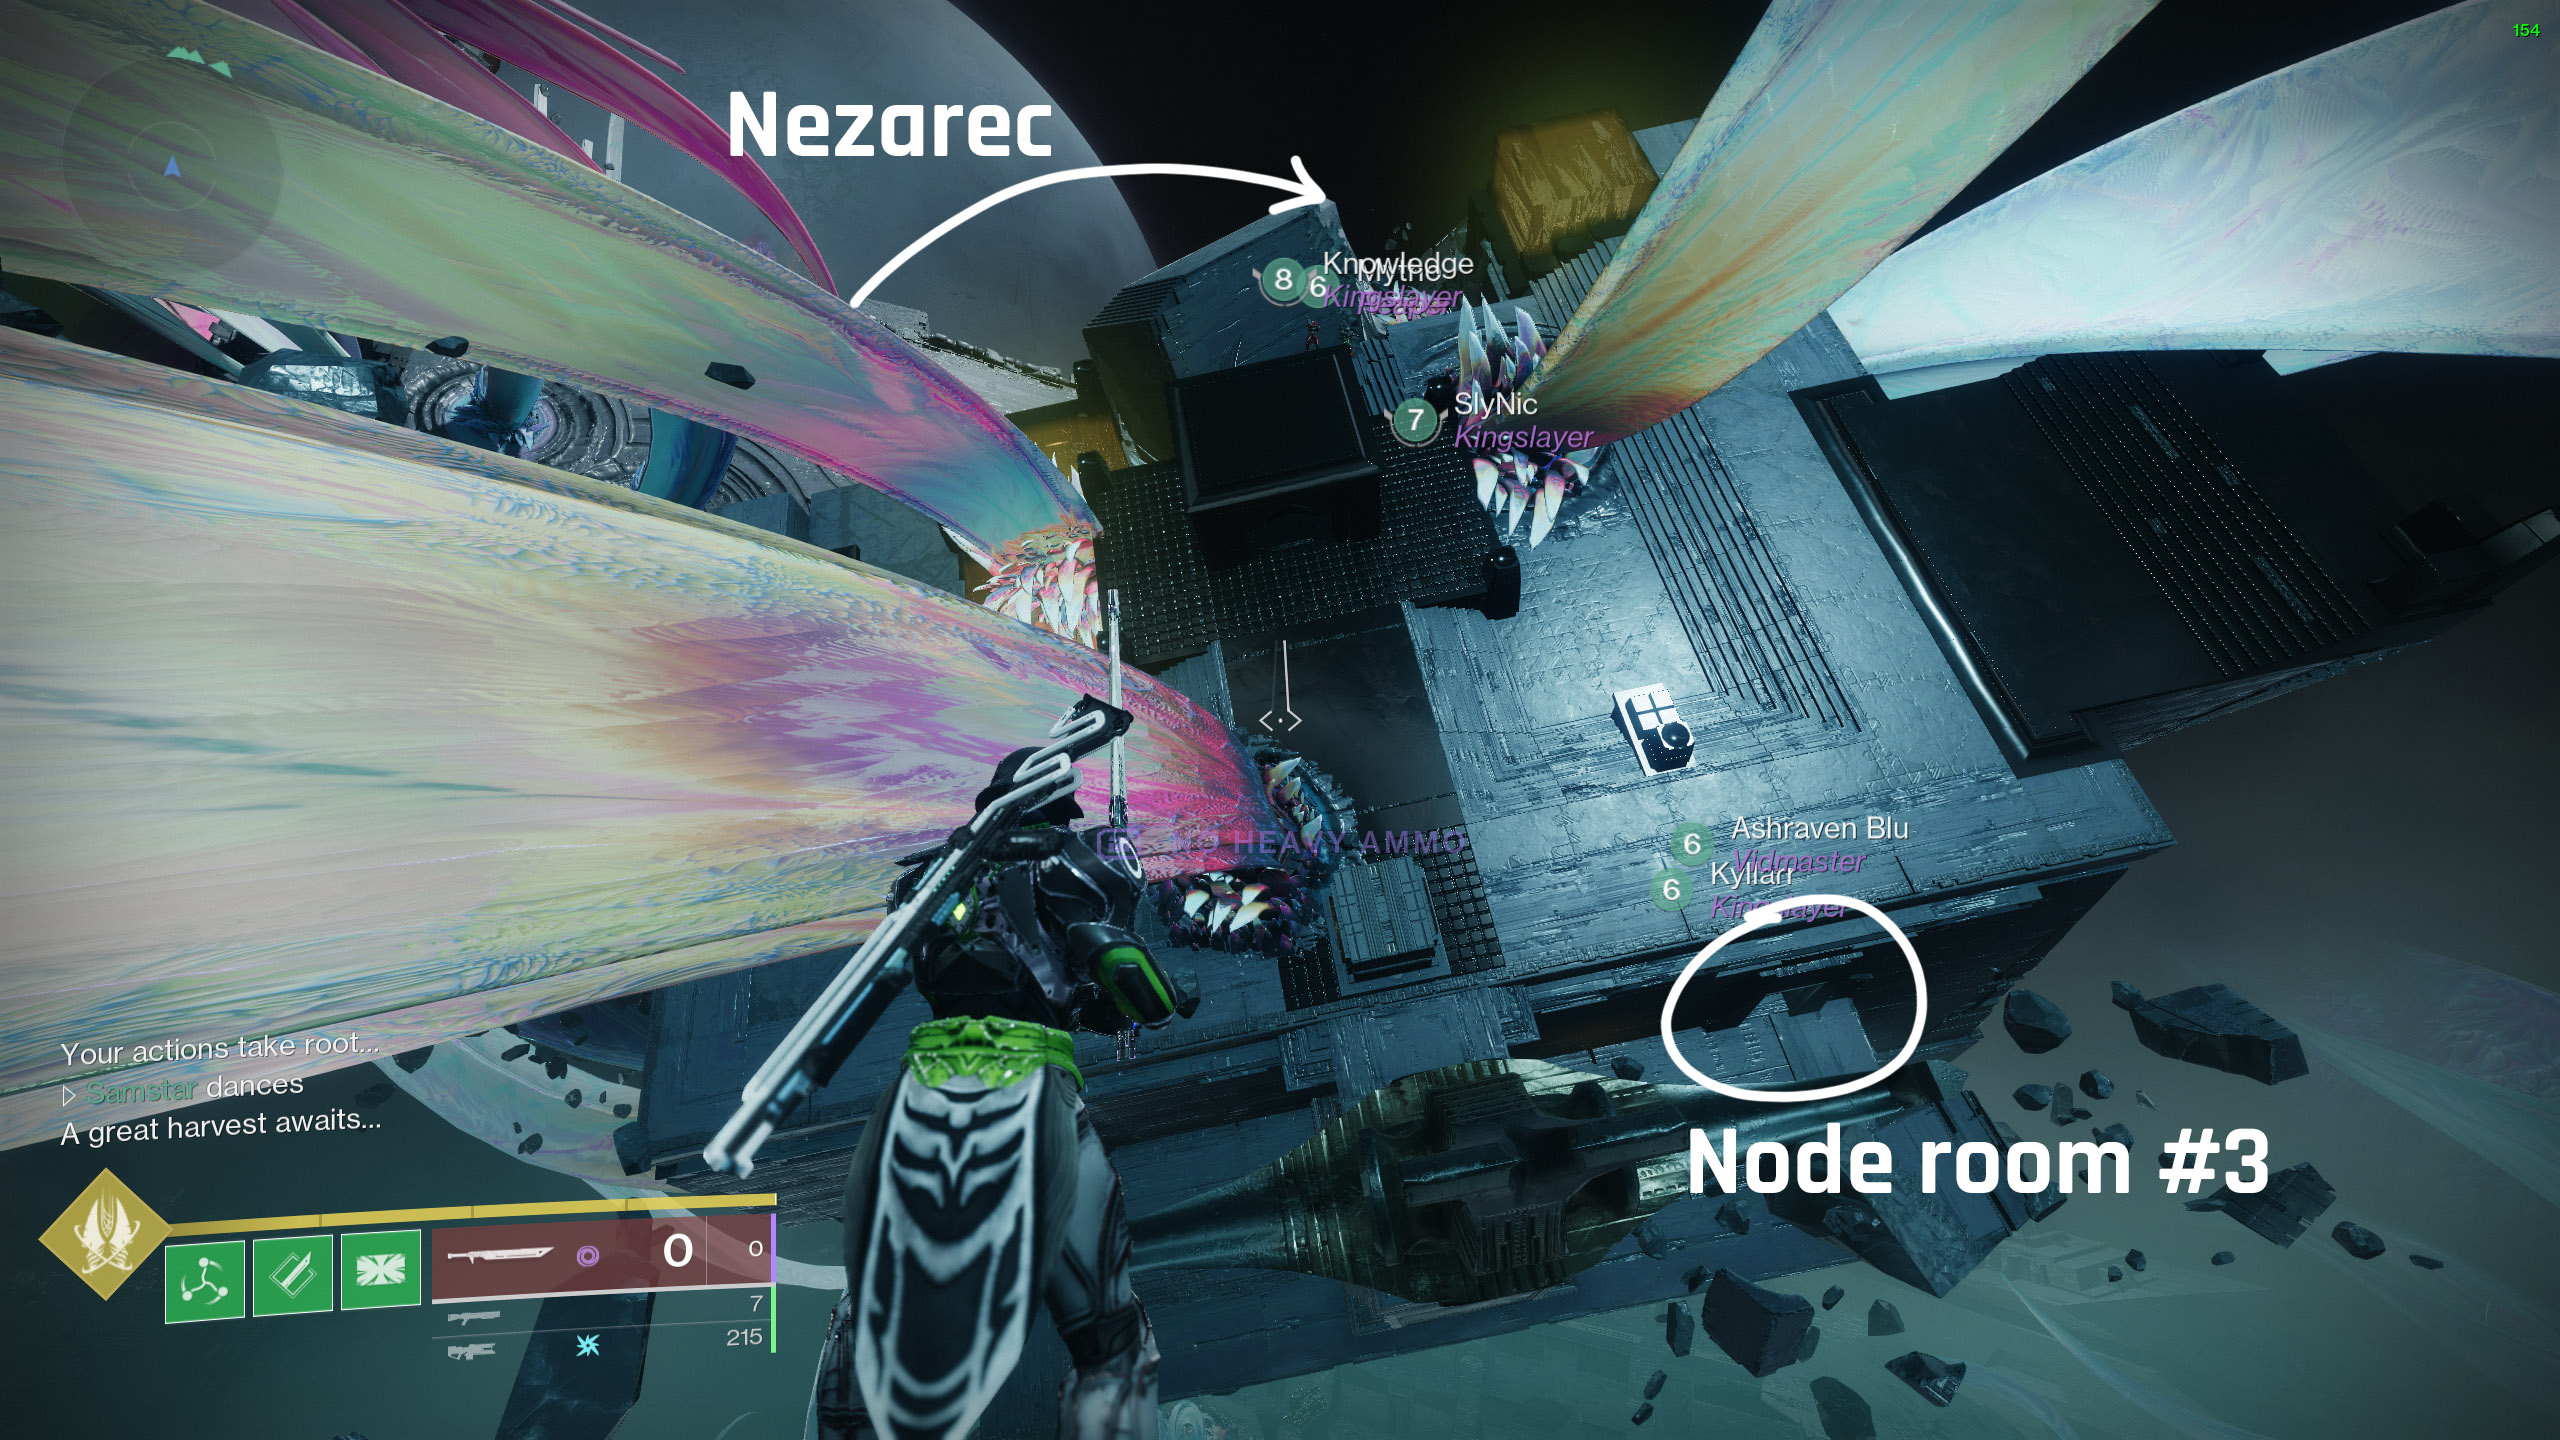 Third node room.
Secret Chests
Cataclysm
Roles:
- 1 Runner
- Finish the network by gathering the Field of Light buff from the beginning node.
- 5 Ad-clear
- Defeat ads, Psions and Tormentors.
Recommended Loadouts:
- Anti-Barrier Weapons and Skill Procs
- Machine Guns/Waveframe GLs (Any weapons good for ad-clear)
-
Optional: Divinity (One player on ad clear)
- Using divinity on tormentors makes their hitbox much easier to hit.
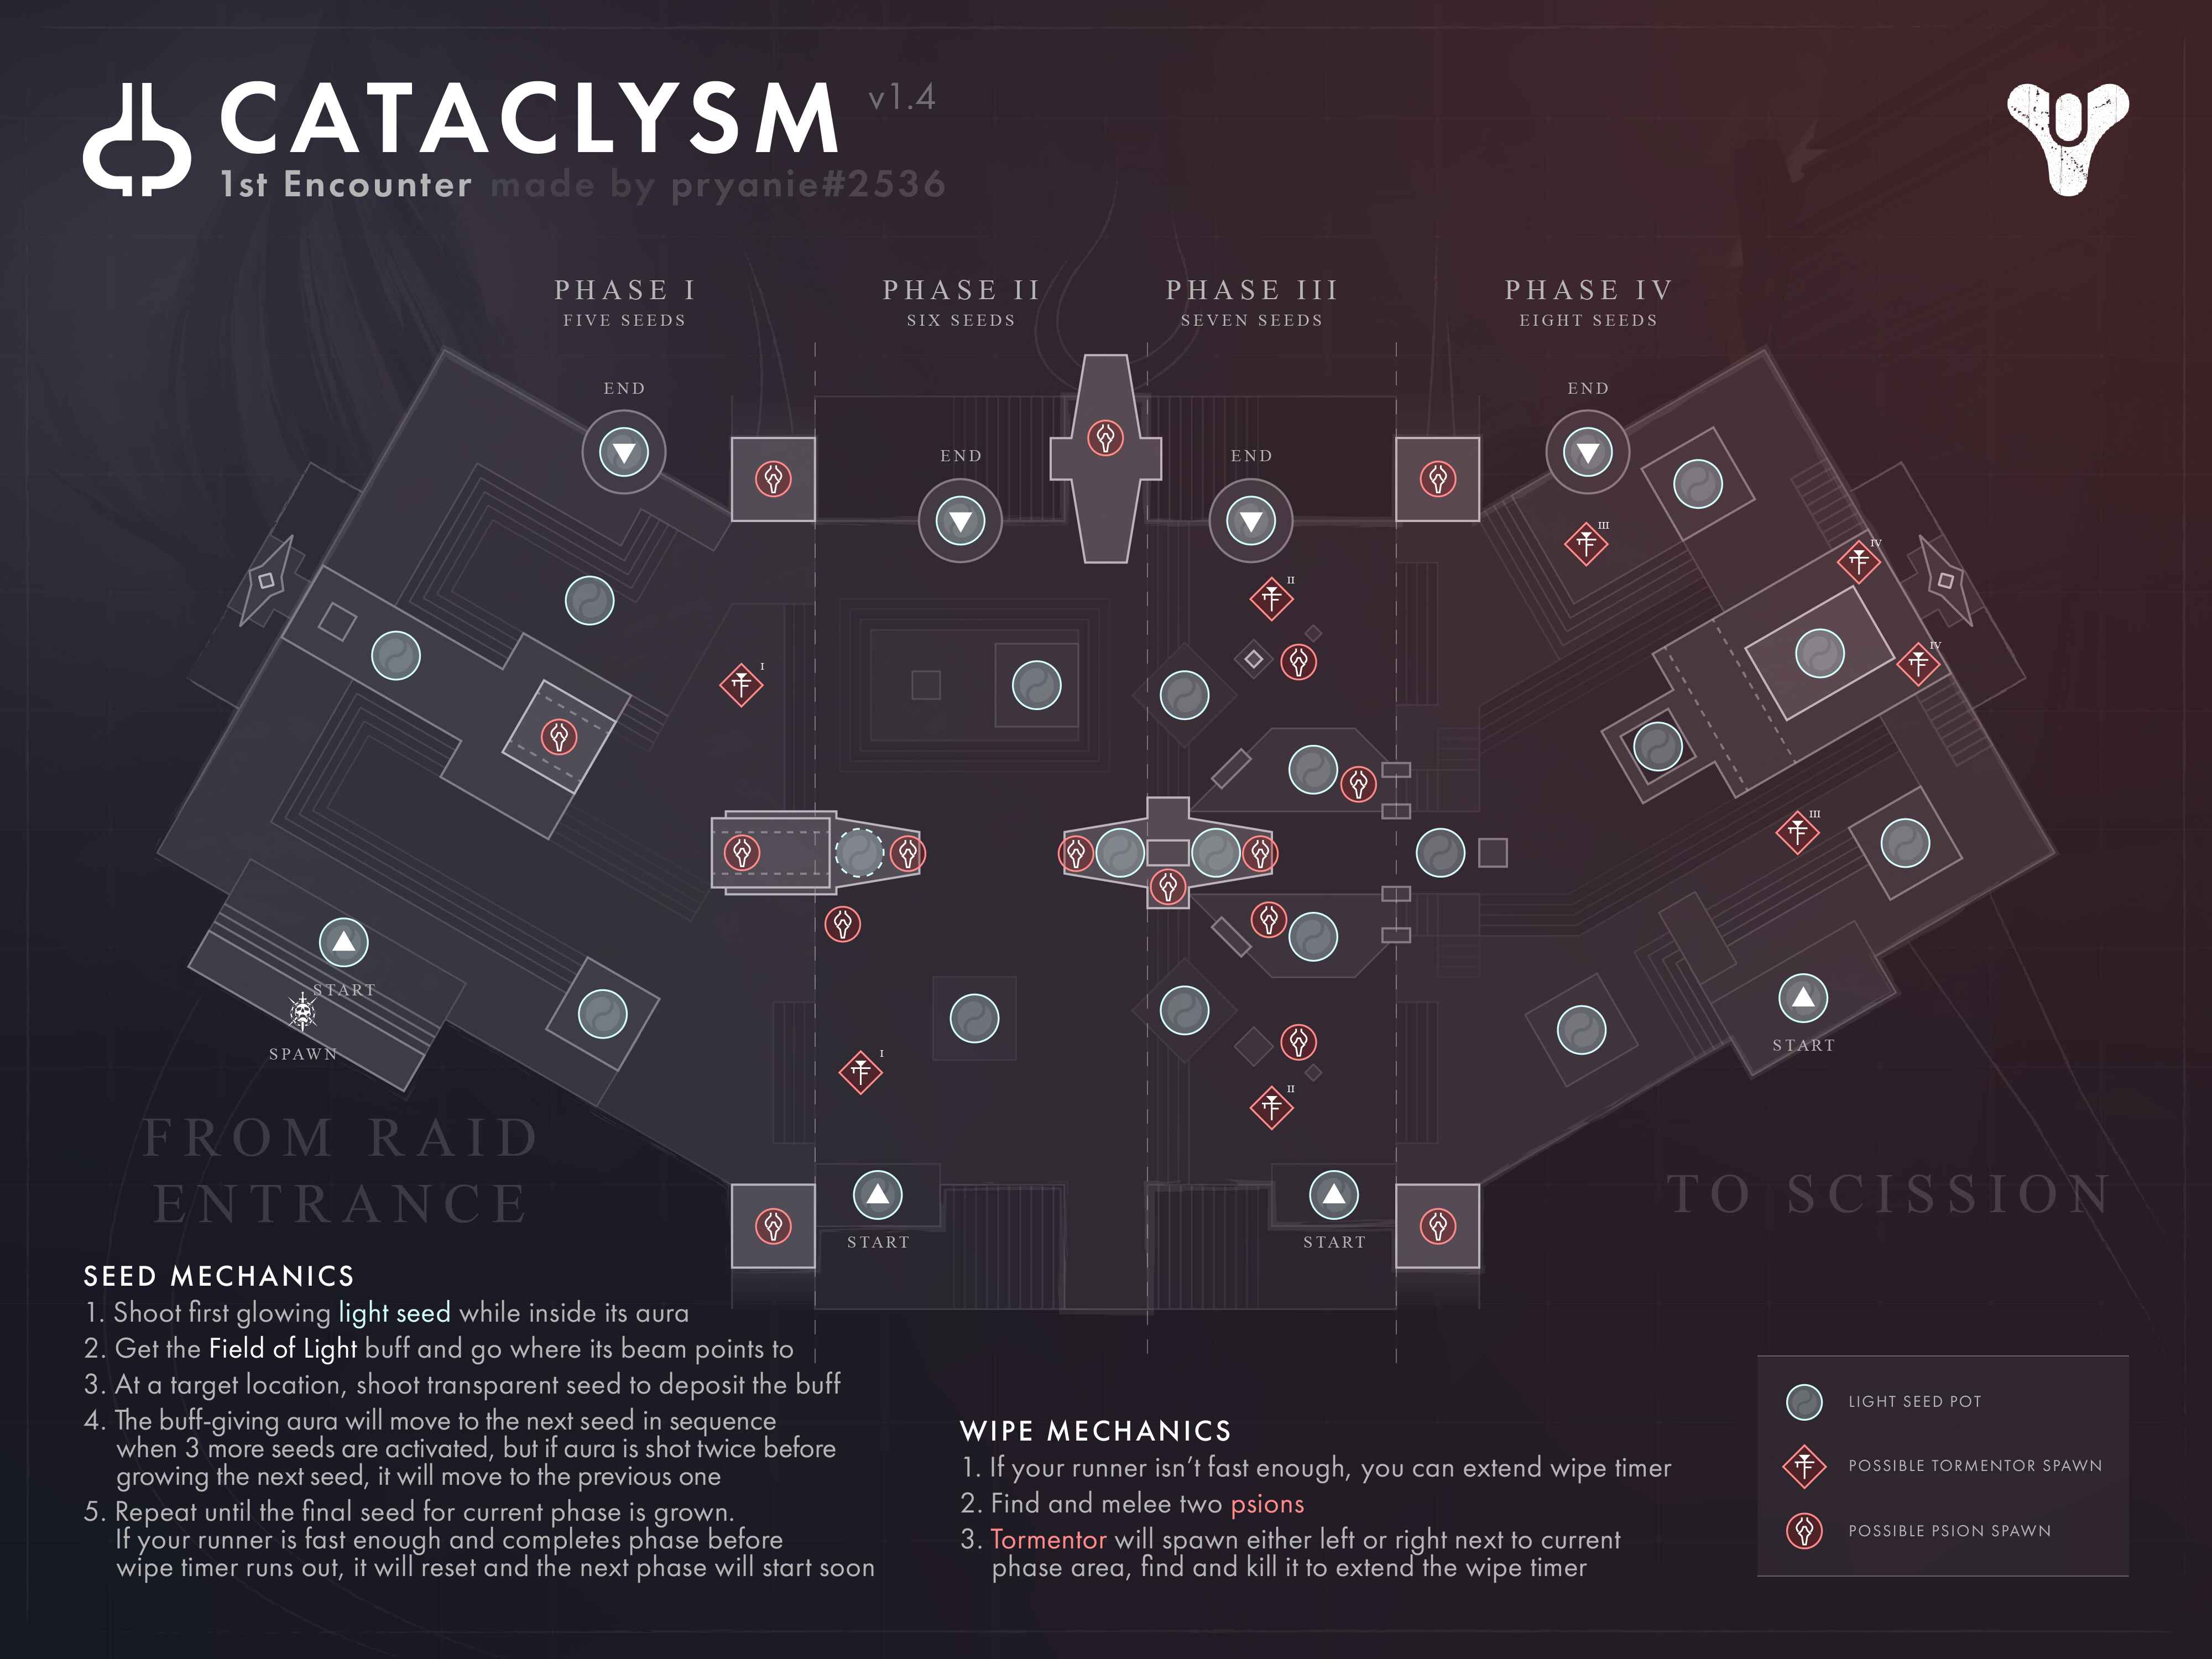
Encounter Mechanics:
- Sweeping Terror: A debuff that lasts 33 seconds and wipes the squad when it reaches zero. Tormentors should be eliminated to extend this timer by 35 seconds.
- Nodes: A group of nodes that must be shot at while carrying the Field of Light buff in order to be linked. An active node points to the next node in the chain. A full set stops the Sweeping Terror debuff momentarily.
- Field of Light: Shooting the glowing node with the aura will grant you this 15 second buff. Holding the buff while shooting the subsequent node in the chain activates the node and consumes the buff.
- Disruption: Players lose the Field of Light buff and must recollect it. This occurs when the aura node is activated if the next node has not been activated before another players gets the buff.
Encounter starts when the runner shoots the light orb in the centre while inside the aura. Sweeping Terror will be introduced.
When a light orb with an aura around it is shot, the player(s) inside the aura gains Field of Light with a 15 second timer. They then have to look for the next white orb. This is done by observing the beam that the orb shoots out, as this orb will point in the direction of the next orb.
Beam points in the direction of the next orb. The orb to be shot will appear as a small ball in a light structure.

When the runner activates the next orb by standing under it and shooting it, they will activate the orb, but also make them lose their buff. Thus, they must run back to the orb with the aura to regain the buff and activate the other orbs. The orb with aura is not always the same, so runners should be wary of this.
The runner has to run 4 total paths of 4-5 orbs each. Each path can only be completed after the previous one is completed. Whenever a path is completed, the timer momentarily stops, alongside a message "His Hatred halts".
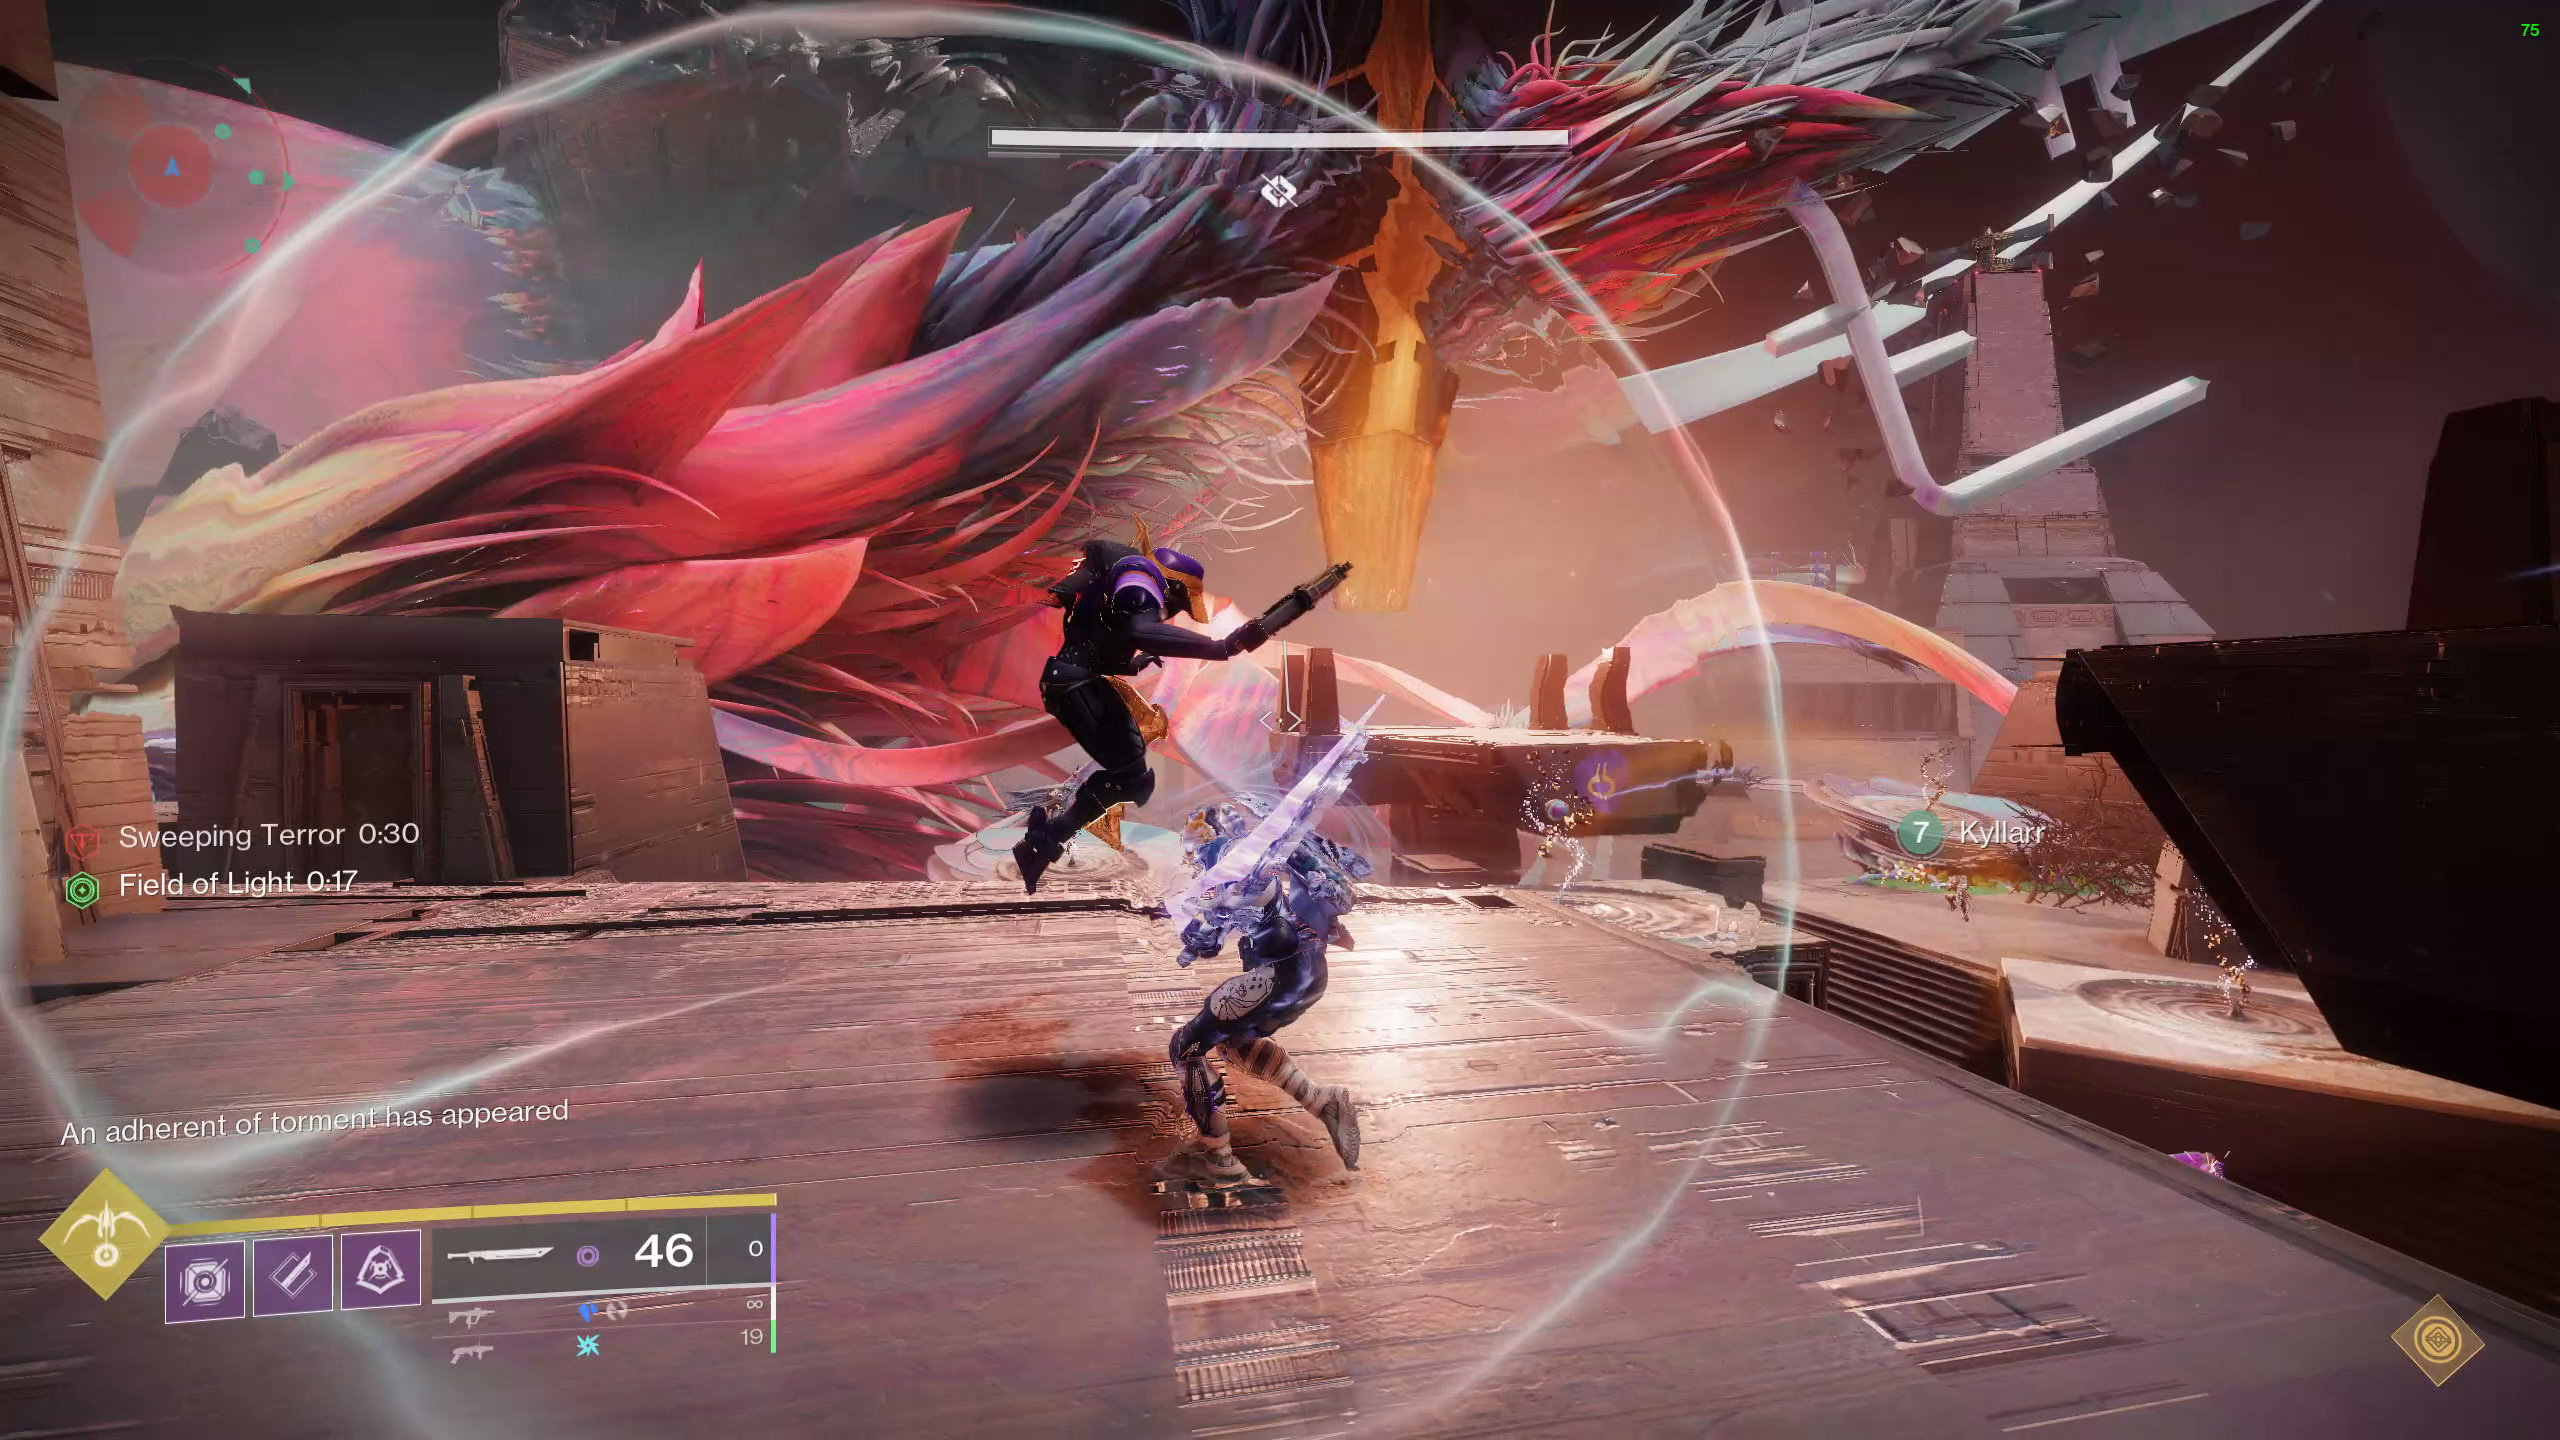
During this process, the beams might become invisible at times. This is caused by the 2 shielded psions that spawn; they will hide the beams. Both must be killed to make the beam reappear.
Killing both psions will also spawn a tormentor. Killing a tormentor will lengthen the “Sweeping Terror” timer. If this timer drops to 0, the team wipes. Keep killing psions and tormentors, while the runner activates the orbs. As the encounter progresses, you will move further into the arena.
After the runner finishes all 4 paths, the encounter ends.
Encounter Triumph:
Psionic Purge - In Catalclysm, defeat all Psions within 1 second of each other.
Challenge Mode:
Illuminated Torment - Defeat Tormenters while buffed with Field of Light.
Master Difficulty:
- Barrier Champions (Colossus) now spawn in greater numbers.
- Solar shields on Centurions.
Scission
Roles:
- 1 - 2 Runners
- For 2 runners, the main runner will complete the chain on the opposite side, side runner will complete the chain on the current side. Good to save some time.
- 5 Ad-clear
- Side runner can help with ad-clear.
Recommended Loadouts:
- Anti-Barrier Weapons and Skill Procs
- Machine Guns/Waveframe GLs (Any weapons good for ad-clear)
- Eager Edge (Well/Shatter Skating for runners)
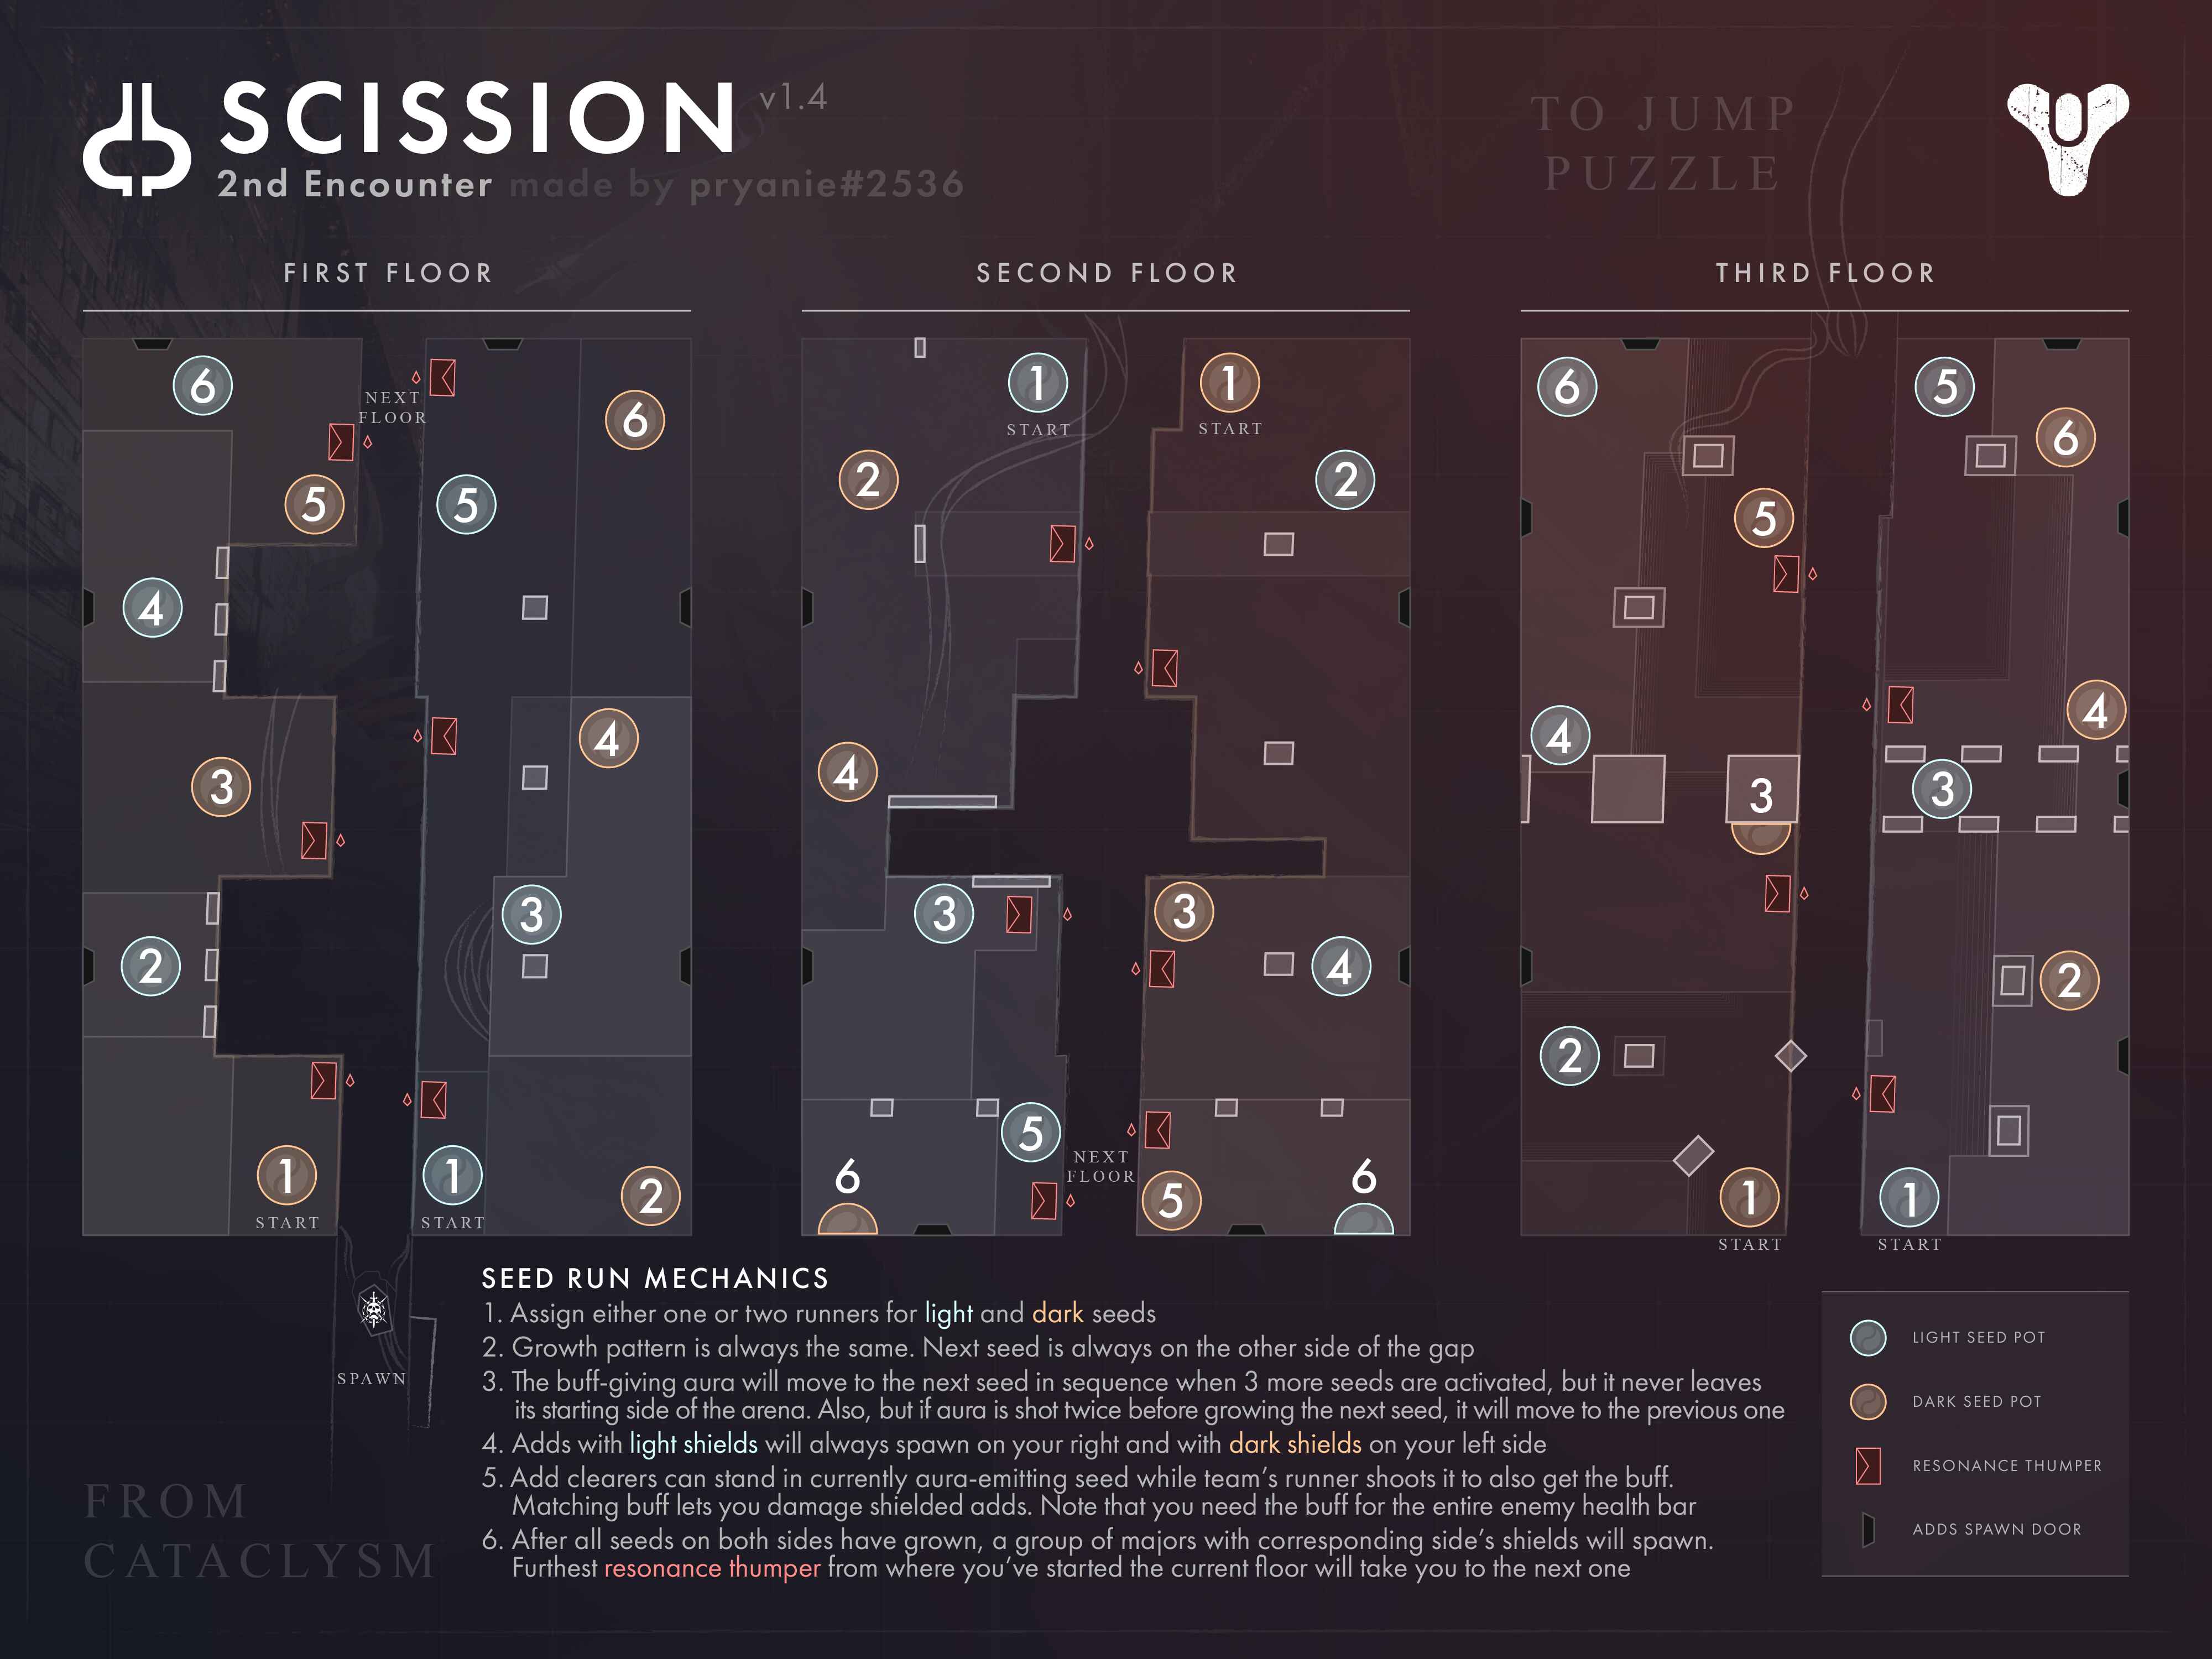
Encounter Mechanics:
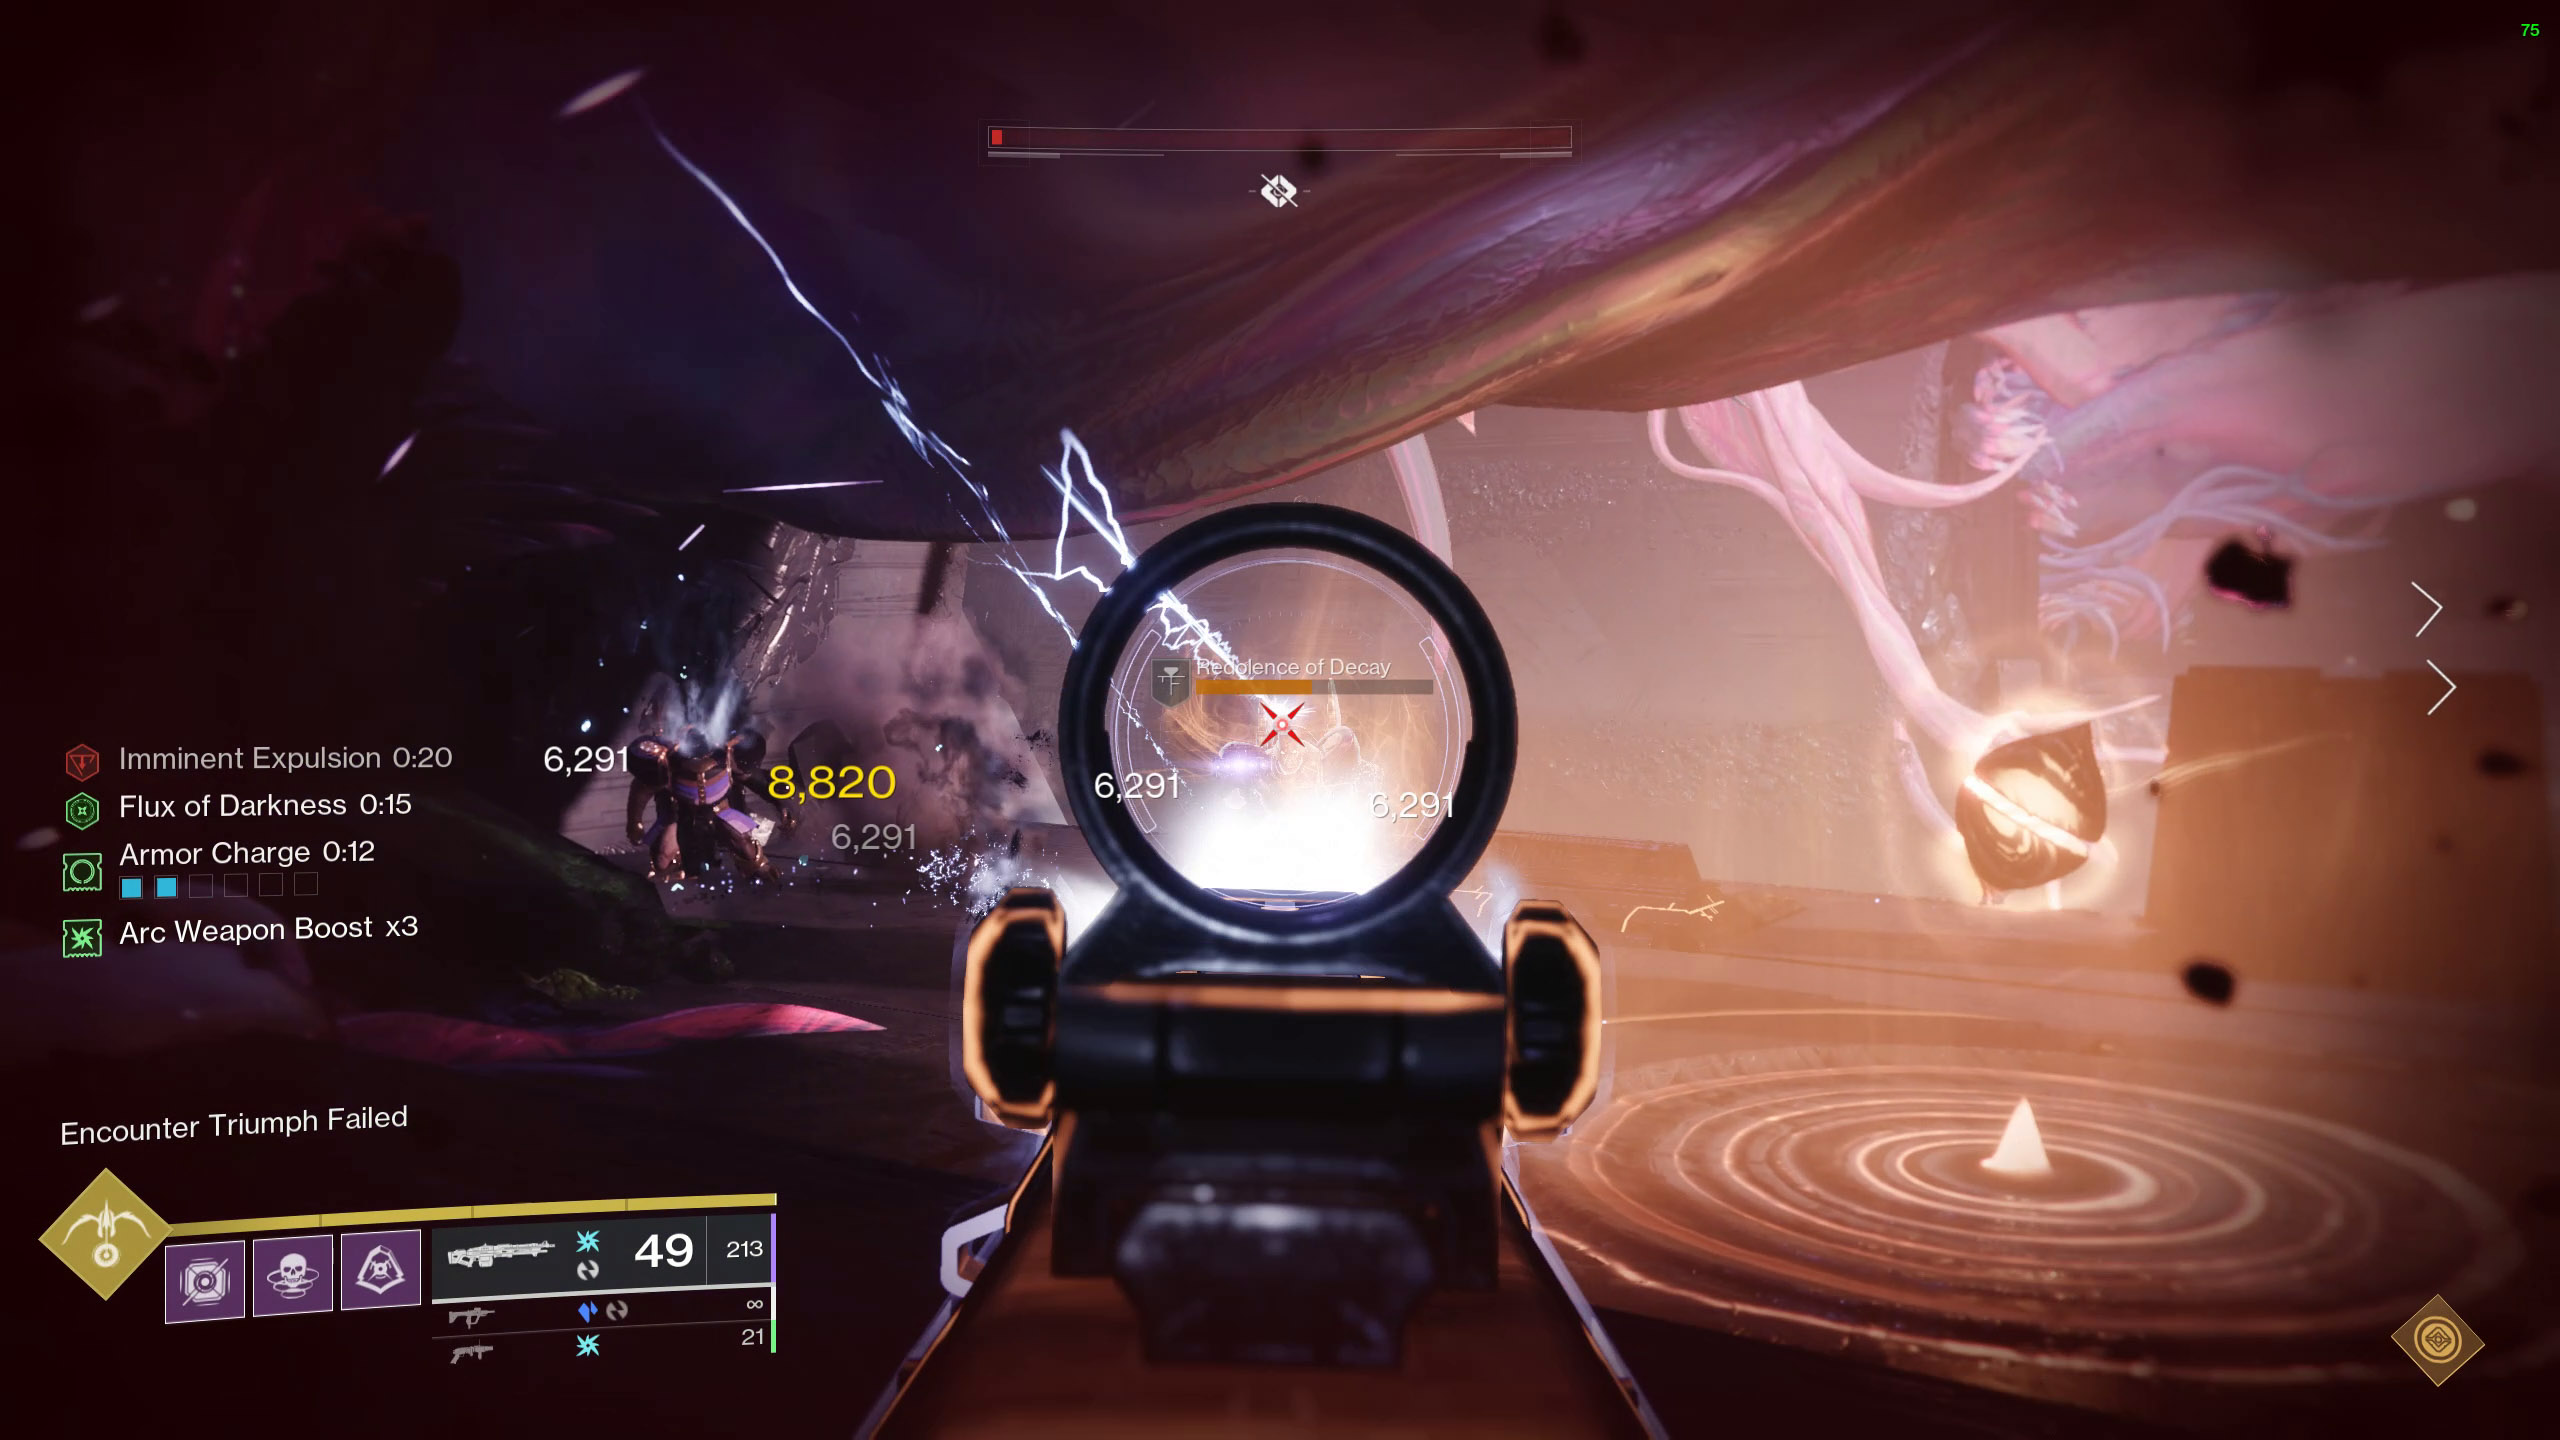
- Field of Light / Flux of Darkness: A 15 second perk that enables players to activate the following node. By firing the node while standing inside the aura, you can gain this buff. This buff expires when the following node in the chain is shot. The buff also enables players to damage the Redolence of Splendor. An opposing-color node cannot be activated by a buff.
- Nodes: A group of nodes that are triggered by firing it and standing on its plate when equipped with the buffs Field of Light or Flux of Darkness. Field of Light/Flux of Darkness buff is used up while activating a node.
- Imminent Expulsion: A timer that will wipe the group. As soon as both networks are finished, the timer disappears.
- Redolence of Splendor / Redolence of Decay: Special enemies that can only be damaged when a player possesses the Field of Light/Flux of Darkness buff.
- Pistons / Thumpers: Used to cross the chasm. To activate the piston, shoot the shard. After its network has been established, the piston at the end of a floor will activate to progress to the next floor.
- Disruption: The buffs Field of Light and Flux of Darkness are removed. Occurs when a player with the buff moves to activate the next node in the network and shoots an aura node.
Encounter starts when the runner shoots the light orb in the centre while inside the aura. Imminent Expulsion will be introduced.
The runners on each side get the buff (recommended that 1 other player stands in the aura when the runner activates it to get the buff), then the runners must chain orbs just like in the previous encounter. The orbs will alternate between either side, so the runners must use the crux-activated launchers to shoot themselves across the chasm in the middle to get to the other side to activate the orb there, then return to their side to activate the orbs there and regain their buff.
Light orbs cannot interact with dark buffs and vice versa. If someone stands in the aura while having a buff, if the orb is shot, the orbs will be “disrupted”, making the orbs of that type temporarily disappear and the team has to do that orb again.
Throughout the encounter, immune centurions will spawn on both sides. These centurions can only be killed by players with the buff. Thus, it is recommended that 2 players get the buff per side, so that one can run while the other kills centurions.
After all shielded enemies are killed and orbs are charged, the timer disappears and more shielded enemies spawn on both sides, marked by the message “Your ascent is blocked by interlopers”. Kill these enemies using the buff from the orbs. Once dead, another message appears, “Energy travels upwards, beckoning you”. This indicated that players must now head to the launcher at the end of their floor and launch their team to the next floor. Once the entire team is on the next floor, the buffs are re-acquired and the team repeats this 2 more times.
When all 3 floors are completed, the encounter ends.
Encounter Triumph:
Shields Up - In Scission, do not defeat any attuned shield combatants on a floor until both node chains are complete on that same floor
Challenge Mode:
Crossfire - The gravity cannons must be activated by the opposite side.
Master Difficulty:
- Unstoppable Champions (Incendiors) spawn on each floor.
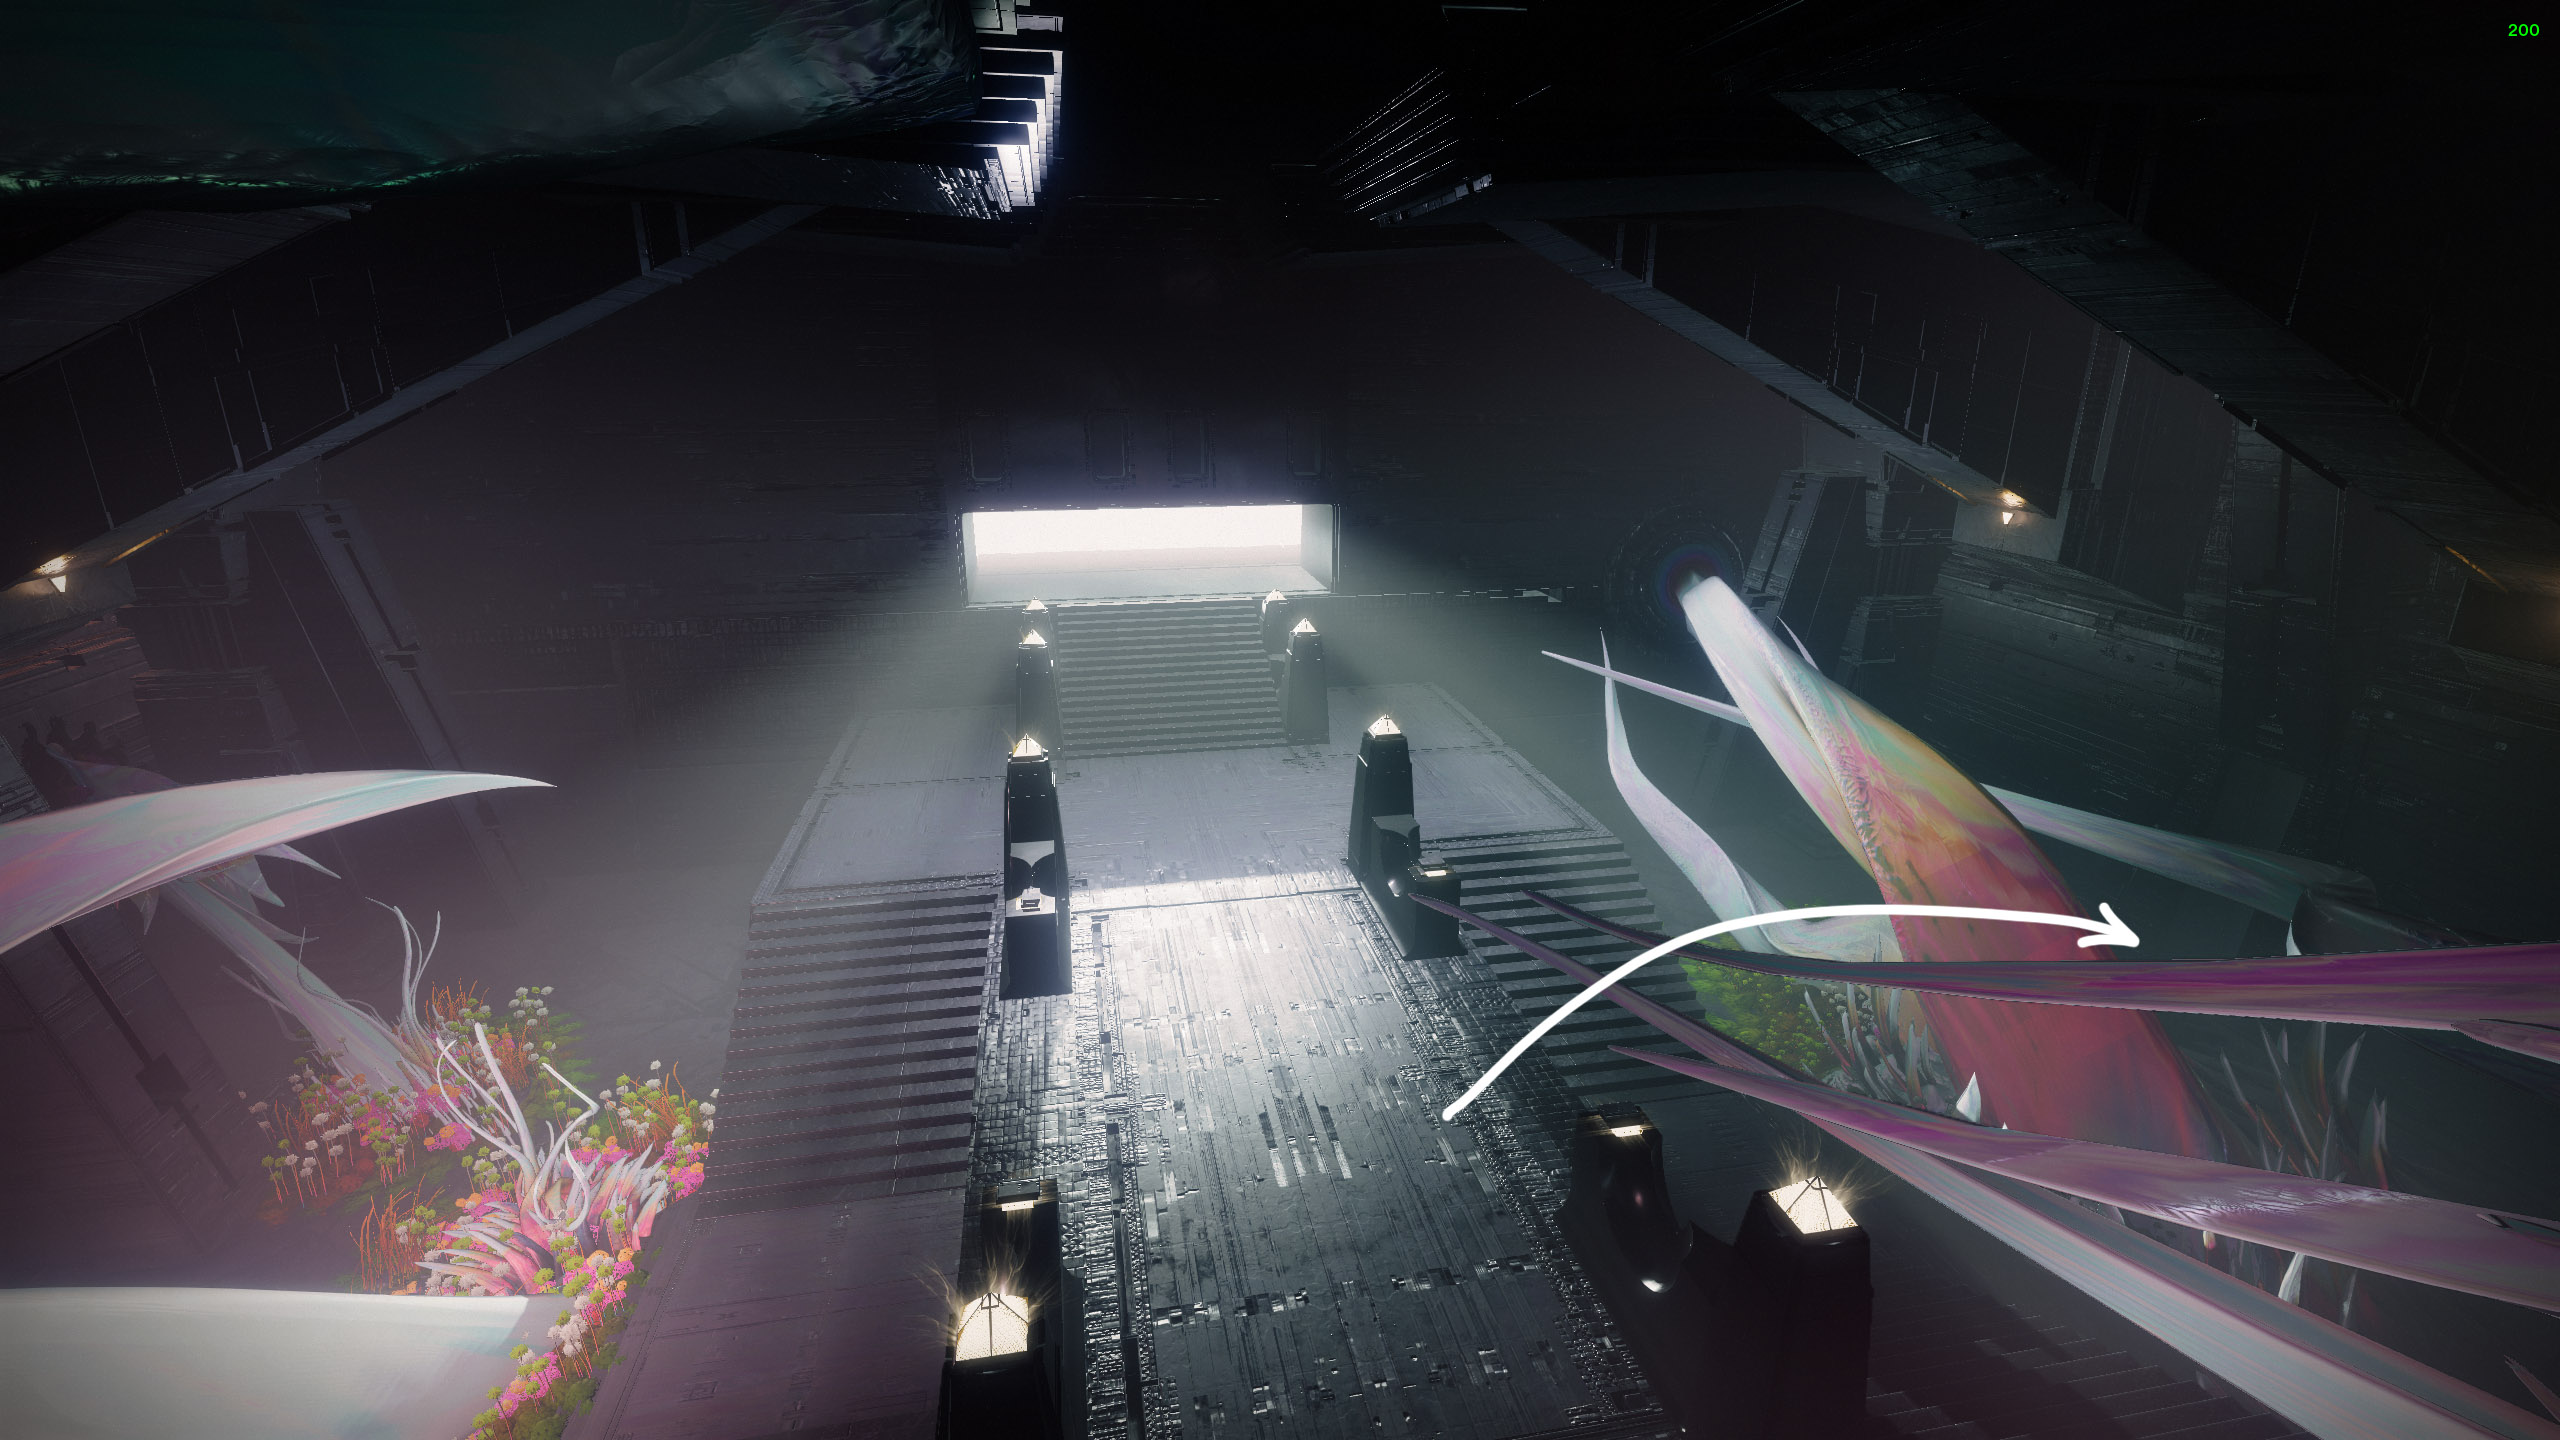
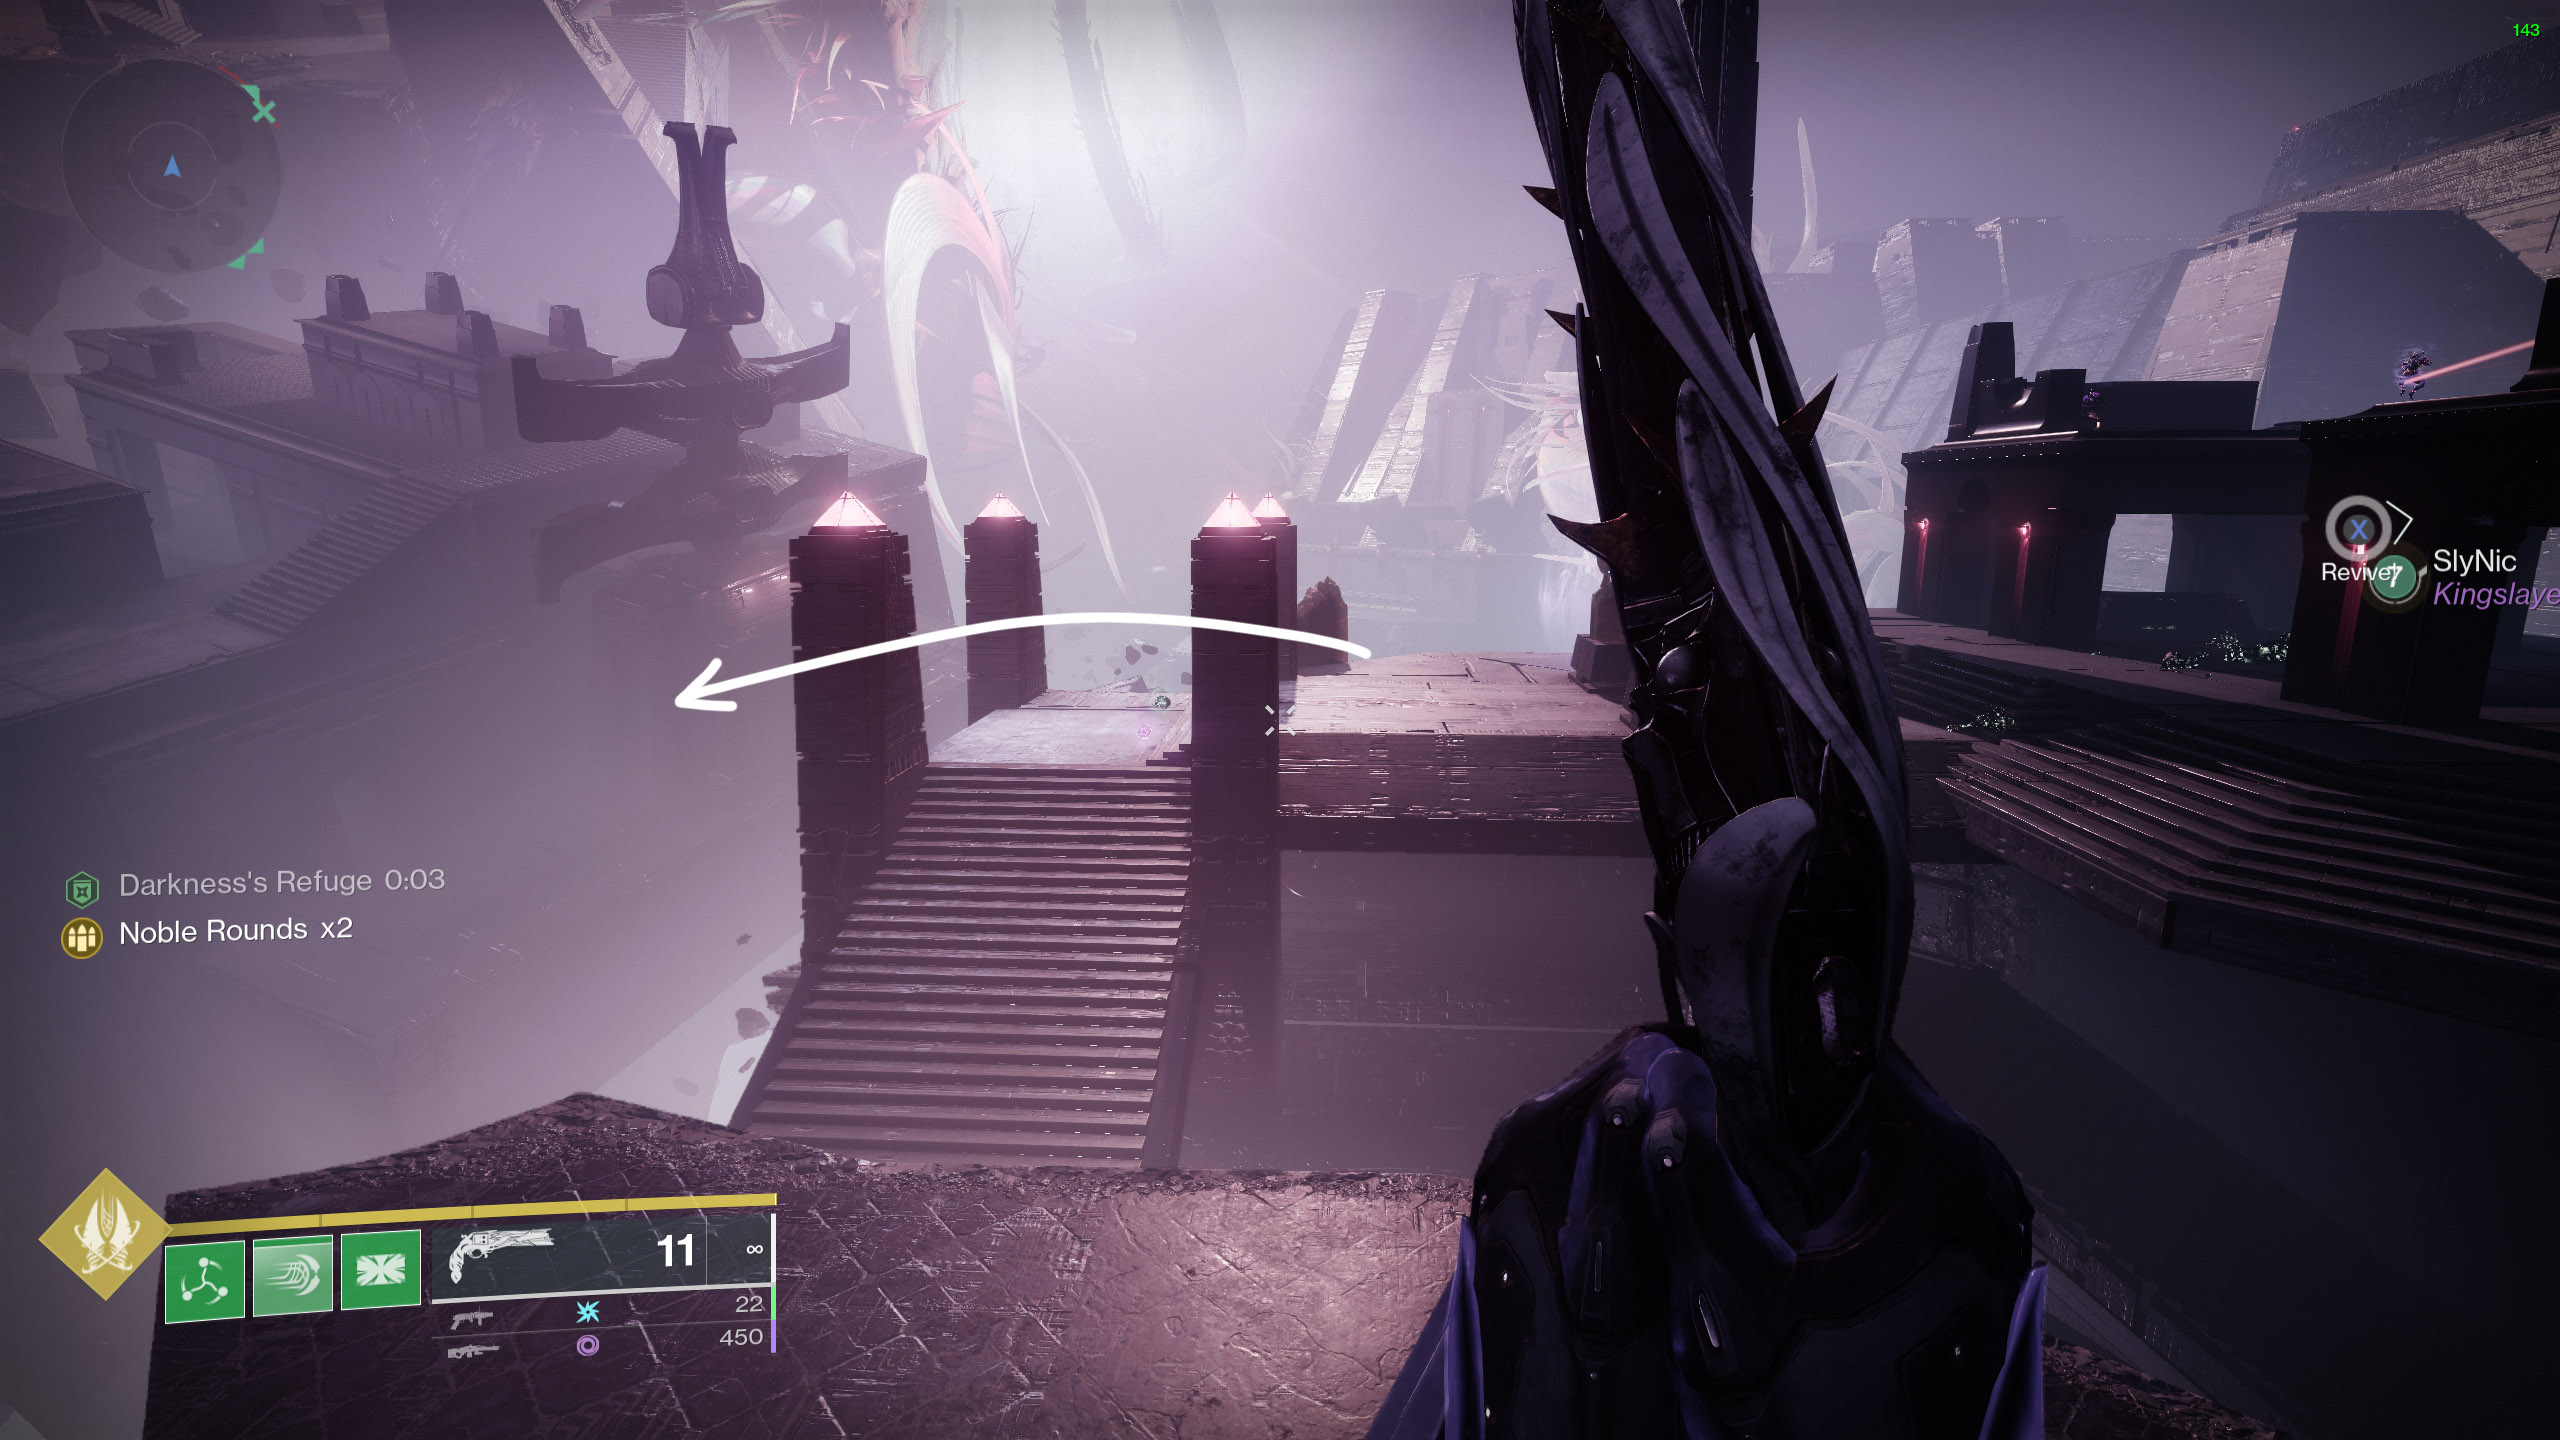
Crossing the Chasm
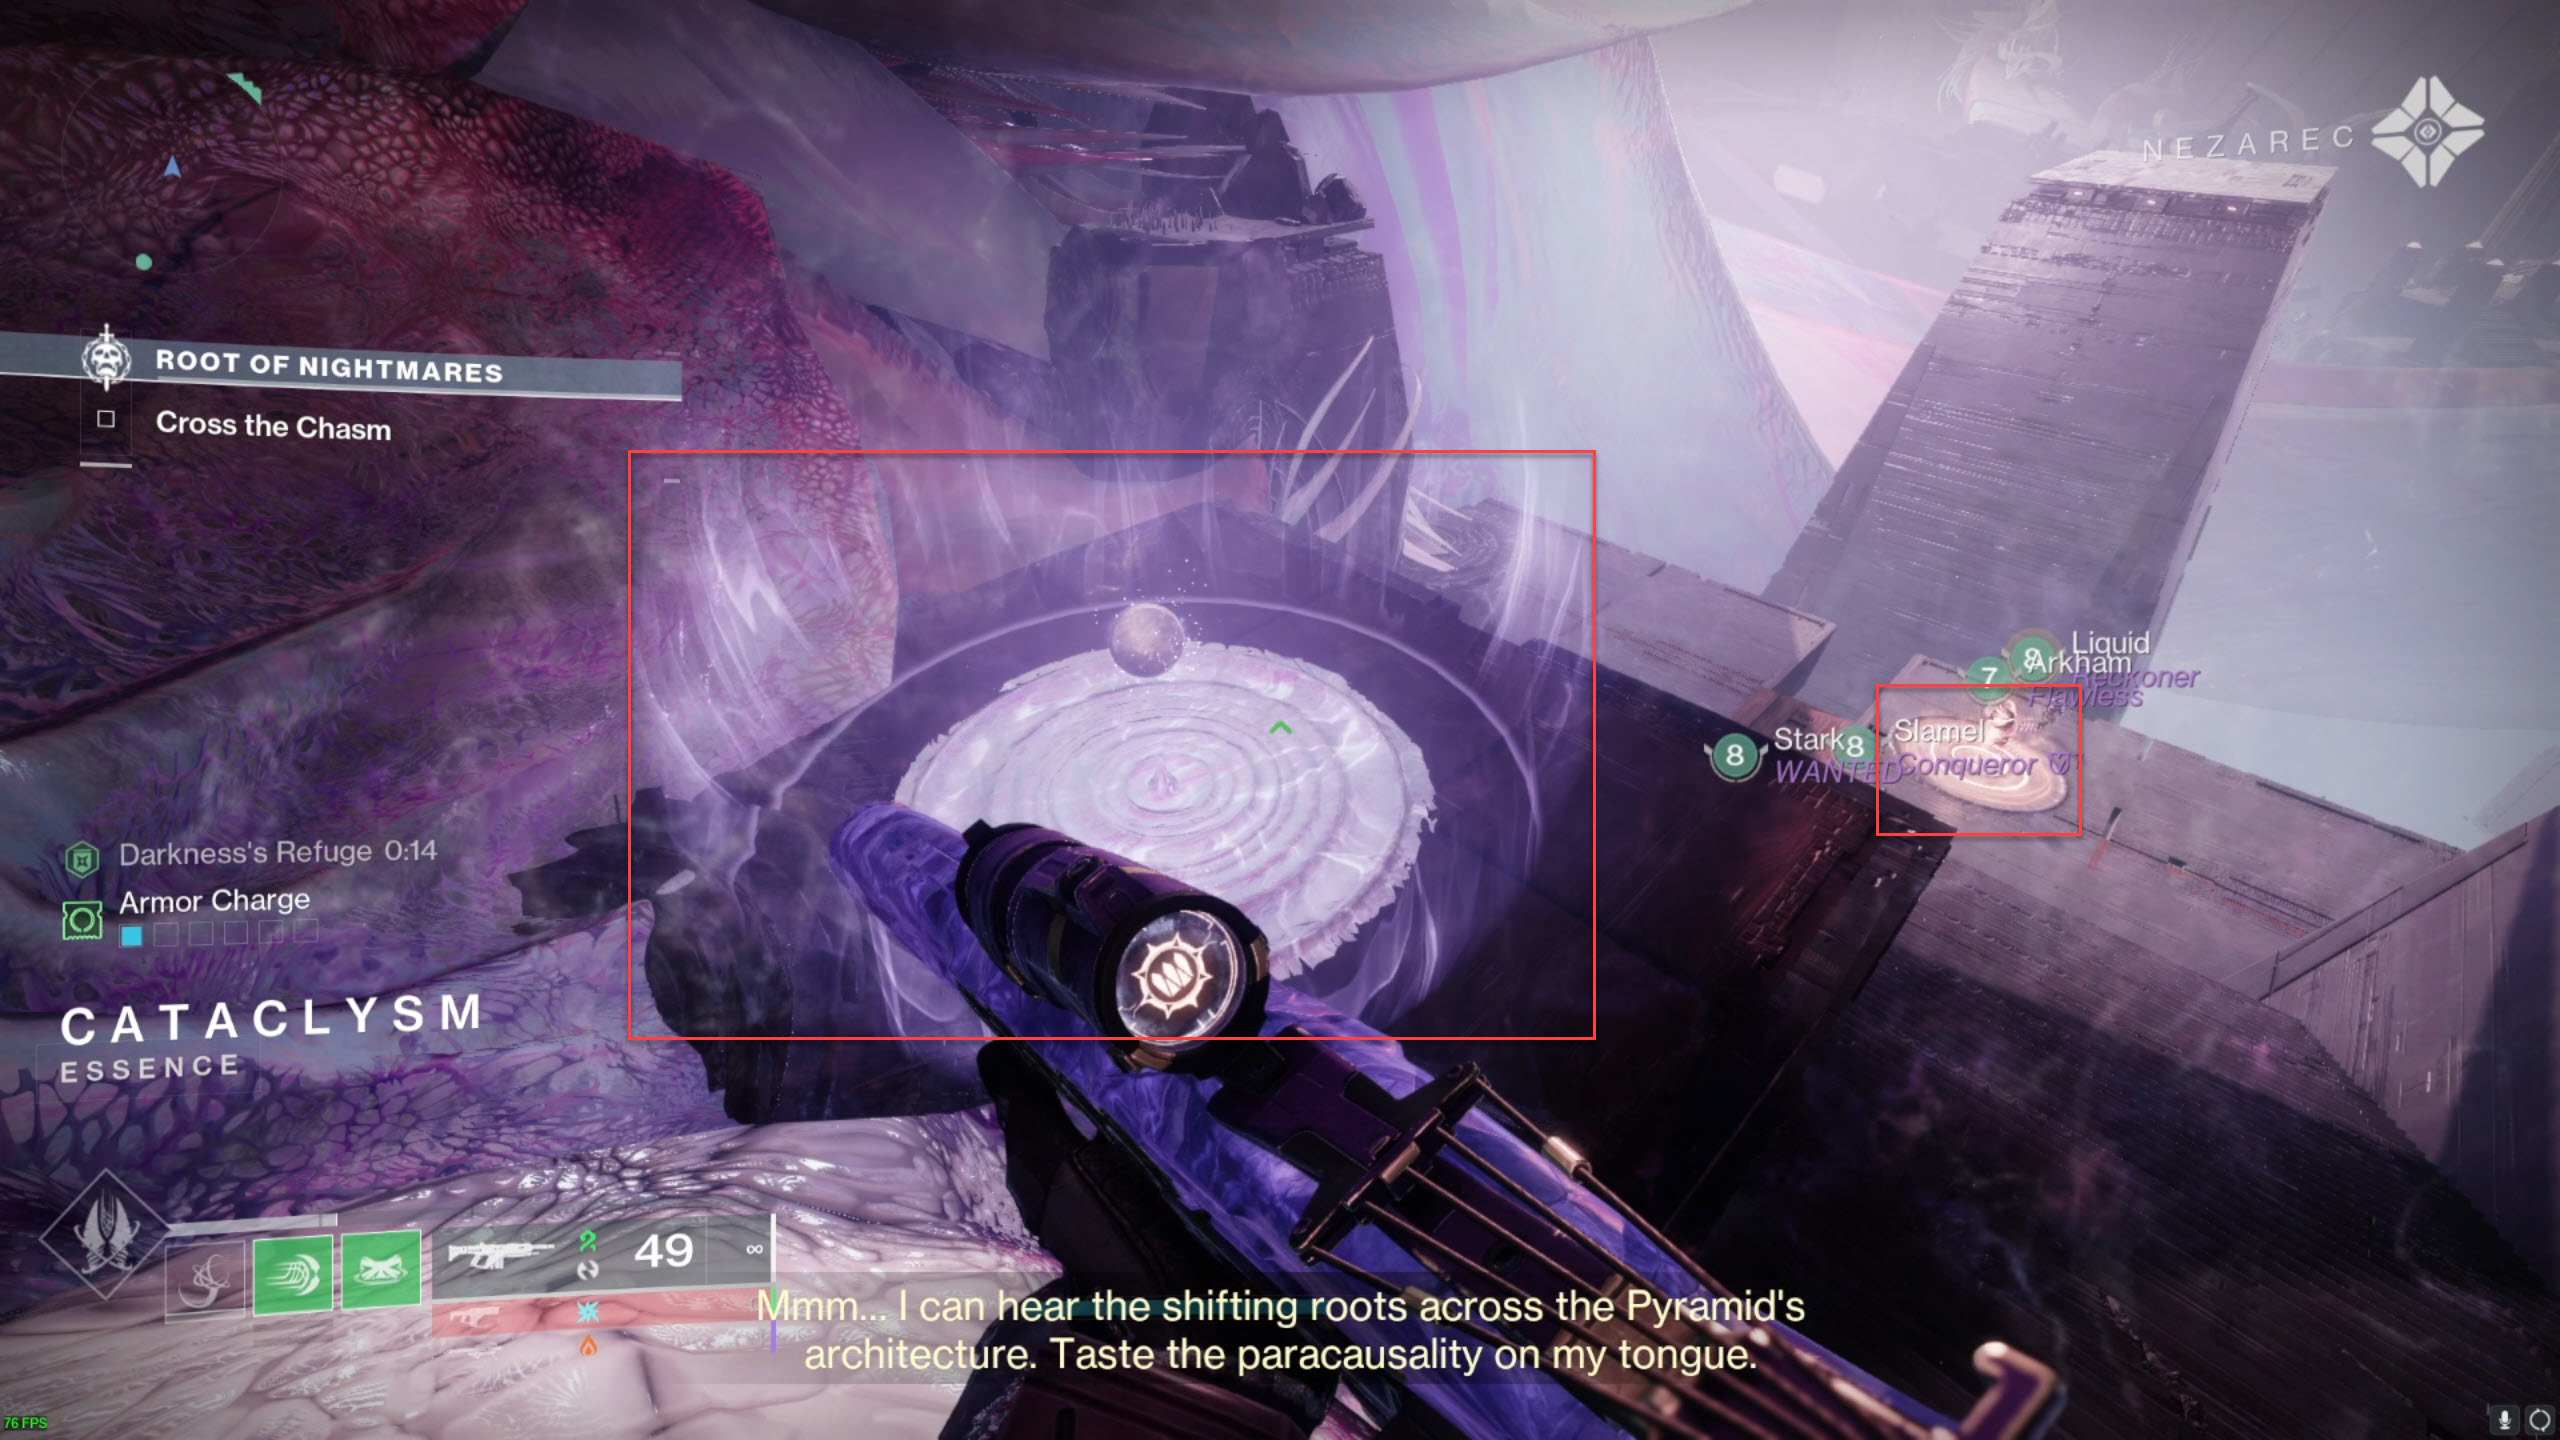
One of the most challenging jumping puzzles in the game, but once you figure out the mechanic, it becomes lot simpler. You must utilize the launch pads to move around the map after completing a light and dark chain. The approach is quite straightforward, however if you don't have the "Darkness's Refuge" perk, a pulse of overwhemling energy kills you every 15 to 30 seconds. You might be wondering how to obtain this bonus. Easy: Connect a darkness and a light node.
When you reach this point in the jumping puzzle, descend and shoot the light node to activate it and give you the "Field of Light" buff. Go on to the following set of light and dark seeds while you have the "Darkness's Refuge" boost by activating the accompanying darkness node, which turns that specific darkness node into a temporary safe haven.
As you get at the first door, keep doing this all the way through. The location of the second hidden chest, which is covered below, lies just beyond this door. (This door won't open until every fireteam member is present.) After the door is opened, continue making the same light-to-dark chains it took to get there to find a second door. The door will open and take you to the third encounter, Macrocosm, after all players have arrived.

Zo'Aurc, Explicator of Planets
Roles:
- 4 Runners
- 2 Ad-clear
Recommended Loadouts:
- DPS weapons (Rockets/Div+LFR)
- Fusions (Killing Colossi)
- Well of Radiance
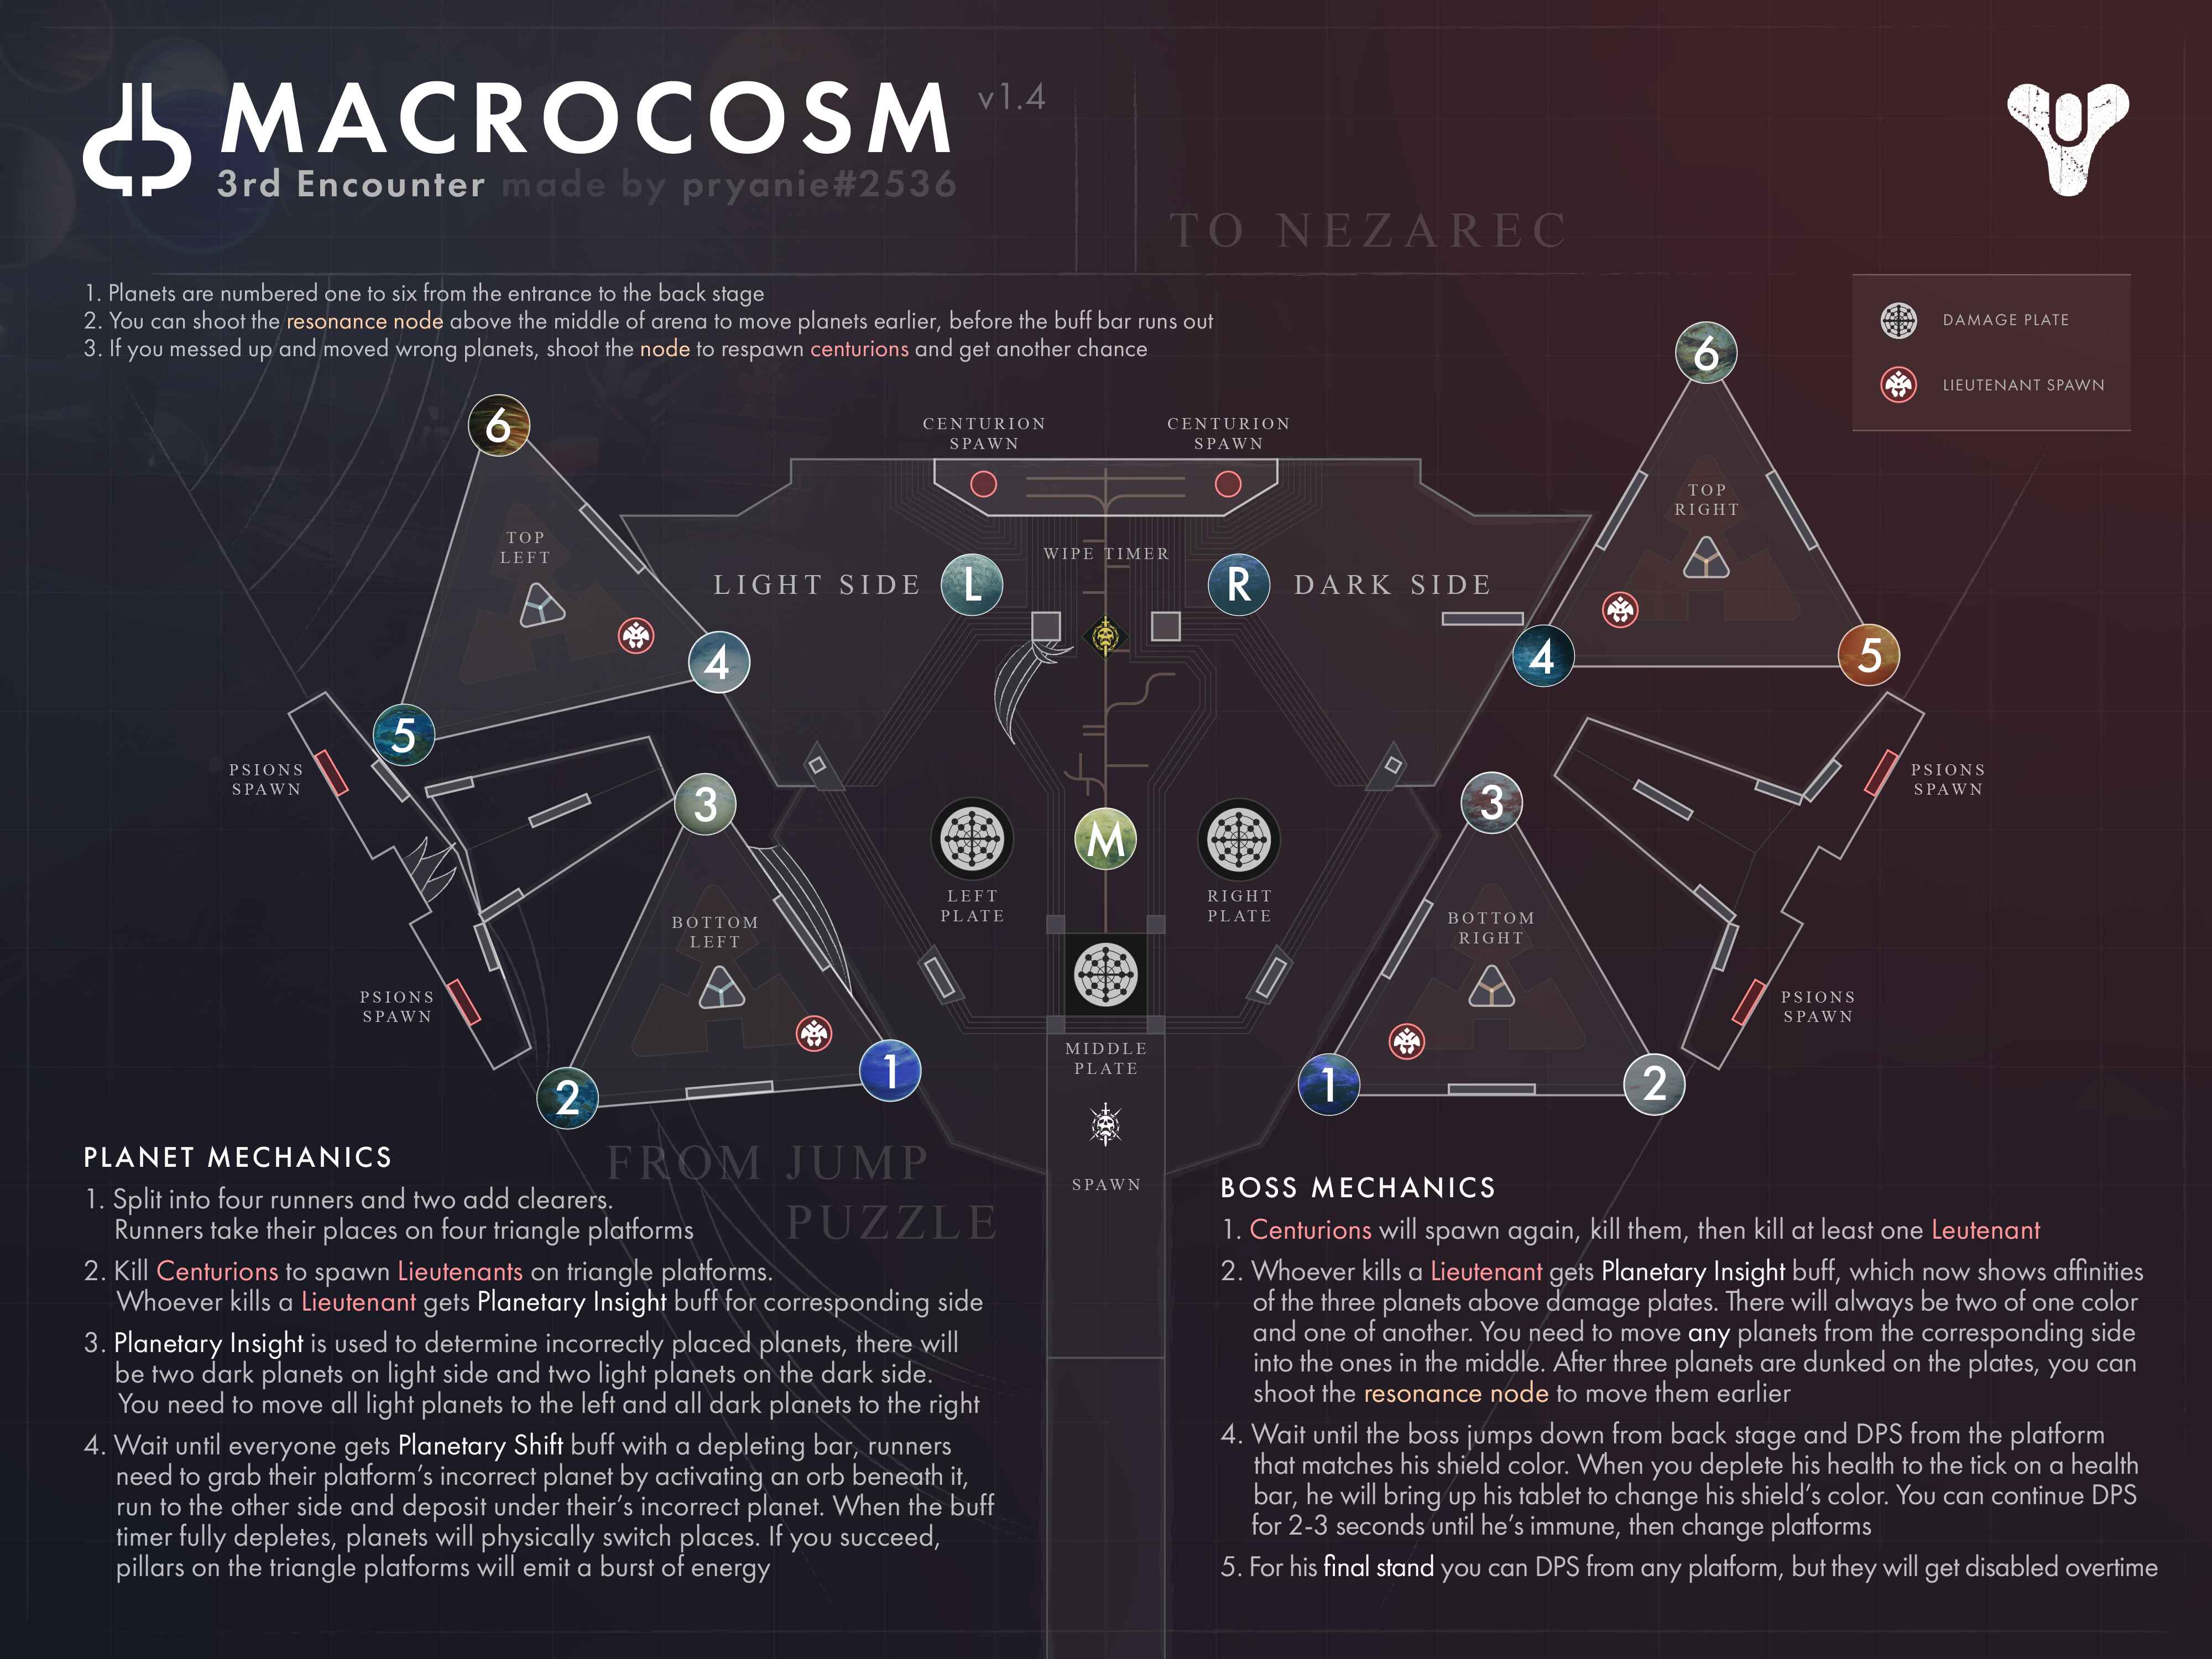
Encounter Mechanics:
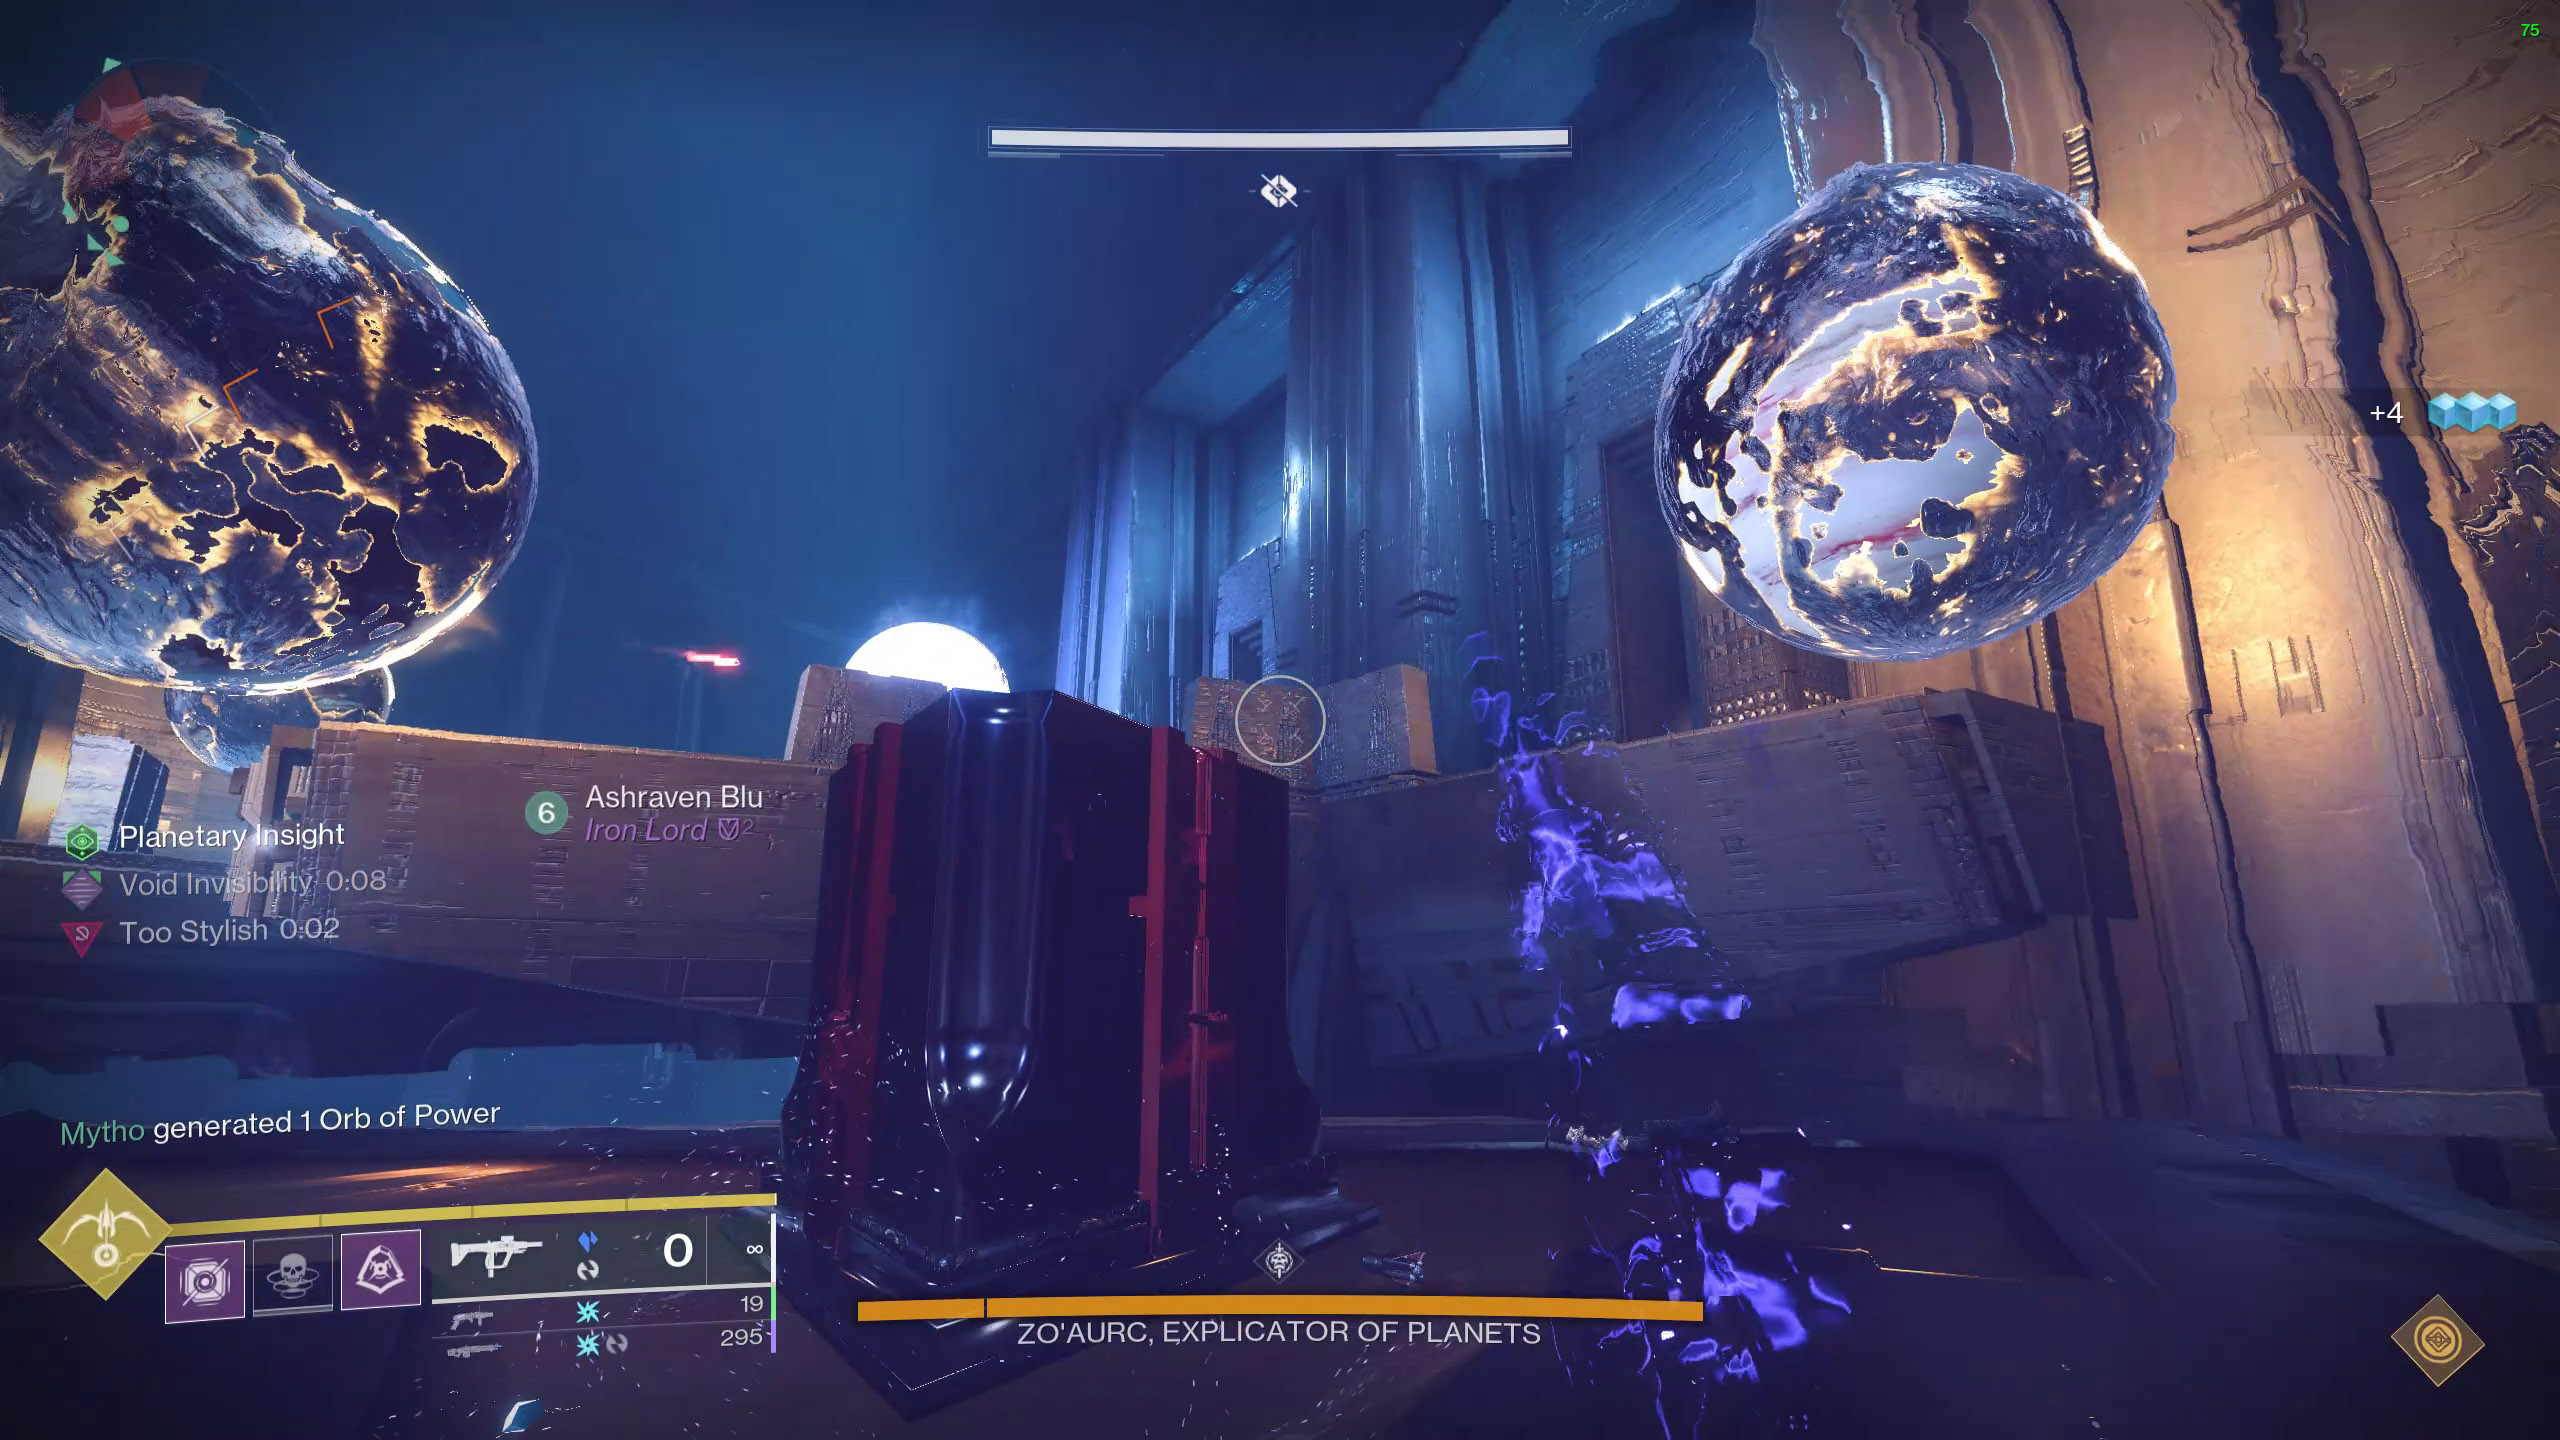
- Planetary Insight: Being able to distinguish between the light and dark colours of the planets. Obtained by killing Terrestrial Lieutenants.
- Planetary Attunement/Alignment: AN interaction displayed on-screen when a planet is in view. Grabbing a planet displays Planetary Attunement, whereas delivering a planet displays Planetary Alignment.
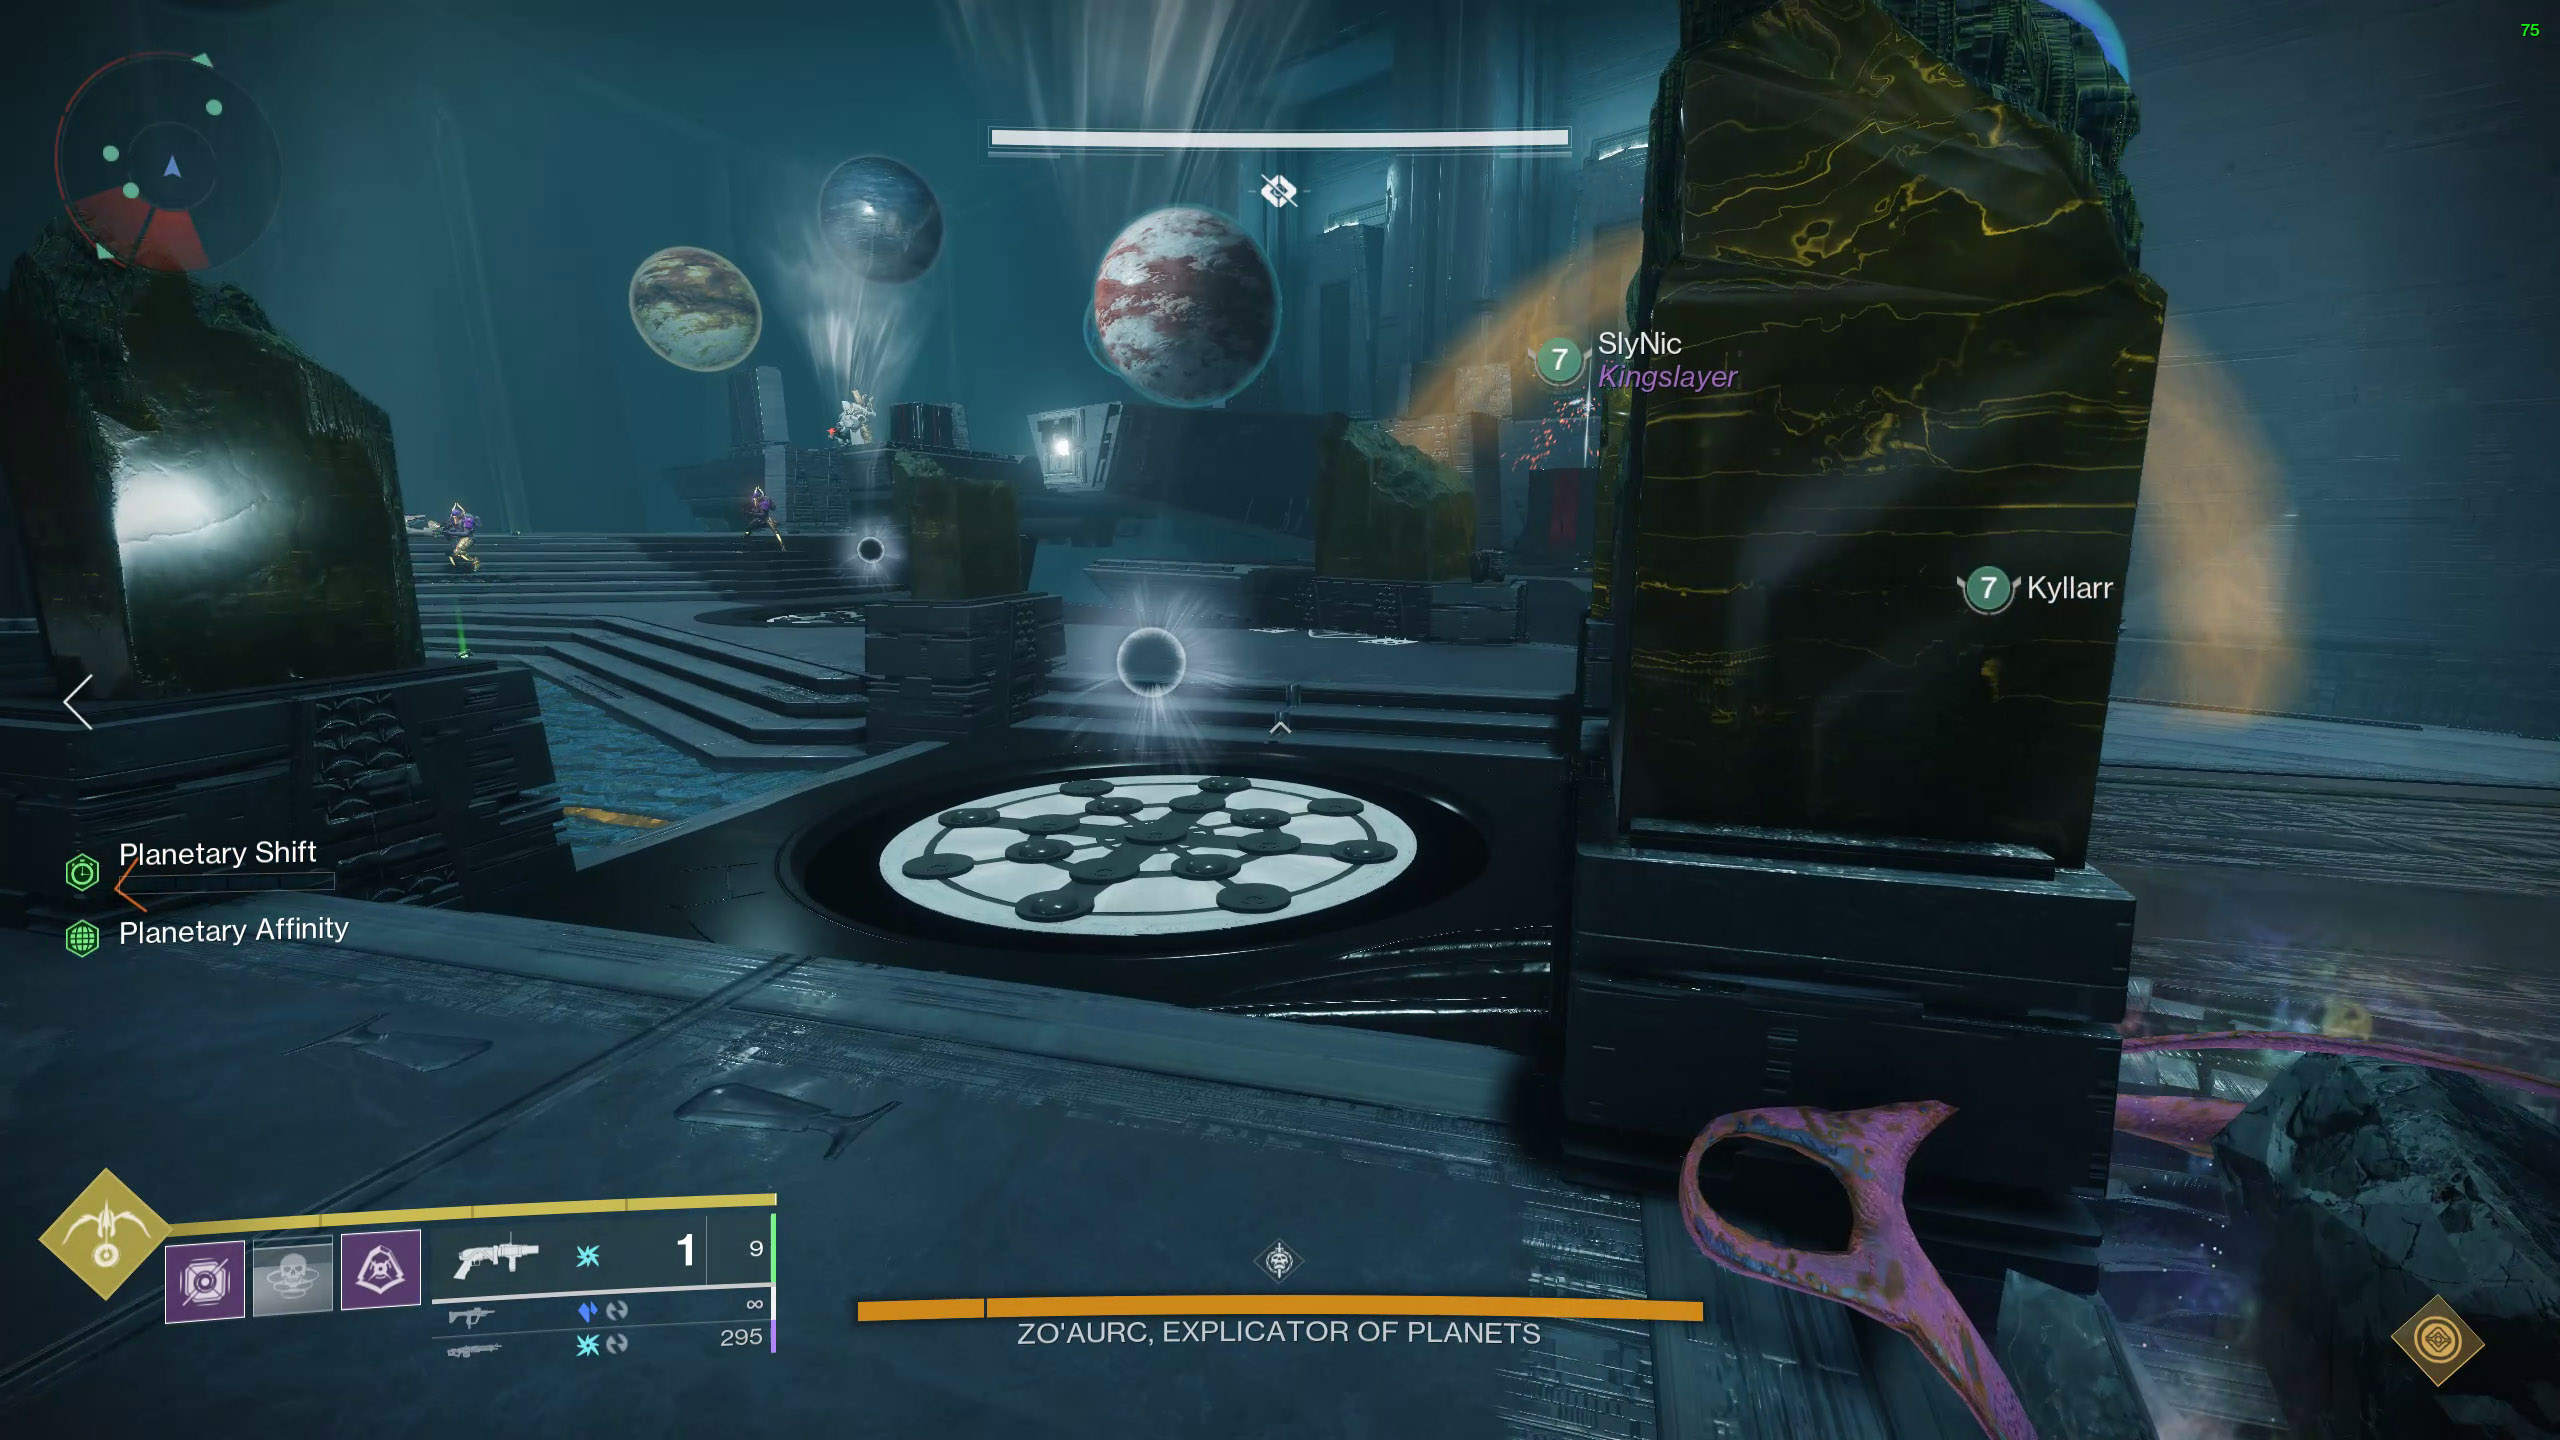
- Planetary Affinity: Guiding a planet to a new location while holding it.
- Planetary Shift: The amount of time you have to move a planet.
- Field of Light / Flux of Darkness: A 7-second buff that increases damage to the boss. Obtained by stepping on the correct plate below the planets during DPS phase.
- Shard: Shot to expedite the encounter's procedures. Shoot it to advance to the index phase if all planets have been placed. Shoot the planet you missed to advance to the Centurion/Lieutenant phase.
Planetary Phase
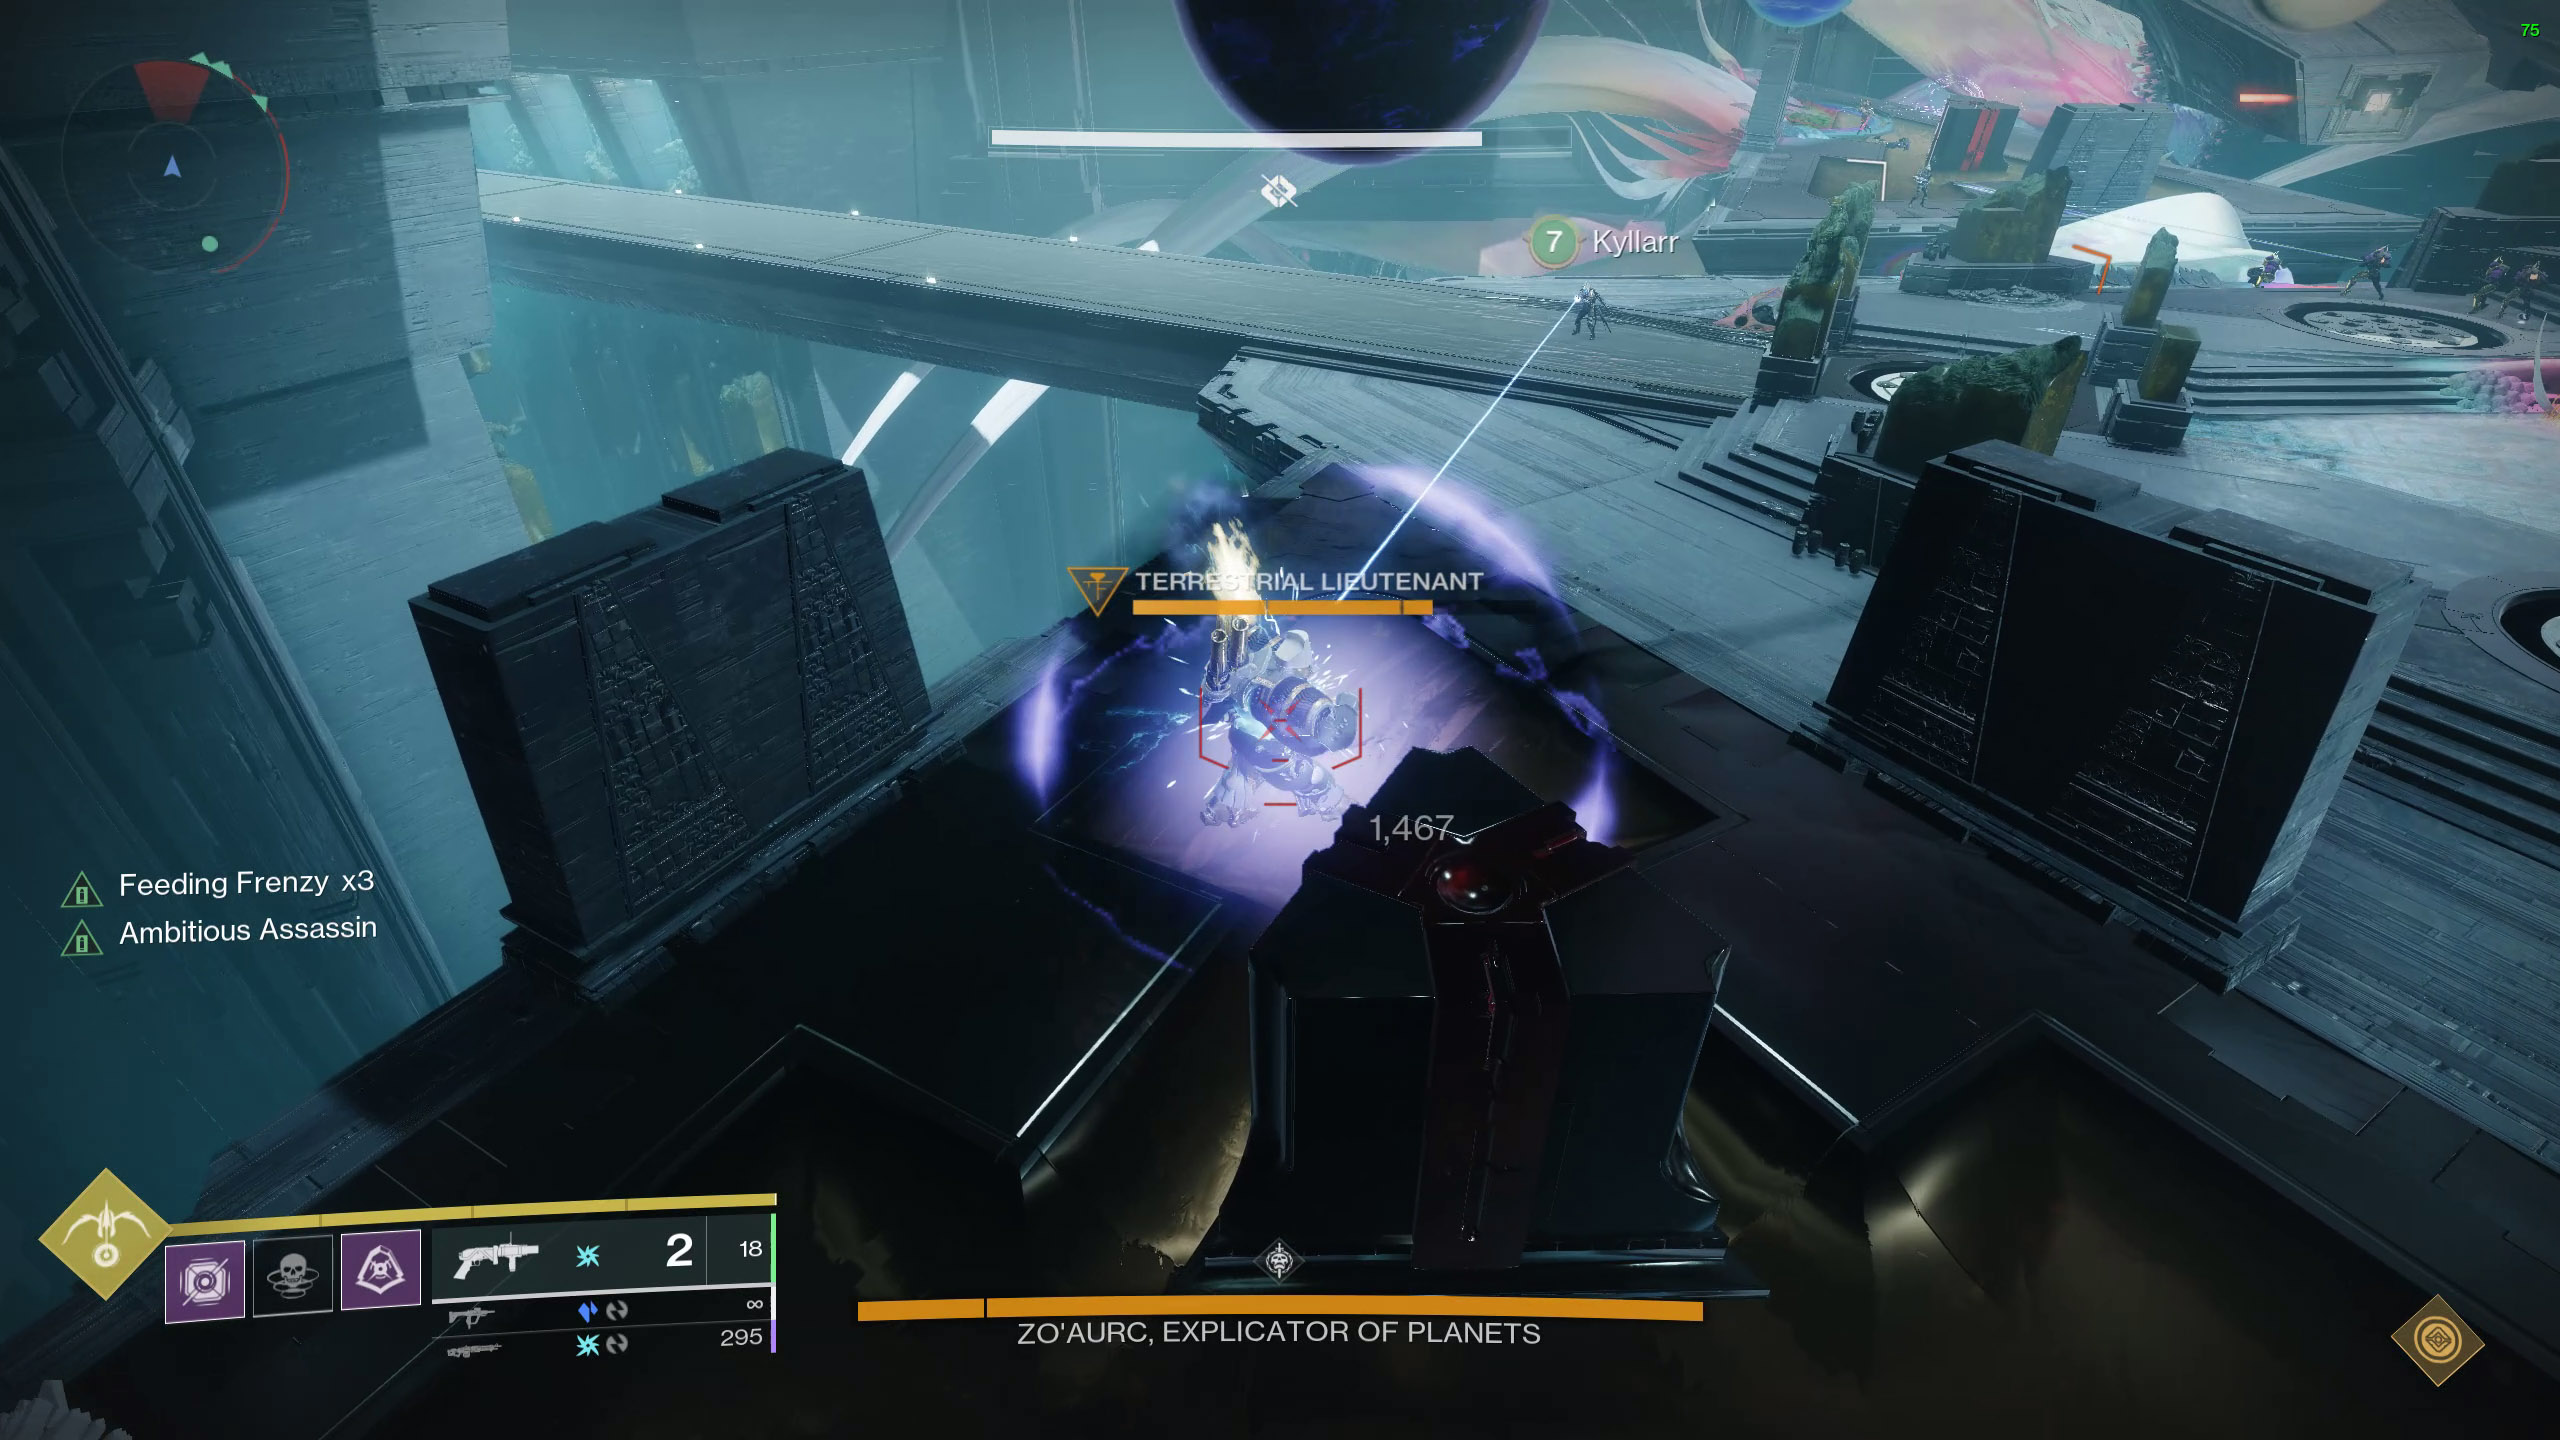
This encounter starts by attacking the boss and his psions at the front of the room. 2 centurions, will spawn. When these centurions are killed, 4 colossi, Terrestrial Lieutenants, will spawn at the sides of the arena, 1 per triangular platform. When a player(runner) kills the colossus, the player gains a buff called “Planetary Insight”. This will allow the player to observe the planets above their heads, and see which is the “odd one out”.
On the left side, all 3 planets above each platform will be Light except one, which is dark. The player should call which planet it is to the runner on the opposite side of the room. The same happens to the opposite side, where the runner observes all 3 planets to be dark except one. This player calls this planet out to the other runner.
The players will then pick up the Planetary Attunement (the white orb below the odd planet, visible only with Planetary Insight). Once a player picks a Planetary Attunement up, a buff called “Planetary Shift” appears on all players' screens. During the time of this buff, runners must run to the opposite side to dunk the planet on the spot that was mentioned by the runner of the plate they went to.
This will move the planets according to how the team moved the planets by moving the Planetary Attunement. Once the planets are properly positioned, a message will appear in chat, “The indexed planets reveal themselves”.
 A player that successfully kills a Terrestrial Lieutenant is
rewarded with Planetary Insight. They can see the colour of the
planets thanks to this buff.
A player that successfully kills a Terrestrial Lieutenant is
rewarded with Planetary Insight. They can see the colour of the
planets thanks to this buff.
 The planet's actual colours may be seen with Planetary Insight.
Darkness is the colour these two worlds.
The planet's actual colours may be seen with Planetary Insight.
Darkness is the colour these two worlds.
Pre-DPS Phase
Once the indexed planets have revealed themselves, players must kill another set of centurions and colossi to regain Planetary Insight. This will allow them to observe the 3 planets above the 3 plates in the middle of the arena. The 3 planets will be dark or light. The players must then go to the respective sides and pick up planetary attunement, such that a light planet is deposited into a plate with a light planet as well, and the same for dark. Once planetary attunement is picked up, the player is unable to see which plate needs which colour, so it is important to remember.
For this phase, the Planetary Attunement can be obtained by any player. When buffs are deposited correctly and Planetary Shift ends, the team should wait on one of the plates which has another similar colour (if there were 2 dark and 1 light, the team waits on a dark plate and vice versa).
DPS Phase
Eventually, the boss will jump down from the stage and the plates will light up. This begins the damage sequence:
- Standing on the correct plate (colour that the boss glows) gives the players a corresponding buff (field of light/flux of darkness) that lets them damage the boss from anywhere on the map as long as they have it.
- Players can move to the space between the 3 plates, drop a well and begin damage.
- The boss's health bar has a small threshold, functioning similarly to that of the Caretaker from Vow of the Disciple. Thus, damaging past this threshold gives the team 3 seconds to continue damage before the boss becomes immune.
- Once this 3 seconds ends or a certain amount of time passes, a message, “The Explicator shifts focus” appears. The boss will then start to glow the other colour, indicating that the next plate is available to buff players to damage.
- The team moves onto this plate to get the buff, then moves back to the well in the middle to damage. The damage mechanic is the same for all 3 plates, so once the damage for this plate ends, move to the final plate and repeat damage there.
- Once all 3 plates have given the buff, the damage phase ends.
The sequence for plates is always Dark → Light → Dark or Light → Dark → Light depending on the plates.
Once the boss's health reaches final stand, he will become immune momentarily, then become vulnerable again. To finish off the boss here, you must also be on a plate.
 Make sure a planet is positioned correctly on the corresponding
plate for DPS.
Make sure a planet is positioned correctly on the corresponding
plate for DPS.
 Make sure to provide enough damage to reach the threshold by
dealing damage from each plate.
Make sure to provide enough damage to reach the threshold by
dealing damage from each plate.
Encounter Triumph:
Singular Orbit - In Macrocosm, a player cannot gain Planetary Insight twice in the same Planetary Shift.
Challenge Mode:
Cosmic Equilibrium - Move all Dark planets to left side and Light planets to right side.
Master Difficulty:
- Barrier Champions (Colossus) replaces the Terrestrial Lieutenants
- Solar shields on Centurions.
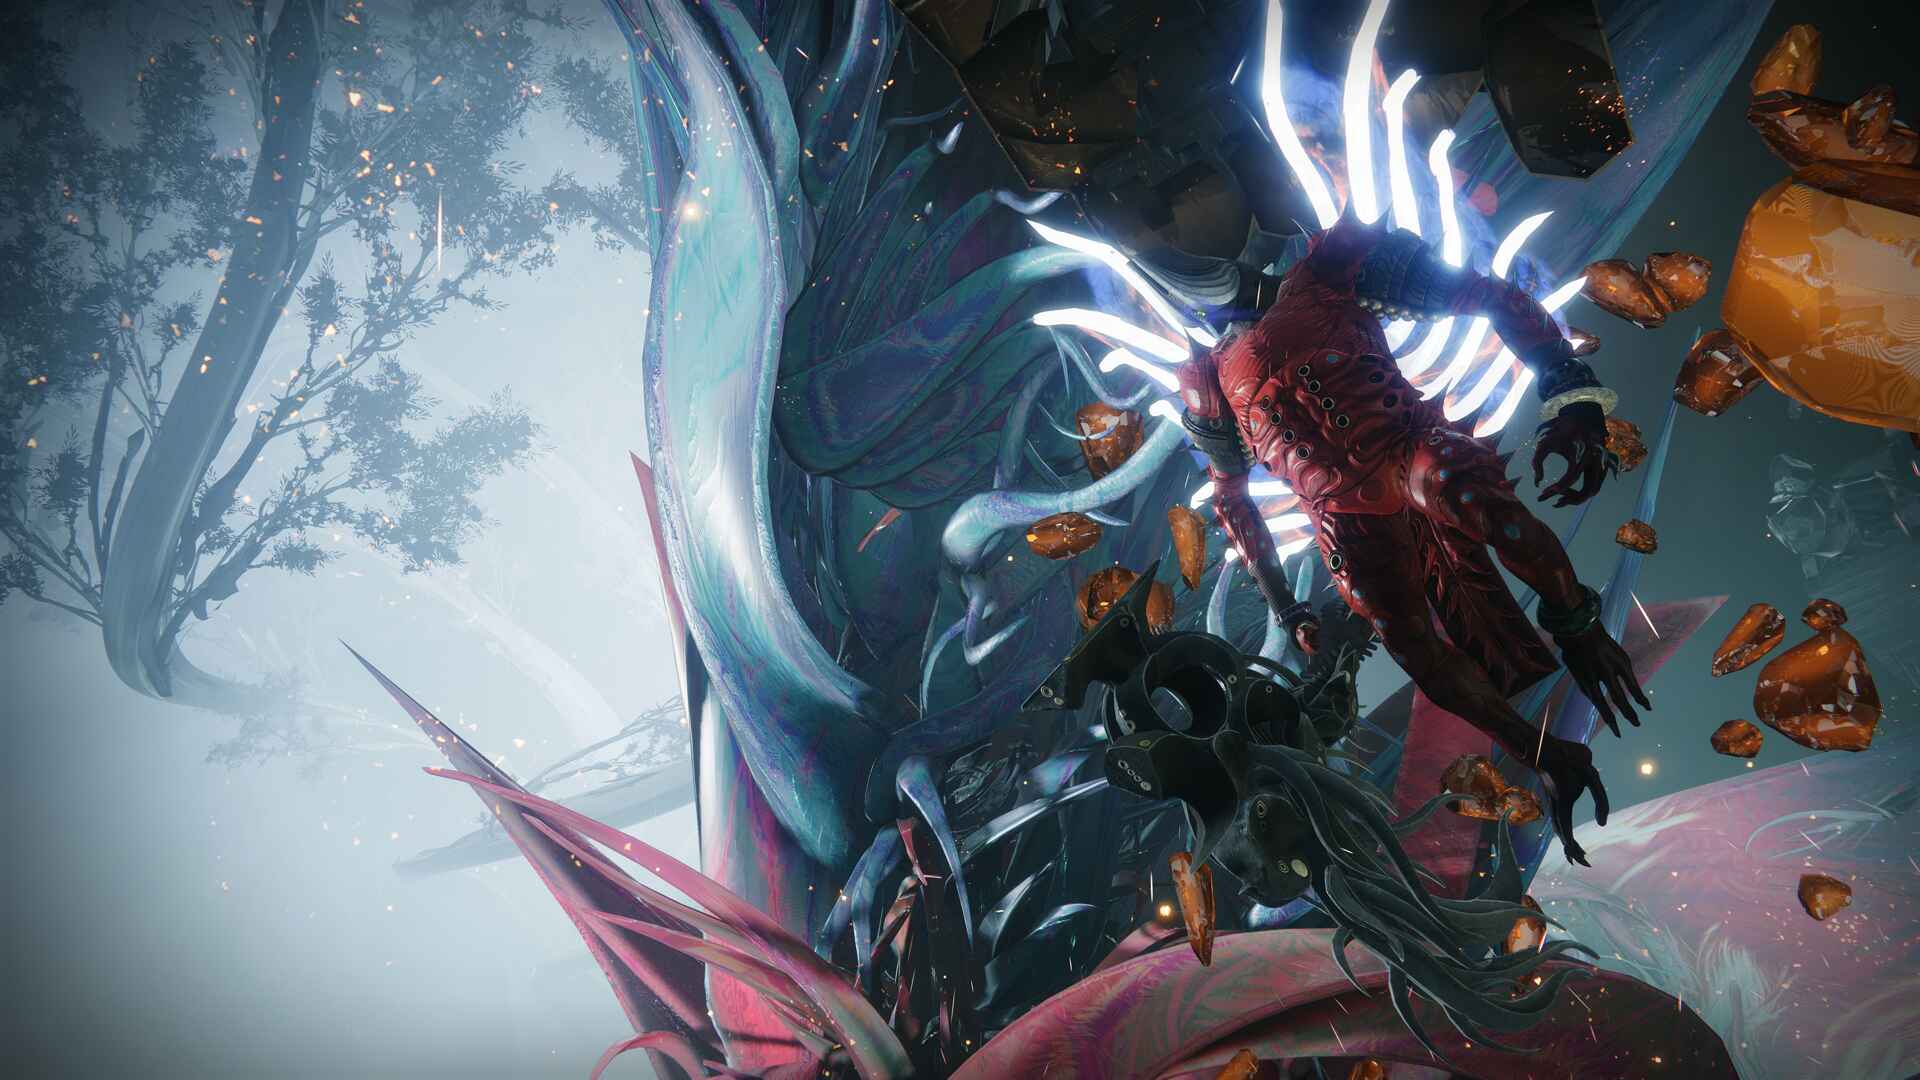
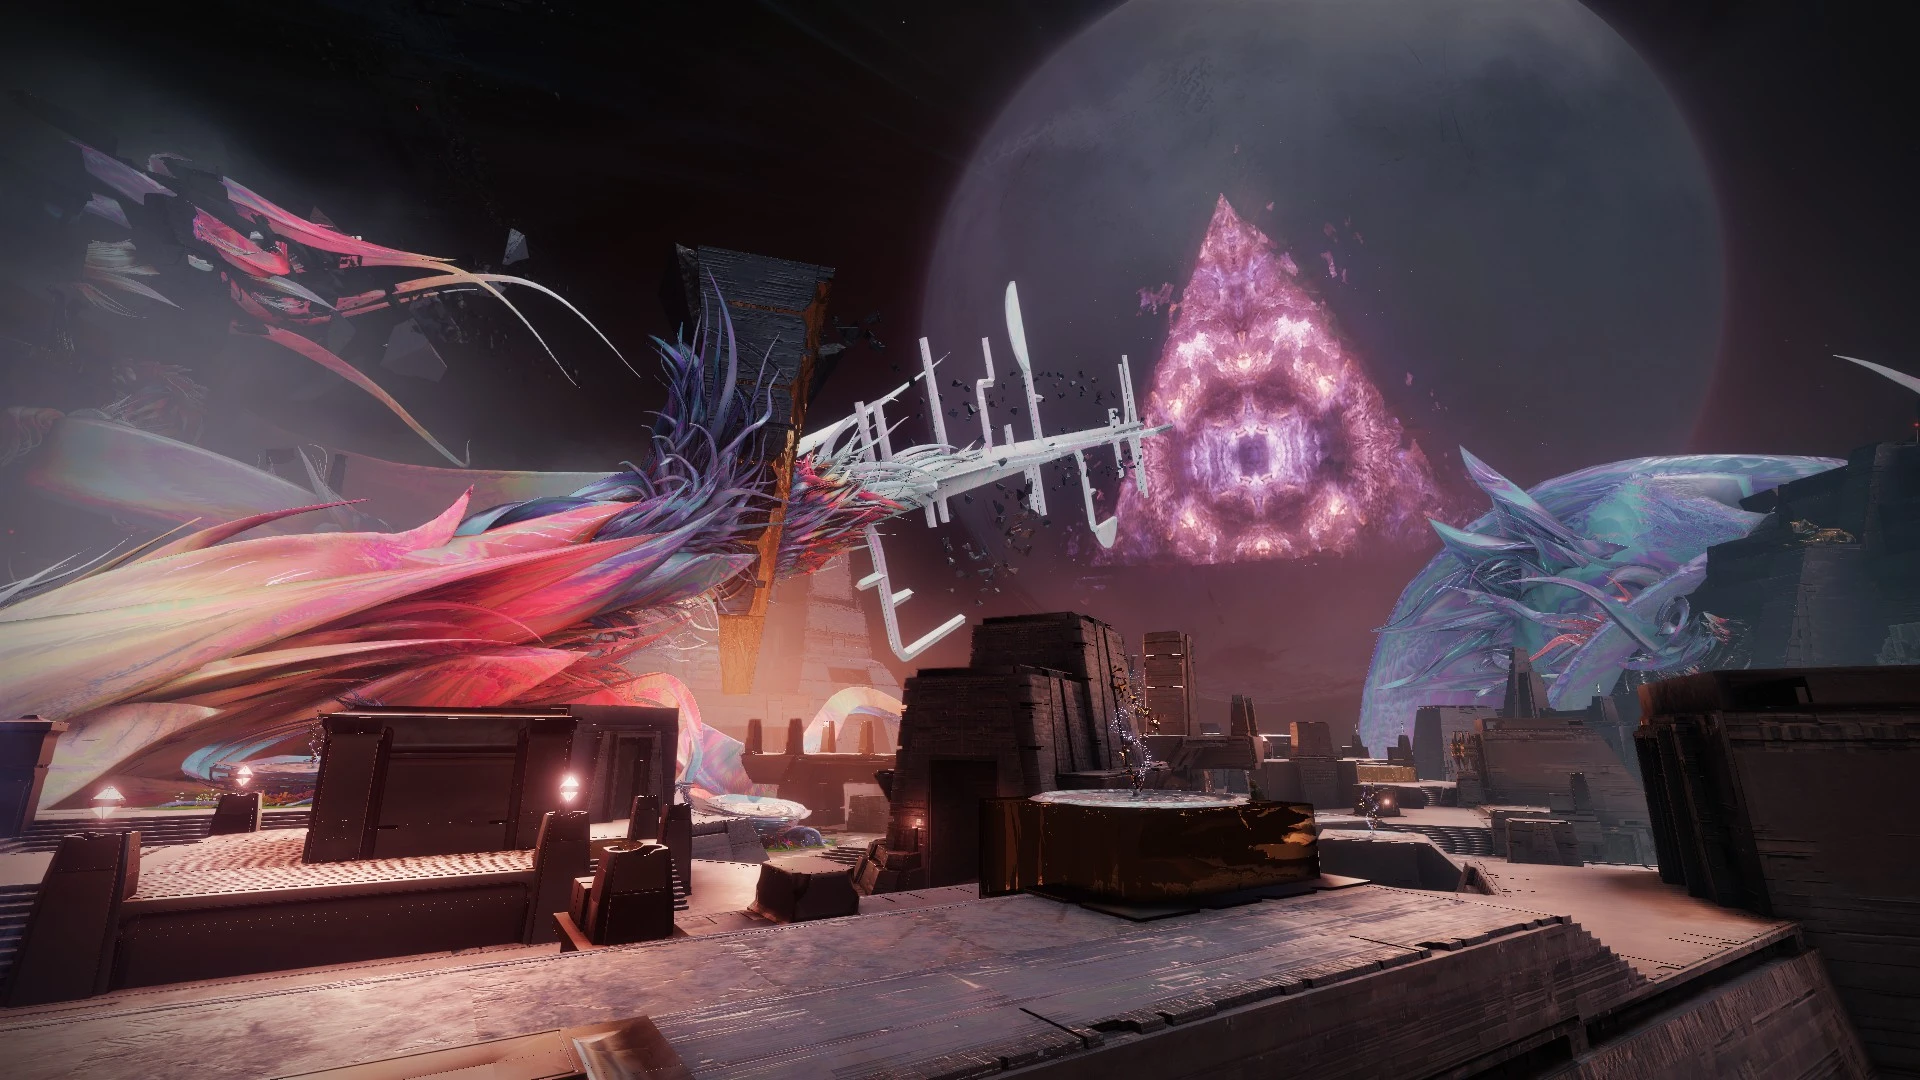
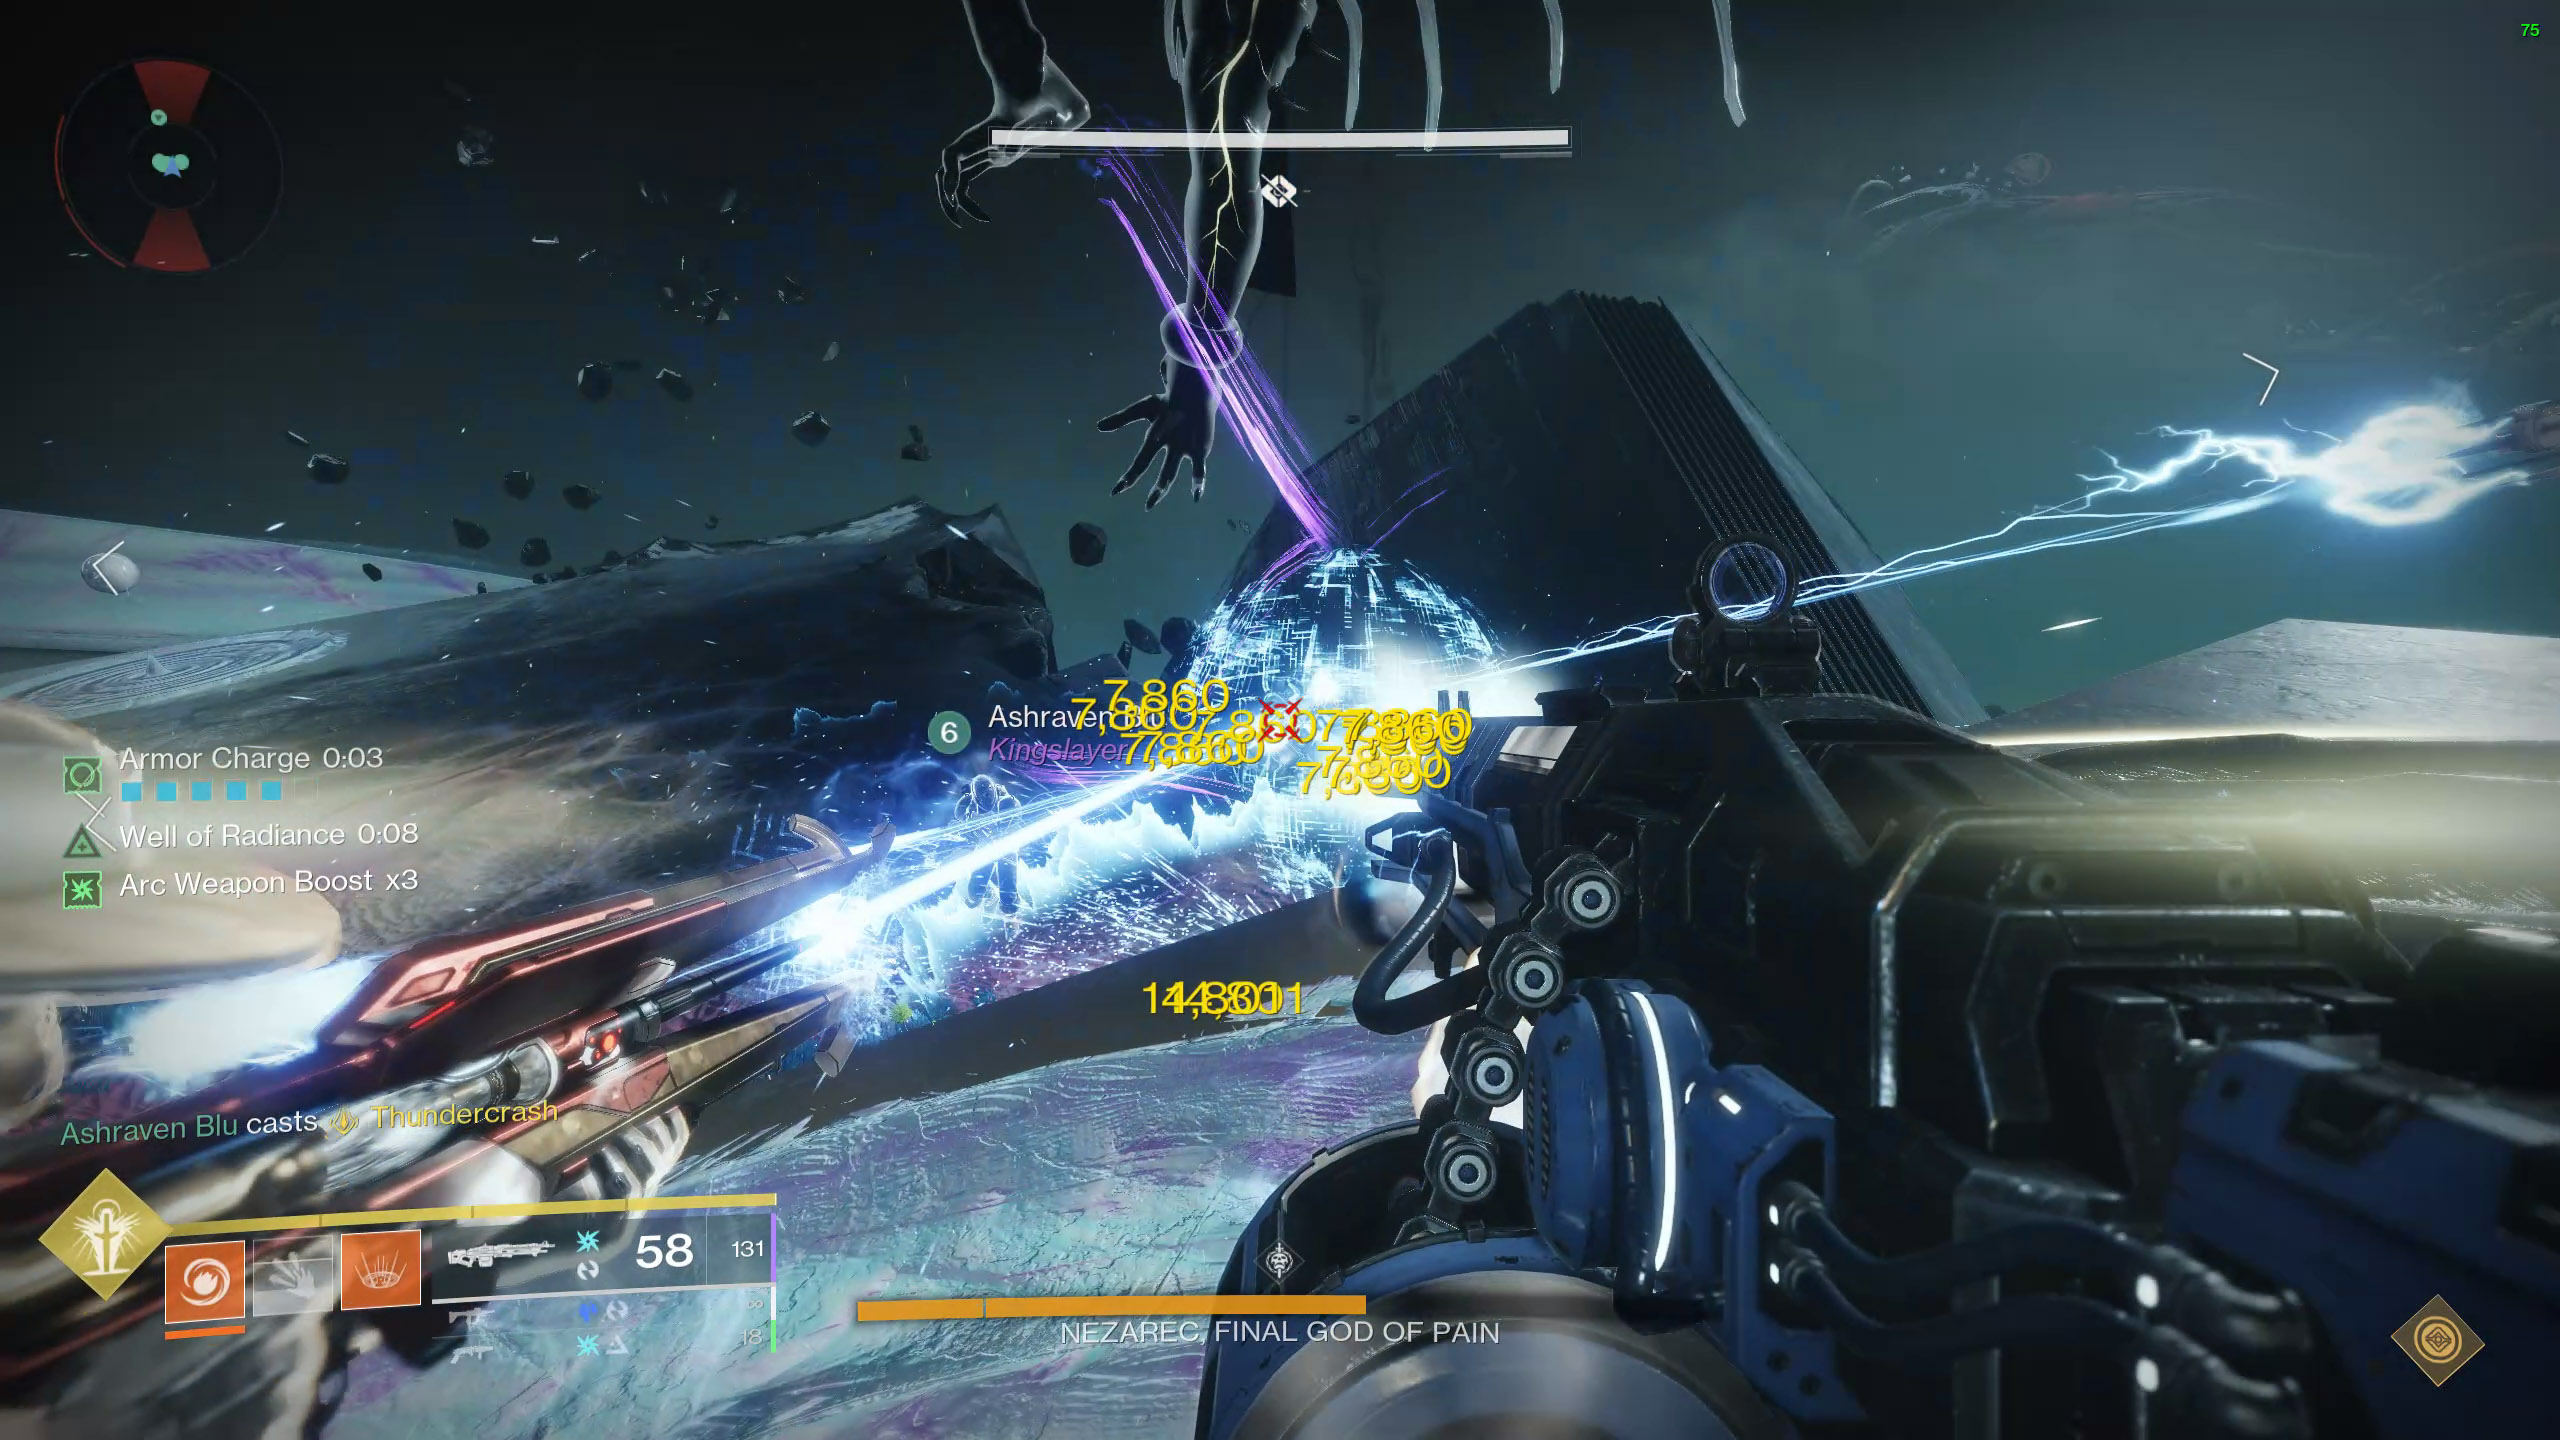
Nezarec, Final God of Pain
Roles:
- 2 Boss Gazers
- Focus Nezerec's Hatred on themselves and callout which refuge to form.
- 2 Runners
- 1 on each side. Each to form the chain, as well as form refuge in case it's needed to prevent a wipe.
- 2 Ad-clear
Recommended Loadouts:
- DPS Weapons (Rockets, Thunderlord, LFR)
- Divinity
- Well of Radiance
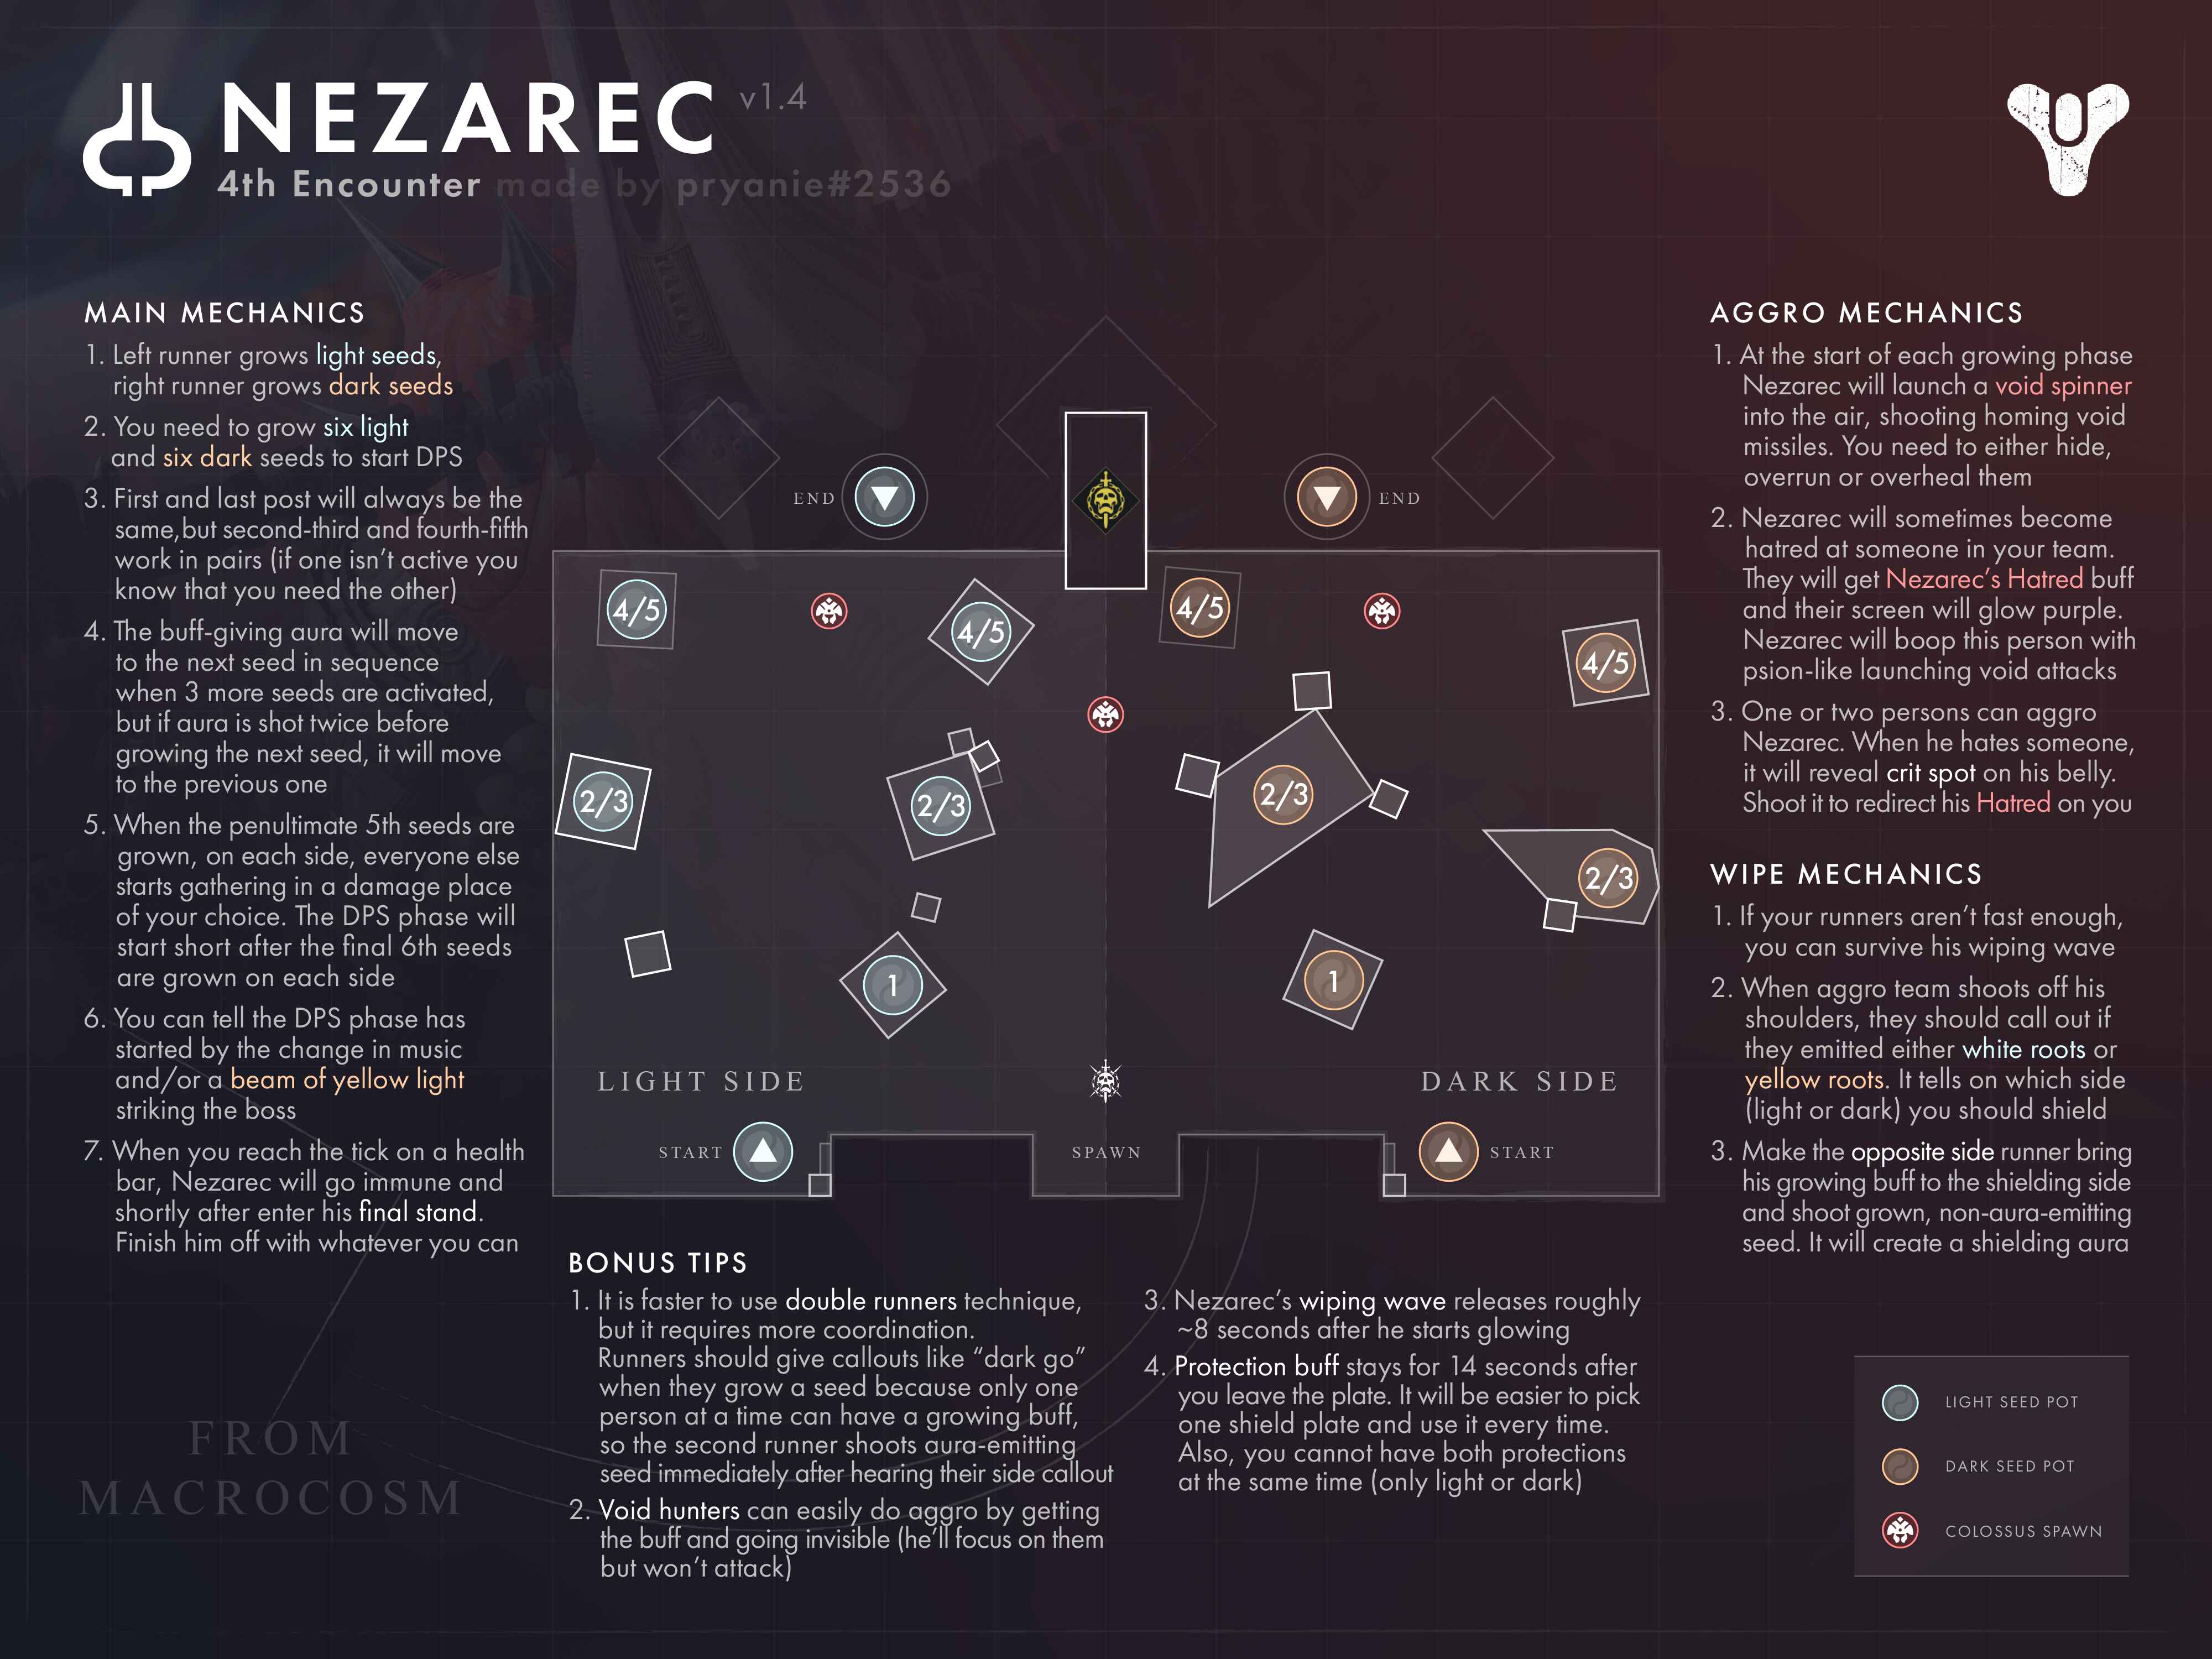
Encounter Mechanics:
- Field of Light / Flux of Darkness: Standing inside an aura and shooting the node will provide you this buff, grants the ability to activate the following node for 15 seconds. This buff expires when you shoot the subsequent node in the chain. A Refuge is made by bringing a buff to the opposing node.
- Nodes: A group of nodes that are activated by firing it when positioned on its plate and having the buffs Field of Light or Flux of Darkness. The buff for Field of Light/Flux of Darkness is used up after activating a node. From one active node to the following one in the chain, a line indicating the pathway is shown.
- Light's Refuge / Darkness's Refuge: You are shielded by an aura against Nezarec's wipe mechanism. Bringing a Flux of Darkness to a Light node produces Light's Refuge. Bringing a Field of Light to a Darkness node produces Darkness's Refuge. You can tell which Shelter you need by looking at the glow on Nezarec's shoulder after it breaks.
The encounter starts when the Orbs at the sides of the map are shot to gain a buff by the runner. The 2 runners should then start running and shooting orbs just like in the first 2 encounters.
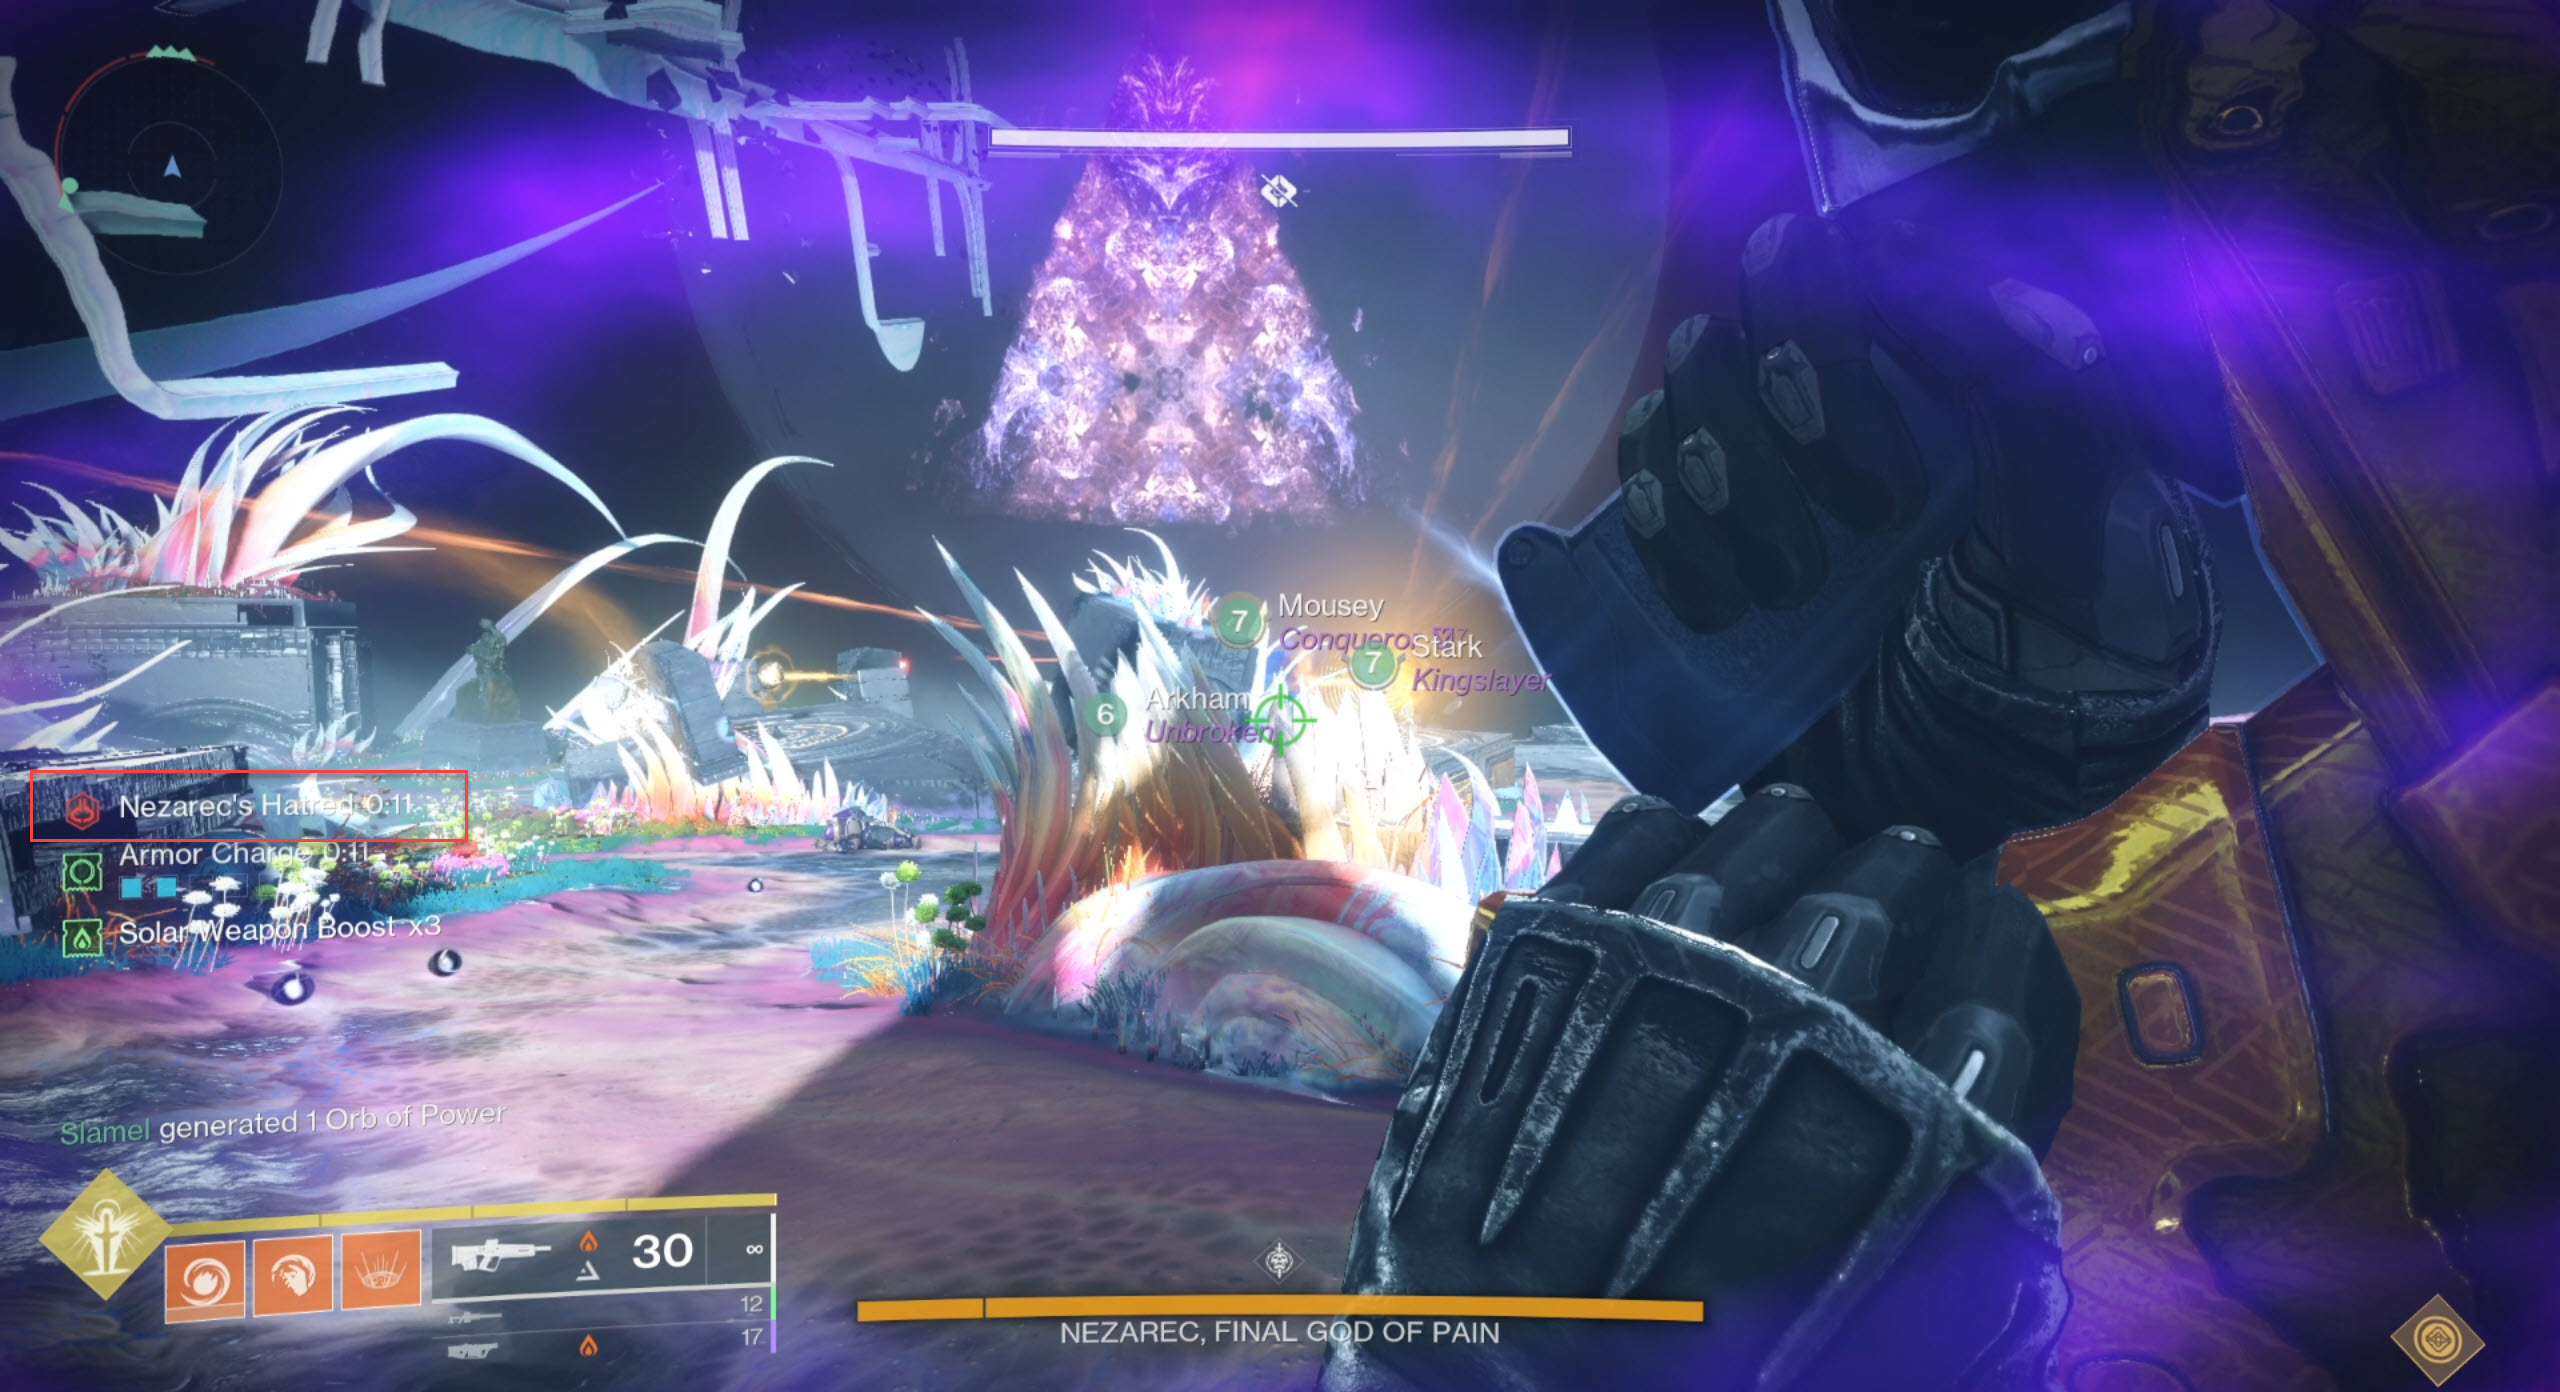
As the runners are completing orbs, some players will gain Nezarec's Hatred. This buff causes the player to be constantly shot upwards with a blast akin to that of Psions, as well as be targeted by Nezarec.
Thus, a Boss Gazer should shoot Nezarec's chest to take the buff away from other players, especially the runners. They will receive the debuff instead as a result. This time, however, the buff would have a timer of ~13s that would go back to a random player if it reaches 0. The other Boss Gaze player should thus shoot Nezarec's chest again to take the buff when the timer is getting low.
The runners have a set amount of time to finish running every phase:
- 1st phase: 60s
- 2nd phase: 55s
- 3rd phase: 50s
If all orbs are not shot by these times, Nezarec will wipe the team. However, there is a way to avoid this wipe if your runners are not fast enough. In the first phase doing this immunity mechanic is not really needed, but is more important on the 2nd and 3rd phase. The immunity mechanic is as follows:
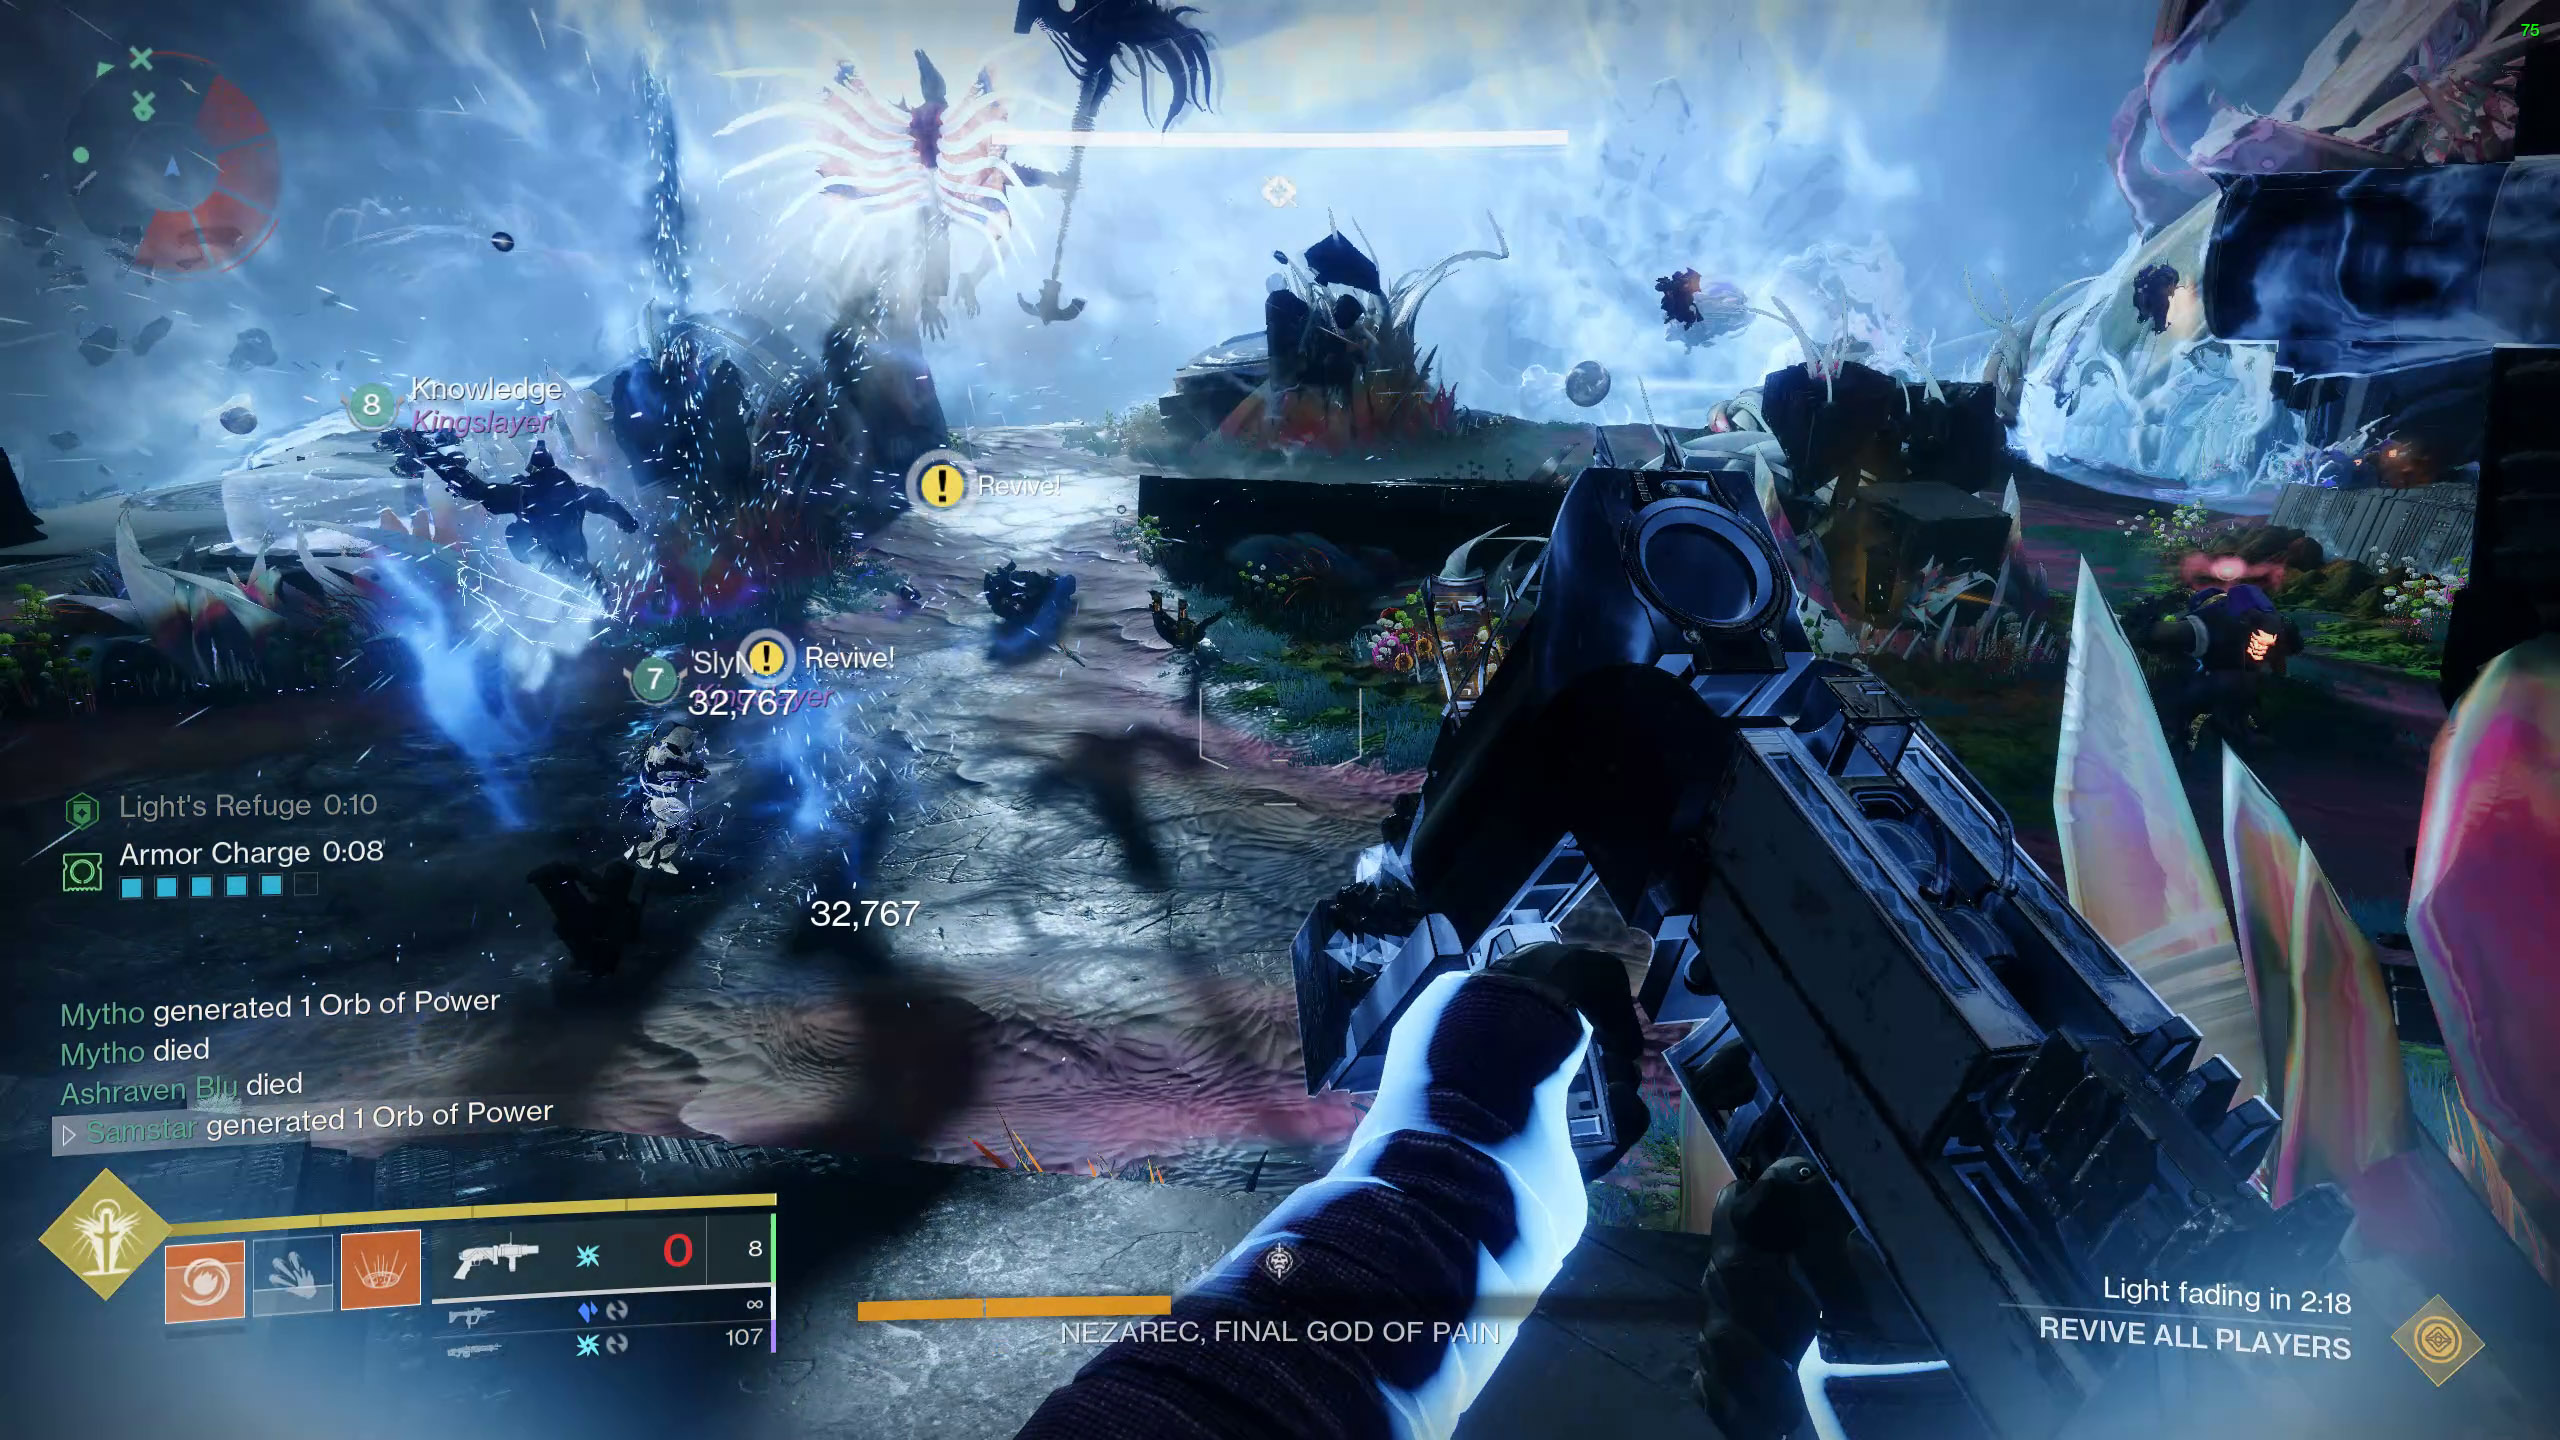
Apart from Nezarec's chest, his shoulders are also vulnerable. Once both shoulders have been shot, Nezarec will emit an aura that is either Light or Dark. This aura should be called out by either one of the Boss Gaze players or ad-clear players.
The runner from the opposite colour should move to that colour's side to stand under one of the orbs that does not have an aura, and shoot it. This will give them a Refuge Buff that lasts for 14s. All players should move under this orb to get the Refuge as well. This buff can be refreshed by leaving and exiting the orb. The refuge buff will cause players to be immune to Nezarec's wipe mechanic. The runners can then continue running.
In Summary:- If his shoulder emits a dark aura, Take a Field of Light buff to a Flow of Darkness node to get Darkness's Refuge.
- If his shoulder emits a light aura, Take a Flux of Darkness buff to a Field of Light node to get Light's Refuge.
Once all orbs are complete, the team should move to one of the plates on the map. You can technically DPS from anywhere, even on the pedestal where Nezerec retreats to, but most teams use the platform at the far left of the arena, or one of the 2 middle platforms. When Nezarec is shot by a large beam, the damage phase starts. Nezarec may jump around and suppress players during DPS.
After damage ends, the team repeats mechanics, immunity and damage until the boss reaches final stand.
Final stand is also quite simple, as Nezarec becomes momentarily immune, then vulnerable to damage again. Once Nezarec is killed, the raid is complete.
Encounter Triumph:
Synchronicity - During the final battle with Nezarec, activate both sets of nodes within 5 seconds of each other, for every activation, and complete the encounter.
Challenge Mode:
All Hands - Each player must activate one Dark plate and one Light plate between each DPS phase.
Master Difficulty:
- Barrier Champions (Colossus) replaces the Esteemed Colossus.