Done by: Vedallion#7774 | June 24th 2024
Loot Table
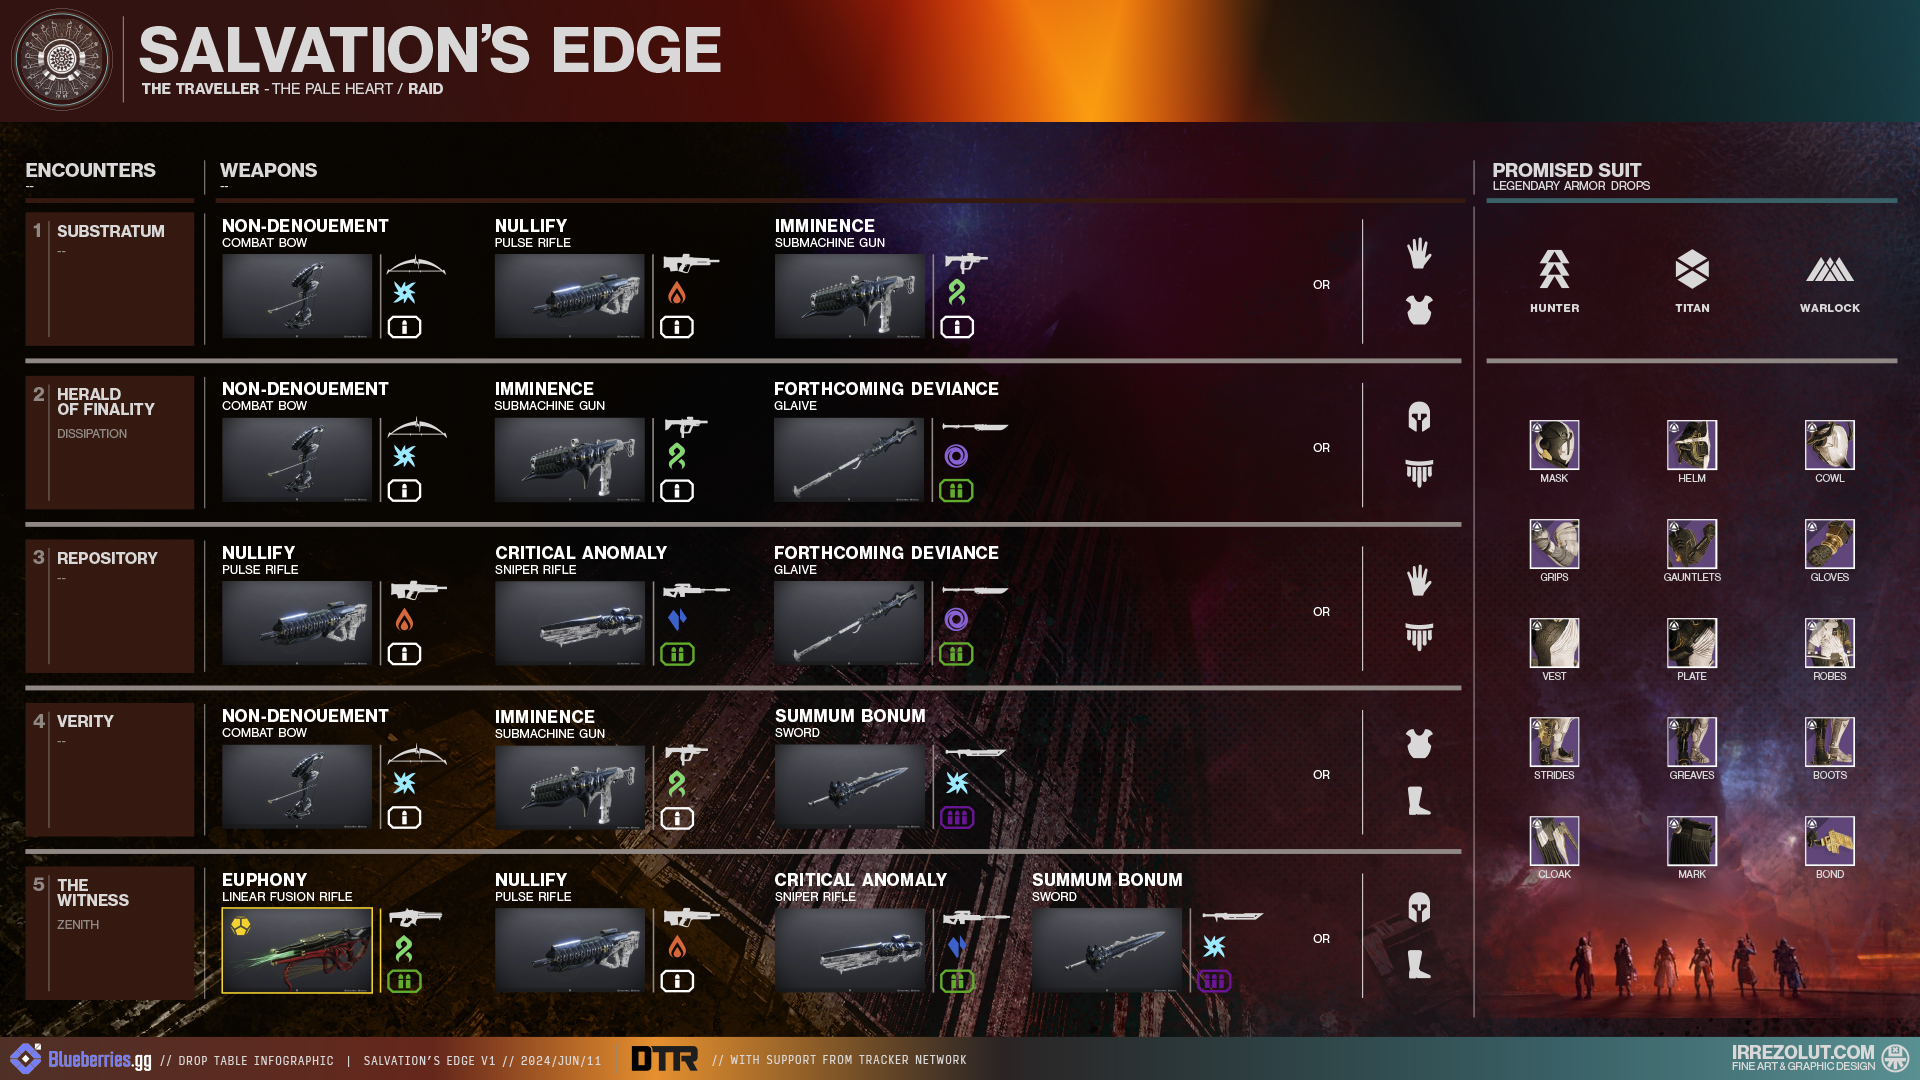
Deepsight Chest
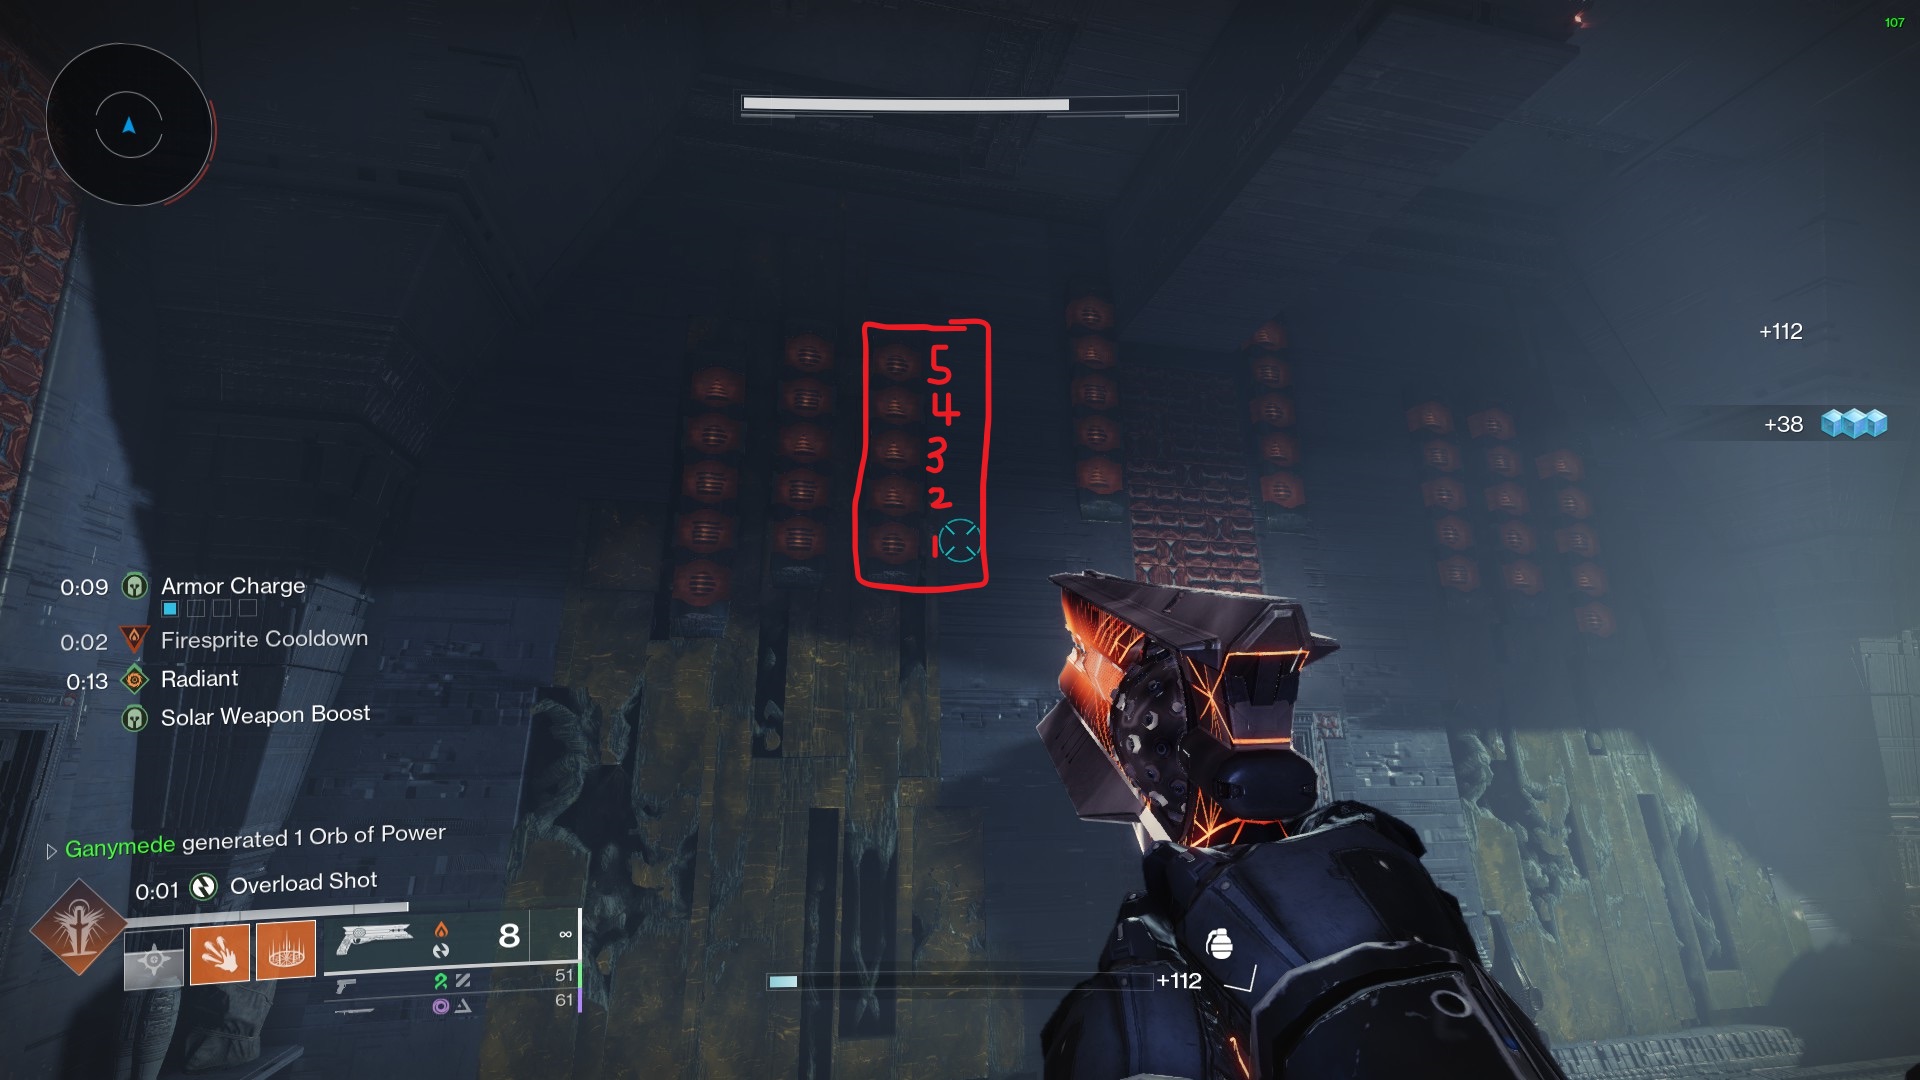
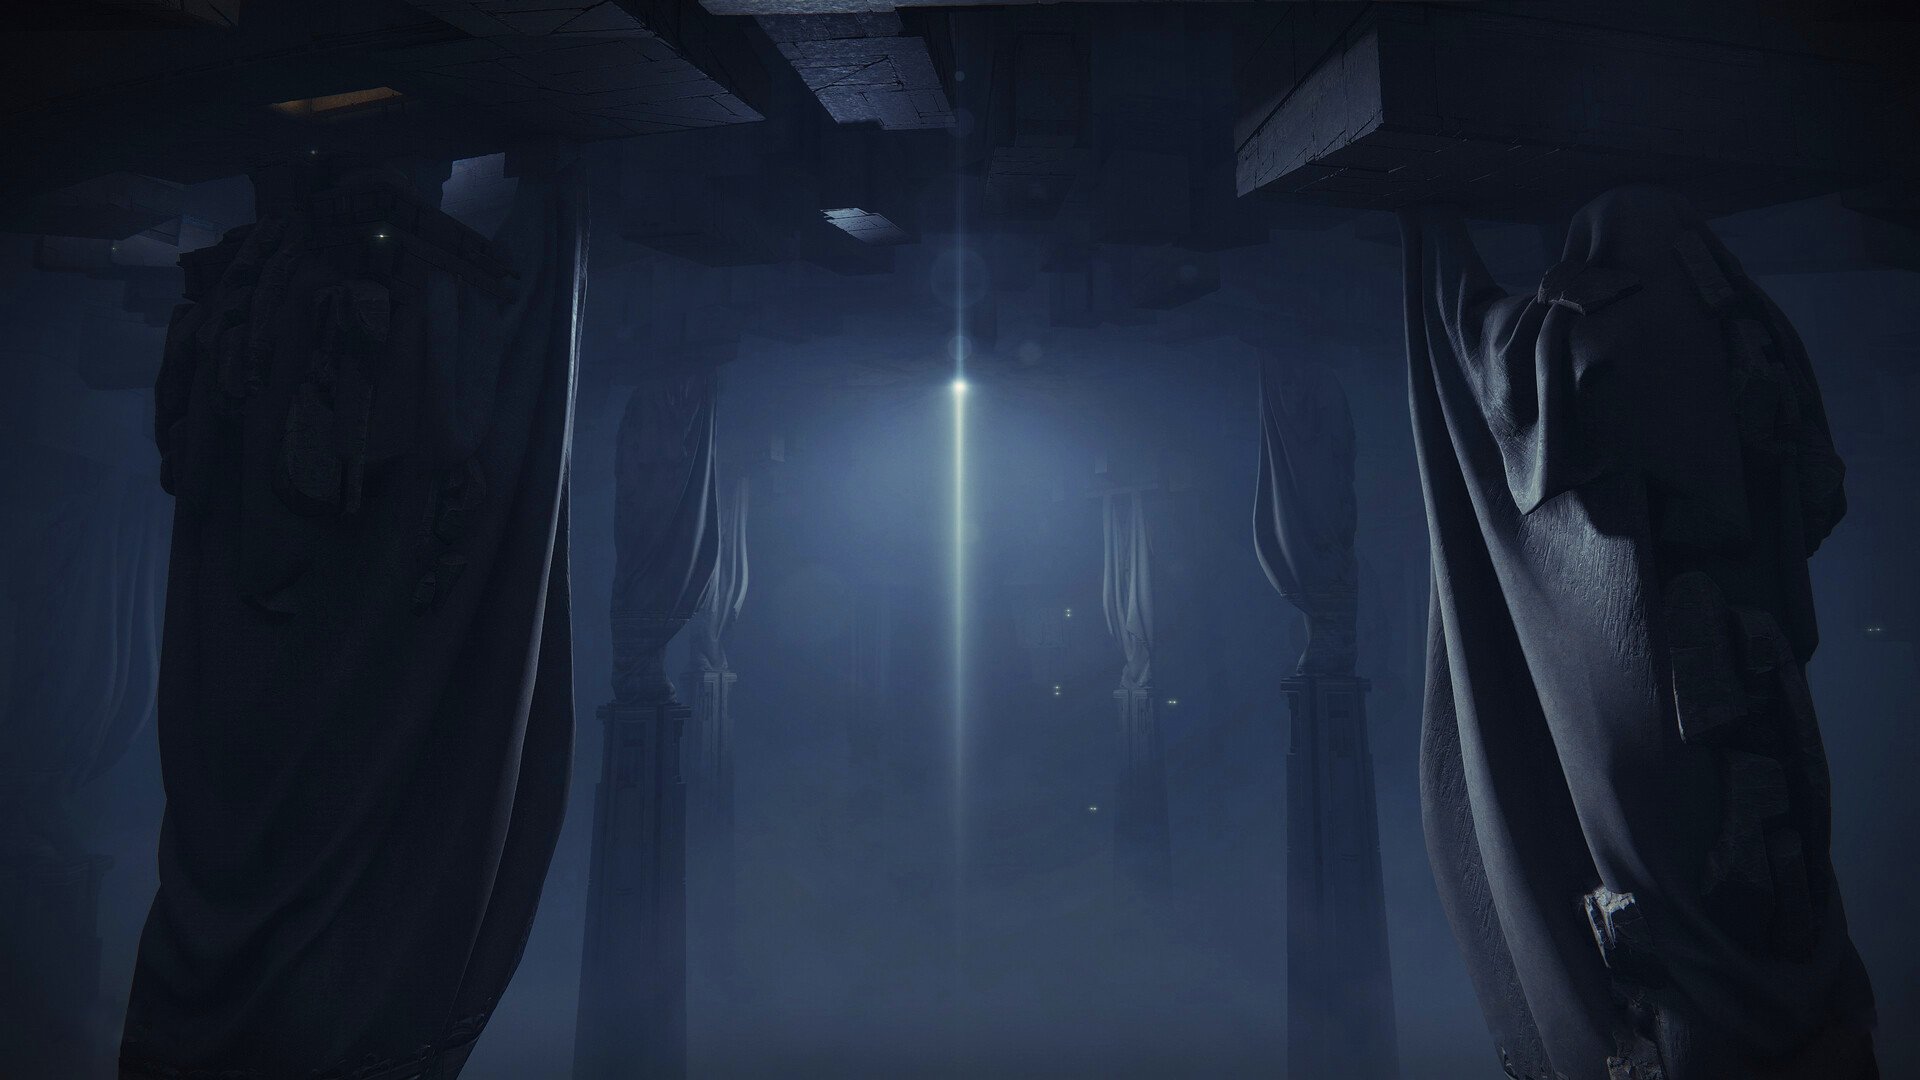
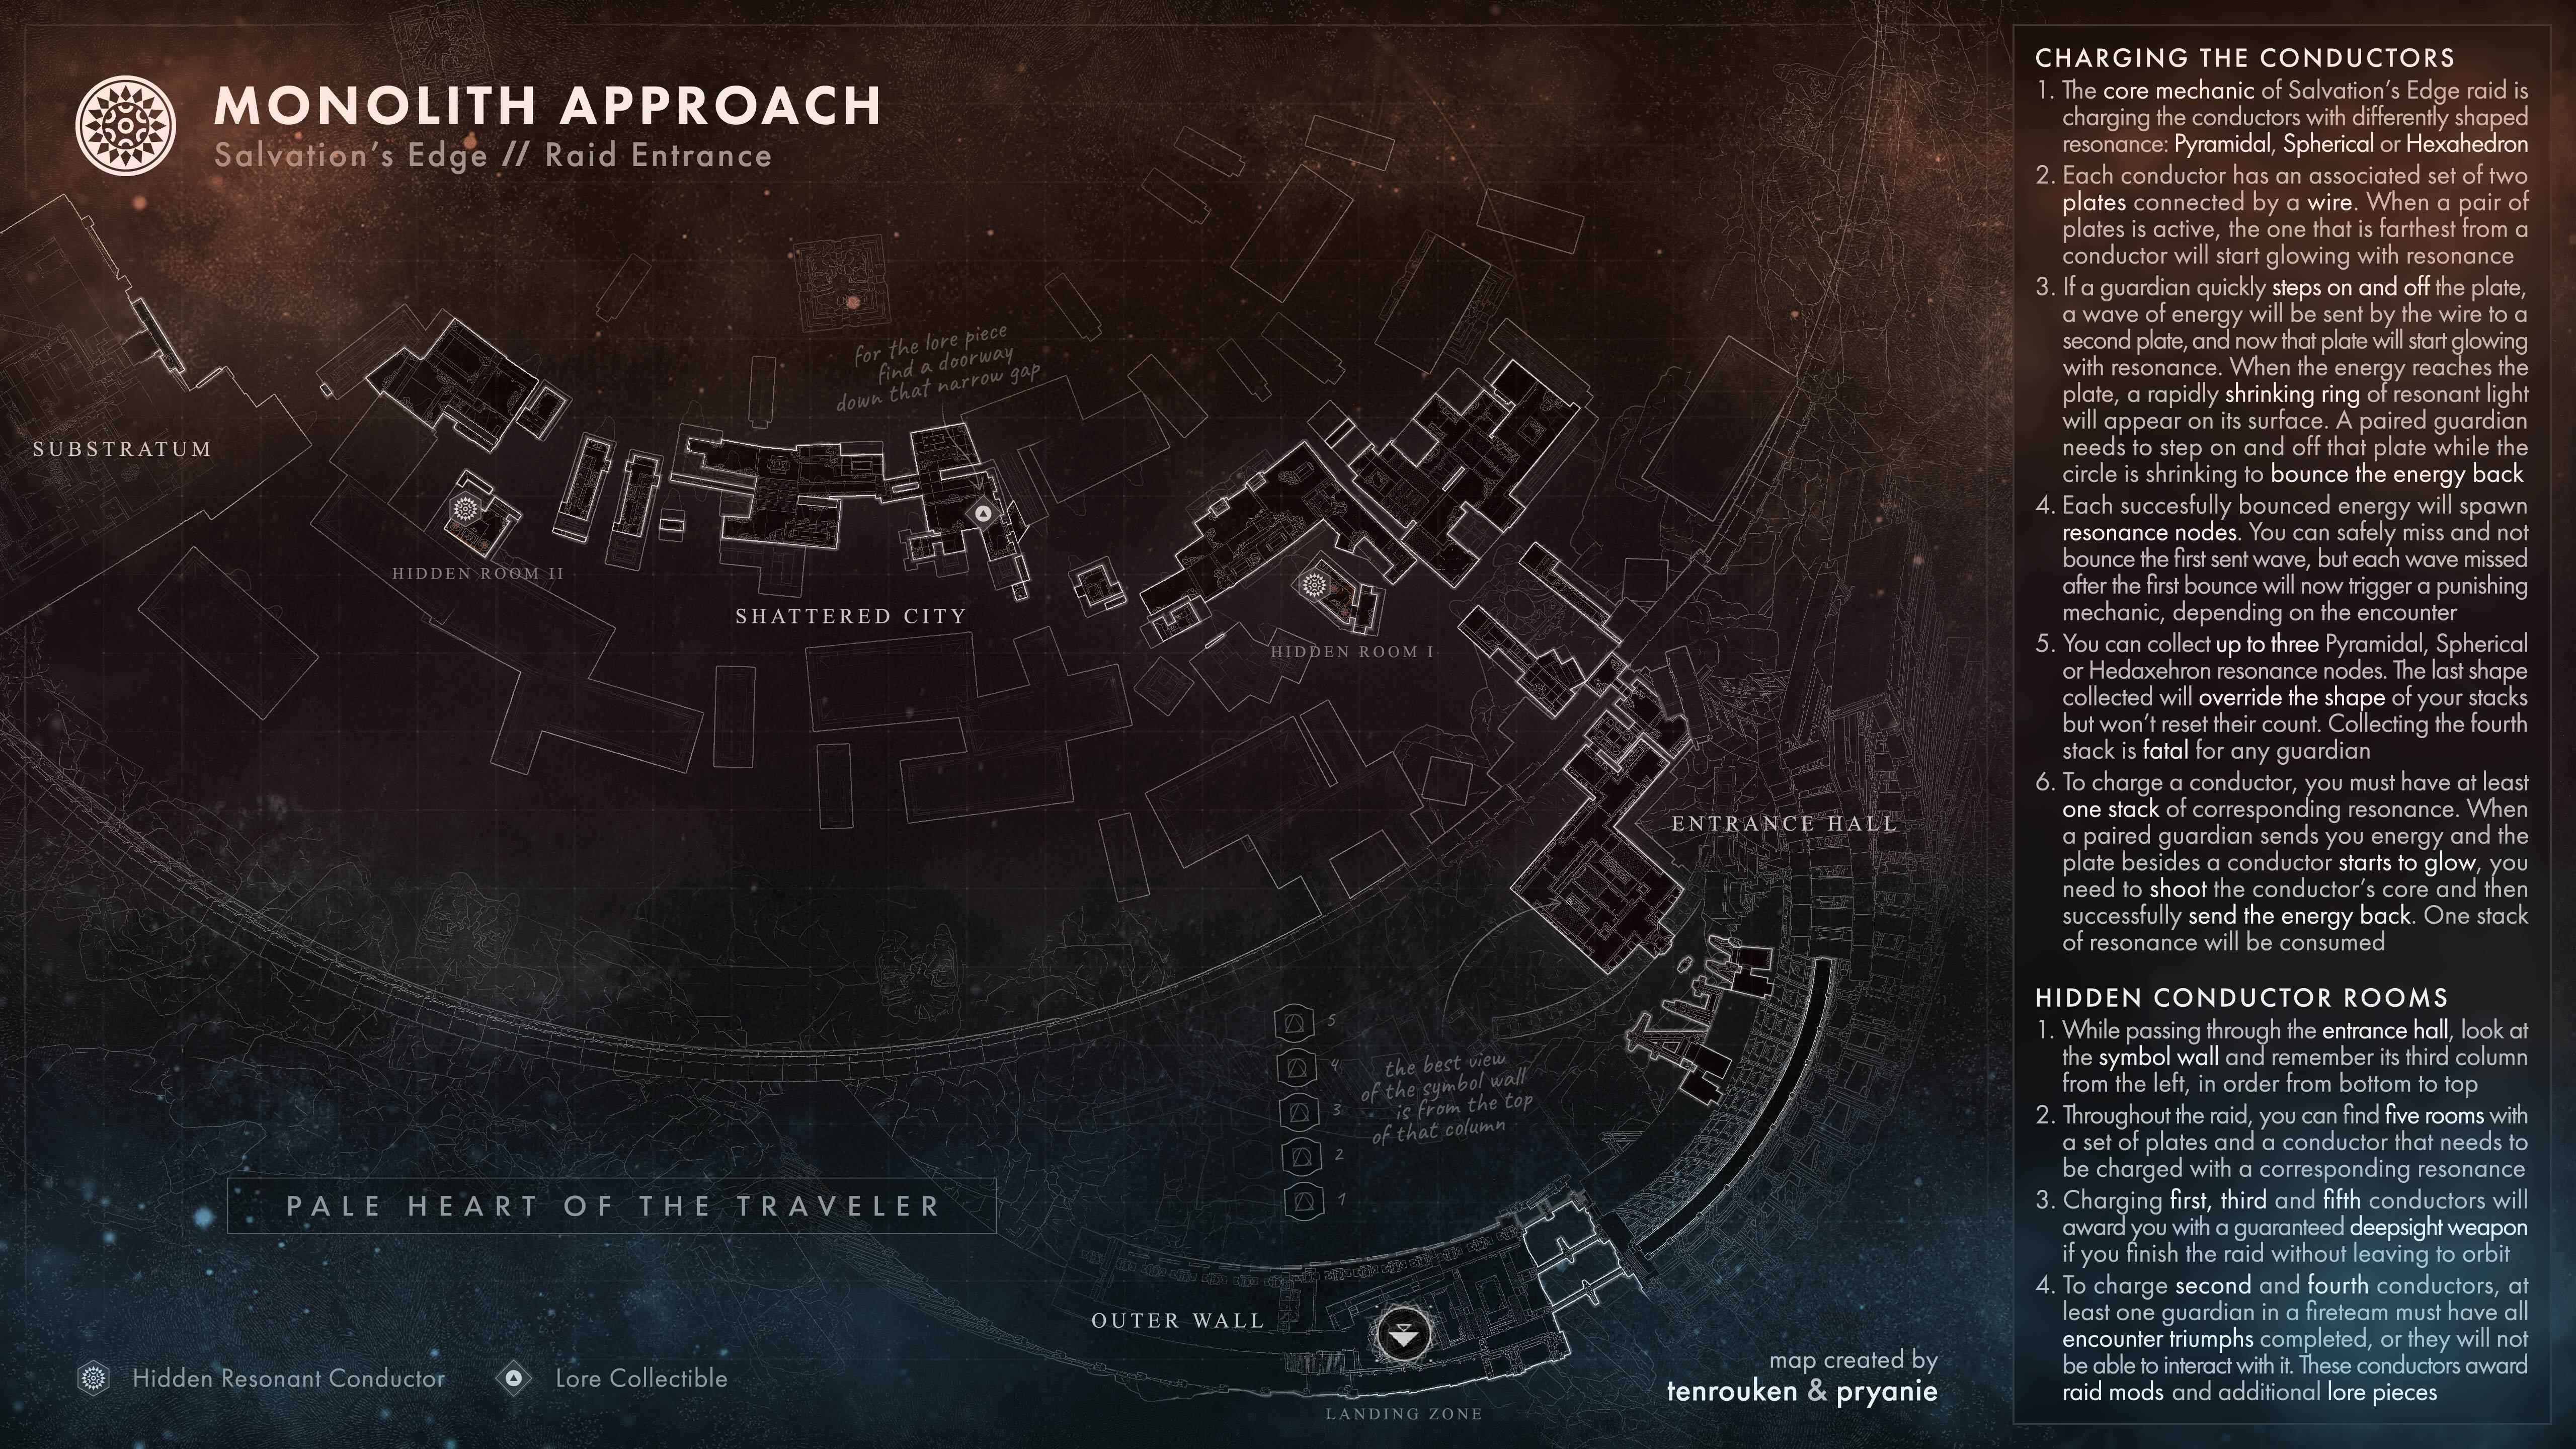
In the first enclosed chamber you see at the beginning of the raid, is where the red border puzzle starts. This chamber has columns of different shapes in front of it; the third column from the left is the one you will need to remember. These forms correlate to the various resonance buffs that can be discovered scattered throughout the raid, and they are all connected to distinct hidden rooms. There are 5 hidden rooms in total but only 3 are needed for the deepsight chest.
For the deepsight chest to spawn, the conductors in each of the three active rooms must obtain the matching resonance buff. The picture above indicates that room one is represented by the symbol at the bottom of the third column, while room five is represented by the symbol at the top.
Rooms 1, 3 and 5 will always be active, which means that they will have glowing conductor plates that produce resonance. These 3 rooms are always the rooms you need for the deepsight chest.
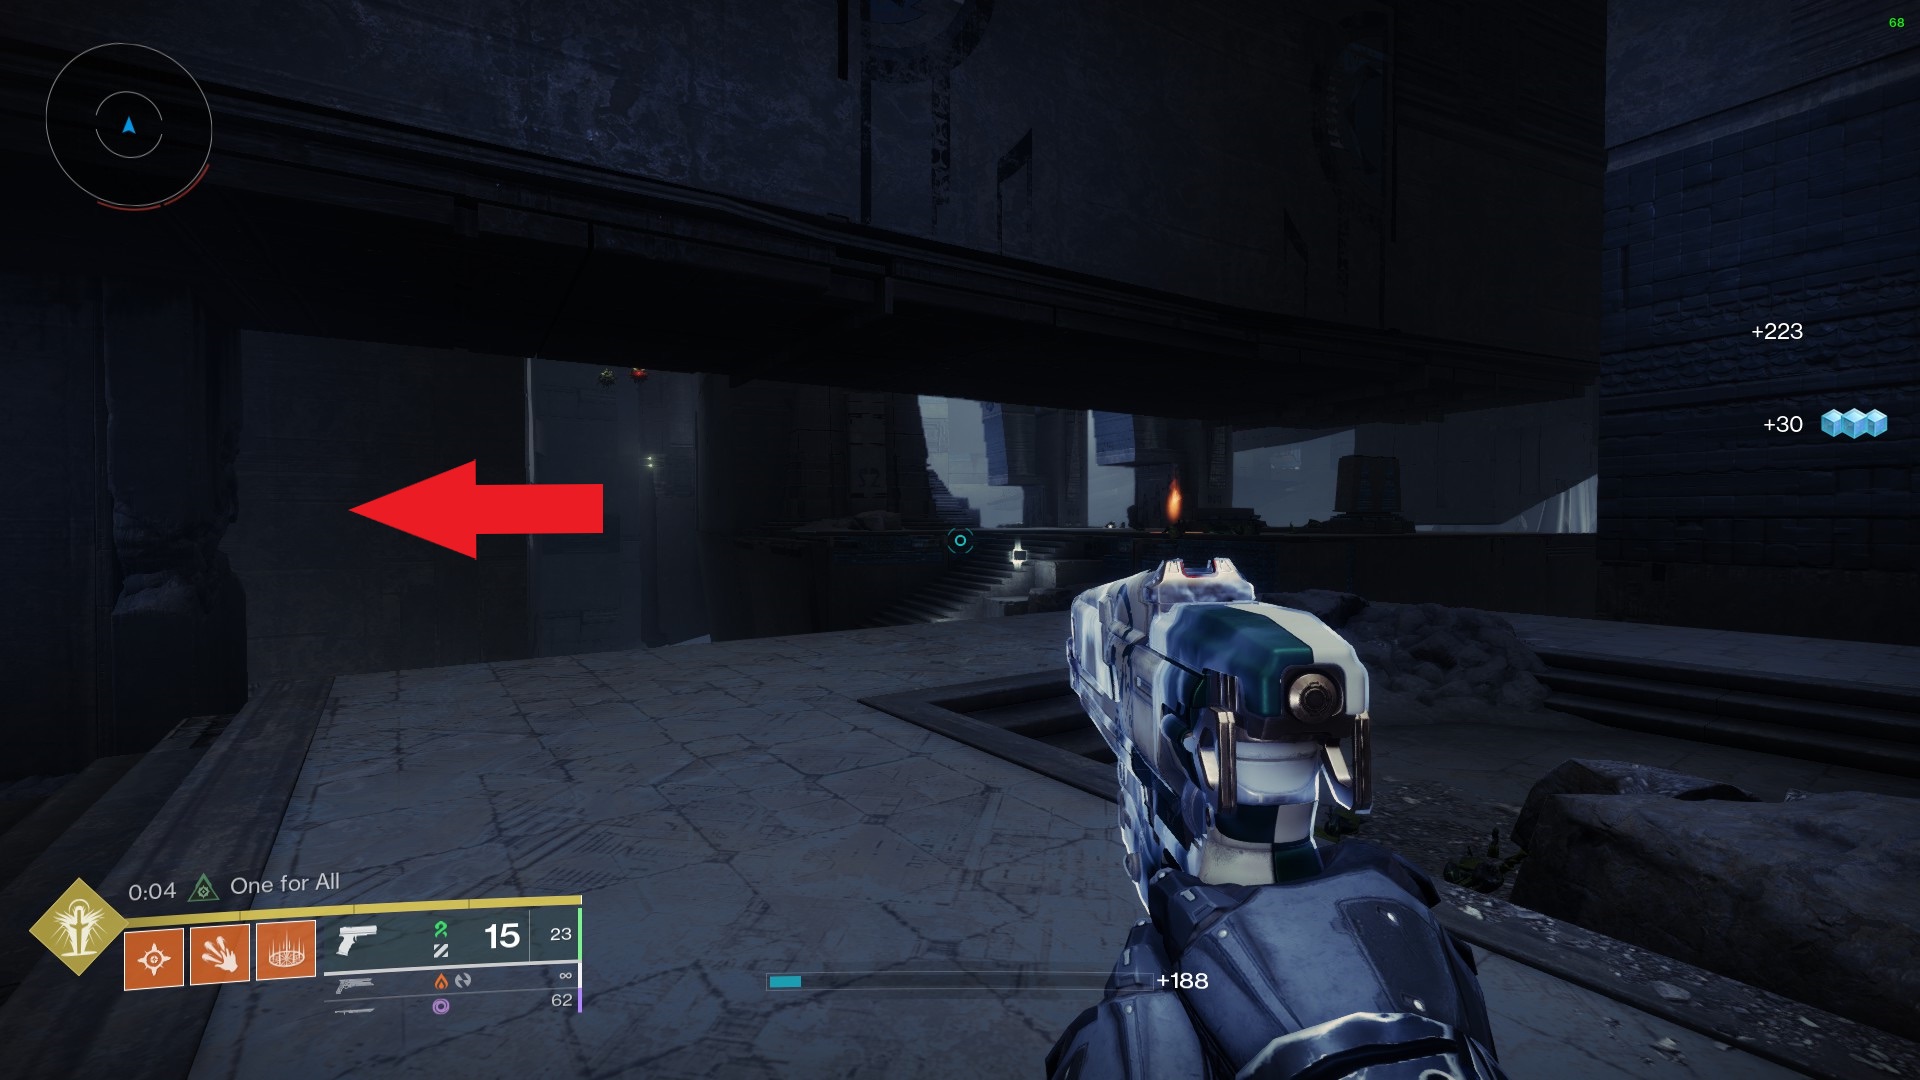
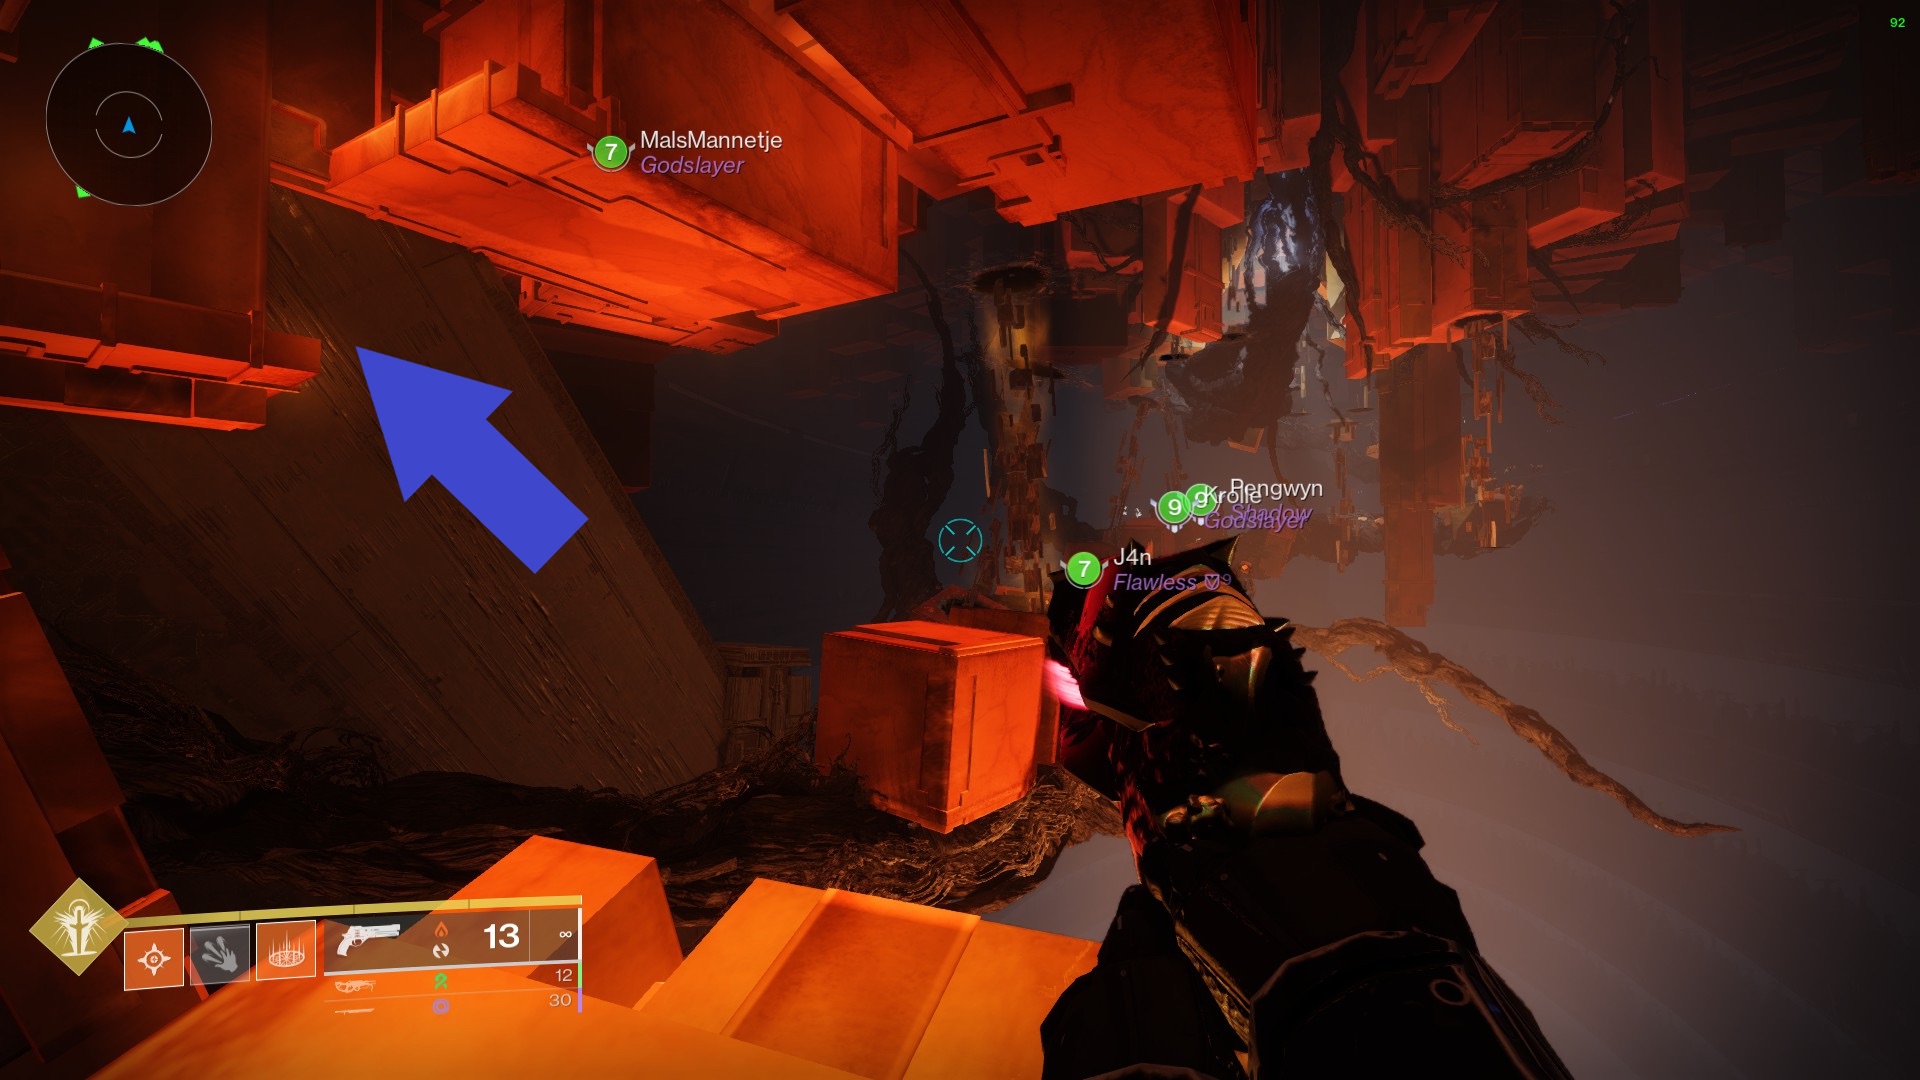
The first room is located as soon as you enter the spacious, open area at the start of the raid. Once you have jumped up a little, you should see the area shown here. Follow the left arrow and locate a spacious, brightly lit entrance. This leads straight to the first room.
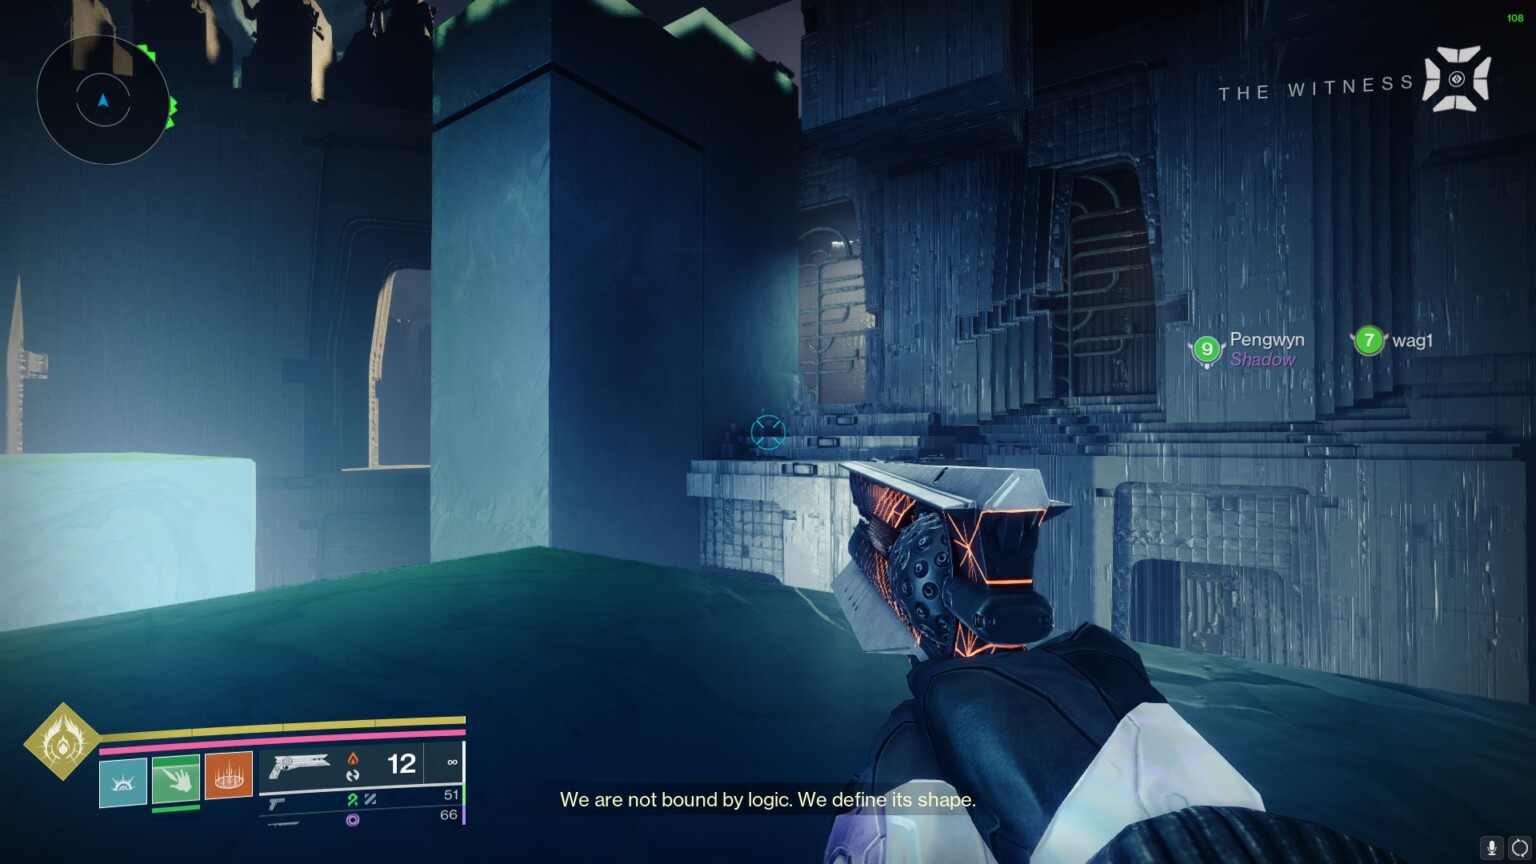
Between the first and second encounters lies room three. You will soon come across big greenish-blue cubes that you will need to hop over after climbing the red elevator. Watch for the wide, well-lit opening on the right side wall that finally leads to the third room.
And lastly, room five is situated prior to the third encounter. As soon as you enter the inner chamber with the decaying tree limbs, do a leftward jump. The set of conductor plates somewhere on one of the cubes, so keep jumping up until you discover it.
Each time you activate the pylon for these 3 rooms, the text "Energy flows deeper into the monolith..." will appear. If you do it wrongly, the text "Energy retreats from your grasp..." will appear, and you need to restart the raid. Once you have activated all 3 pylons correctly, the text "A boon will be granted." will appear, signifying that you have completed the deepsight puzzle and the bonus chest will spawn at the end of the raid.
Raid Mods
Rooms 2 and 4 are not activated until you do the encounter triumphs in the raid. The work the same as the other 3, the only difference is that activating these 2 rooms will give you a raid mod once you have completed the final encounter of the raid.
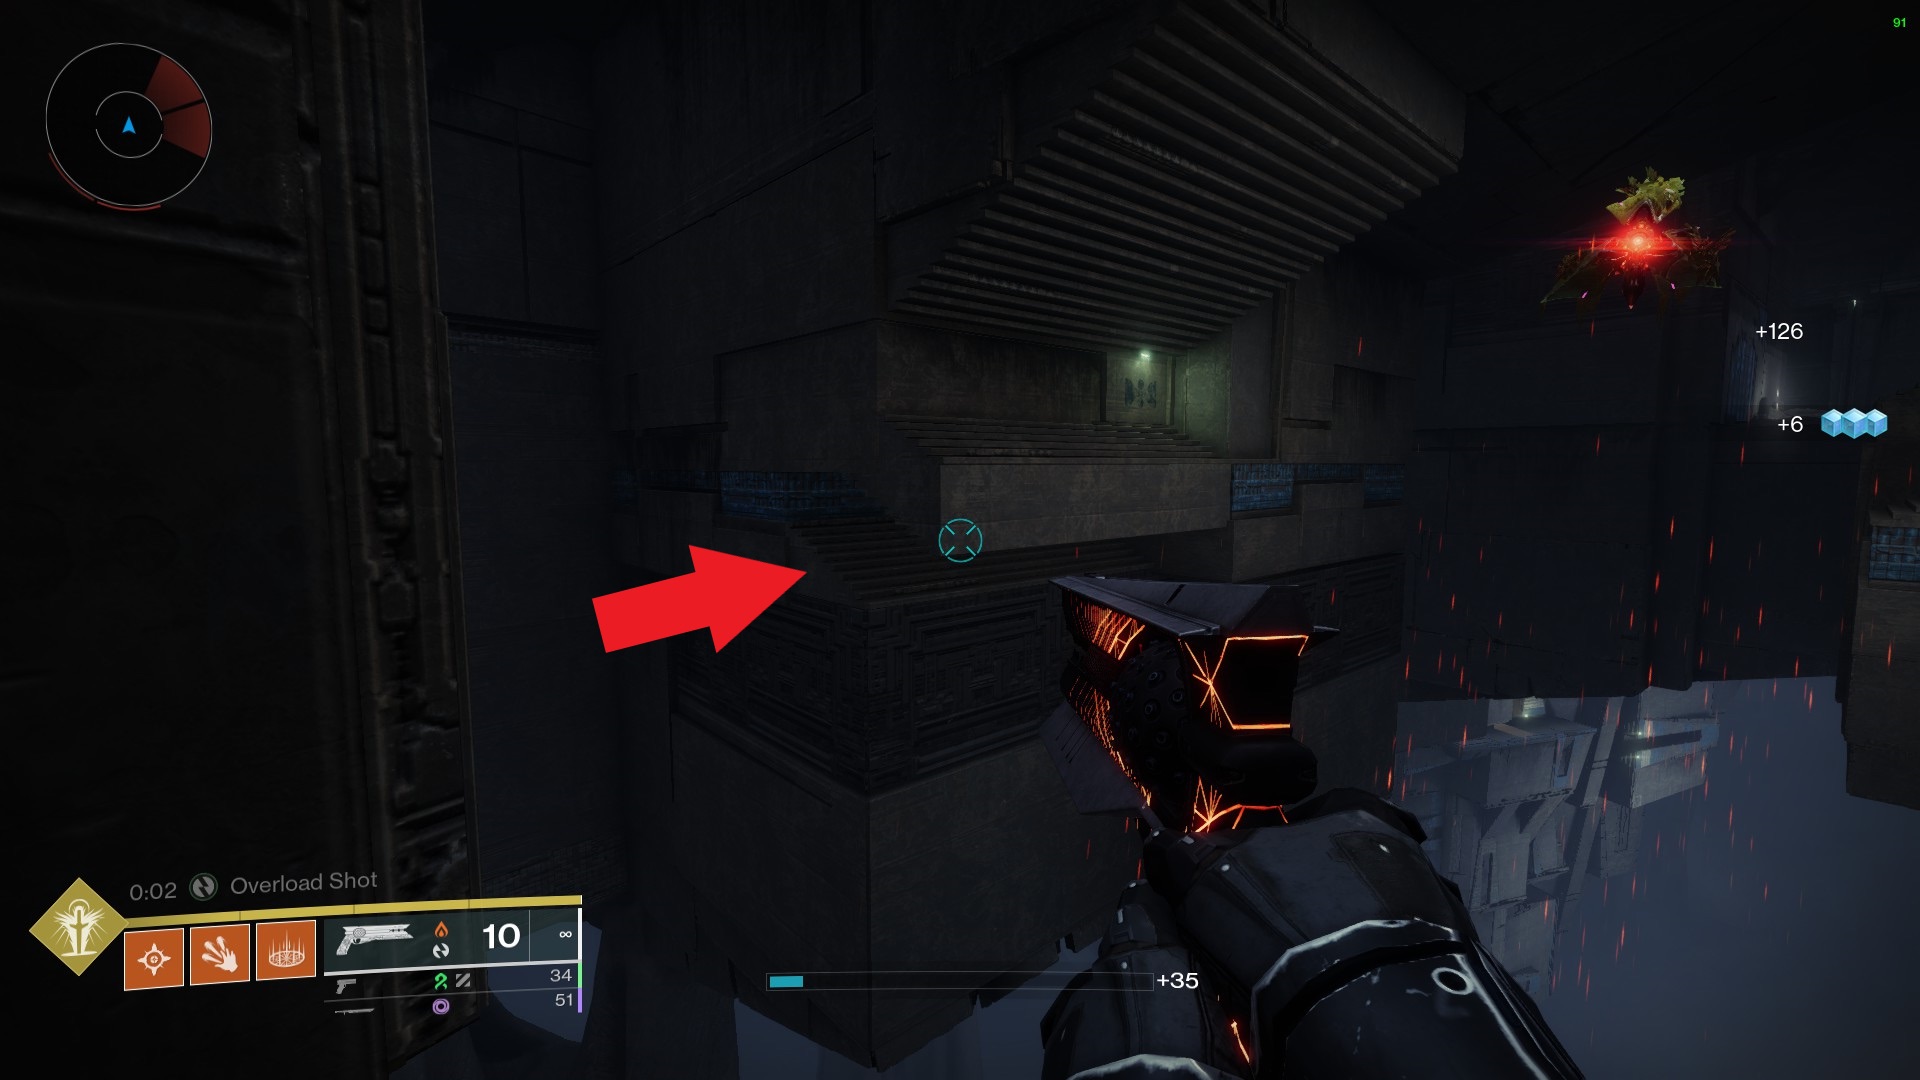
Even though it is towards the end of the first parkour section, room two is also before the first encounter. Proceed until you encounter a closed set of stairs occupied by fans. You should notice the peculiar set of stairs seen here immediately after this. There is a tiny opening leading to room two if you can crouch through to the bottom set of stairs.
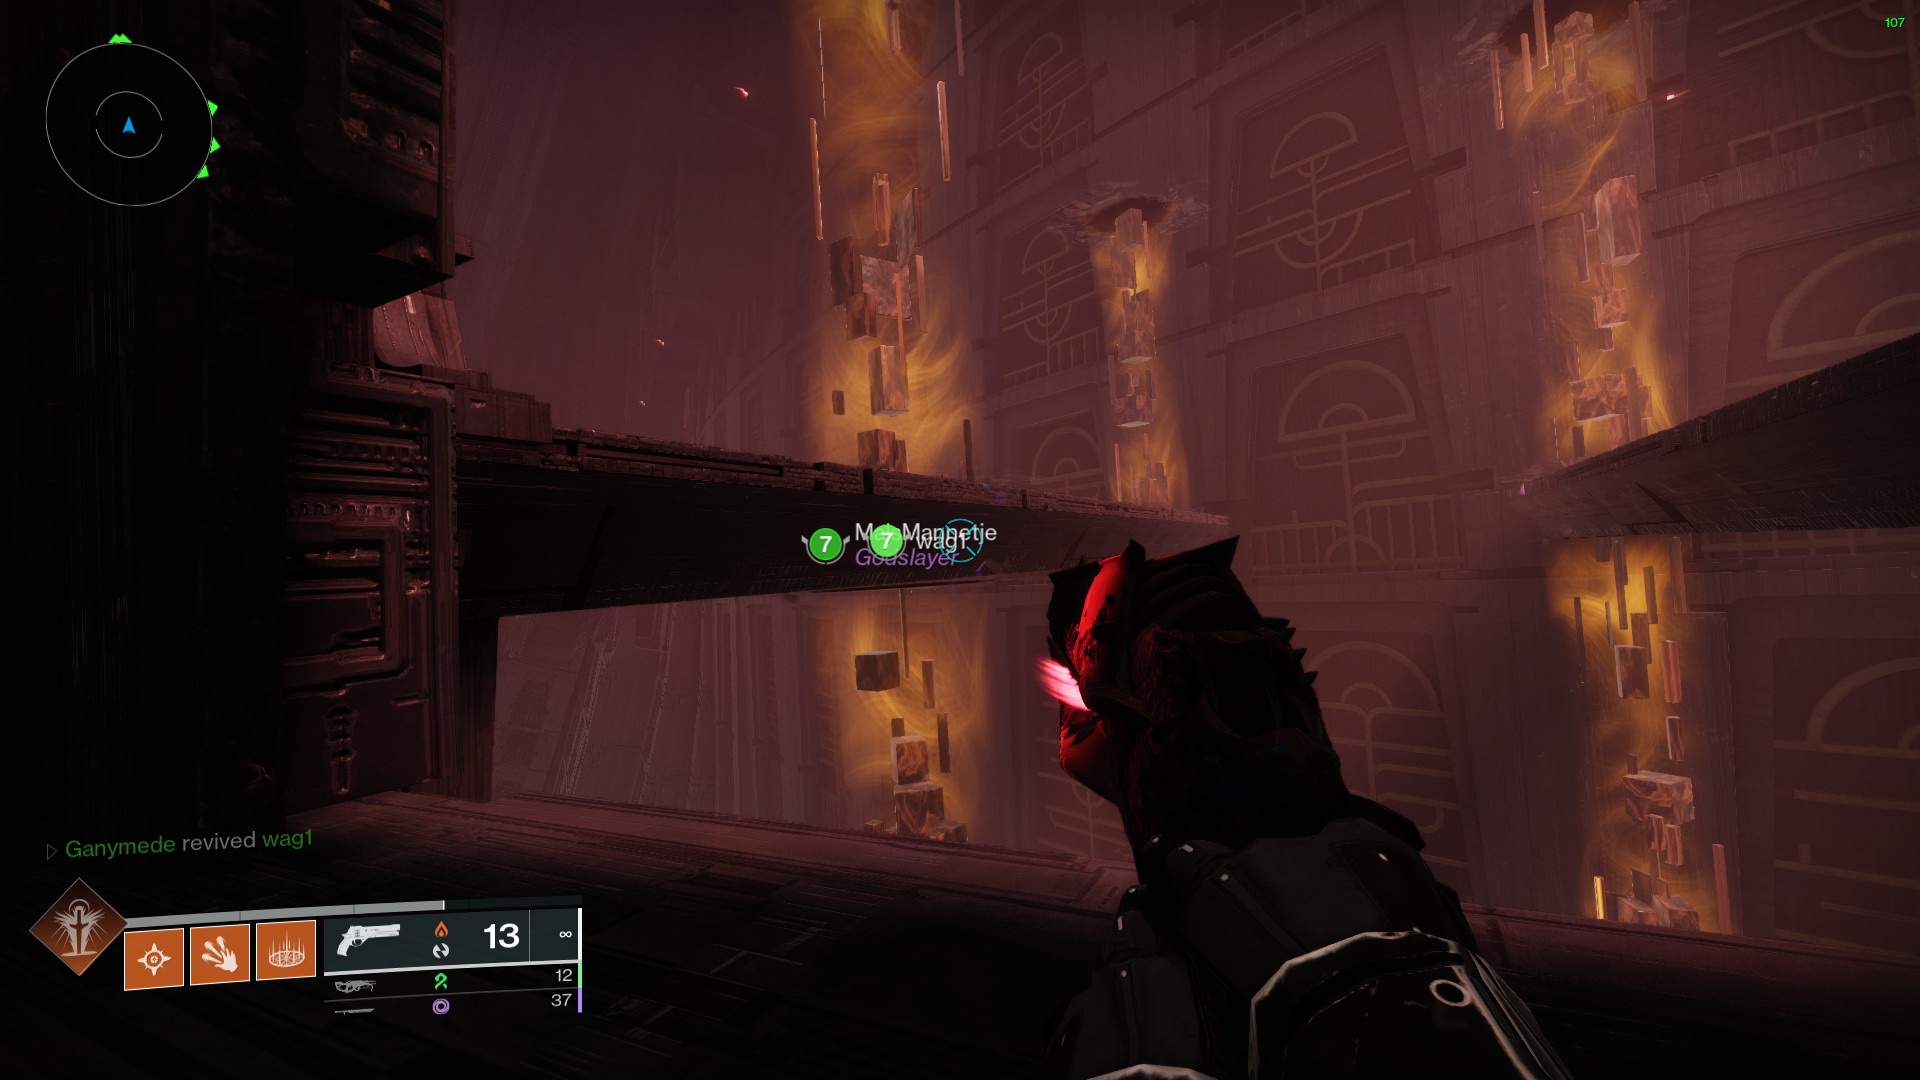
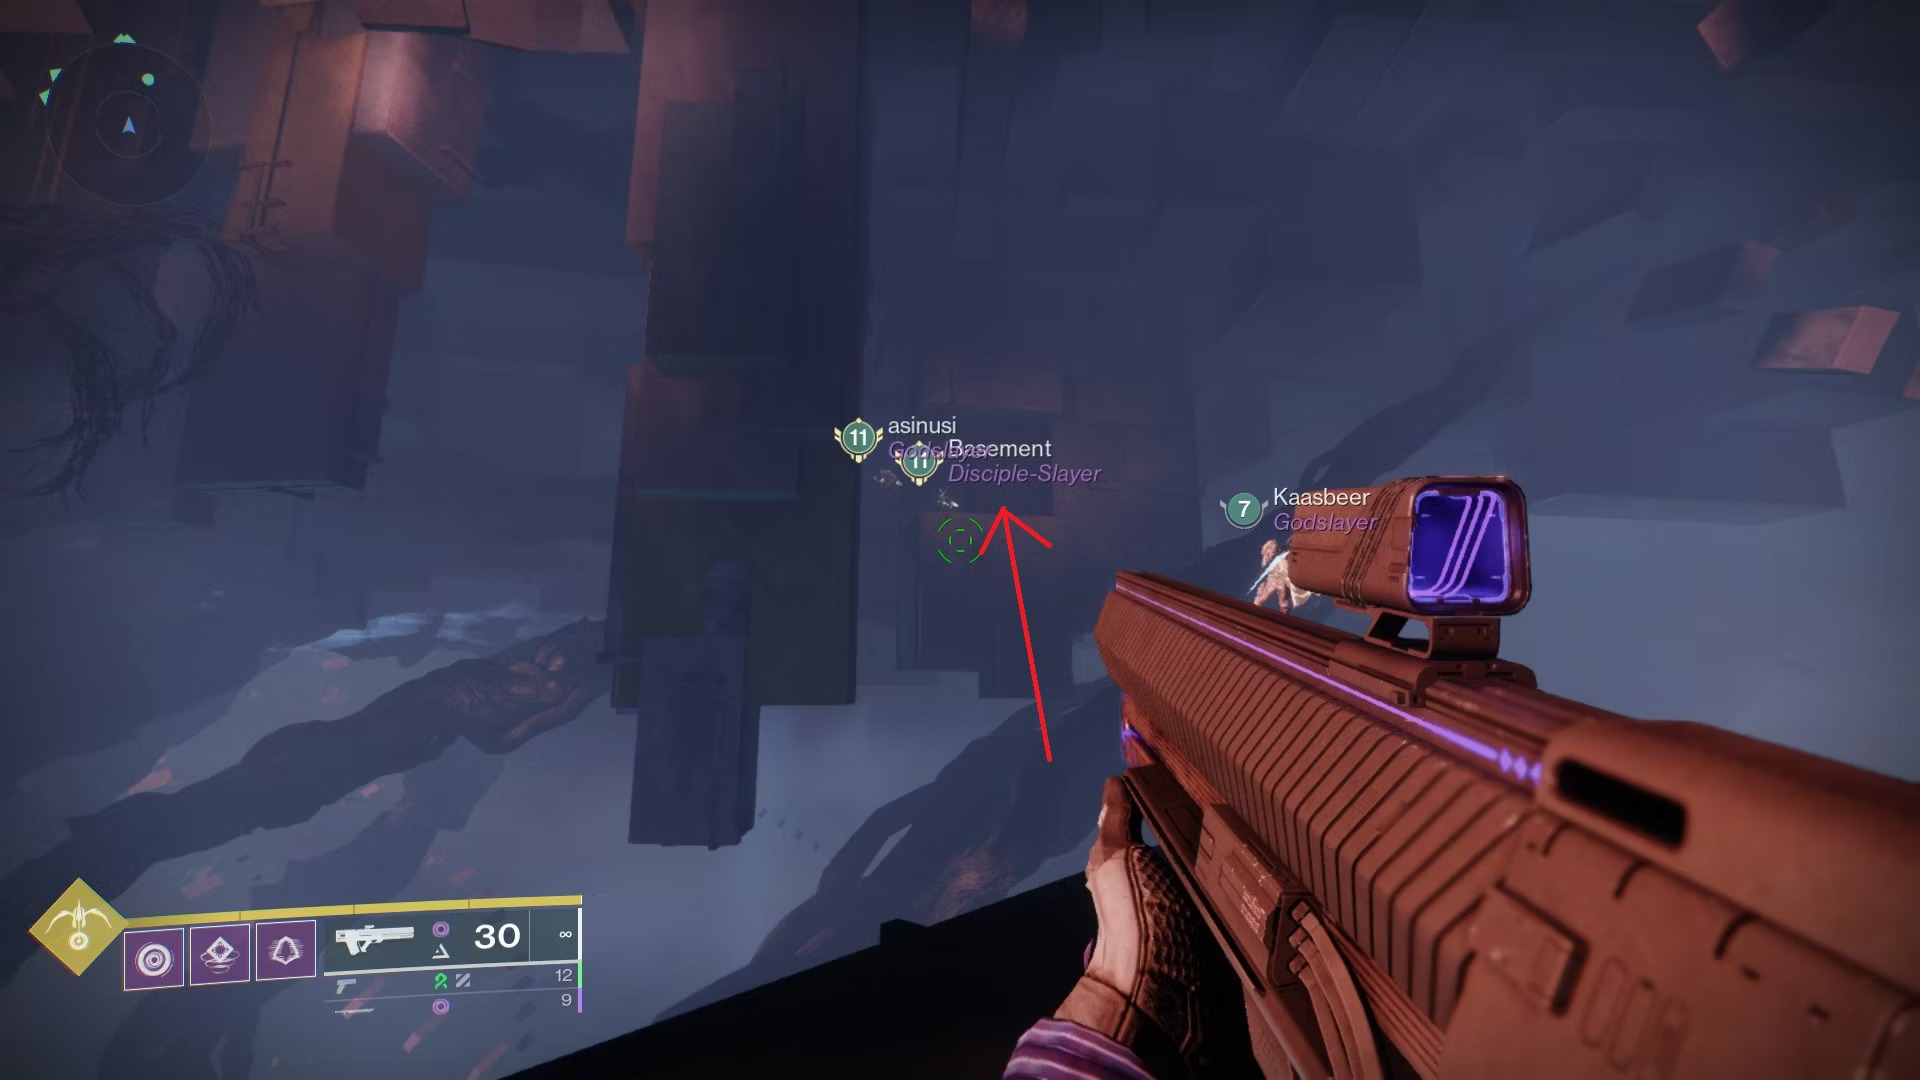
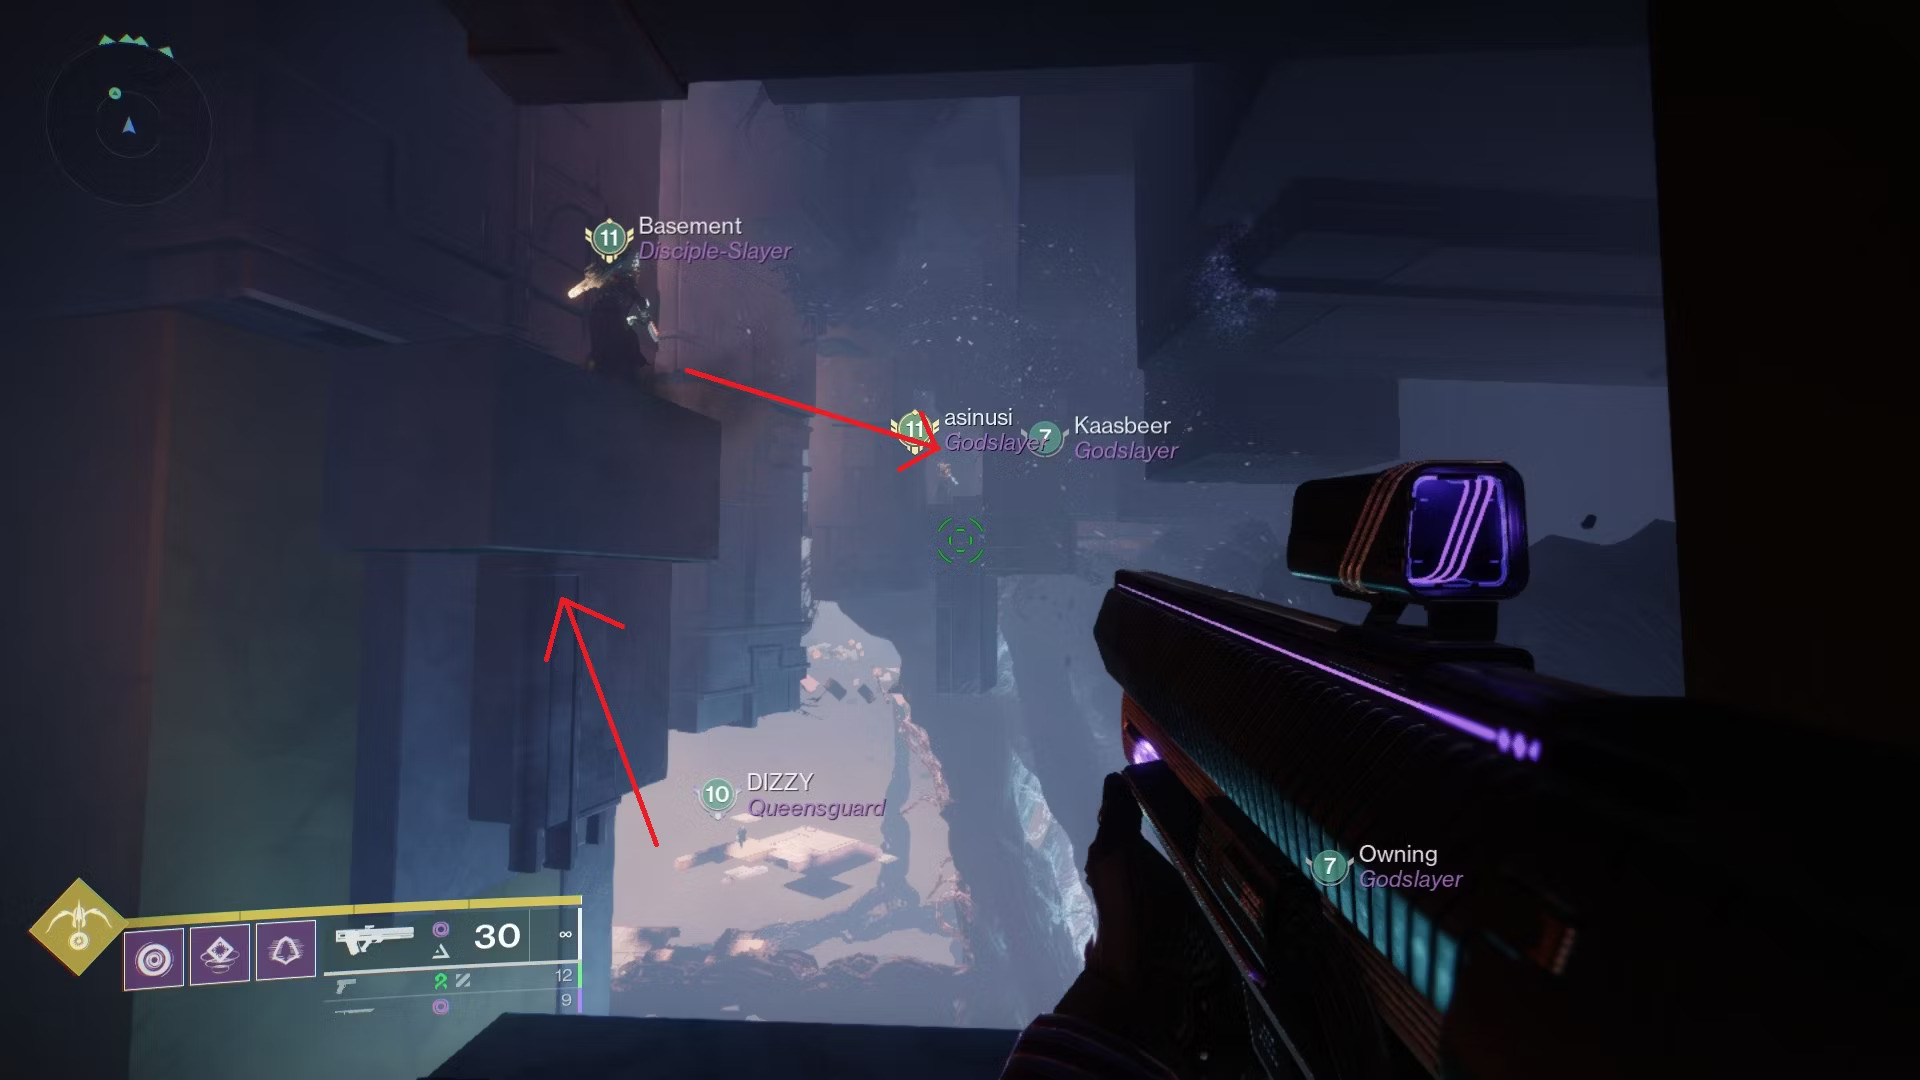
Between the second and third encounters is room four. Instead of going further to the right after passing through the substantial outer scaffolding shown above, jump to the upper-left platform. The fourth room is located on the wall across from the one you entered earlier (the two Guardians shown in the screenshot below are in this room).
Secret Chests
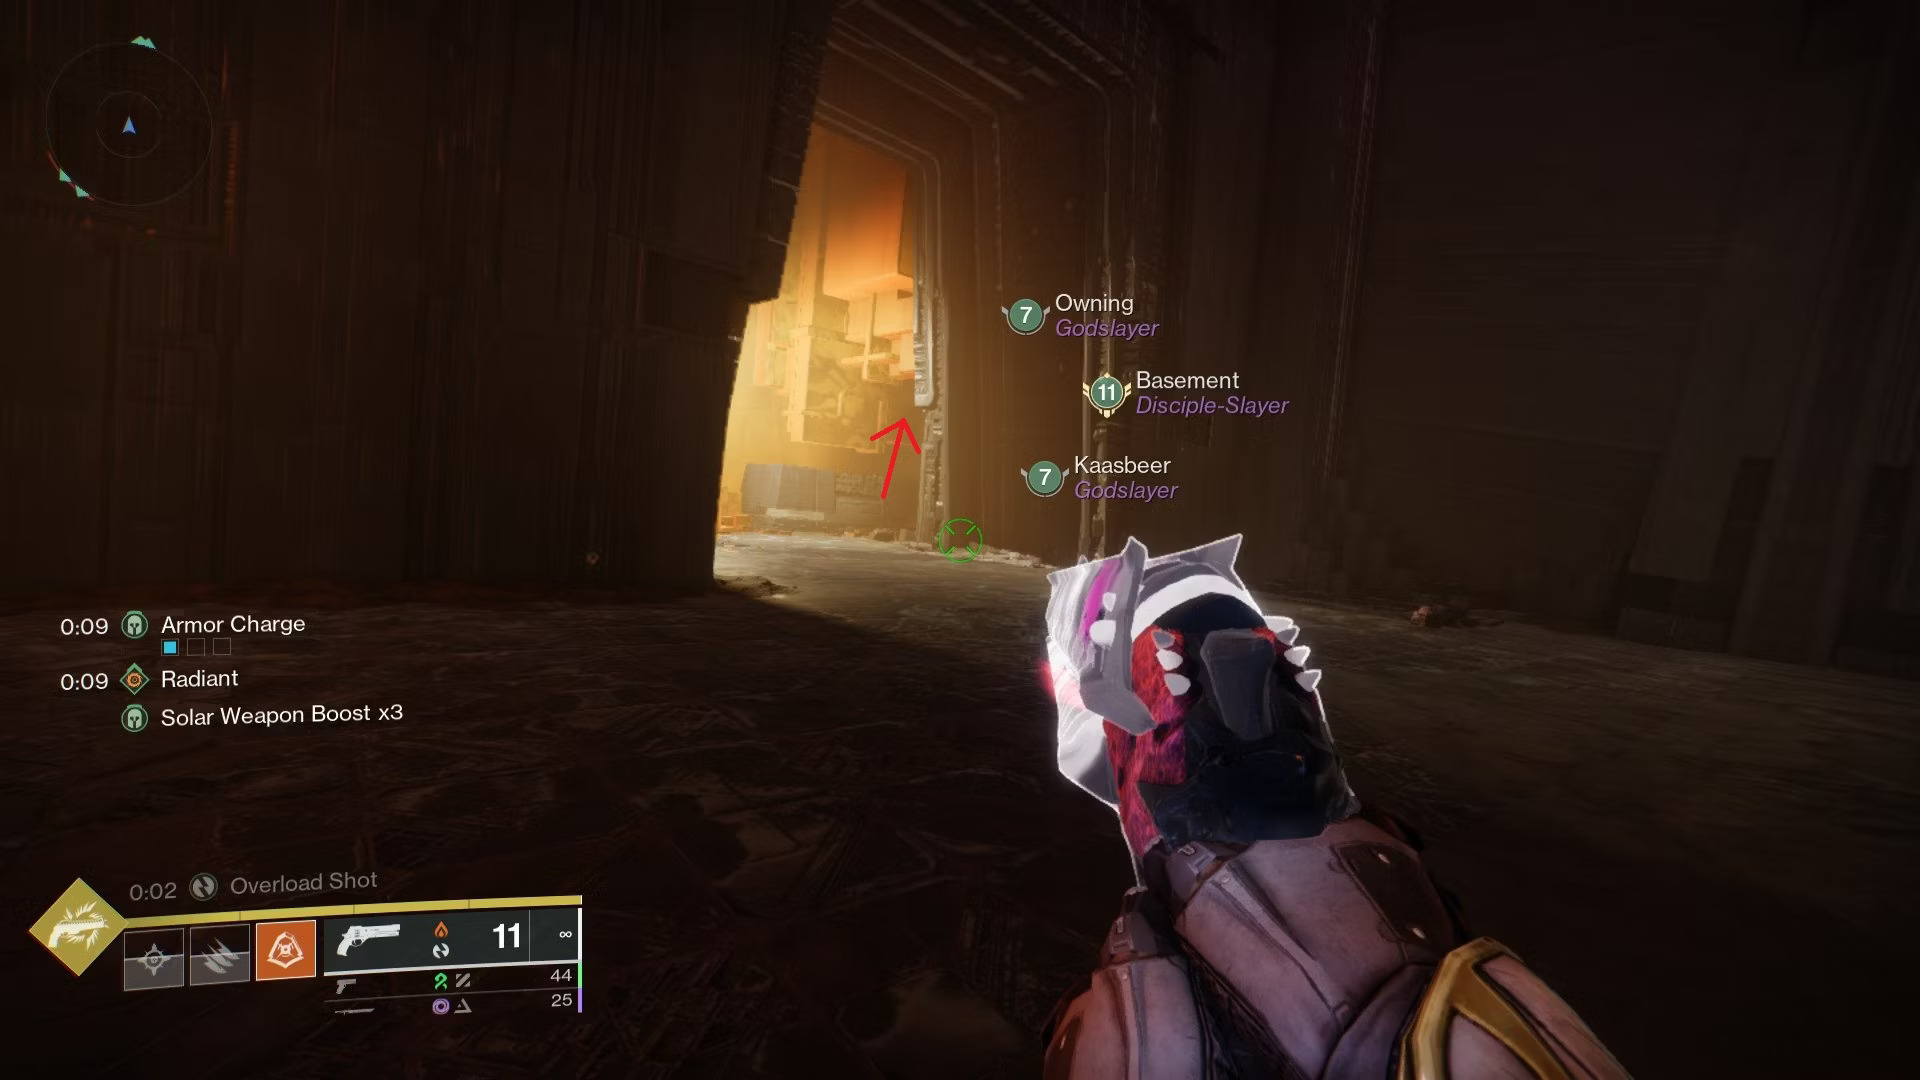
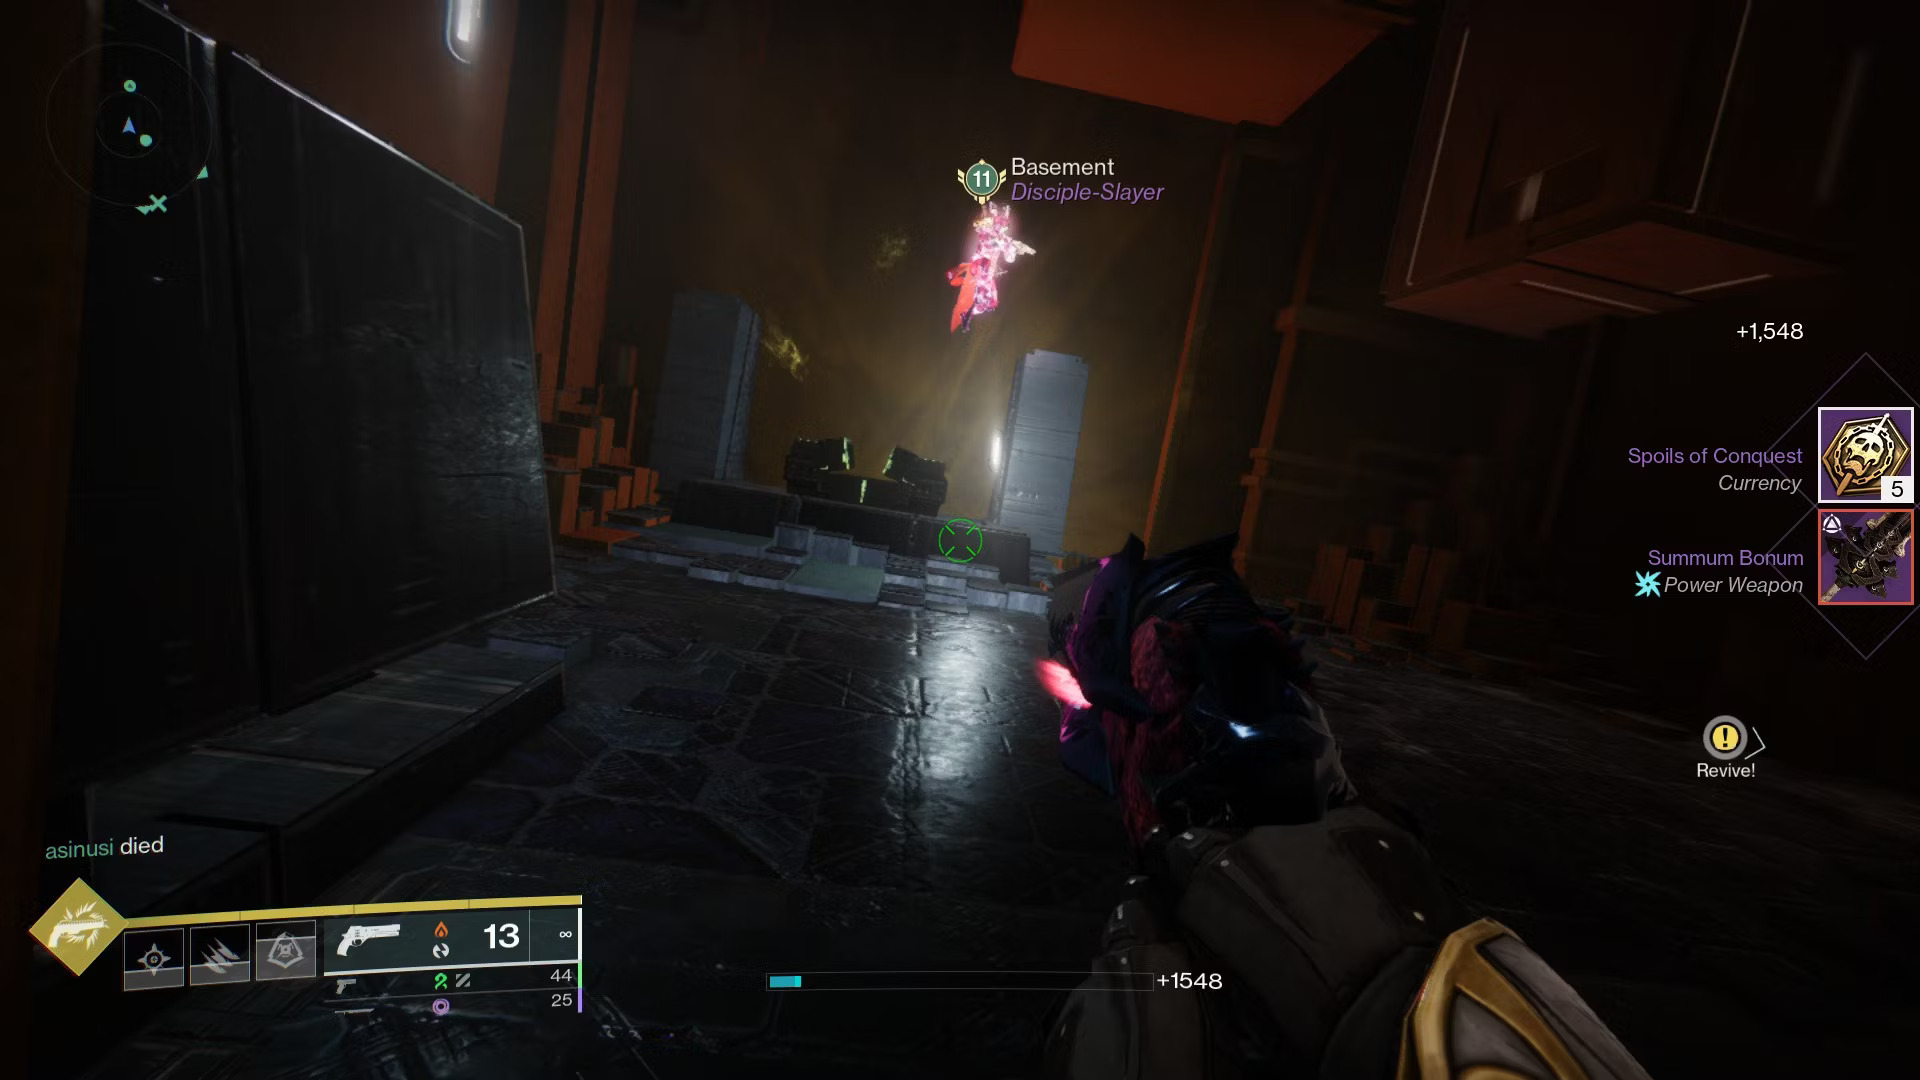
Secret Chest #1Proceed to the south of the arena to continue the Raid after taking out the Herald of Finality. Once you take the red elevator to the top, you will see several ledges within the dark building you are in. Continue climbing until your fireteam and you find yourself in a room with two "Omen of the Witness" Subjugator bosses and glowing orange stones affixed to the ceiling. After eliminating both of those mini-bosses, proceed to the area's back and make a left. There will be a short walkway excavated at the bottom of an entire wall made of yellow stones. To reach the first secret chest, crouch down and squeeze through the little opening.
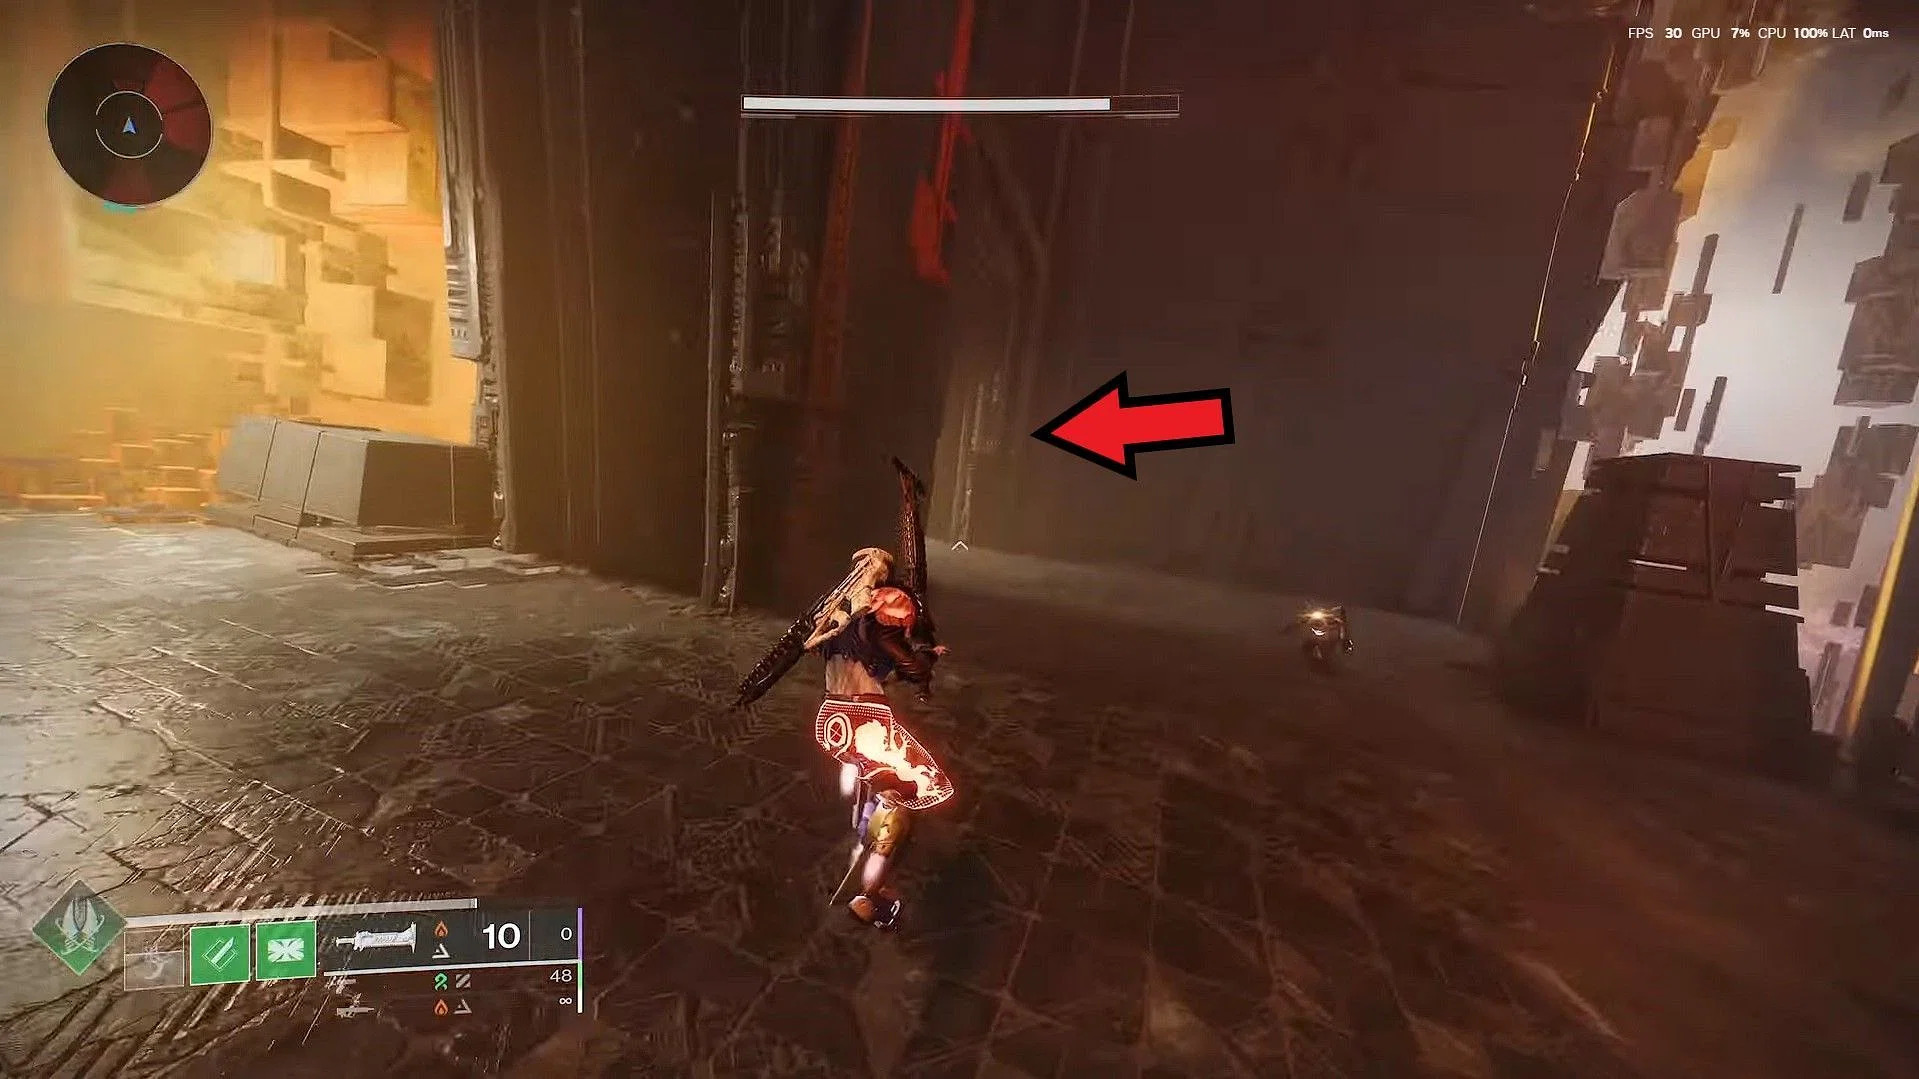
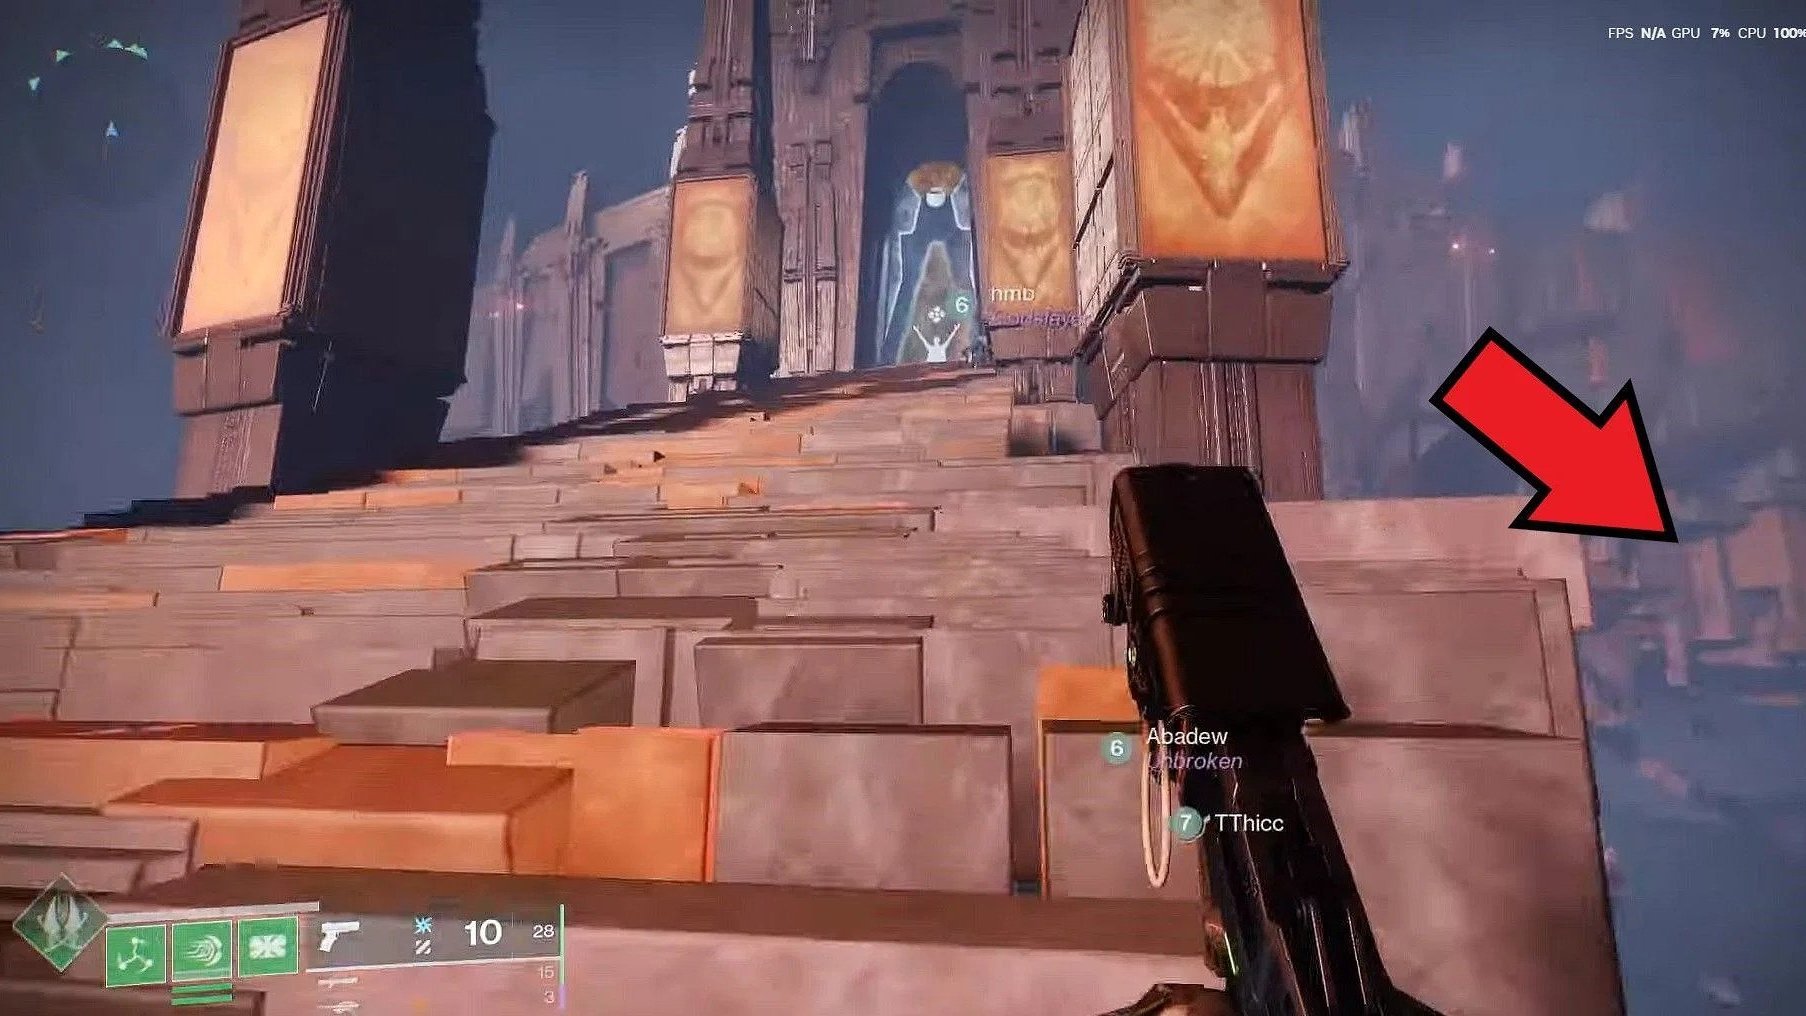
The second chest is in the long traversal area with block platforms and roots, right before the Witness boss fight. To locate the chest, stop in front of the massive entrance that leads to the boss battle and drop to your right. For a safer option, try jumping to one of the large platforms on the right or trying to stand on one of the tiny ledges that are fastened to the wall. In either case, ultimately you will find the secret chest by looking for a hole on the bottom-right wall from the enormous door.
Monolith Approach - Traversal
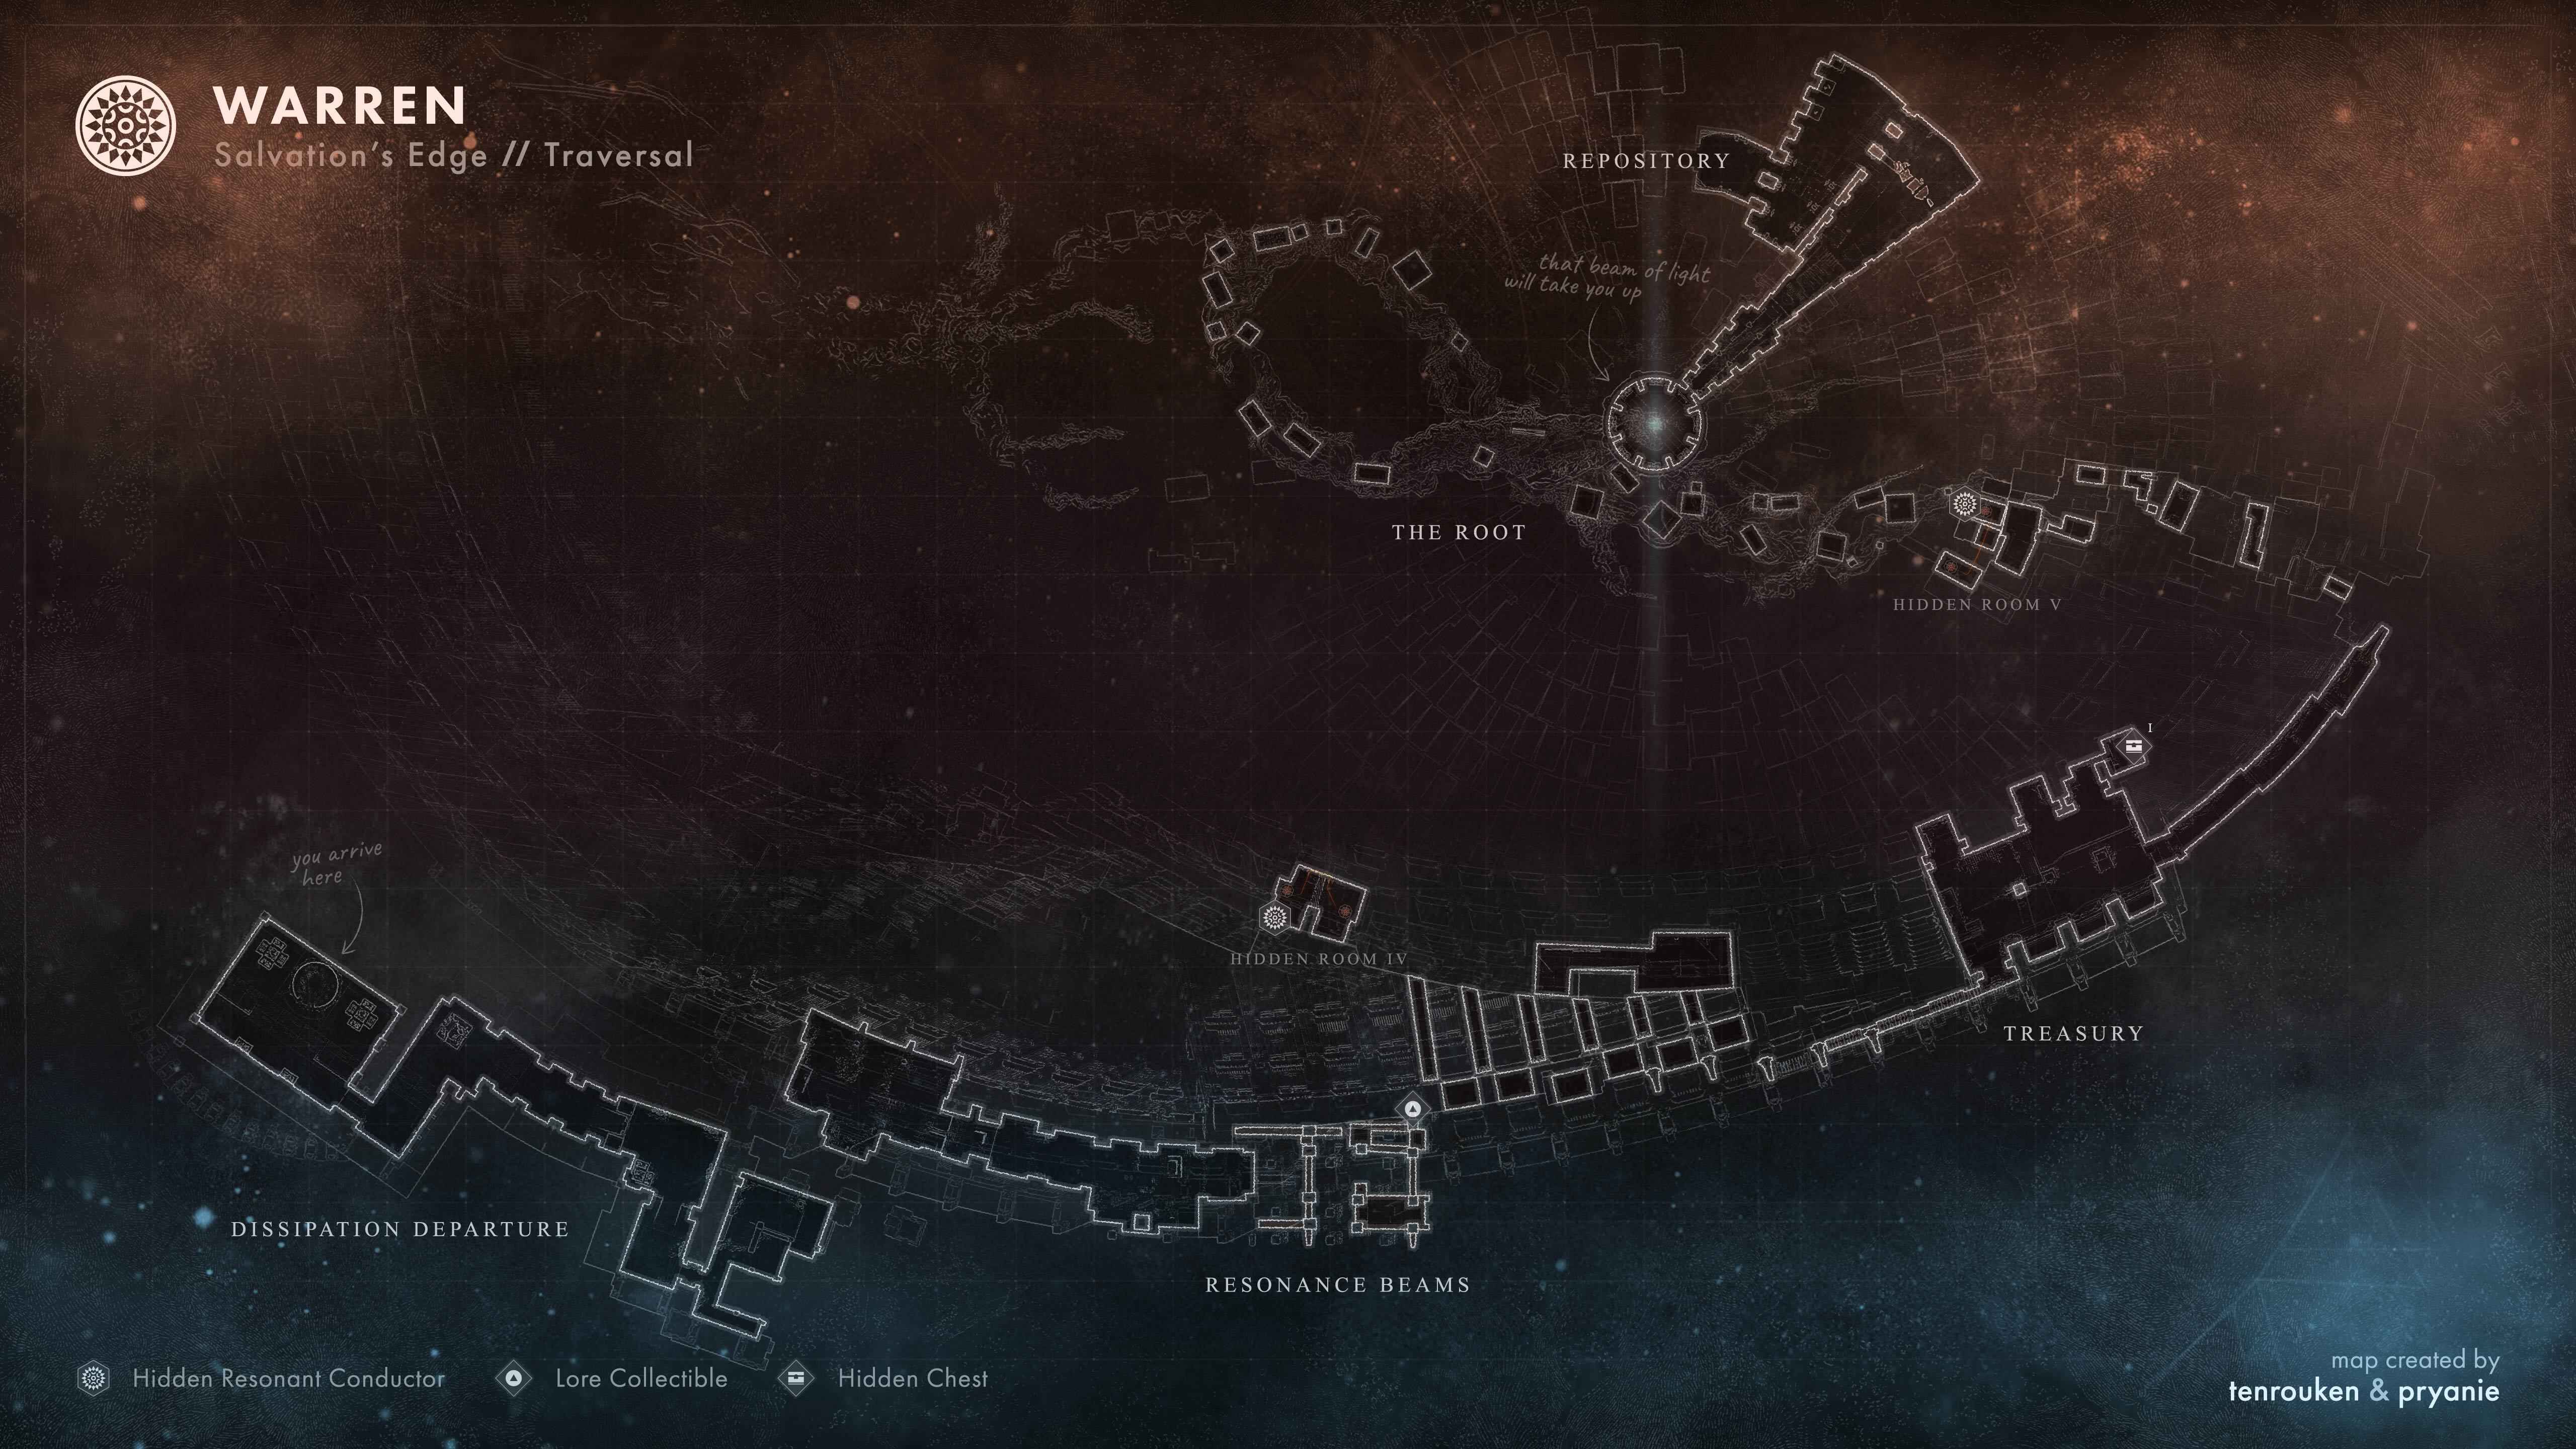
As soon as you load into the raid, you must run up the sides of structures to reach the first encounter. The path you should take, as well as the deepsight chambers and lore items, are shown on the map below:
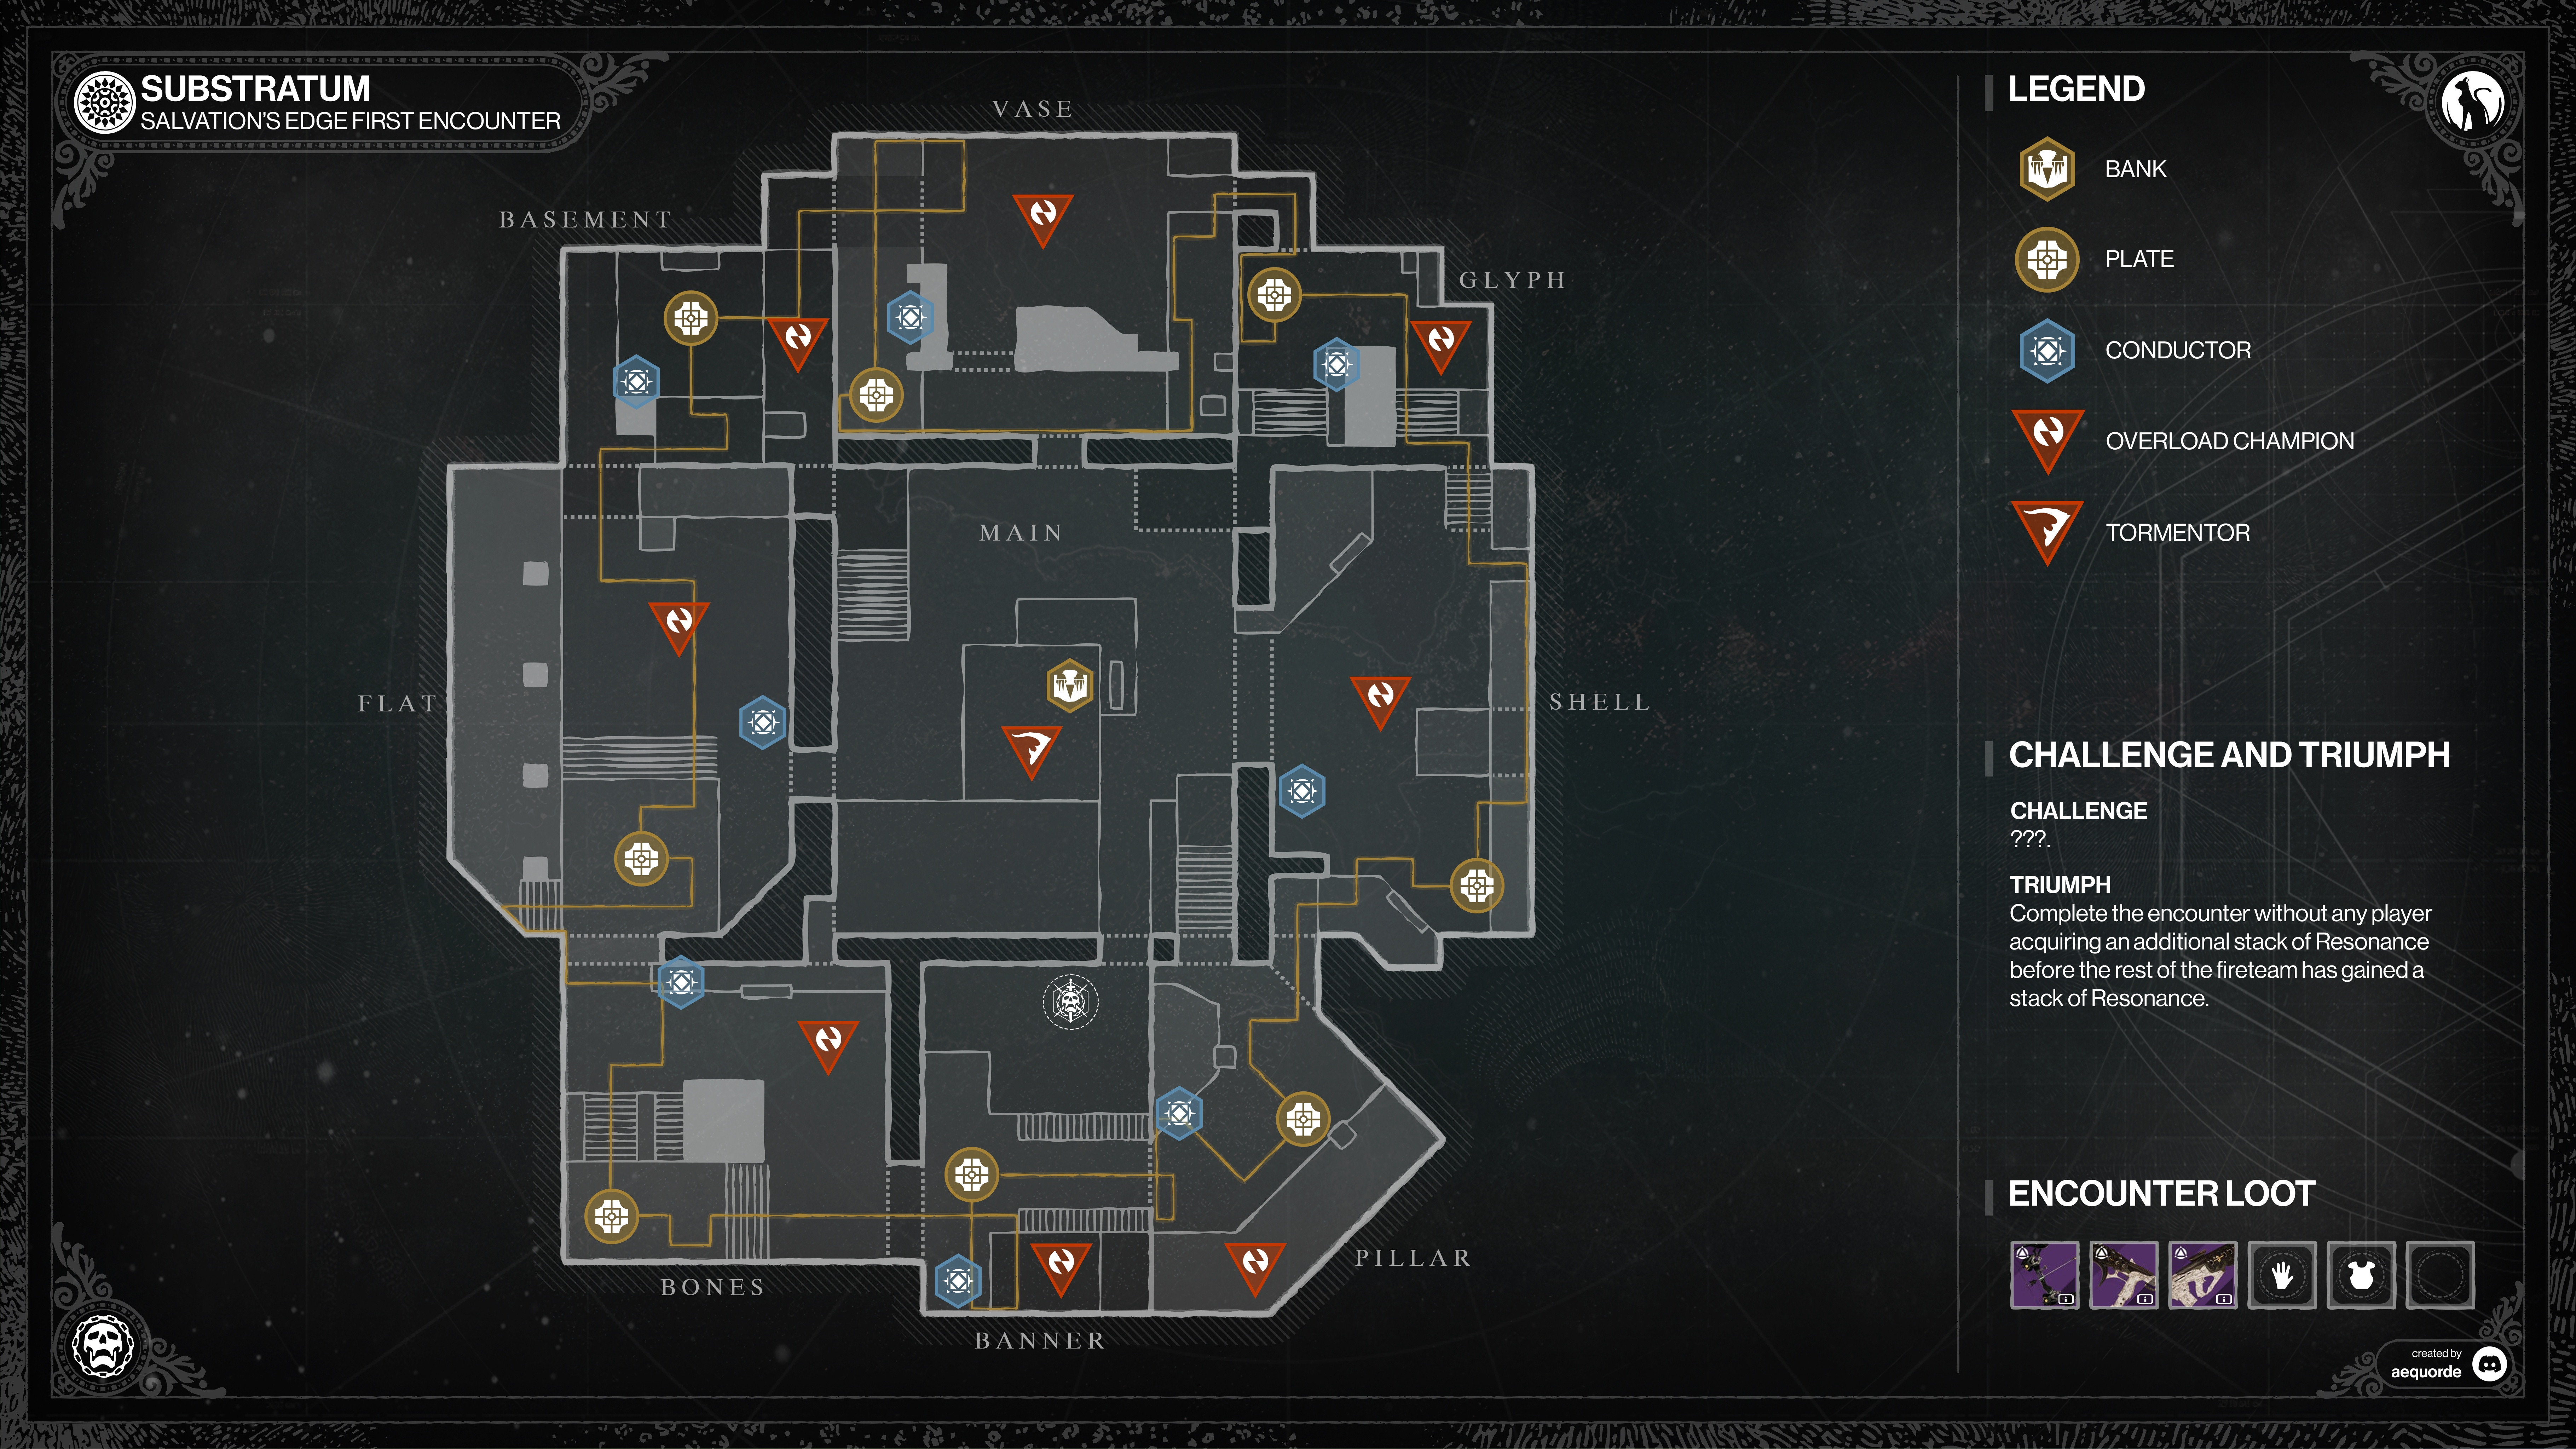
Substratum
Loadouts:
- Ad-Clear weapons.
- Anti Overload Weapons
- Macrocosm helps with dealing with Tormentors and Omens.
- Ultimates are up to you, certain ults like celestial golden gun can help with killing tormenters omens, and other minibosses.
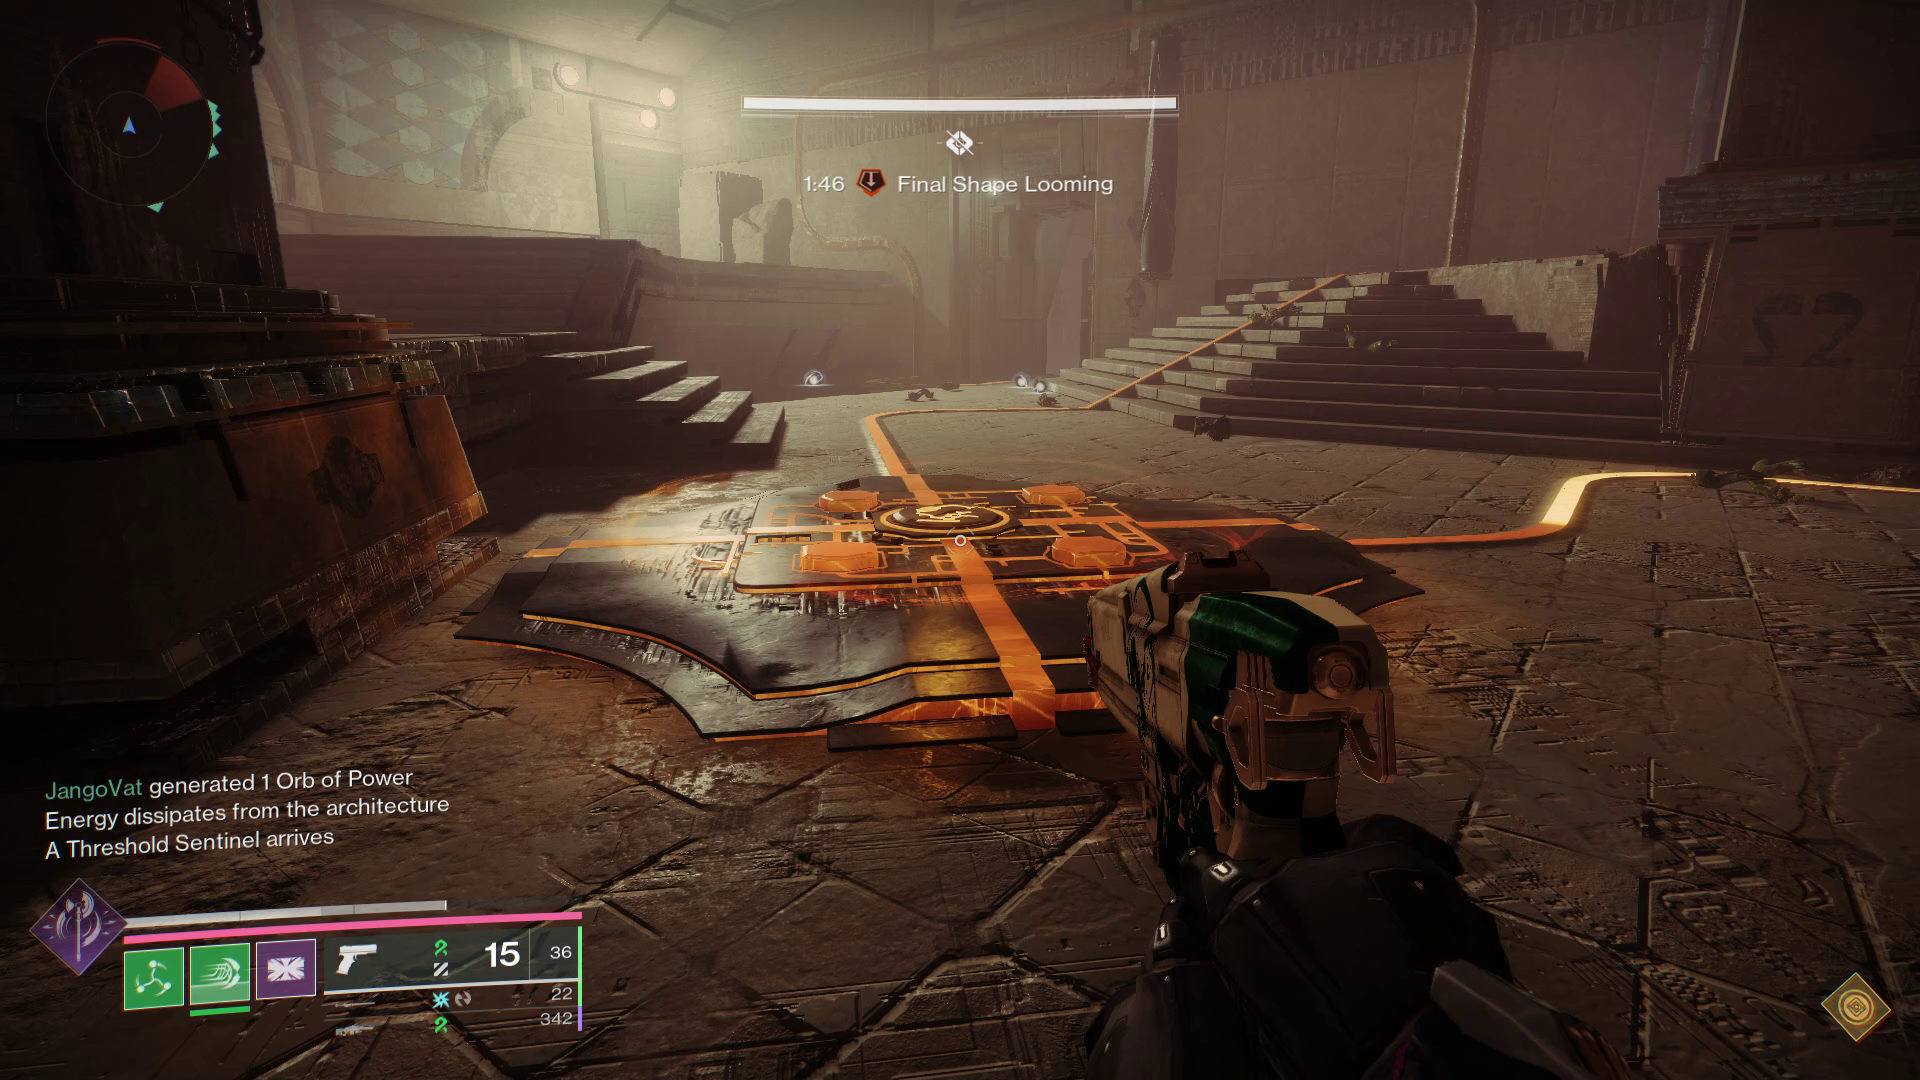
How to Activate Charging Plates
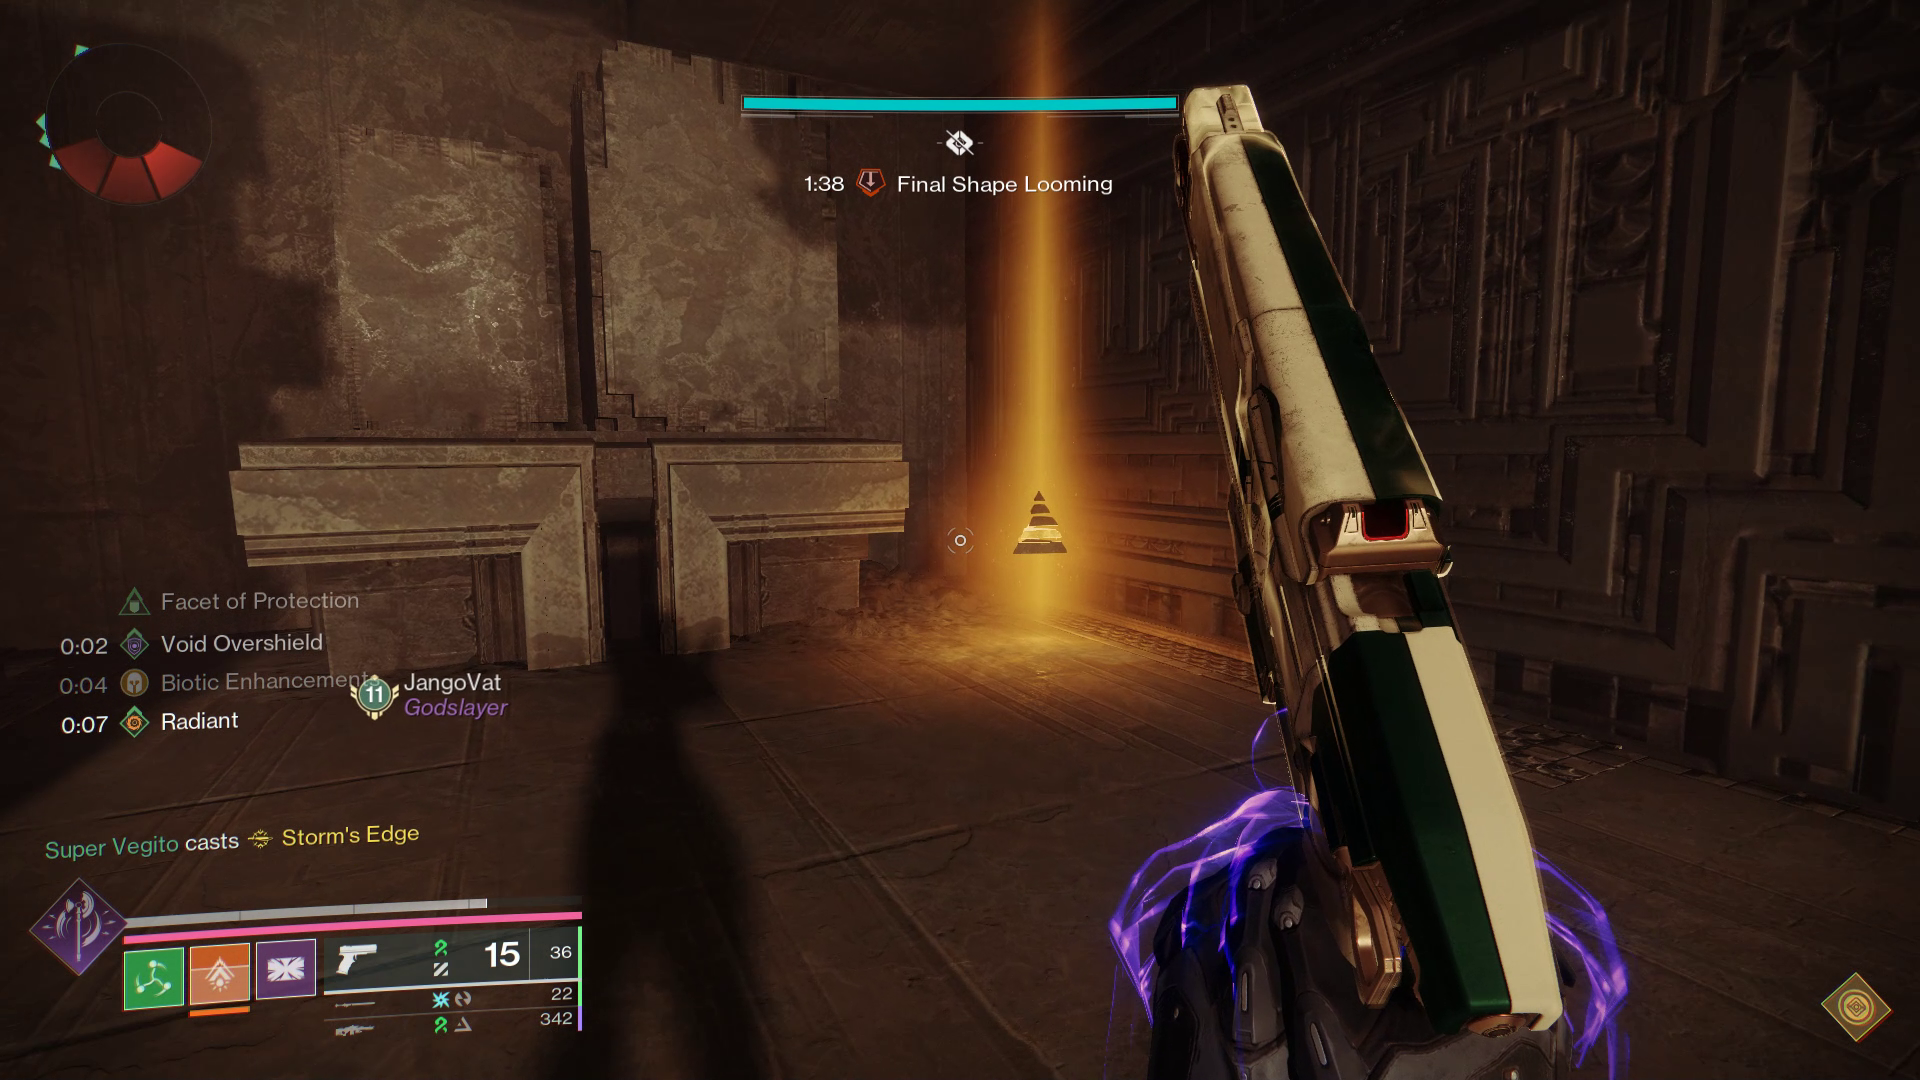
In almost all the encounters of the raid, there are three or four pairs of plates, each of which is wired to the other pairs. One of these plates will start to glow when you unlock it, which is typically accomplished by eliminating a miniboss of some sort like a Tormentor or an Omen. Stepping on a glowing plate will transfer its energy to its connected pair across the wire.
Do not step on the plate too early or too late as it will result in the circuit being disrupted. The plates will be locked and a miniboss will spawn, which you must kill to unlock them again. So you have to time it, look for the pulse entering into the plate via the circuit and once the plate glows, step in and step out, dont stay on it for too long either as that can disrupt the plate as well. If done correctly, you will rebound the energy back to the original plate and create Resonance nearby.
How to Create Resonance Pickups
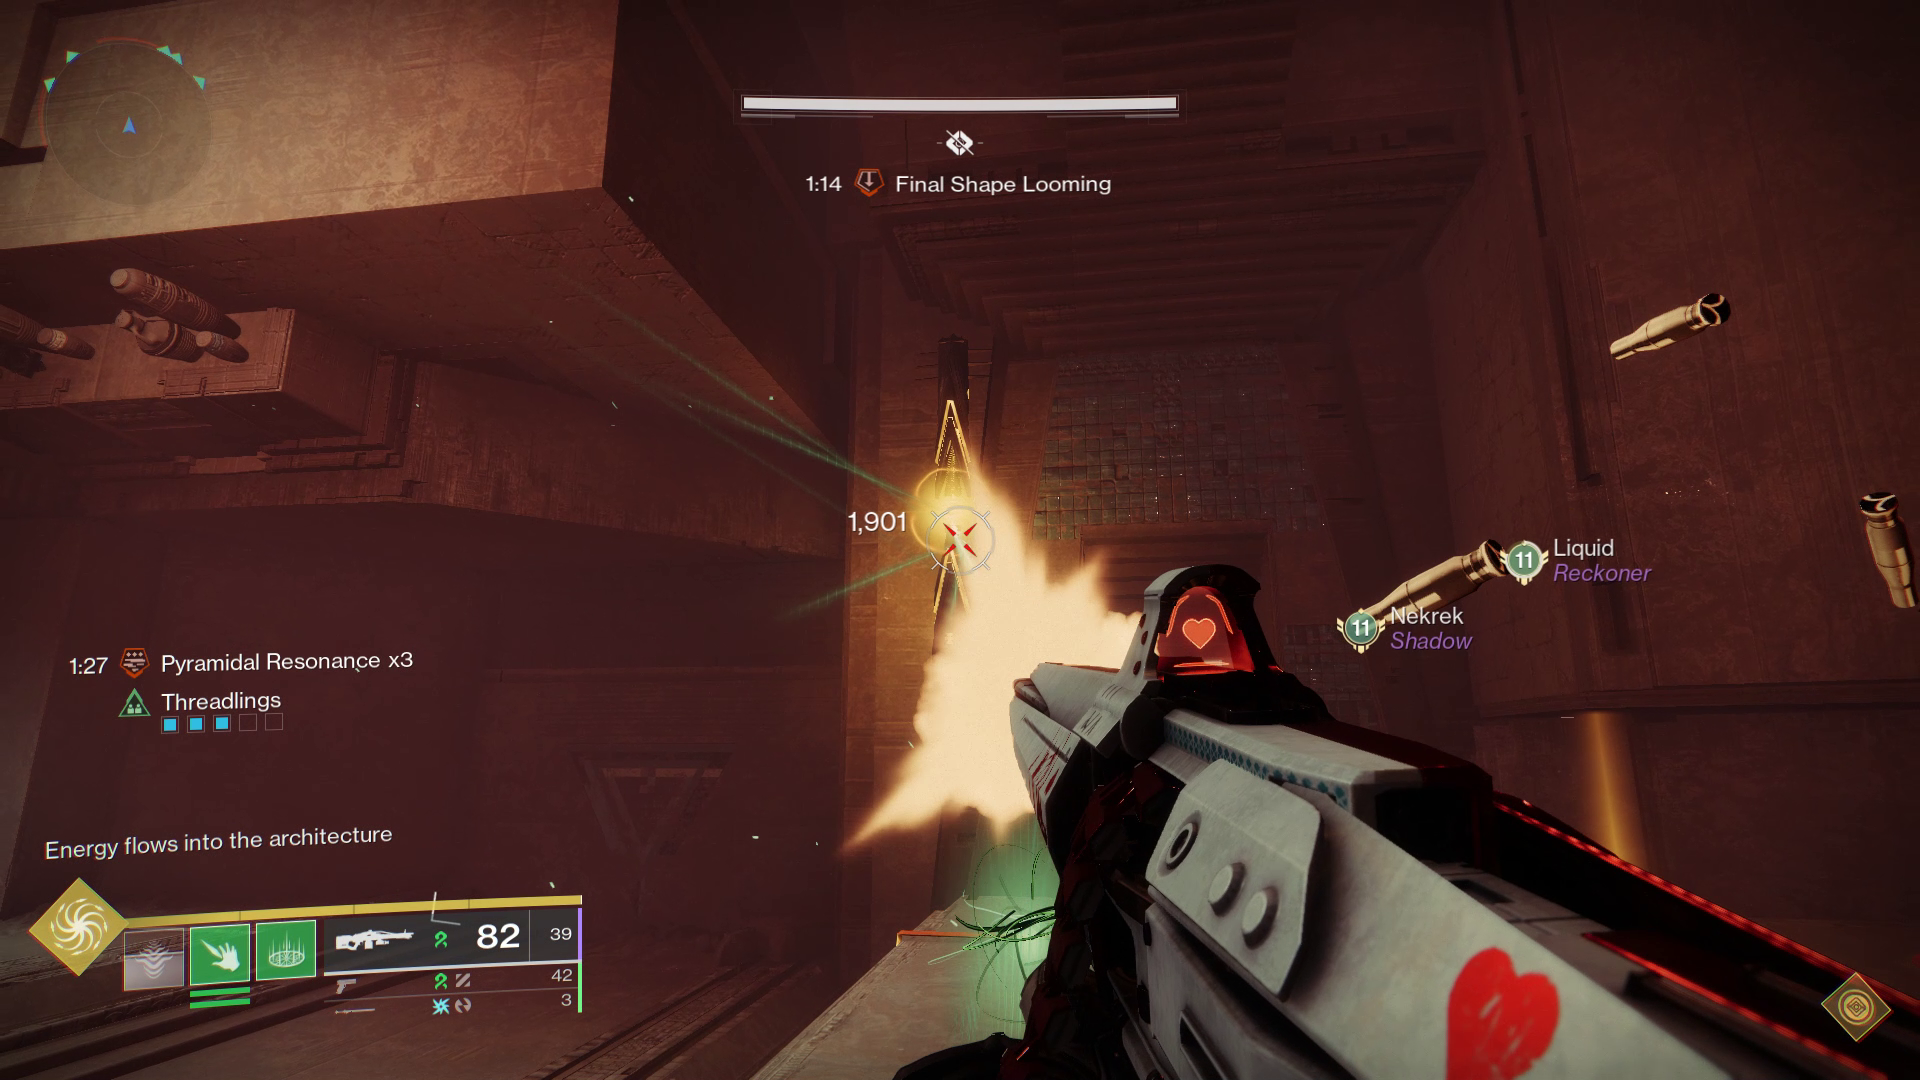
Throughout Salvation's Edge, you will utilize the core mechanic of gaining Resonance buffs based on its shapes. Pyramidal resonance is the only resonance to spawn in the first encounter and it takes the shape of a triangle. Circles (Spherical Resonance) are added in encounter two, and you will also be able to access ones shaped like a square (Hexahedron Resonance) in encounter three.
Picking up a resonance will give you the resonance debuff with a timer, around a minute and a half. If you do not get rid of it by the timer ends, you die. If you pick up another resonance, the resonance will stack. You can only carry 3 stacks of resonance, picking up a 4th kills you instantly. If you pick up a resonance of a different shape, the shape will overwrite the previous shape you had while increasing the stack of resonance you have. For example:
- You pick a triangle resonance: 1 x Pyramidal Resonance
- You then pick up a circle resonance: 2 x Spherical Resonance
- You then pick up a square resonance: 3 x Hexahedron Resonance
- You pick up any more resonance: YOU DIE.
How to Activate Conduits
Conduits may occasionally be found close to charging plates; these conduits may in an activated or dormant or locked state. The same energy that activates the plate must be supplied to the conduit while it is dormant. A conduit will display a shape (square, circle, or triangle) that indicates the type of resonance required to activate it when it is dormant. The Resonance bank, which you must interact with to move on to the next stage of the encounter, is spawned in by activating numerous conduits.
A conduit must be carefully activated, so there are a few things you must perform to activate it:
- Send energy to the conduit plate via the wire by having a fireteam member step on the plate that is not linked to the conduit.
- With the appropriate Resonance shape buff, shoot the shape in the conduit. You know you did it correctly if the shape in the conduit glows.
- Once the glowing energy is present, step on the plate when the pulse enters it to activate the conduit.
When the conduit is fired correctly, it will grow and flash bright gold, and the shooter will lose one stack of resonance. But all of the resonance produced by that plate pair will vanish if the conduit is locked. Thus, be careful to get the additional resonance before your allies (never more than three or you will die). The bank will appear beneath The Witness' time bomb once you have loaded three conduits to the brim with energy.
How to Stop and Reset the Timer
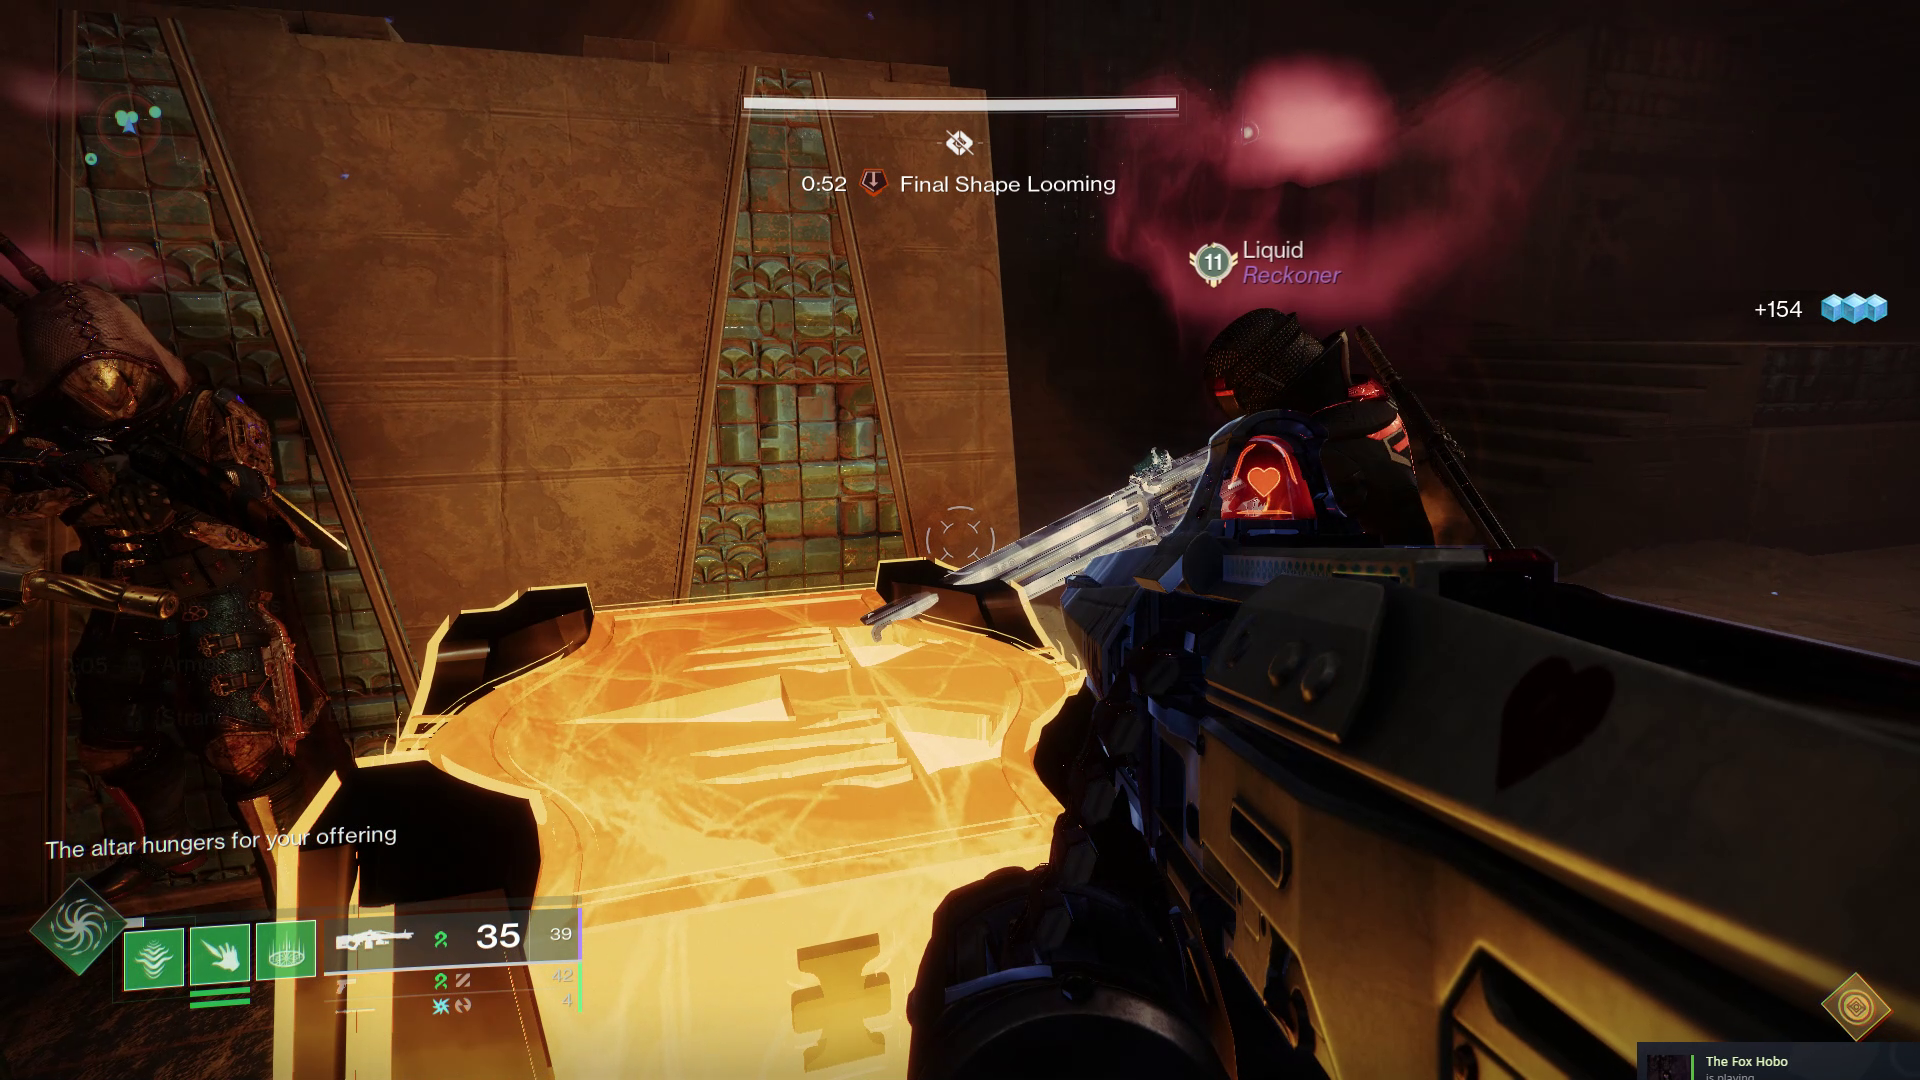
There is a wipe timer on every encounter in this raid, and it is shown at the top of the screen. You will die and have to redo the encounter if you do not finish it before the timer goes off. You will have to reset or prolong the timer to finish the encounter. During the first three encounters, you will do it with the bank. You must transfer all of the extra Resonance you gathered before to activating the conduits into the bank when it respawns. The timer will extend when you deposit your Resonance.
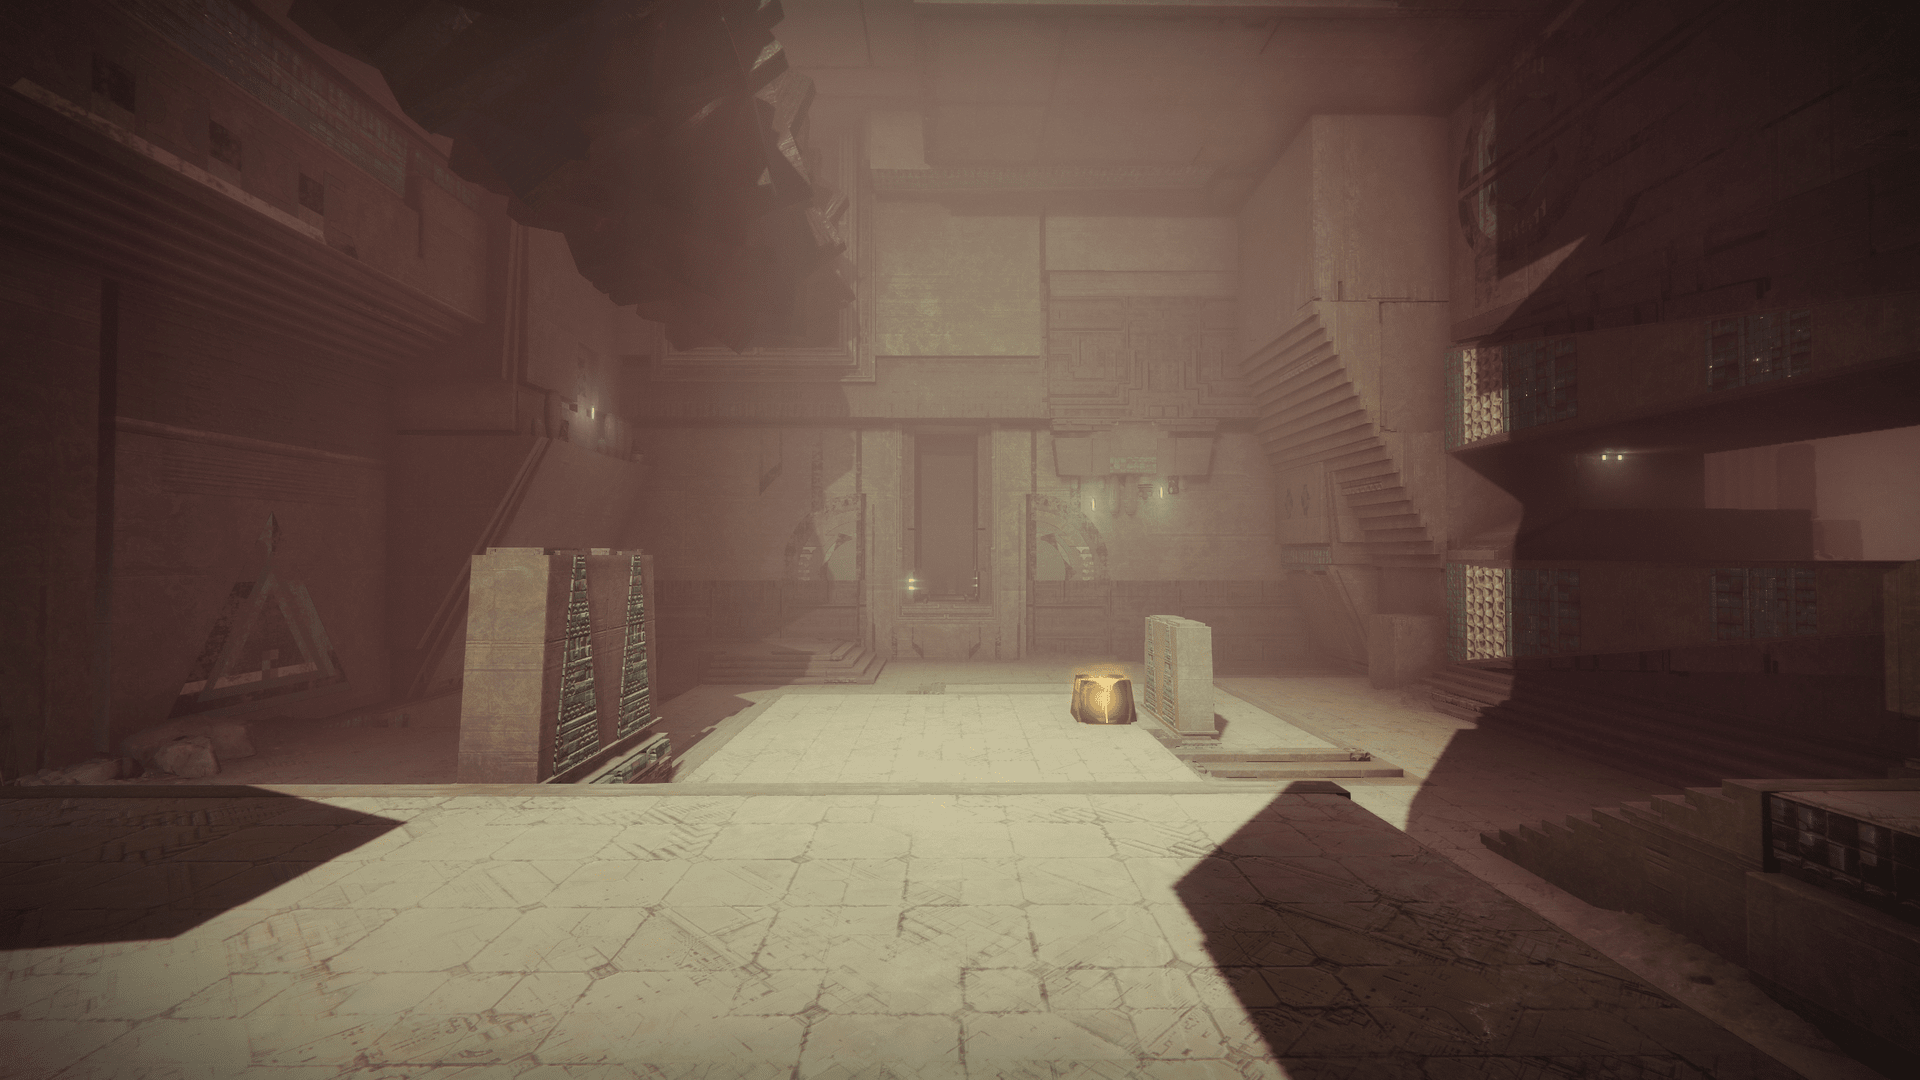
Substratum is carried out on a 9x9 grid with a distinct room in each grid. You will notice a triangle (Resonance) floating above the floor in the center of the space. Pick up it and deposit it in the bank, the box that is directly in front of you. One of The Witness' several hands will appear in the central chamber once the Resonance has been banked. Additionally, two arbitrary doors will open, letting Vex Supplicants—the ones who blow up—hurry into the area.
Clearing the Rooms and Opening Doors
For the duration of the encounter, you should divide into two groups of three. Each side should designate a lead player, and the other players should follow this individual wherever they go. Deal with the supplicants and give one team instructions to enter the first supplicant room and the other team instructions to enter the second. Since the party is divided, you will have to navigate through several rooms together because doors connect one area to the next.
Tip: For the 2 starting doors that open, we noticed that one of the doors that open is always in the north, south, east or west direction, and the second door that opens is in one of the four conrners of the central room (North-east, North-west, South-east, South-west directions).
Several Vex will spawn in the first chamber you visit, so kill them before heading straight to the next available room. A Quantum Minotaur and several other Vex can be found here. Take them all out. A Vex Hydra will be sent to the other team's second room when the Minotaur dies in your room. It will send a Vex Hydra to your team's second room when the other team destroys that Quantum Minotaur. Killing the hydra opens a door to the next room for the opposite team. One squad will encounter an Overload Minotaur Champion known as the Witness's Devotee in the third room. In the main chamber, there is a Tormentor named the Threshold Sentinel that appears when you kill the Champion. The fireteam should head back to the main chamber so they can kill the Tormentor. A text stating that "energy flows into the architecture" will appear after the Tormentor dies. This indicates the two plate pairs and conduits have been unlocked, and one of them will be active.
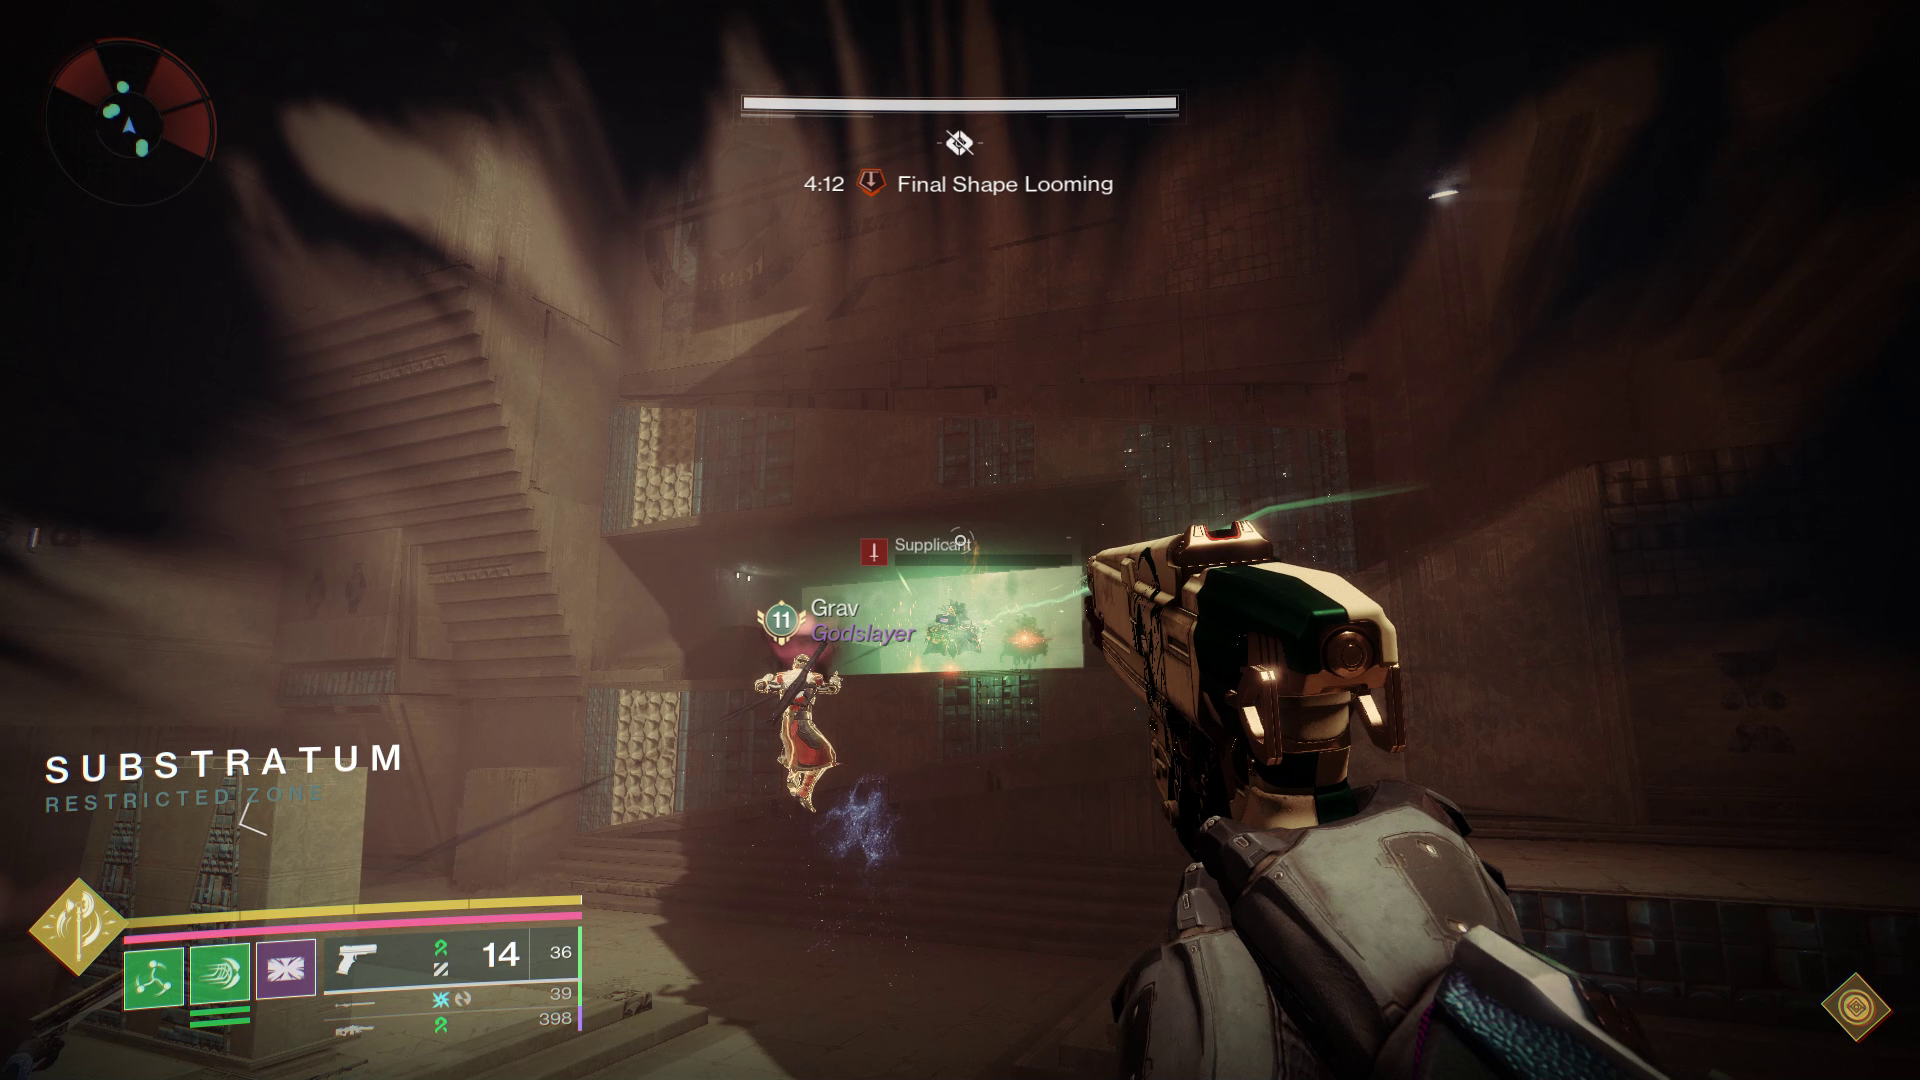 One of the rooms will open after you have cleared the enemies in
the central room.
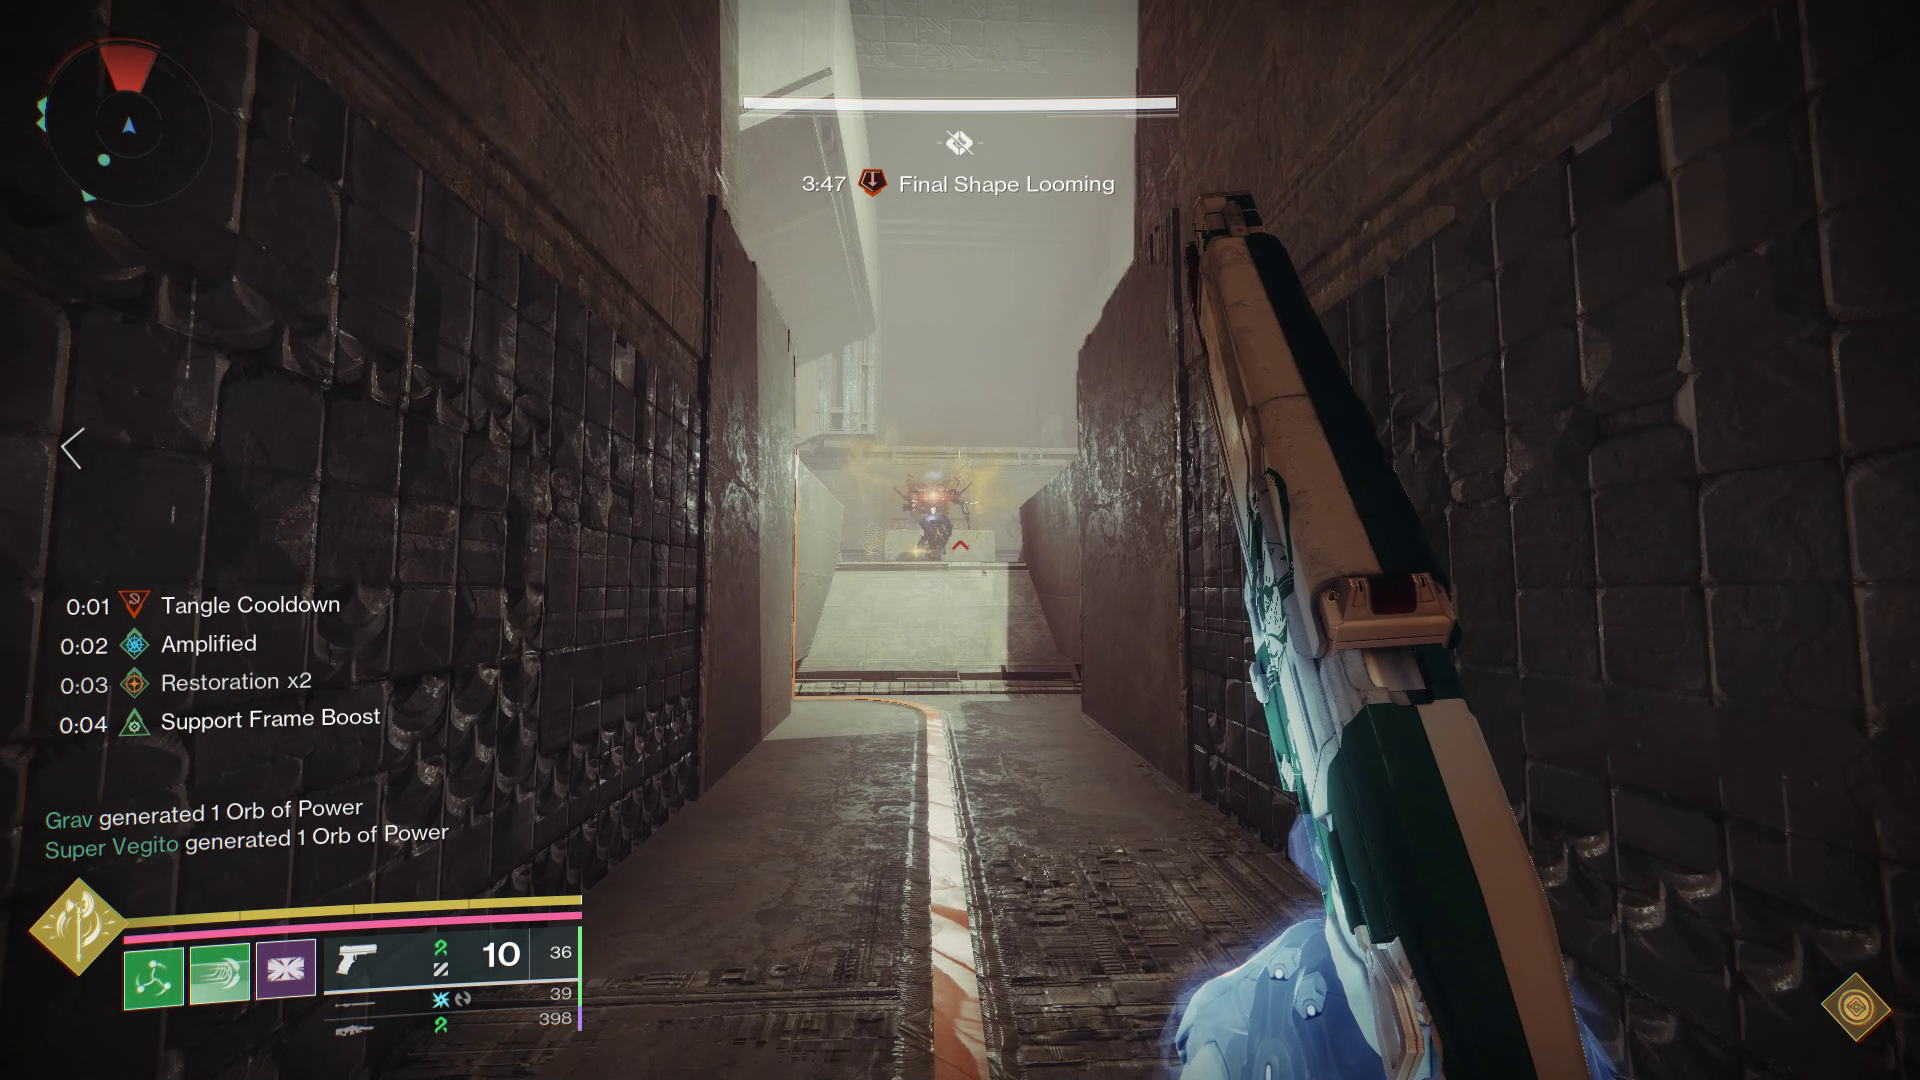 Kill the Overload Champion to spawn the tormentor in the central
room.
Charging the Conduits
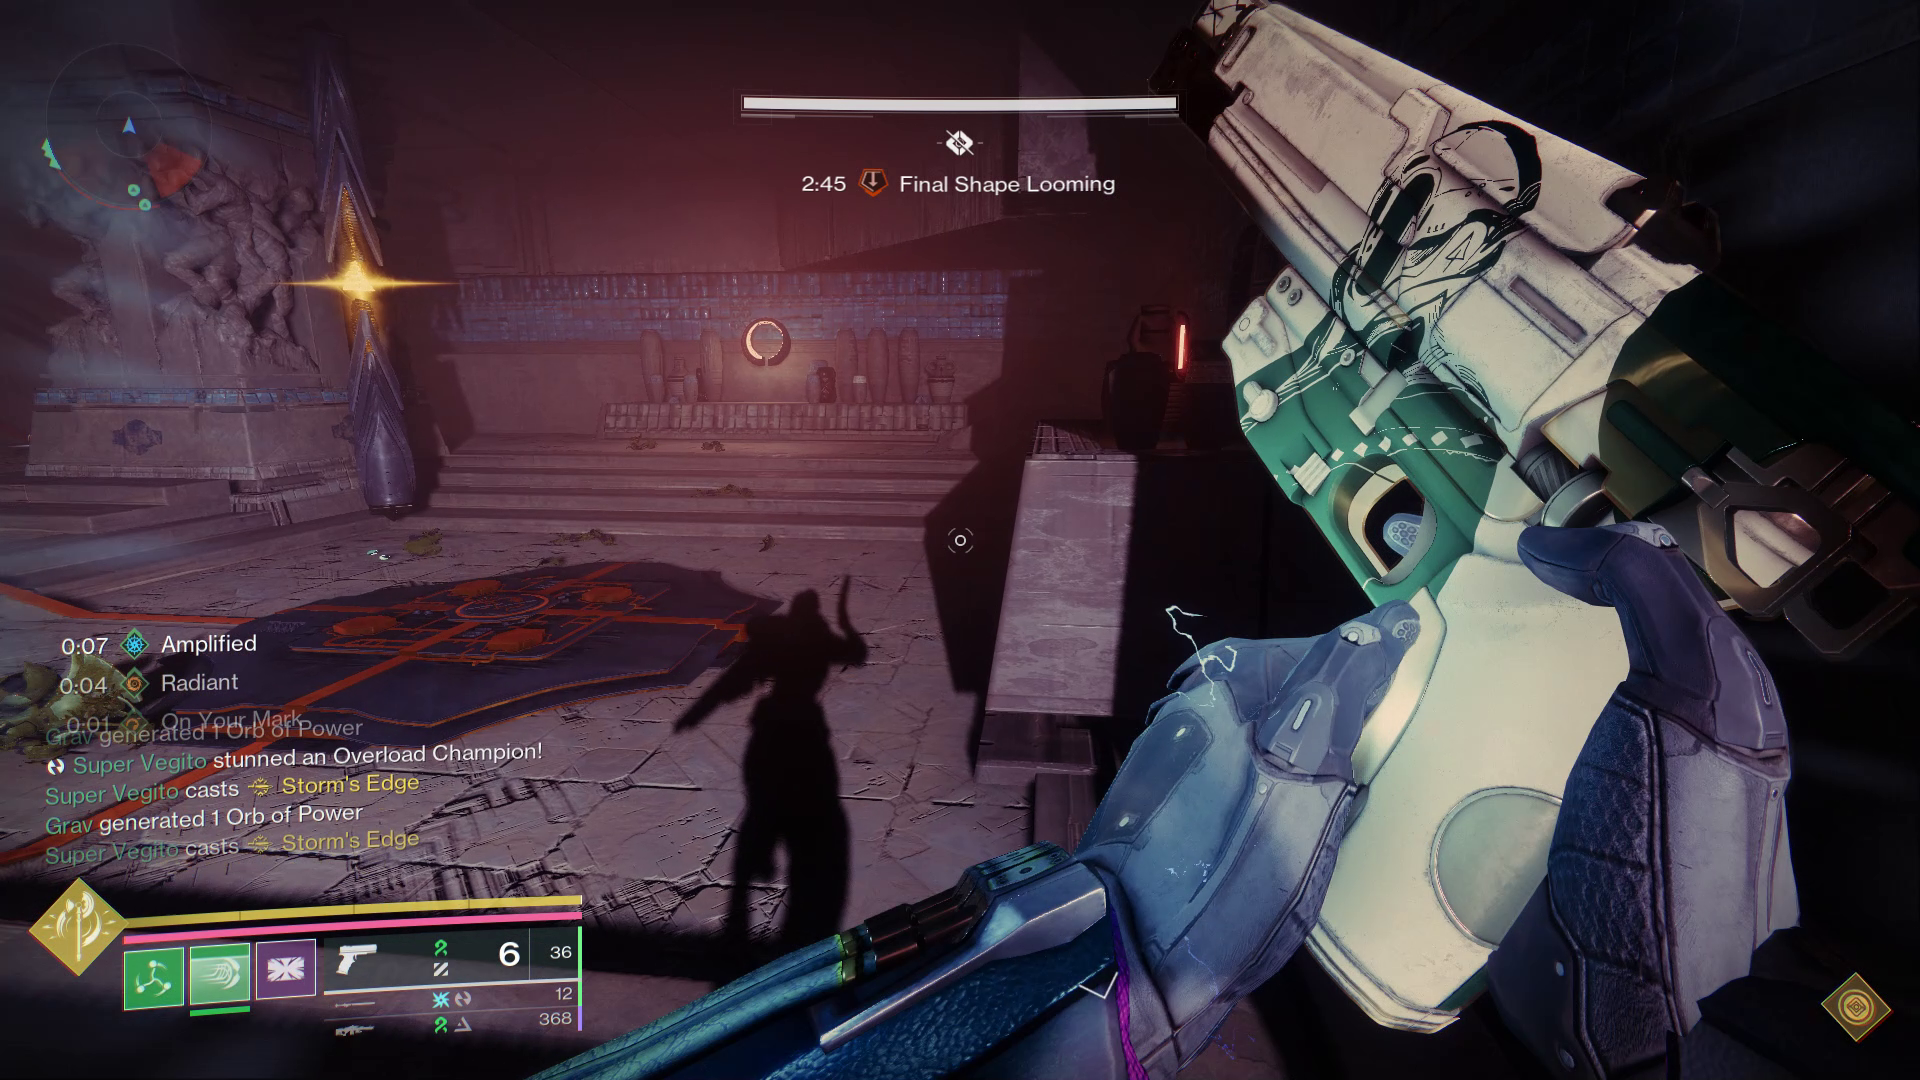
Repeat what you did at the beginning of the encounter and direct your squads to enter through the opening doors while keeping an eye on the Supplicants. However, this time you will come into contact with an dormant conduit and a lit-up plate this time. The team must go back to the center and eliminate the second Tormentor that just spawned. This will unlock an additional pair of conduits and plates. Next, the team can return to the rooms where the charged plate and open conduit are and begin making resonance by pulsing energy back and forth between the two plates.
Resonance will start to spawn in the rooms as the teams create it, with more spawning in the central room. Until they receive a prompt indicating that all of the Resonance has spawned or the timer is running low, which should happen in less than a minute, the two plate players should continue to pulse the energy back and forth between the plates. The 3rd player should assist the plate players to kill Subjugators if they spawn due to a disruption in the plates as well as to collect Resonance and take over plate duties if needed.
When both teams have collected three stacks of Resonance max, or as many as they can, allowing for time, send the pulse via the wires, and have a player with Resonance shoot the shape in the conduit till it glows. After the energy has been filled, step on the adjacent plate as the pulse enters it to activate the conduit. You will "lock in" your conduit if you do this right. A large Subjugator will appear in the central chamber if both teams activate both conduits before the timer goes off. As a team, destroy it so that the bank can spawn in. To extend the wipe timer, deposit all of your resonance. You can extend up to four minutes and fifteen seconds in total. This is the same amount of time as when the encounter begins. It is okay if you do not get the maximum extension of time, but you will need to move more quickly with less time.
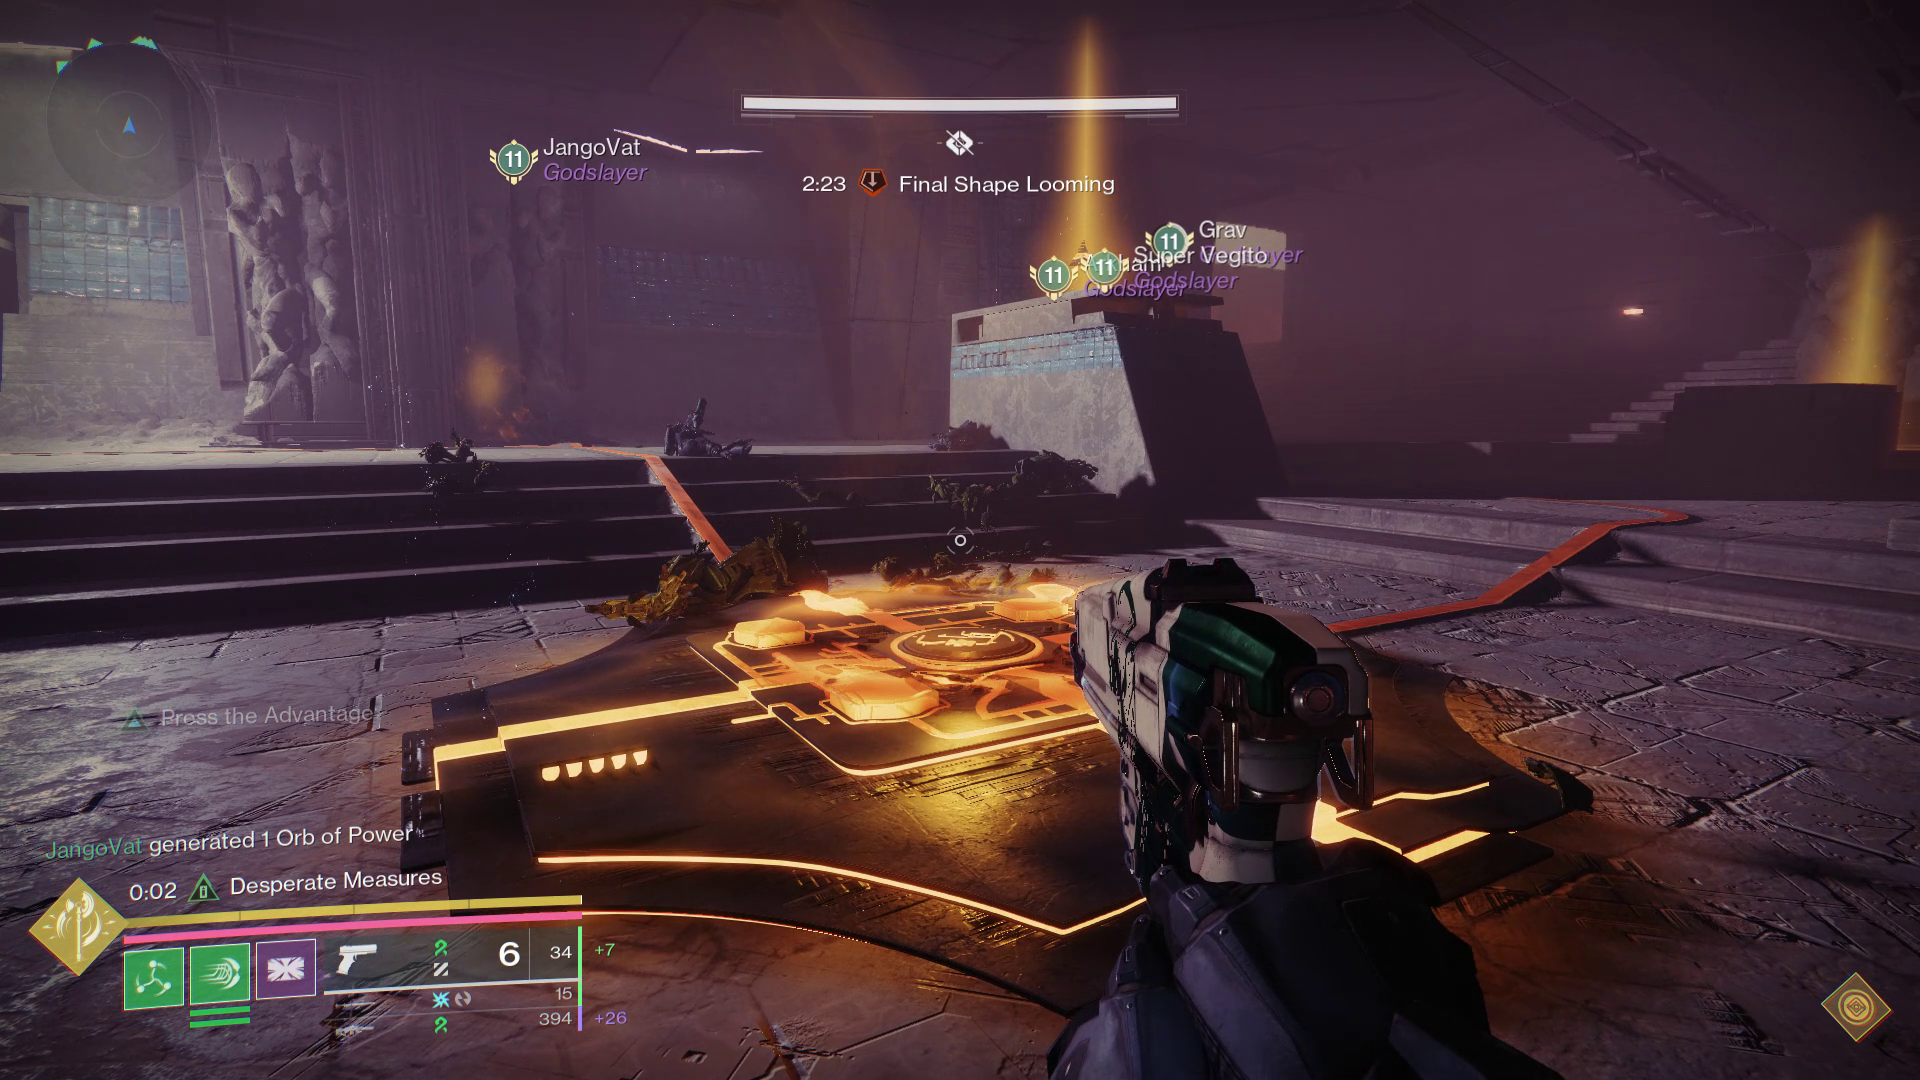 Collect stacks of resonance while pulsing between plates.
 Shoot the shape on the conduit until it glows. Step on the plate
as a pulse enters it to activate the conduit.
Continue doing this until you have completed three rounds. On the third attempt, if time is of the essence, pulse the plates less frequently and do not stress over producing or gathering as much resonance. Simply focus on spawning in the bank and deposit your buffs as soon as you can. When the enormous staircase in the main area lowers from the ceiling, you will know the encounter is complete. Proceed to the second encounter of the raid by following it.
Encounter Triumph:
Touch and Go - Complete the encounter without any player acquiring an additional stack of Resonance before the rest of the fireteam has gained a stack of Resonance.
Challenge Mode:
Scenic Route - For each Tormentor cycle in a phase, you can only kill the Overload Champion that spawns in the 4th room on a given side.
Master Difficulty:
- Homogoblins, Minotaurs, Weavers, Attendants, Hydras and Subjugators are minibosses.
- Harpies have arc shields.
Herald of Finality
Loadouts:
DPS:
- Swords + One Ergo Sum with Wolfpack Rounds
- Legend of Acrius
Encounter:
- Bring an automatic weapon like an SMG for dealing with the Herald's head when being Called to Battle.
- A strong special to deal with majors and Stasis Attendants.
Subclasses:
- Well of Radiance
- Thundercrash
- Tether
- Nova Bomb / Needlestorm
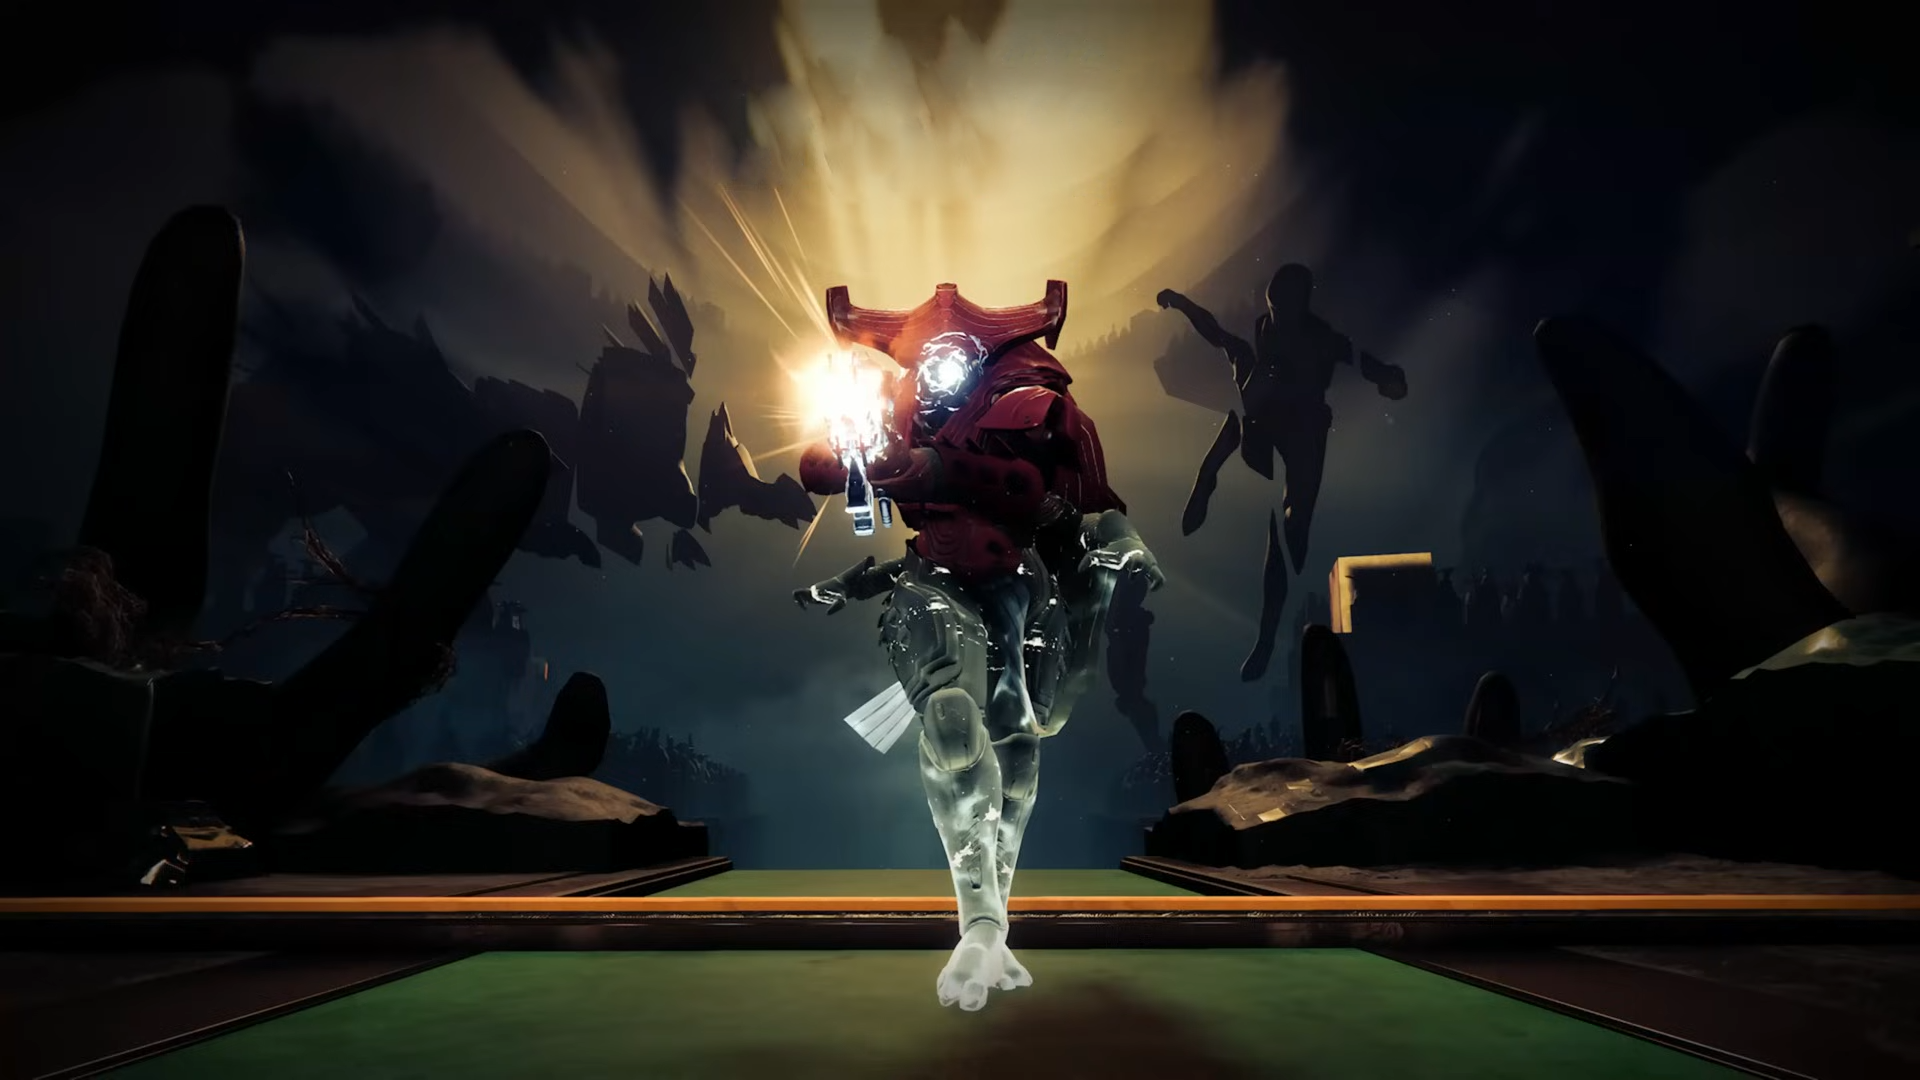
Although the concept is quite similar to the first encounter, you will be dividing into three groups of two and battling a boss this time. Assign each team to one of the three map locations: the middle, which is where you spawn; the left, which has the large tower; and the right. Destroy the large Taken Blight in the center of the chamber to start. For the duration of the battle, the Herald will wait for you down there. Your objective is to deposit Resonance in a bank so you can remove his immunity protection. But as soon as the battle starts, the bank vanishes, and you will have to work to acquire it back.
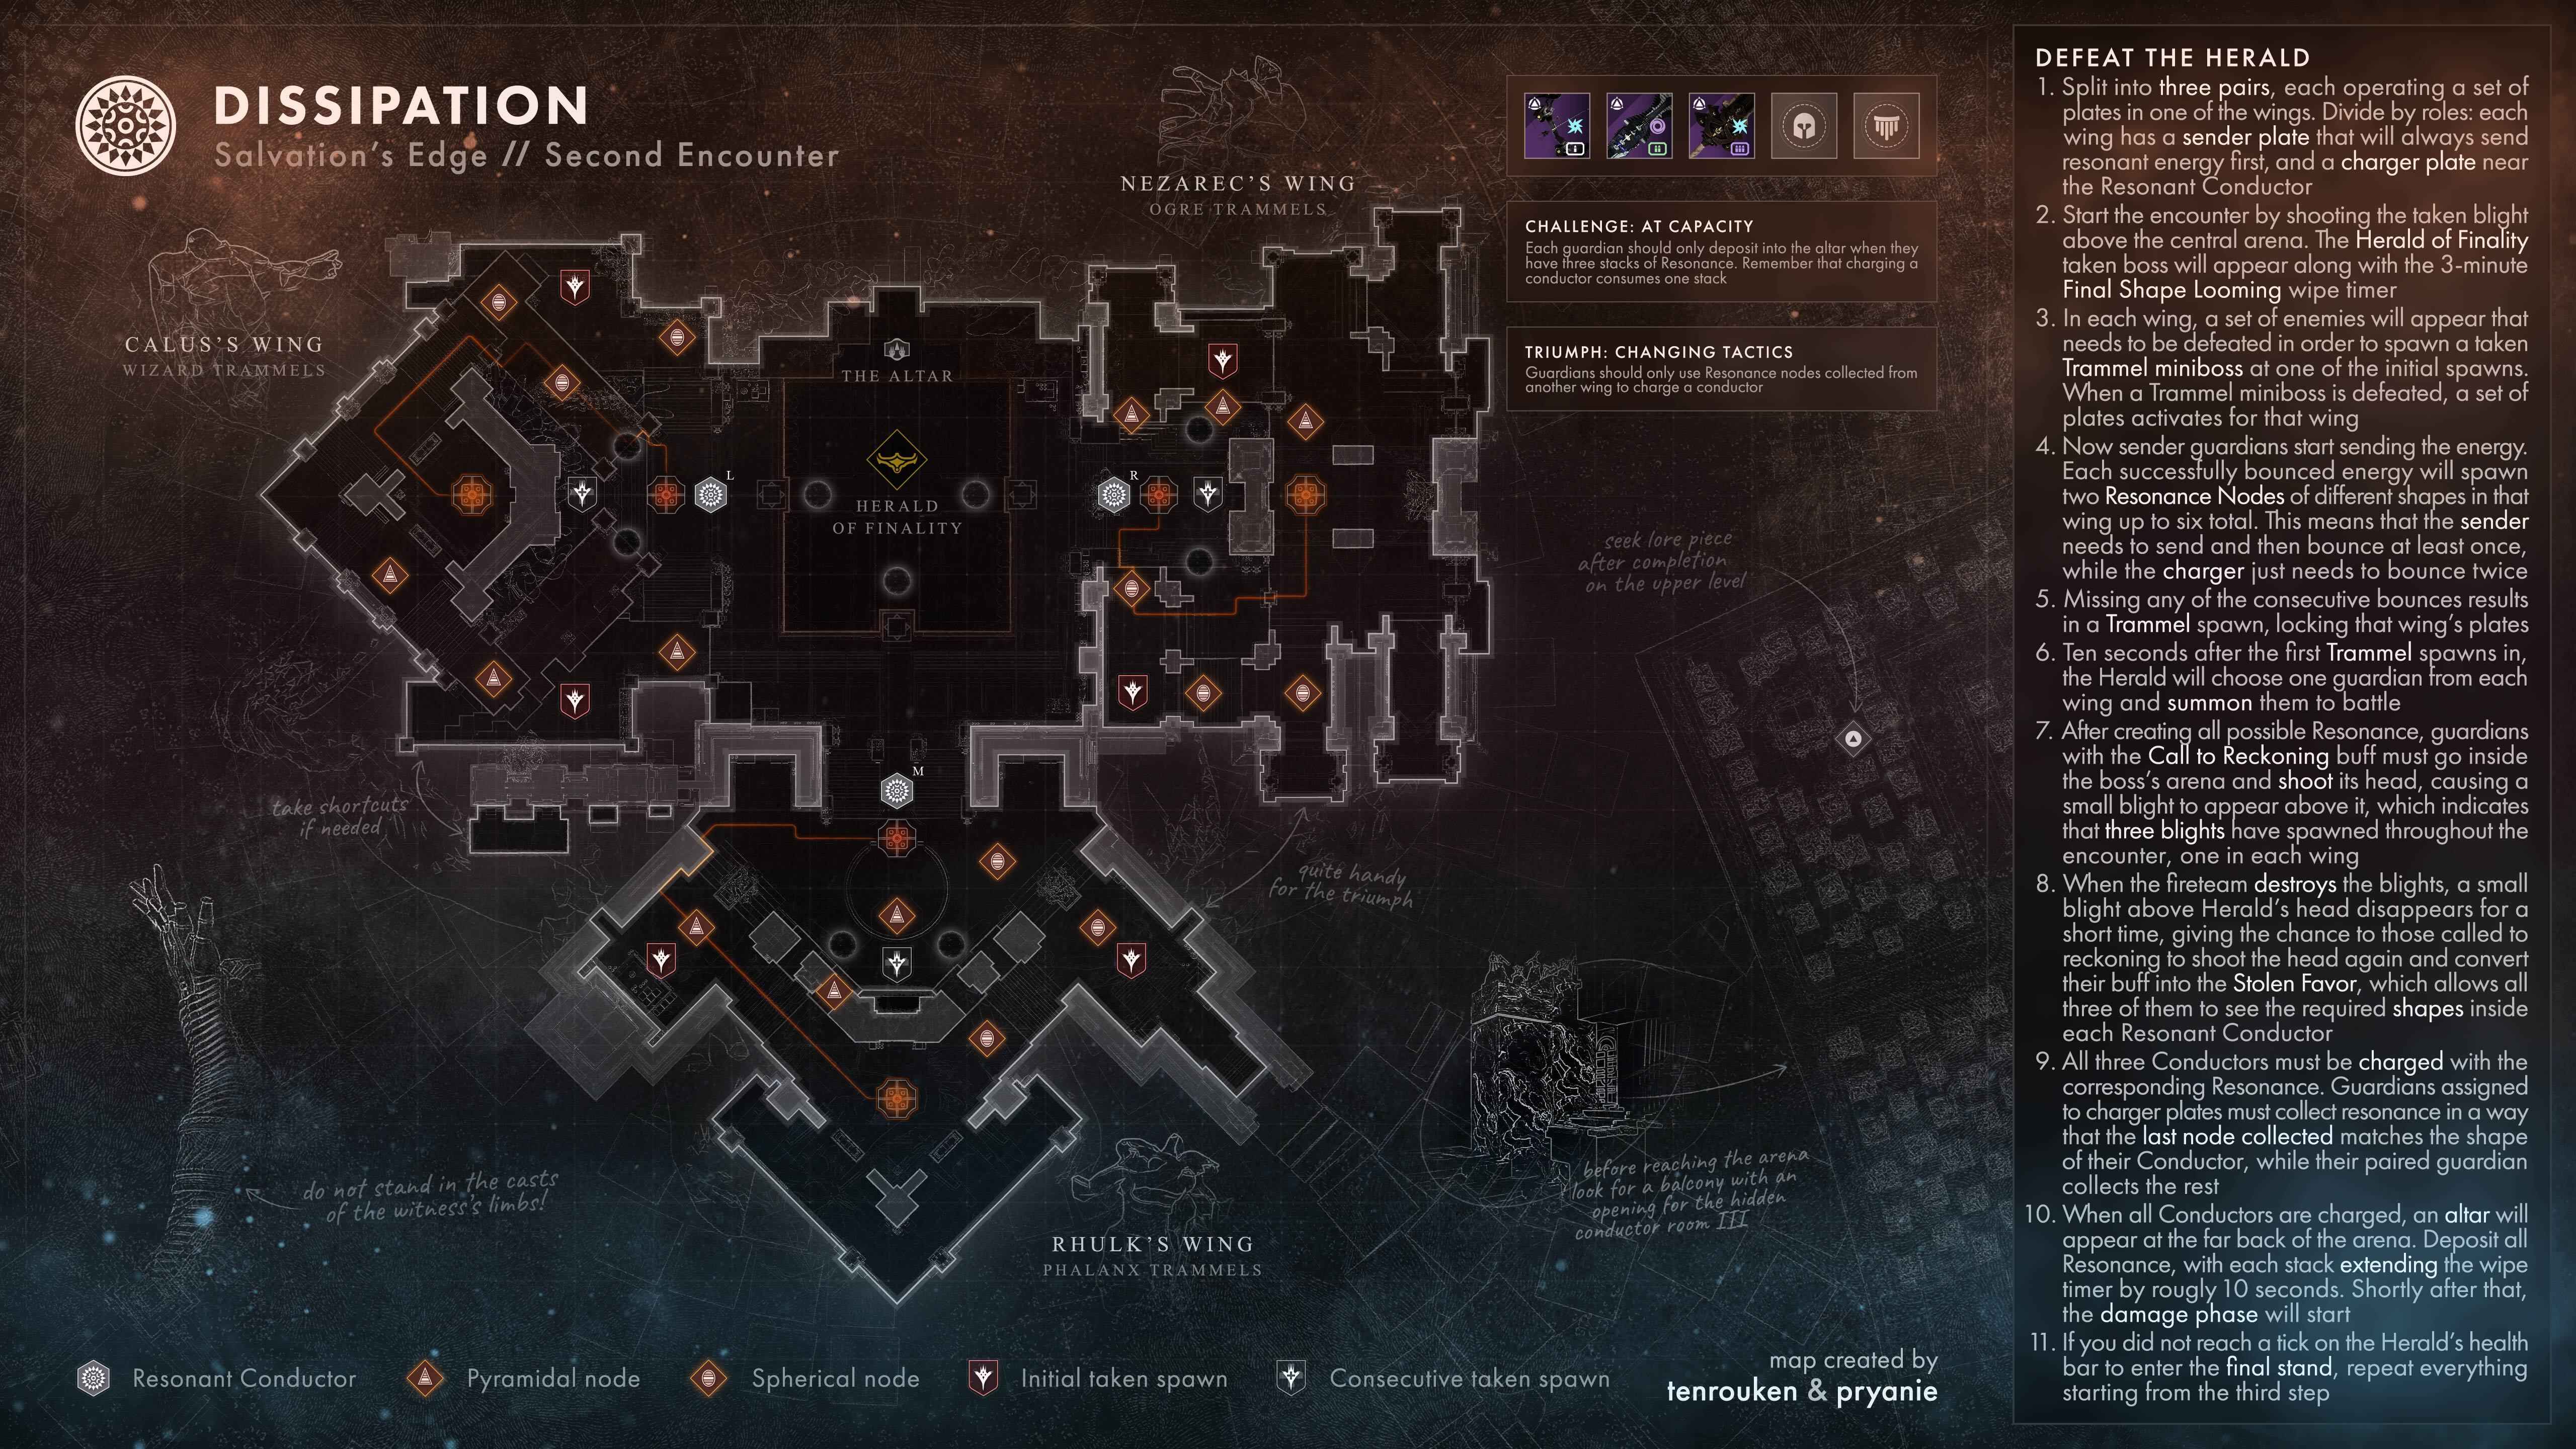
Assign everyone to a side and have them clear the first three waves of opponents. A Trammel, a boss-level Taken enemy, will spawn in the third wave. A Taken Phalanx will land in the center, a Taken Wizard on the left, and a Taken Ogre on the right. Eliminate the Trammel in order to charge the plates and open the conduit, supplying energy to the architecture. That being said, instead of the pyramidic shapes you previously observed in the first encounter, the conduit will not display a shape immediately. For now, ignore it.
Call to Reckoning
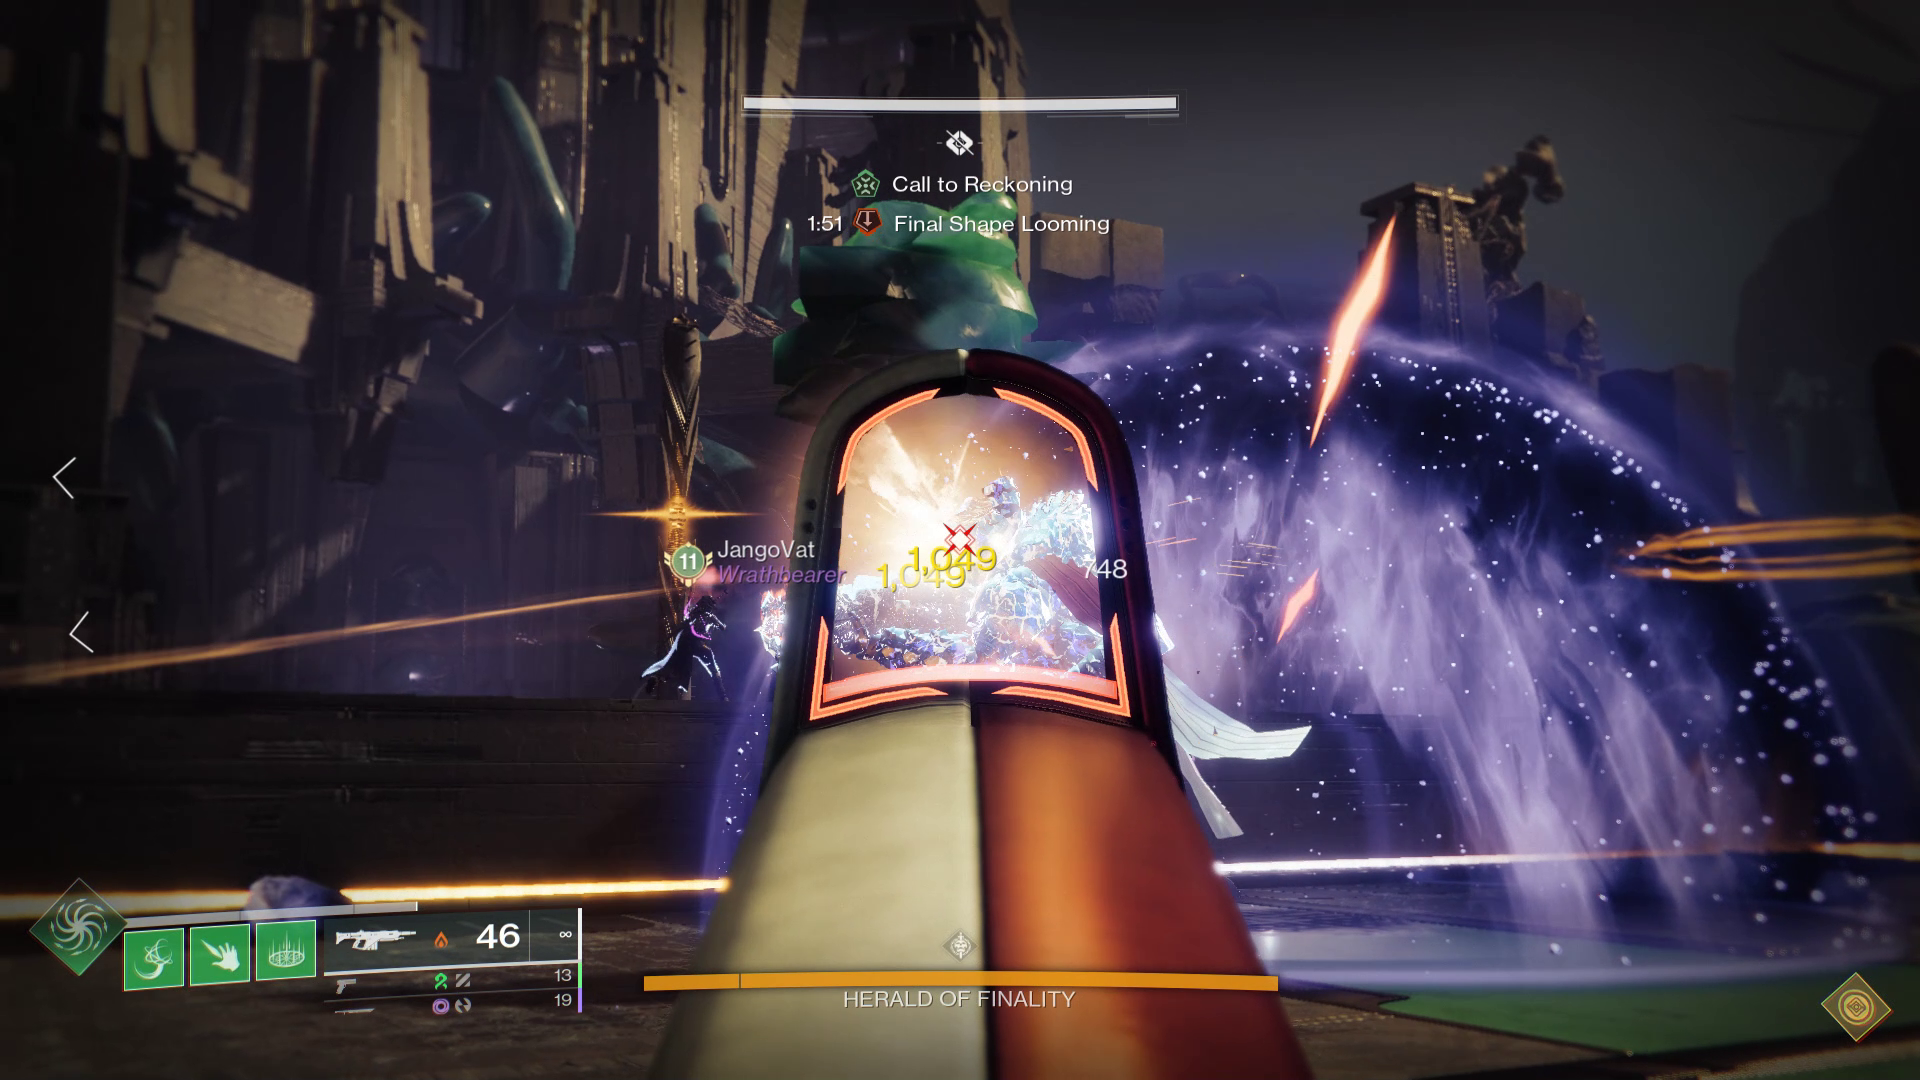
The Herald will eventually call three members of your Fireteam - one from each side - to the center of the arena, and they will get the "Call to Reckoning" buff. It would be best for you or anyone with the buff to head into his arena and begin shooting at his forehead. It is important to note that the Herald should be damaged by all players who have the "Call to Reckoning" buff.
The Herald will use a Taken Blight to defend himself when you have inflicted some damage to him. The Taken Blights may appear in the boss arena with you or on the sides where you are positioned. As everyone looks around, have them shoot the Blights. Continue shooting until The Herald's head pops and becomes immune. Next, you will receive a debuff known as "Stolen Favor". Leave the center arena and return to your side. There are two shapes that can be seen while looking at the conduit: a triangle or a circle. This indicates the Resonance buff you or your team mate will need to have in order to shoot the conduit and activate it: Spherical or Pyramidal Resonance.
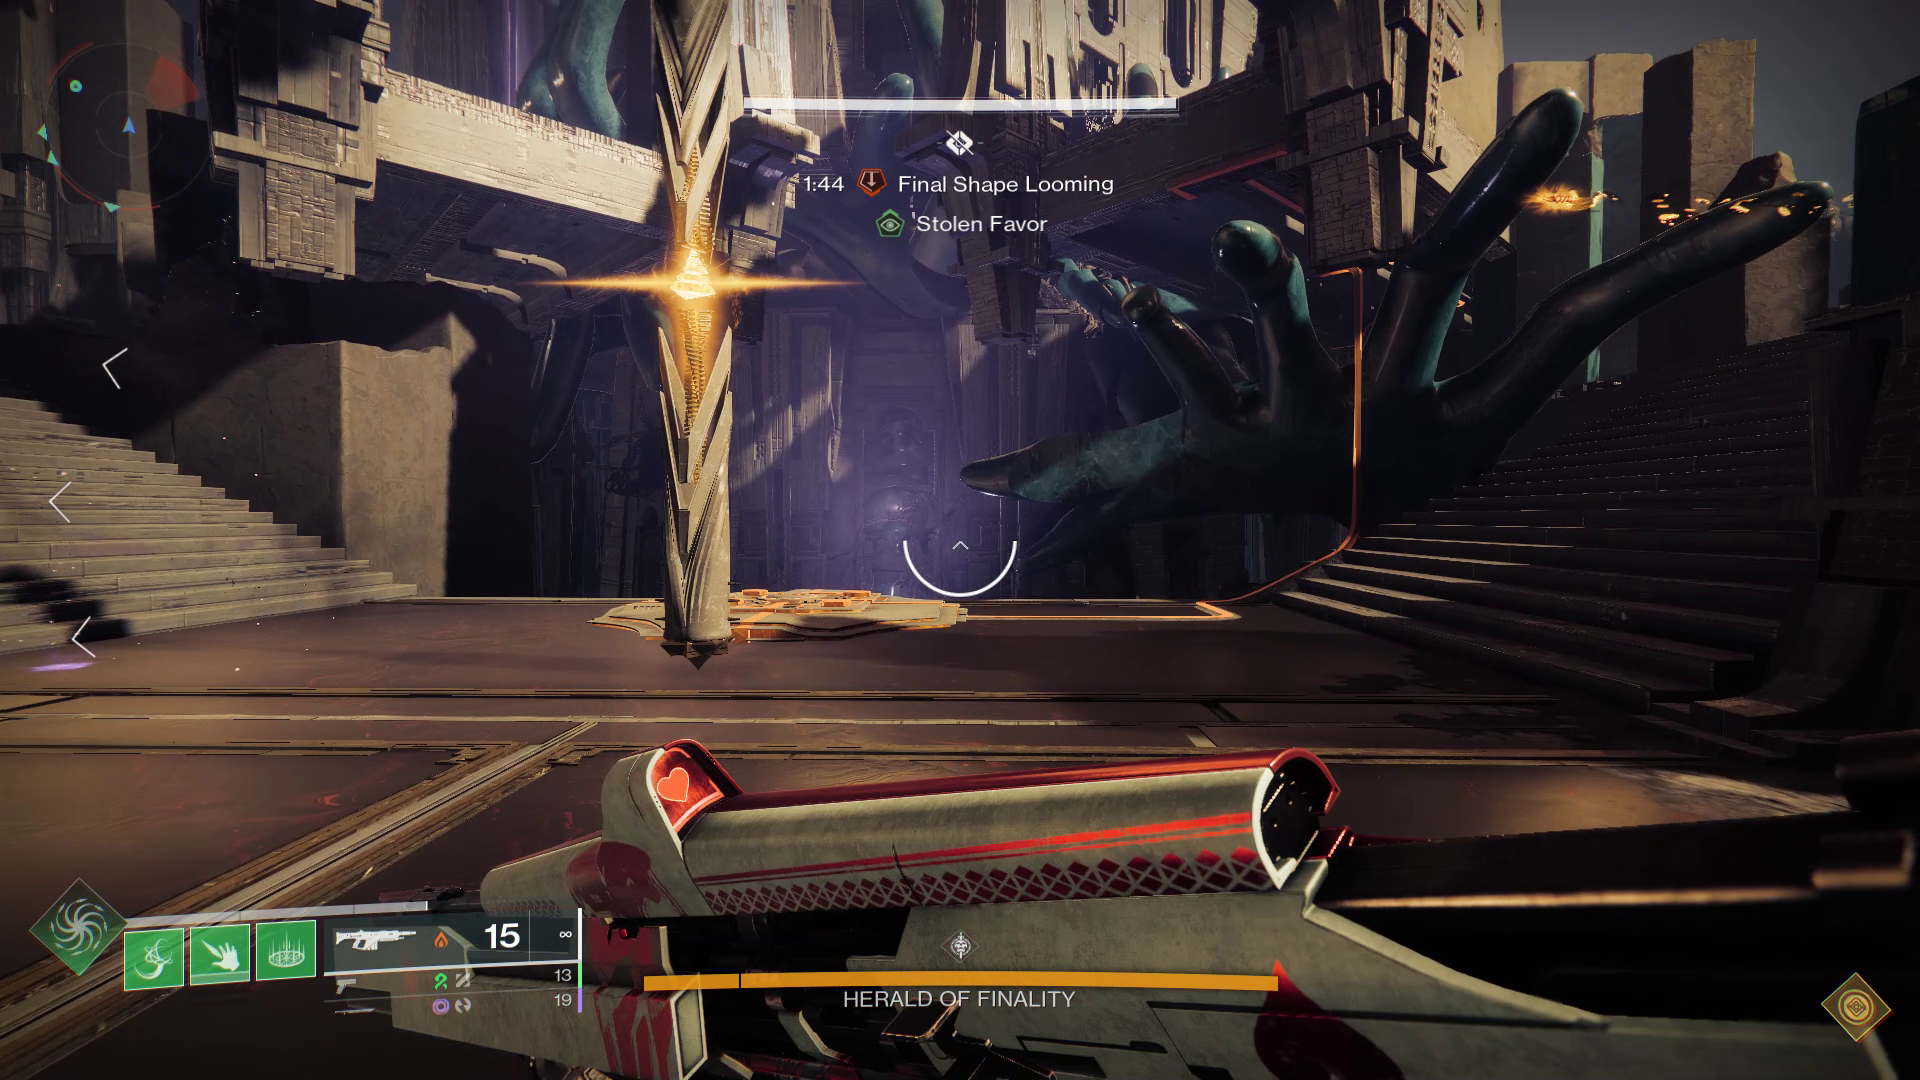

Charging and Reading the Conduits
After calling out what your conduit needs and getting back on your side with "Stolen Favor," take one of the plates and have your friend take the other. After you kill the Trammel, the plate farthest from The Herald always receives the energy first, while the plate closest receives the conduit. Proceed as you did in the first encounter, taking extra care to kill the Taken Knights and deadly Stasis Attendants as soon as you can. You will spawn a Pyramidal Resonance on one side of the arena and a Spherical Resonance on the other after each plate bounce.
For the back plate player: As long as you leave your friend with at least one of the resonances your side requires, it does not matter what kind of resonance you choose. As the front plate player, you must use extreme caution in what you grab. Getting the opposite resonance type of your conduit first is a good tip in this case. This will give you one stack of the incorrect resonance; however, you can turn that one stack of incorrect resonance into two stacks of the proper resonance by picking up the correct resonance next to it.
There is one additional thing about this part that is important to know. Your side's Trammel will respawn and lock your conduit if you fail to hit a plate following the initial bounce, meaning you allowed the energy to fade. You can eliminate the Trammel, but doing so will reset your conduit, so the symbol may be different from the last time. To be sure, you will need to check it once more. Lock the conduits after you have gathered all the necessary Resonance, and the bank will appear next to The Herald's arena, by the hand of The Witness and the ticking bomb. Now is the moment to prepare for DPS.
DPS
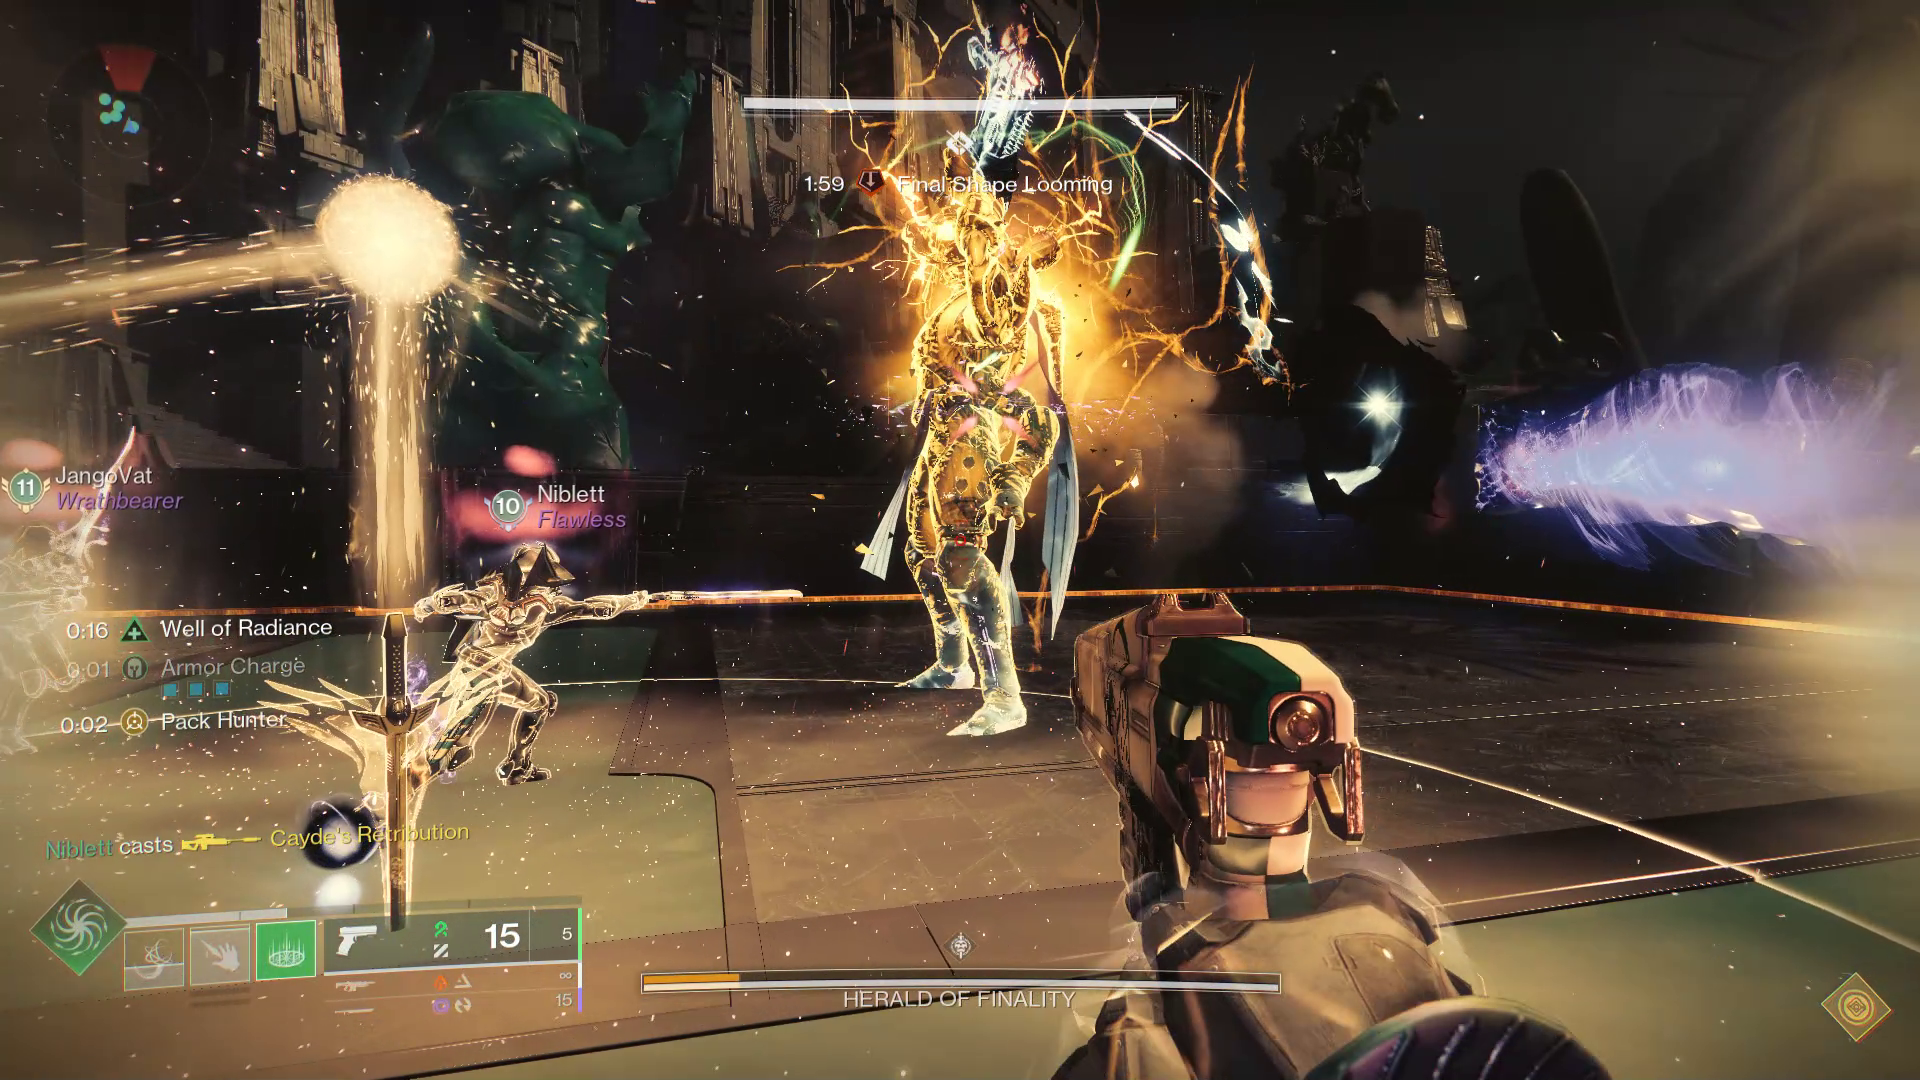
It is time to DPS The Herald now that you have recovered some time and banked all of your Resonance. Enter the center arena and use your swords to damage him. To keep you all safe, make sure Warlocks are using Song of Flame or Well of Radiance. Using the healing turret from the Speaker's Mask Exotic also works very well here. Continue damaging The Herald until he becomes immune. When that occurs, get out of the arena and repeat your previous actions once more.
The Herald will make a final stand once your team has reached the damage threshold. He will turn immune for a little while, so stop trying to damage him and save your ammo. Remember not to get sidetracked as he will call upon the assistance of the three Trammel bosses. Simply ignore them and keep damaging The Herald until he dies. The way to the next encounter will be on your left when you turn into some enormous green columns.
Encounter Triumph:
Changing Tactics - Complete the encounter while only using Resonance from alternate wings to charge conductors.
Challenge Mode:
At Capacity - You may only deposit x3 Resonance into the Resonance box.
Master Difficulty:
- Central Taken Knights are changed to Overload Champions.
- Taken Knights on the sides have solar shields.
Warren - Traversal
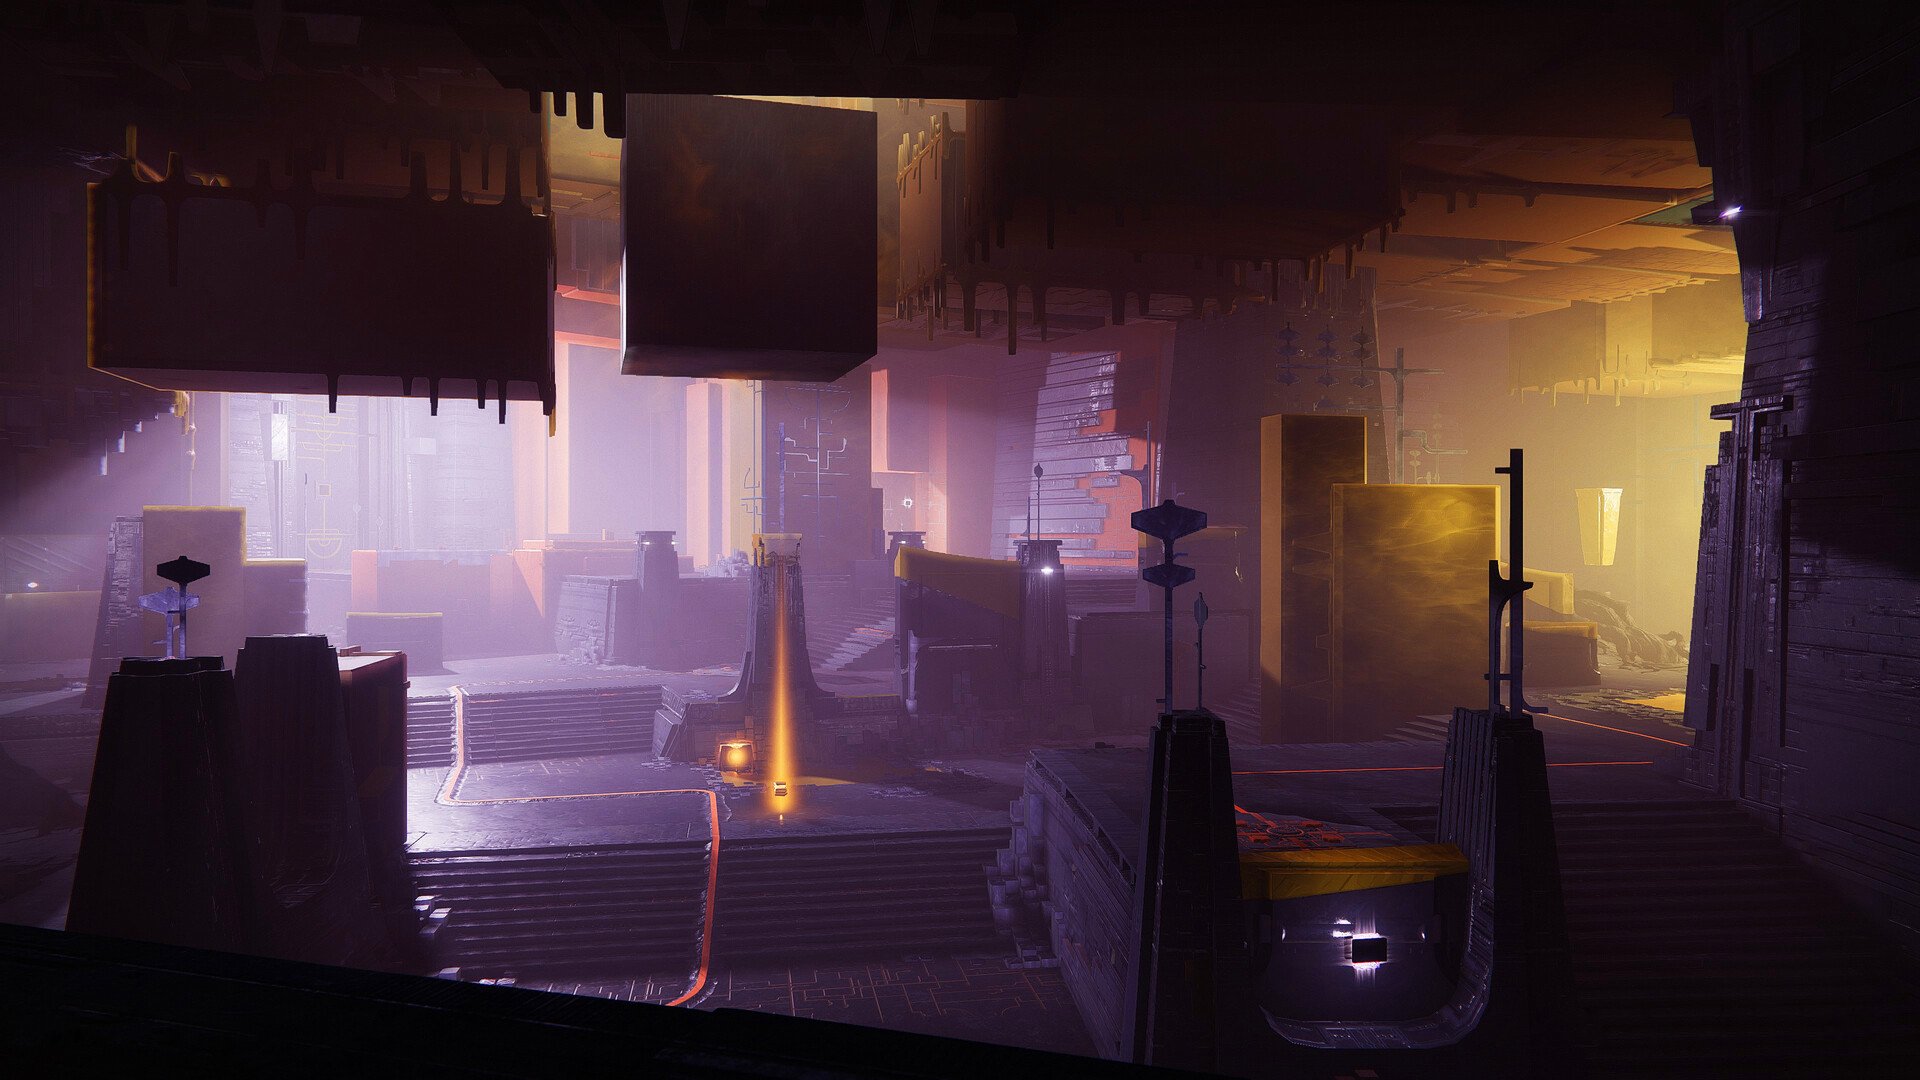
Refer to this map to help you guide your way around the Warren. Don't forget to collect the first secret chest in the raid.
Repository
Loadouts:
Subclasses:
- Prismatic Consecration
- Bleak Artist
- Gyrfalcon's or Liar's Handshake Build
Weapons:
- Graviton Lance
- Commemoration
- Hammerhead
- Macrocosm
- The Call
Opening the Path through the Monolith
The arena is divided into three sides, each with its own plate environment, much like the second encounter. Assign two-person teams to the left, middle, and right sides of the room. It will be up to each squad to eliminate a Subjugator, a Tormentor, and a slew of other enemies. In addition, they must lock a conduit, gather more resonance, and generate resonance. Pick up the Hexahedron Resonance, a new square-shaped resonance, in the center of the room and deposit it in the closest bank to begin the battle. Three Tormentors will spawn, one at the end of each plate. Assist your partner in killing it, and urge your allies to follow suit. The "Stolen Favor" buff from the previous encounter will be awarded to the team member who deals the final blow to the Tormentor. You will be able to see what kind of resonance each conduit need in order to shoot it thanks to this. Additionally, it will allow energy to enter the architecture.
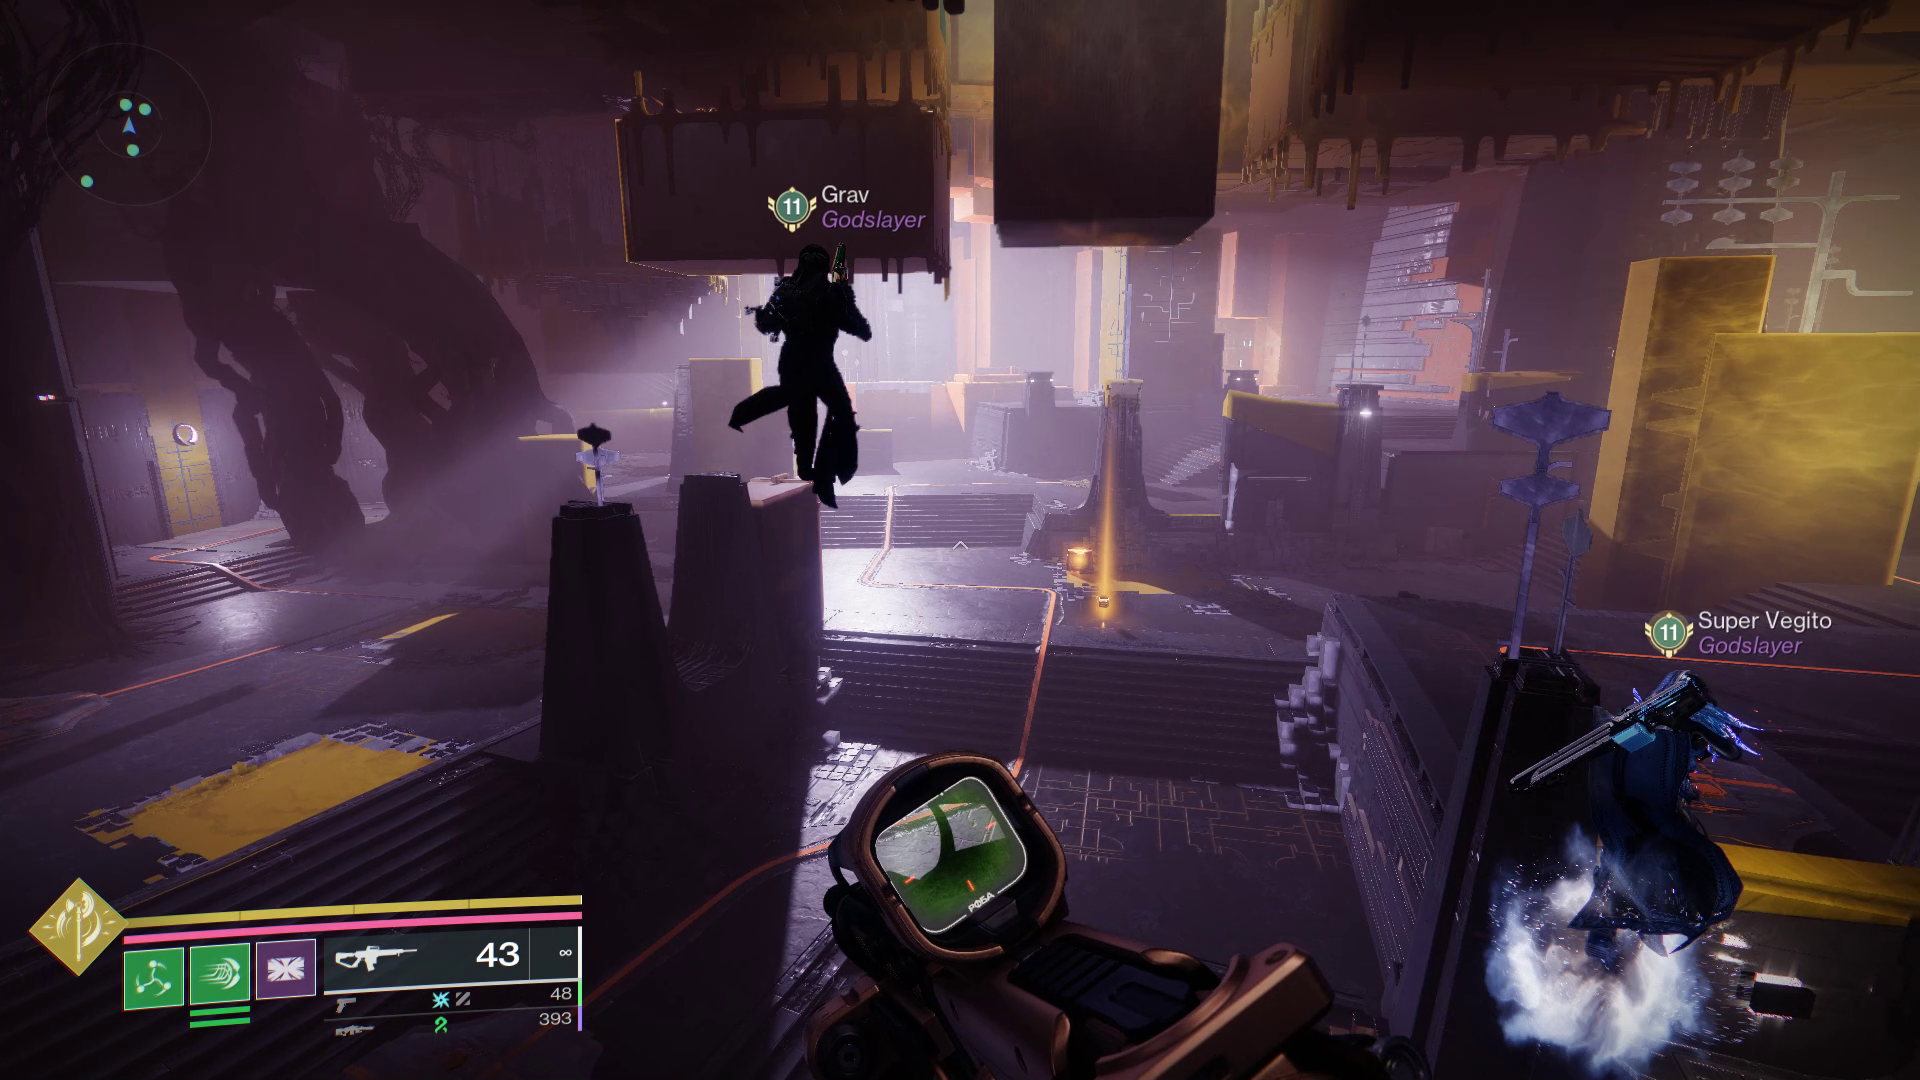
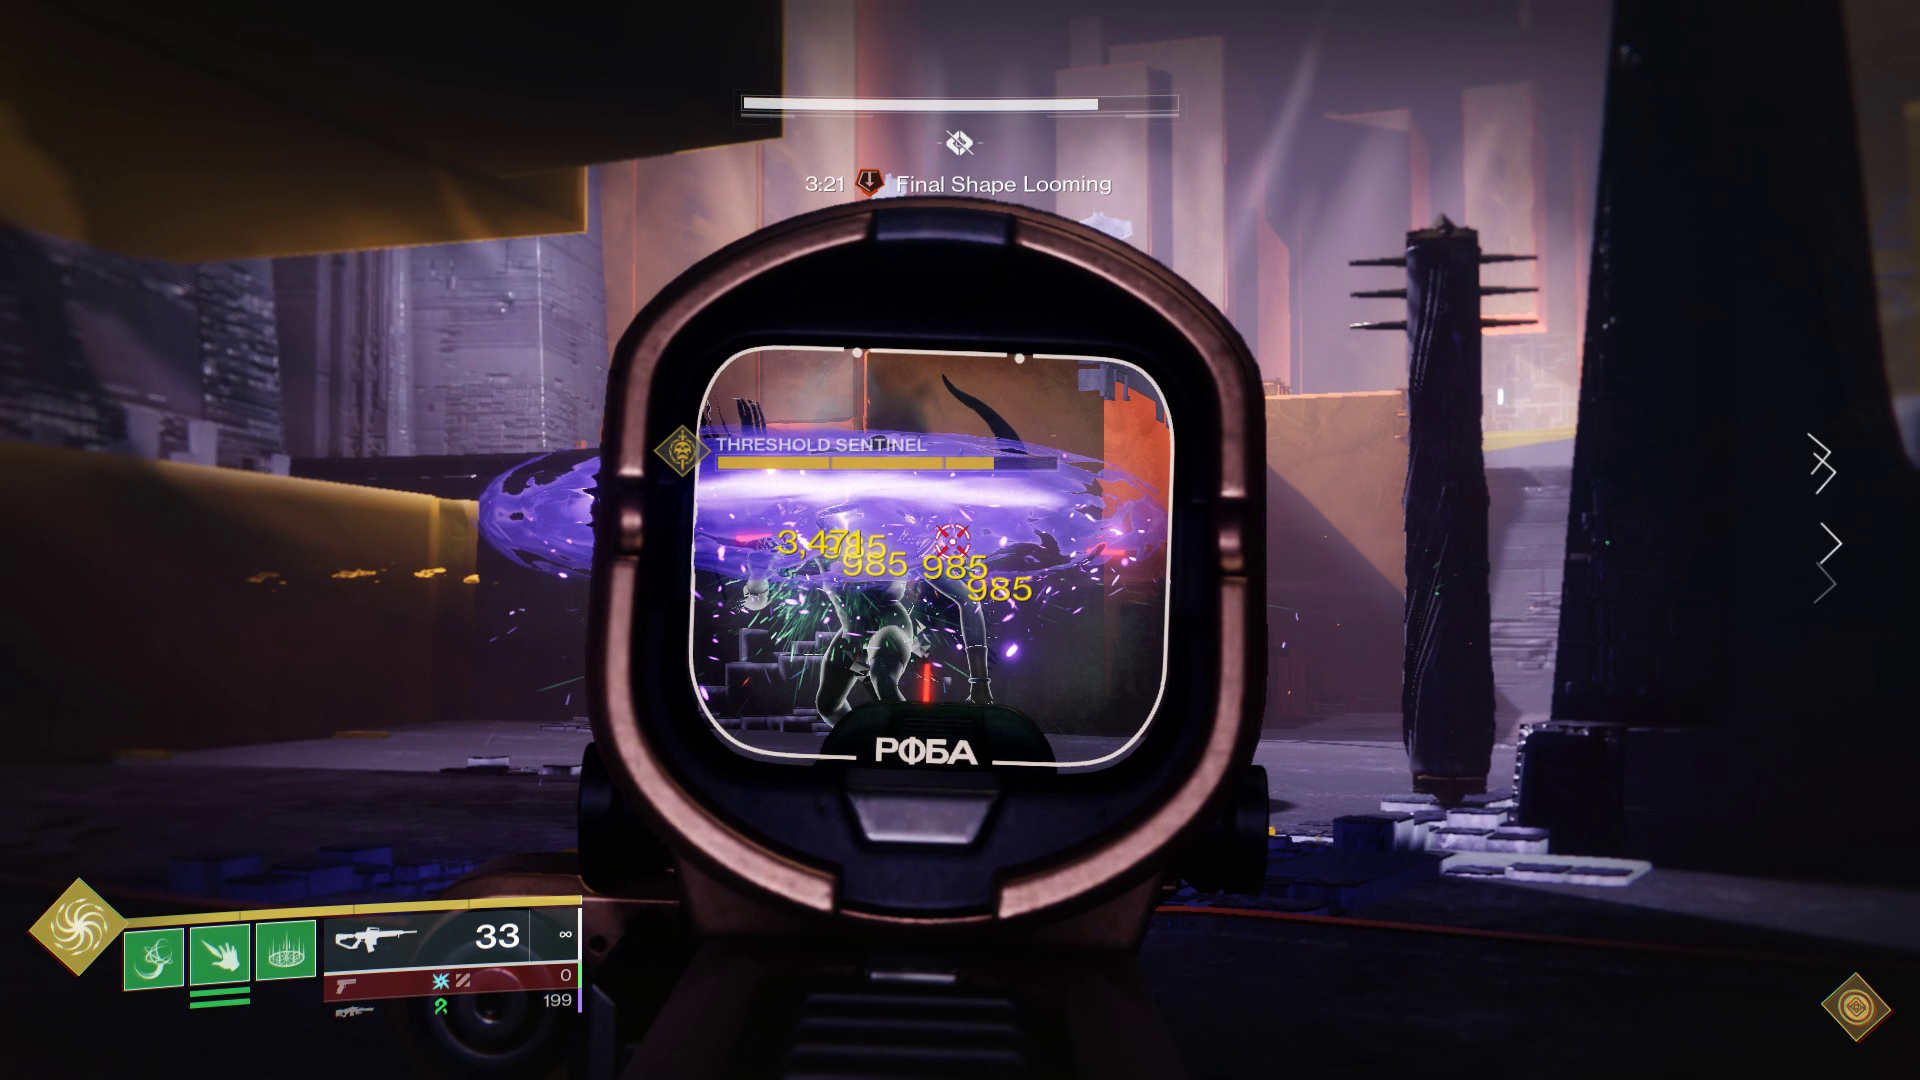
Let the player who has not stolen a favor to home plate, which is next to the door and will be prepared to transfer energy. Then place yourself on the plate close to the conduit holding the stolen favor. To create either a square, triangular, or circular resonance, bounce the energy back and forth. Work with your team to choose which quadrant of the room each sort of resonance will spawn in. You will have a lot of resonance on the floor after three or four bounces. Allow the plate energy to dissipate and then run in search of your necessary resonance. You should avoid using Resonance until all of the players have what they require if any of your teammates do not have Stolen Favor. Kill the Subjugator close to your conduit and secure it once you have three of your resonance and have given your teammates enough time to gather any more shapes.
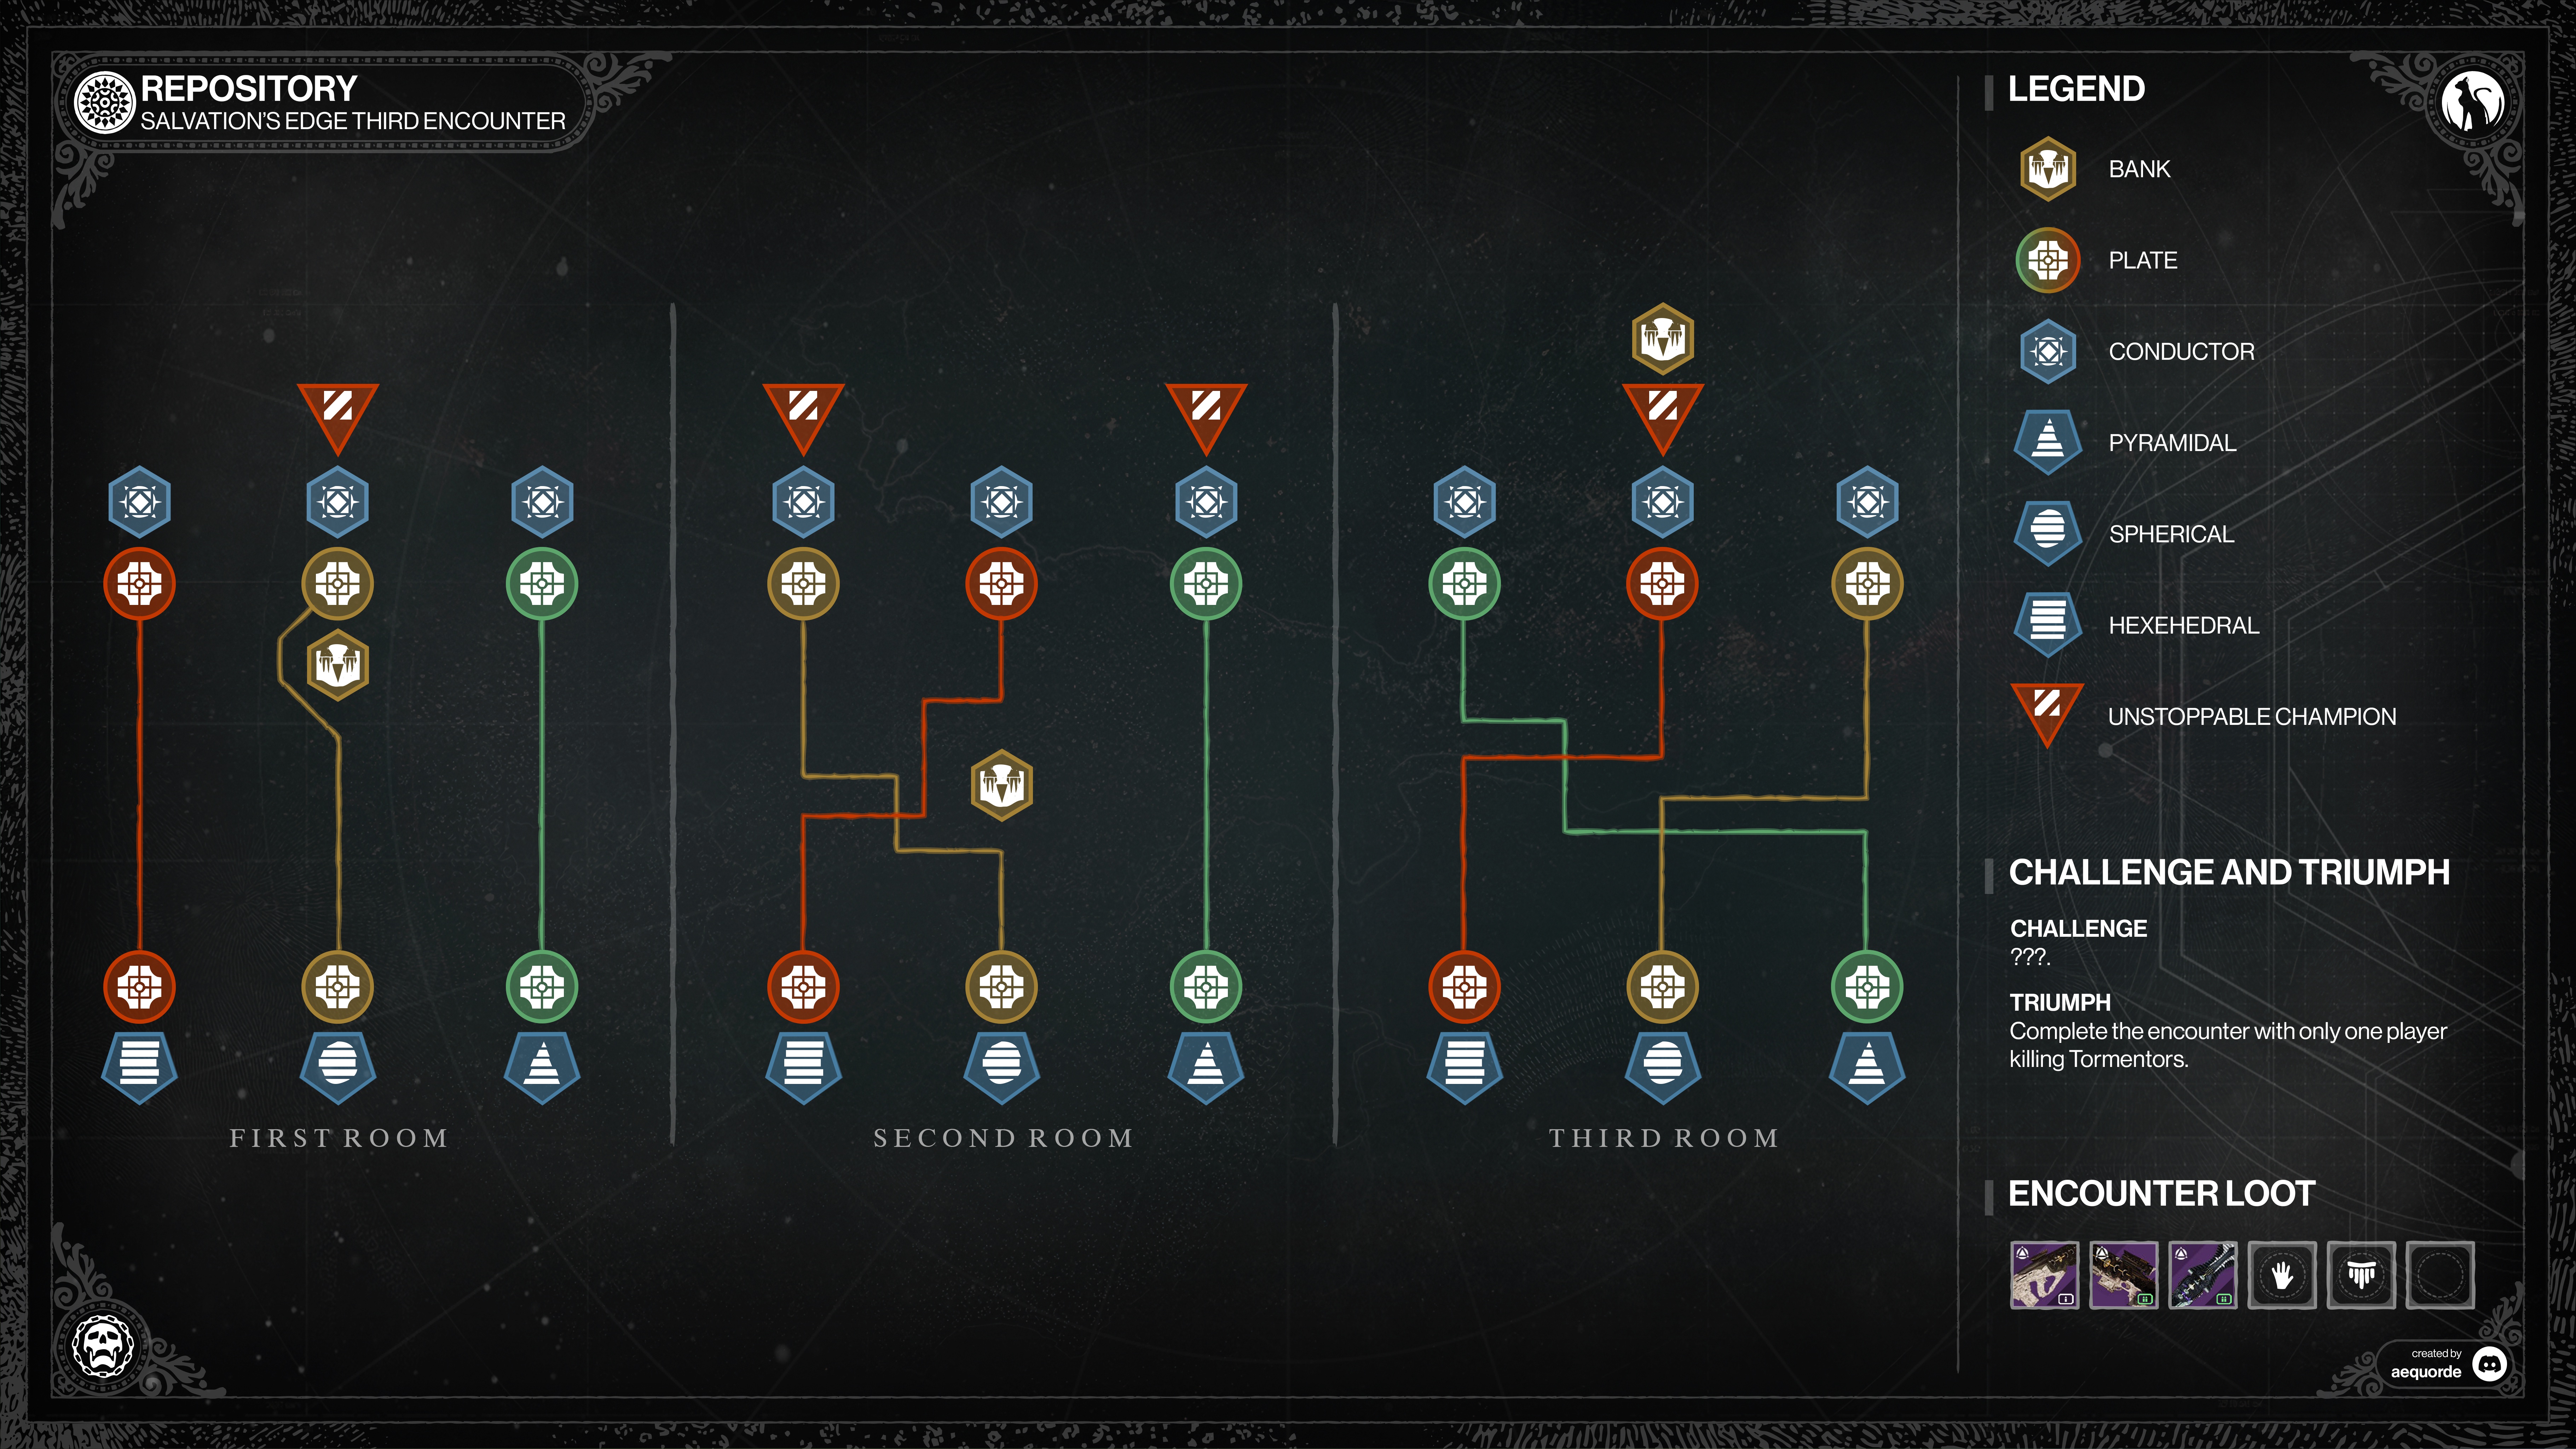
The bank will appear in the center of the room with some turrets once you have locked all three conduits. Bank to recover some time, and an Unstoppable Champion will spawn. Kill the champion to unlock the door and to proceed to the next room. You have to complete this task three times in progressively more complex rooms with each run. A brief summary of the rooms is provided below:

Room 1
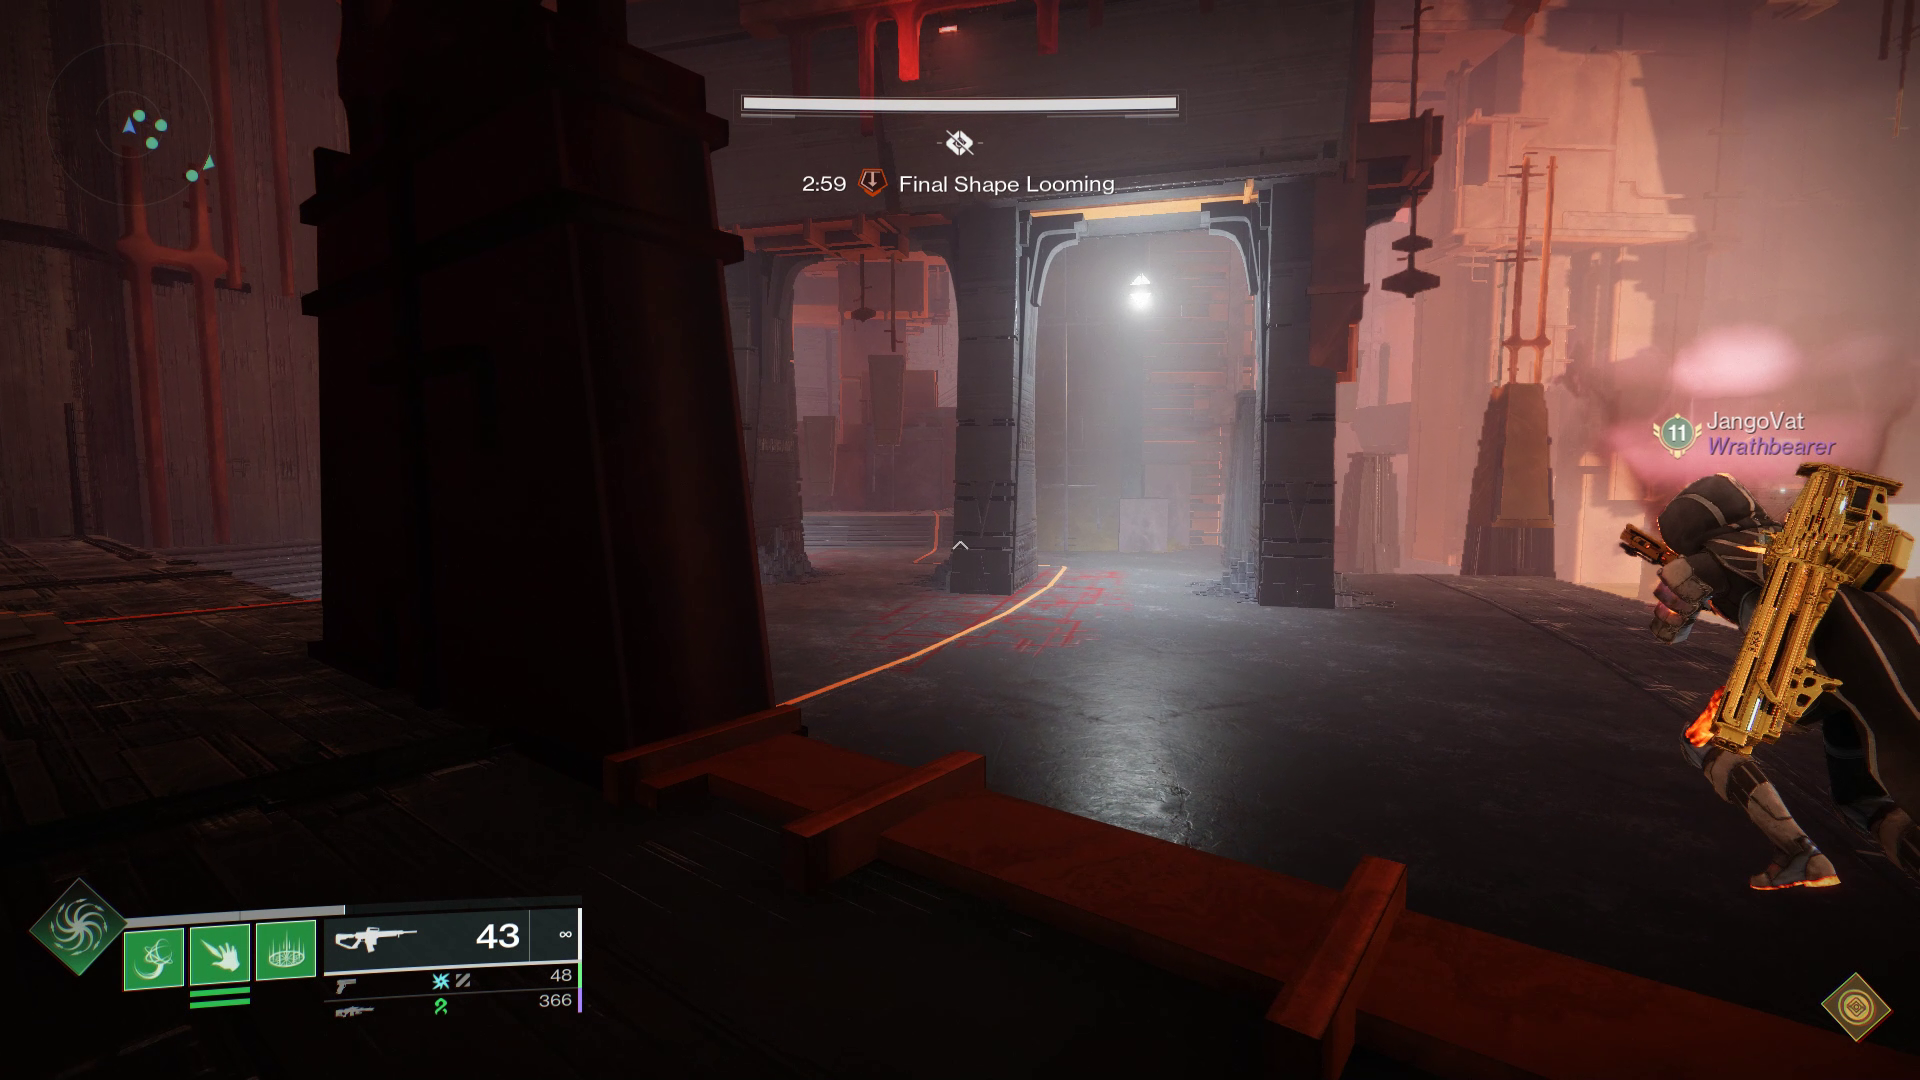
As the first room is rather open and has a straight plate flow on each side, eliminating enemies is simple. To get through this room as fast as possible, just follow the aforementioned directions.
Room 2
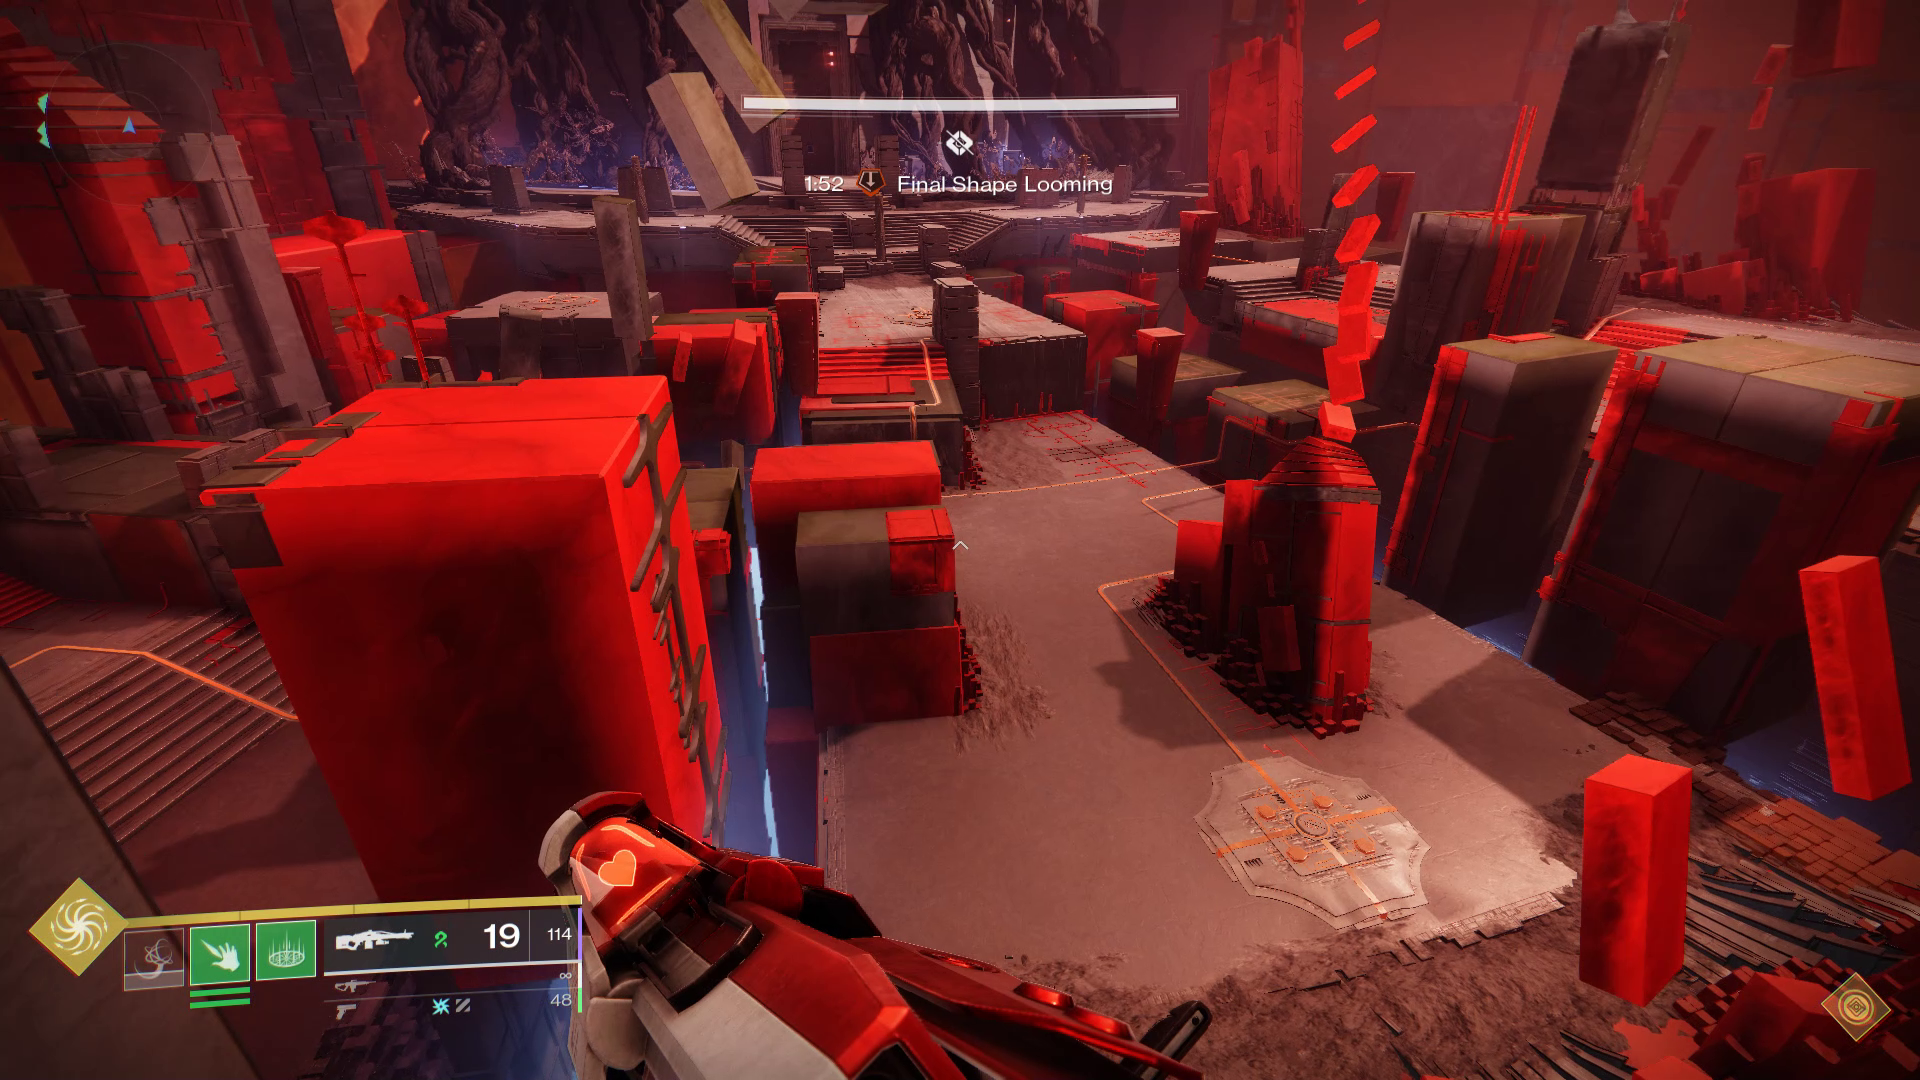
Things get a little spicy in the second room. The wire from the left plate now crosses over the middle plate, which means that your left plate conduit player will ultimately land on an elevated platform in the center of the room. The plate on the left, close to the Tormentor spawn, is where your middle conduit player should be standing.
Room 3
There is chaos in the third room. In addition to the numerous pits, there is a group of three Tormentors that spawn in the front. The wires are also crossed here; the conduit on the left represents the center plate, the conduit on the right represents the left plate, and the conduit on the left represents the middle plate. You will not require additional resonance in this situation, so do not worry about it. Simply obtain the required shape and finish the conduits as soon as you can. When you are finished, use your Resonance to defeat the Unstoppable Champion by banking it three times. At that point, the final door will open, and a chest close by will contain your rewards.
Encounter Triumph:
Singular Torment - Complete the encounter with only one player killing Tormentors.
Challenge Mode:
Balanced Diet - You cannot grab the same symbol twice in a row.
Master Difficulty:
None.
Verity
Now this, is a clusterf**k.
Loadouts:
- Ad-Clear Weapons.
- Grenade Lauchers or Rockets to deal with ogres.
- Champion mods to deal with Unstoppable Champions.
- Any ad-clearing super will suffice, or any super to help with insta killing ogres.
Drip Check
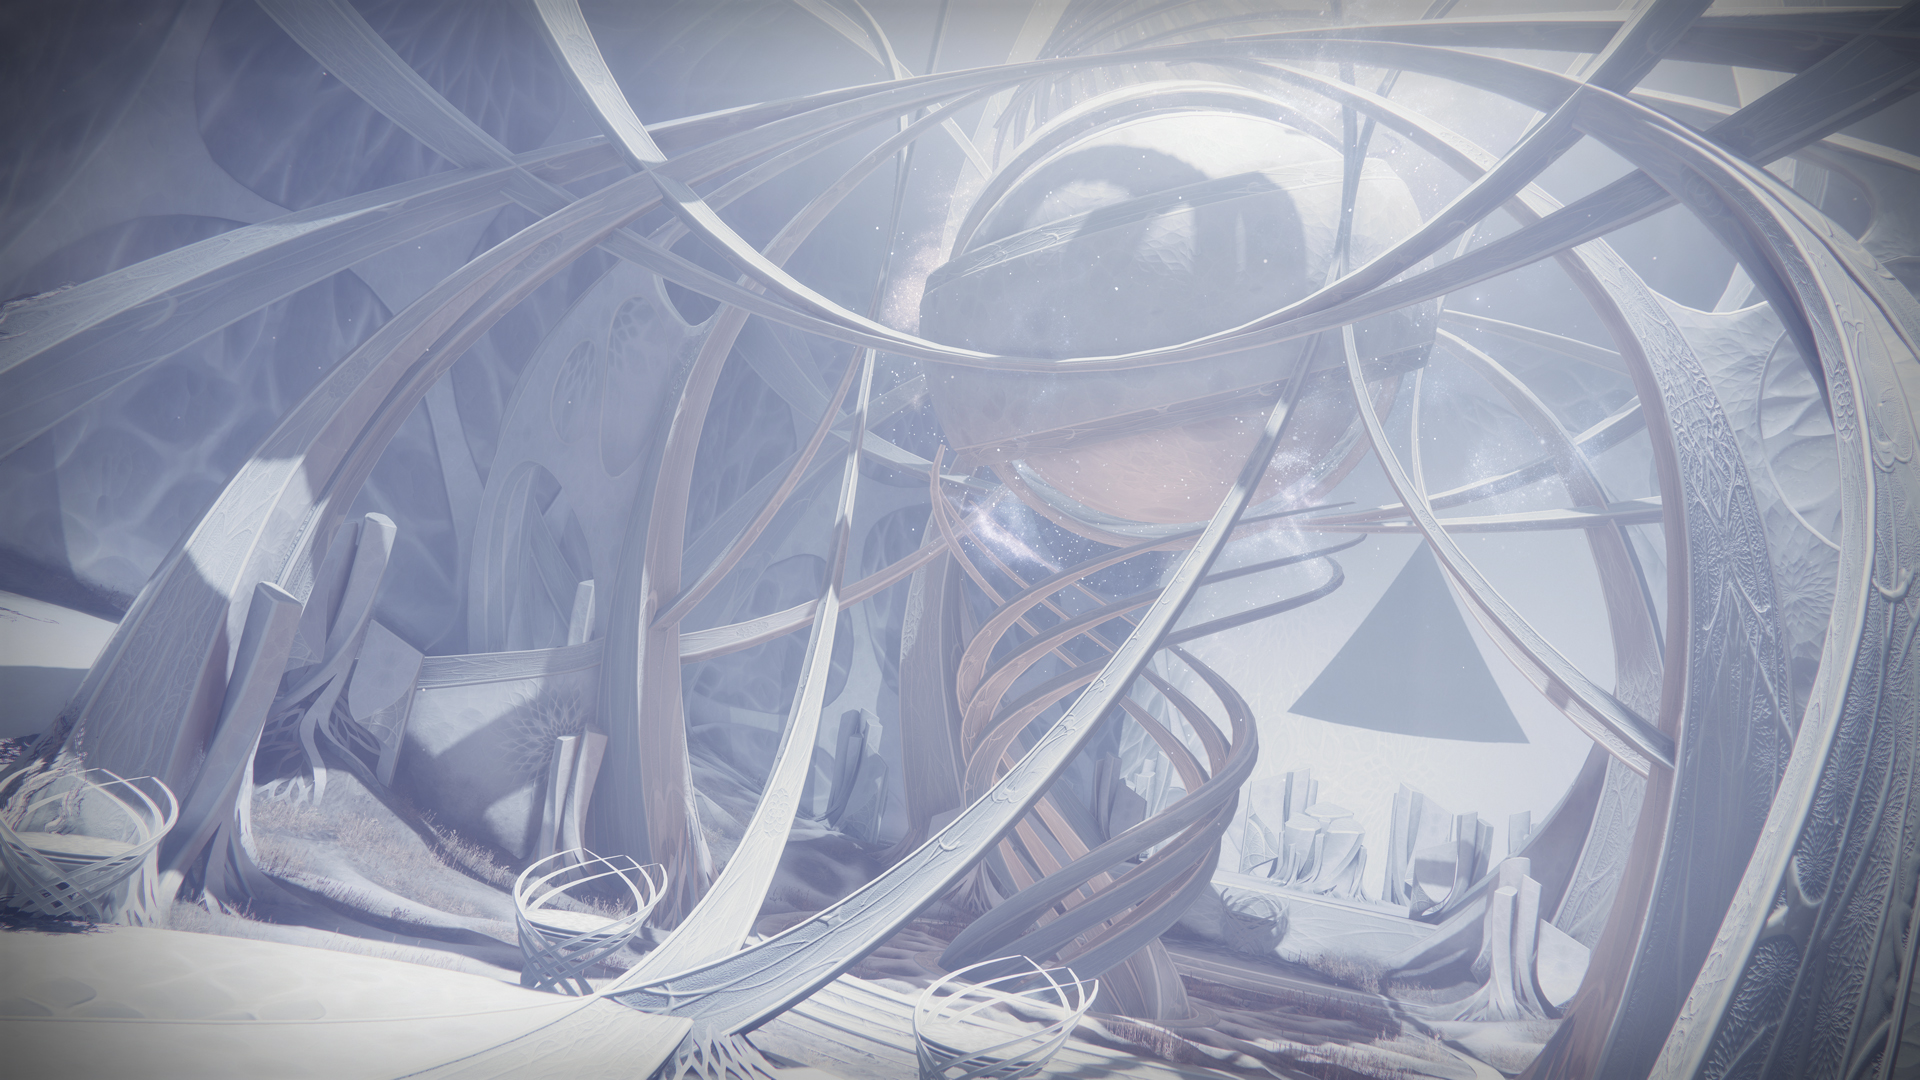
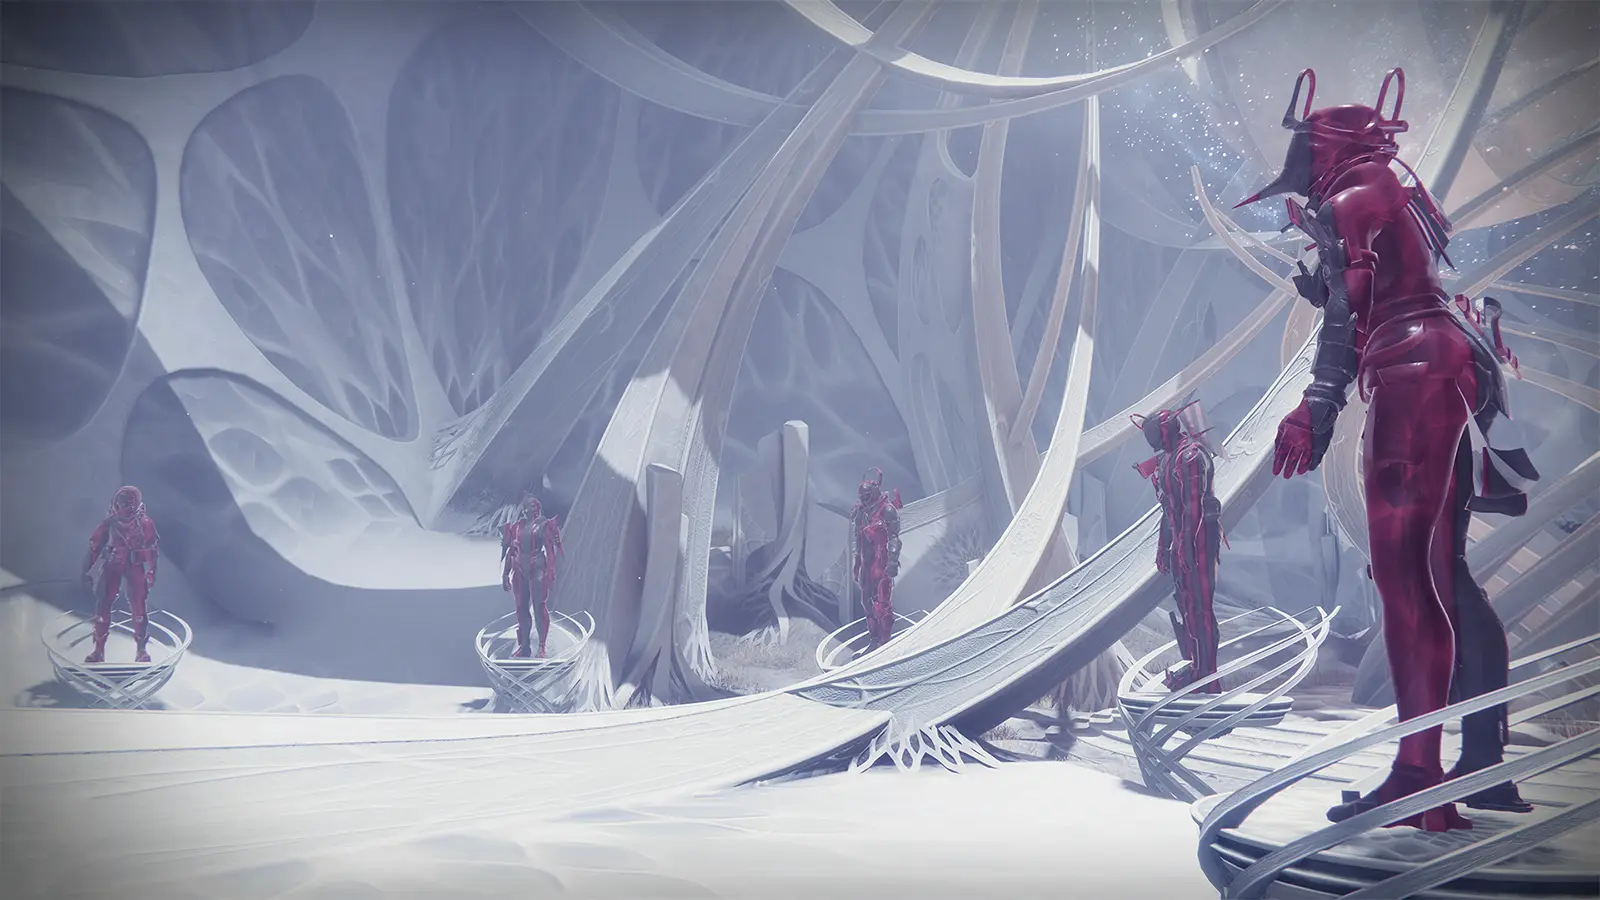
The first thing your Fireteam needs to do is a drip check. It may sound humorous, but it is not the case. To finish this encounter, you must be able to recognize not only your fellow guardians' armor but also their ghost shells. Six guardian statues, can be seen close to the area where you spawn. You can tell that each of these statues is a member of your Fireteam and is dressed in the same set of armor as the actual player if you examine them closely.
Make all of the fireteam members change up their appearance into something different and unique so that the fireteam can distunguish every member from each other. Next, ensure that every player users a unique Ghost Shell. Reason why this is needed will be explained later in the guide.
Three members of your Fireteam will be teleported into the shadow realm at random as the encounter begins. They will be in an exact replica of the main arena while in the shadow realm, but they will be by themselves. They will have to cooperate with you and the other members of their fireteam to figure out the puzzle in order to get out of the shadow realm and go back into your fireteam in the light realm.
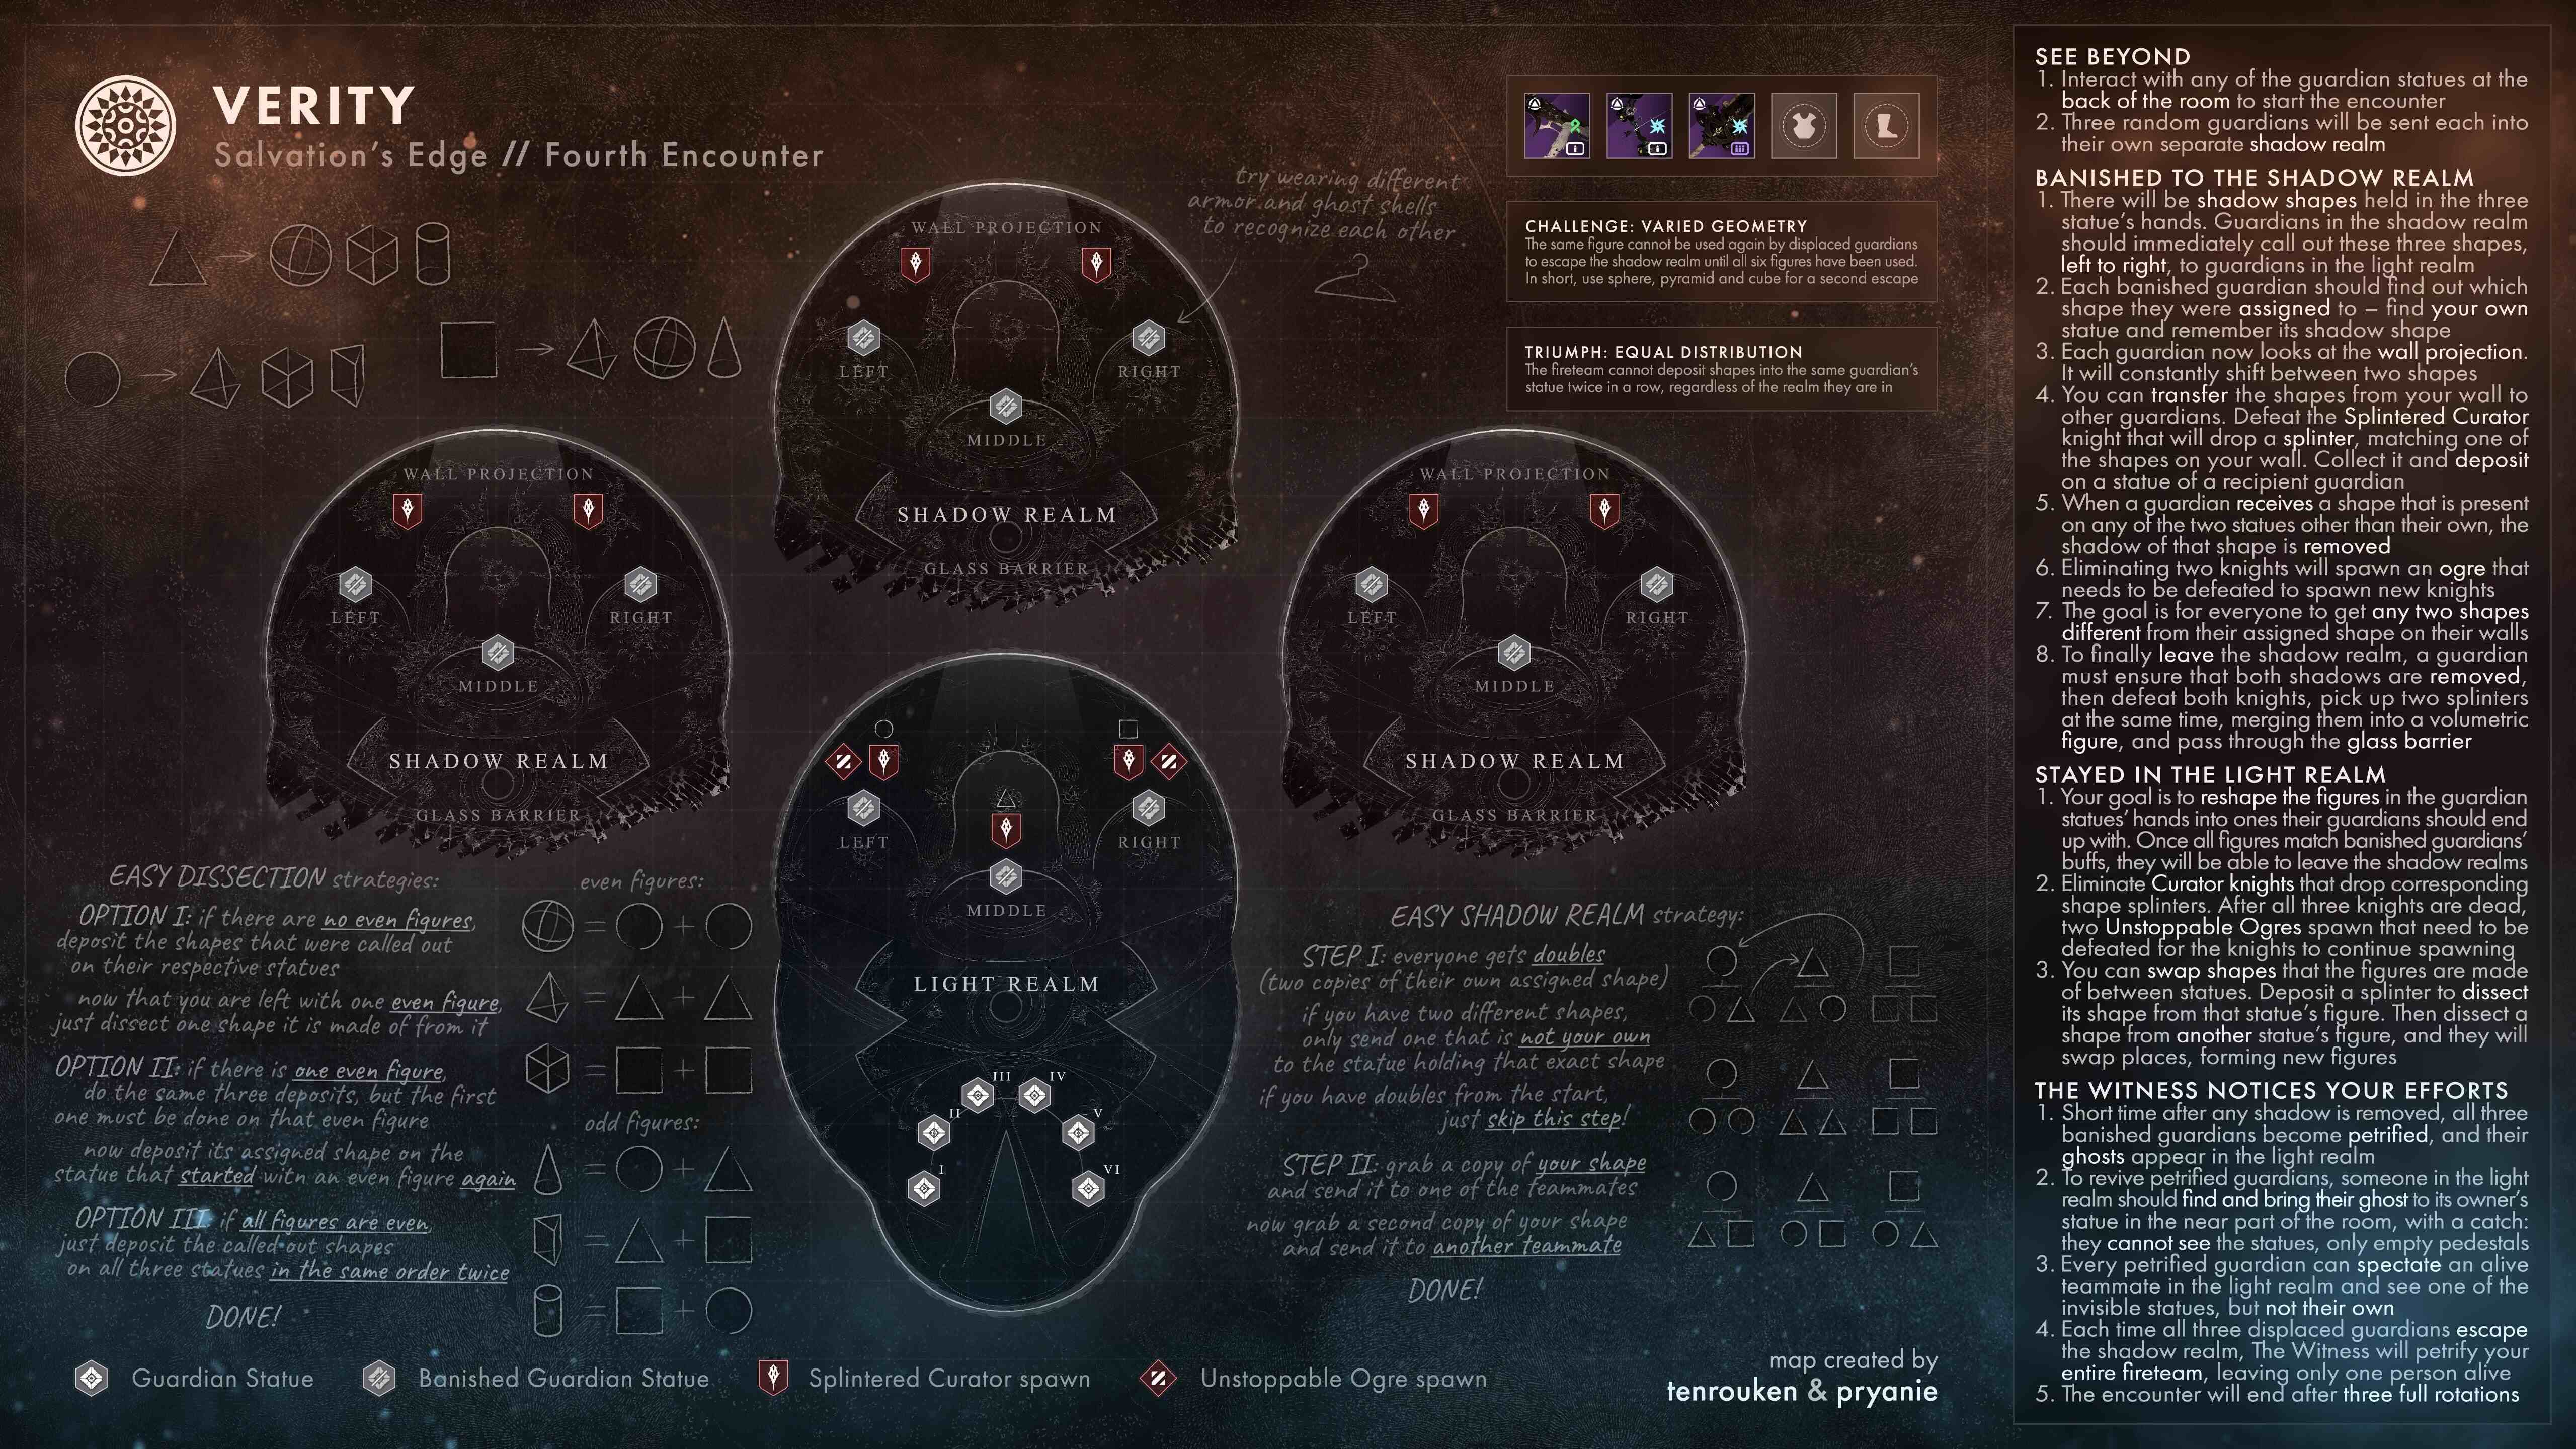
Everything is easier said than done, so lets dissect this encounter 2 Parts: Shadow Realm Guardians and Light Realm Guardians.
Shadow Realm Guardians: Escaping the Shadow Realm (Forming the Key)
If you are one of the 3 guardians to be teleported into the shadow realm, follow these steps:
Phase 1
-
Once you're in, look at the 3 guardian statues in the room.
One of them will be your guardian. The other two will be
the other two guardians who got teleported as well.
- Assign one person to read all three shapes the guardians are holding, from left to right, and type the order in the chat.
- So for example, if left guardian is holding square, middle is holding Triangle and right guardian is holding a Circle, type "STC" in the chat. This is needed for them to solve their puzzle on the outside.
- Look at the shape your guardian is holding (See first picture). Memorise it. The "key" you are forming to leave the shadow realm always consists of the two shapes your guardian is NOT holding. In this example, your guardian is holding a square, so the key is a circle + triangle.
-
Look at the wall in the back with the changing shapes (see
second picture).
- In all cases, you will see two shapes on the wall alternating between each other.
- In most cases, one of those two shapes will be the shape your guardian is holding, the other shape is held by one of the other guardians. In this example, it will be Square + Triangle OR Circle.
- In rare cases, both shapes on the wall will be the shape your guardian is holding, alternating between each other. This means you've automatically completed Phase 1. In this example, it will be Square + Square.
- Pick up Triangle and deposit it into one of the the guardian's statue that is shown holding the Triangle shape in its hand.
-
On the flip side, one of your teammates will pick up and deposit
a Square shape into your statue, and on the wall in your room,
you will see two Squares alternating between each other.
- If you notice only one shape in your room wall with no transitioning animation, it means you have only one shape in your room. You should always have two shapes by then end of the phase.
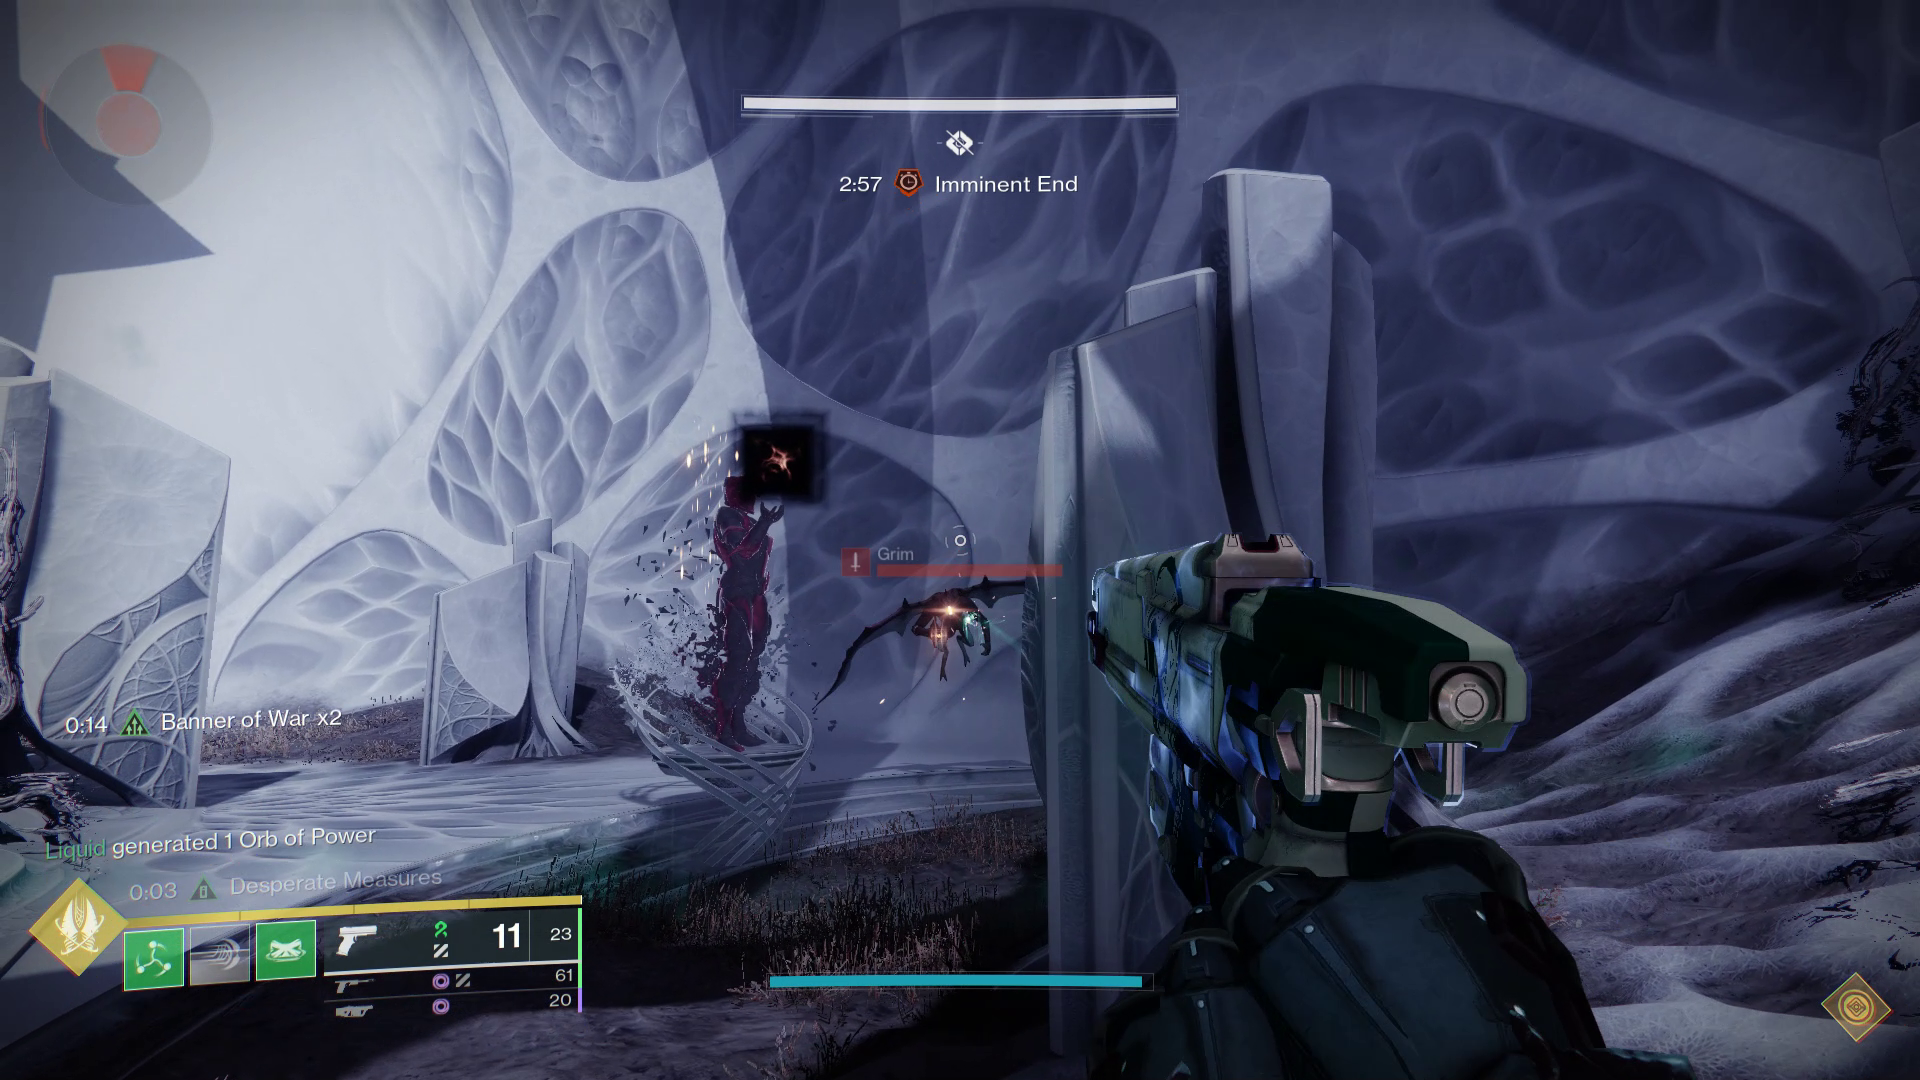 Look for the statue of your guardian and memorise the shape it is
holding.
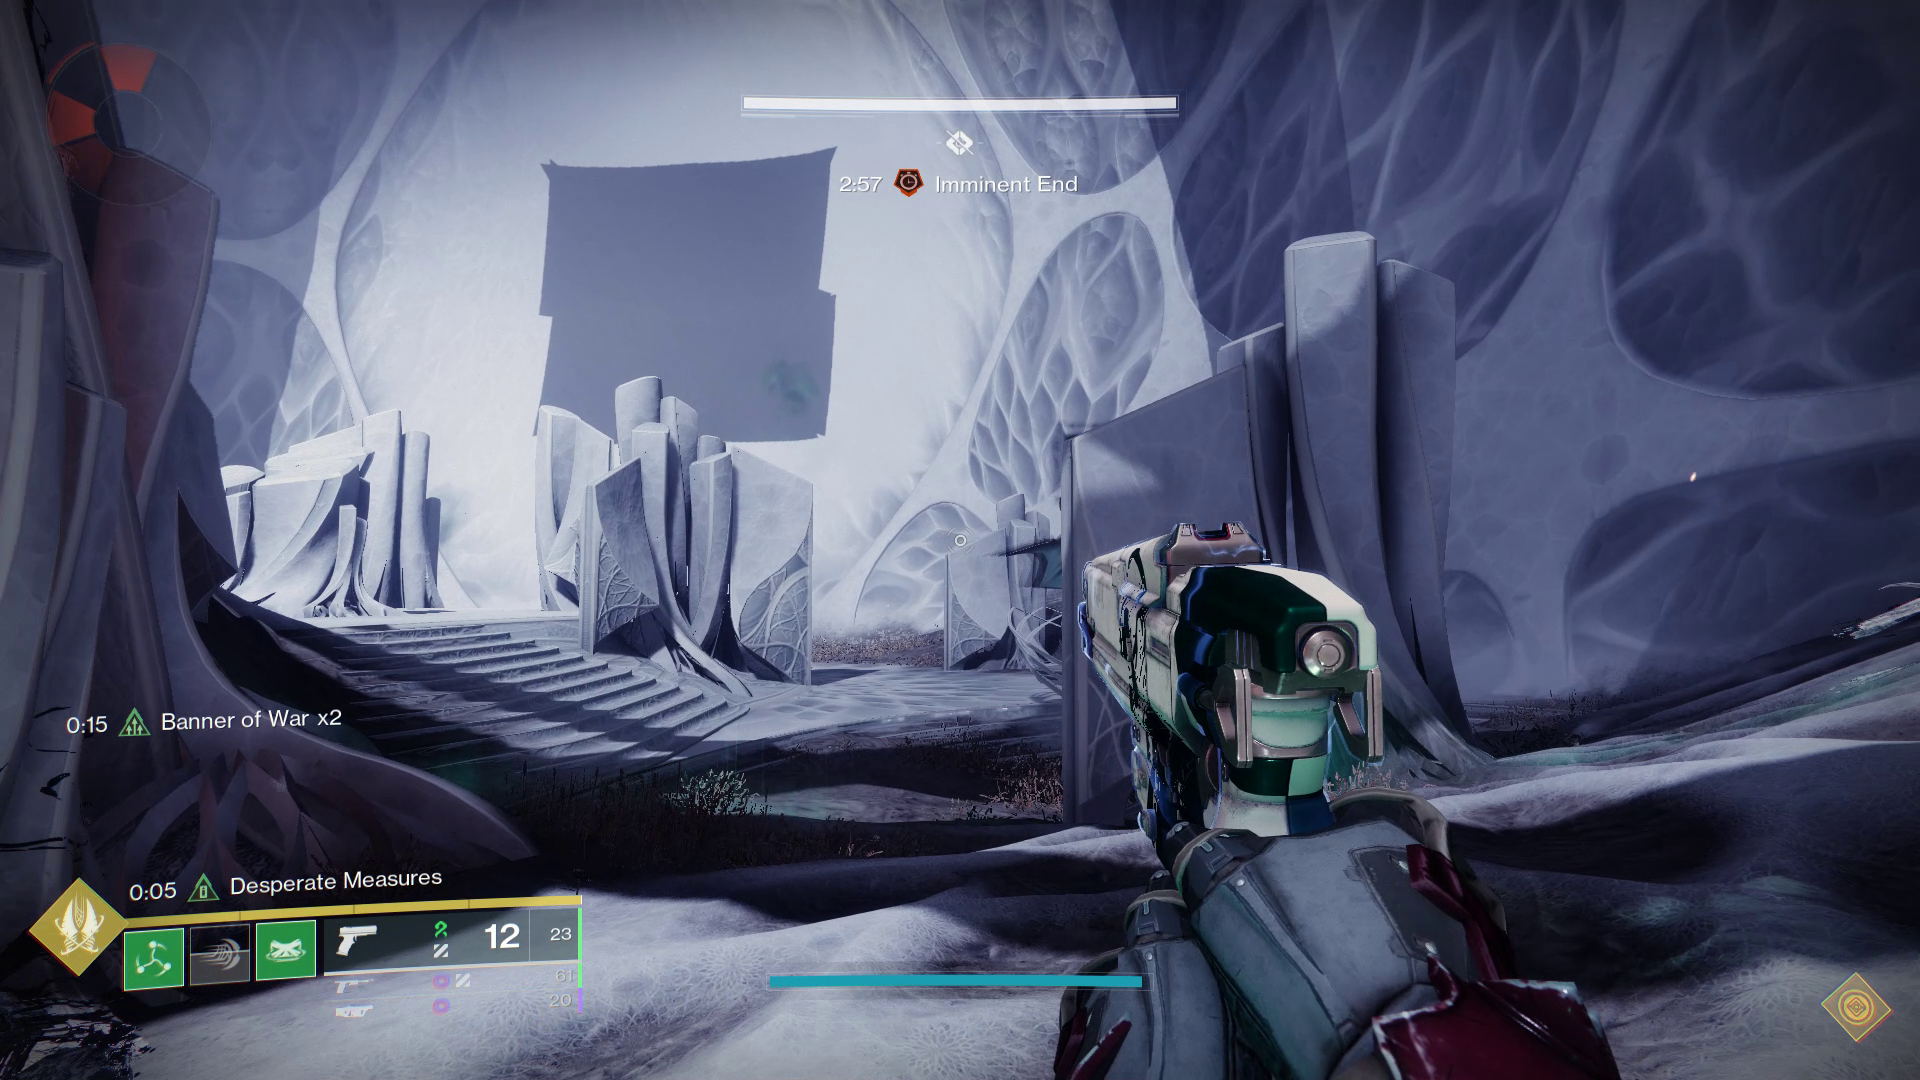 By the end of Phase 1, your wall should have two alternating
identical shapes matching the shape your guardian is
holding.
Phase 2
Phase 2 is very simple. By this phase, all of the 3 players should have a pair of identical alternating shapes on the wall. What you need to do now is to simply pass these two shapes to your other two guardians in their shadow realm. Follow the steps below:
- Check that you have a pair of identical shapes alternating with each other (Square + Sqaure)
- If you notice only one shape in your room wall with no transitioning animation, it means you have only one shape in your room. Aka one of y'all f**ed up.
- Since there are only one type of shape being shown on the wall, killed Knights will be guaranteed to drop the shape, in this case, Square, since your wall is a containing a pair of squares. Kill the Knight and pickup the shape.
- Pick up the sqaures and deposit them into the two statues which DO NOT look like your guardian, one by one.
- Once you kill the Knights and picked up their shapes (or if the shapes despawn), an ogre will spawn (Unstoppable Champion if on Master difficulty). Kill that ogre to respawn the Knights again.
- Your other two teammates in their shadow realm will be doing the same thing. By the end of this phase, you should be seeing the two shapes you need to make your key to escape on the wall (aka the two shapes your guardian statue is NOT holding). For this example by the end, the two shapes on your wall should be a Triangle + Circle, since your guardian is holding a Square.
Reversing Catatonic Decimation (Part 1)
At some point between Phase 2 and 3, or after around 6 dunks in total by the team, the 3 people inside the shadow realm will "die". However, they are not actually dead, and can be revived back into their room by dunking their ghost into their statue. This is where the fashion for your guardian and ghost shell will matter. The process will be as follows:
- The flavour text "The Witness notices your efforts.." will appear, and the 3 shadow realm guardians will "die".
- The 3 guardians outside will pick up the dead guardian's ghosts, noting the ghost's design and dunking it on the podium which has that guardian on it.
- The Problem: The guardians who are alive cannot see where the statues of the "dead" guardians are, so it falls on the "dead" players to spectate the living players to call out which guardian is placed on which statue (See picture).
- Each "dead" guardian can only see one of the other guardians statue and never their own. They must communicate to the light realm guardians which statue to dunk the ghosts in. Guardian fashion is important here so it will be easy to see which statue belongs to which guardian.
- Usually the best way my team does it is to label the statues from 1 to 6 from left to right, and when it is time to dunk, we type: "<Name> <Statue Number>". Example: "Vedallion 5". At the end of the day, do whatever way you prefer, just make sure the correct ghosts are dunked into the correct statues.
- Once a ghost is dunked, the "dead" guardian will be resurrected back into their shadow realm to continue to Phase 3.
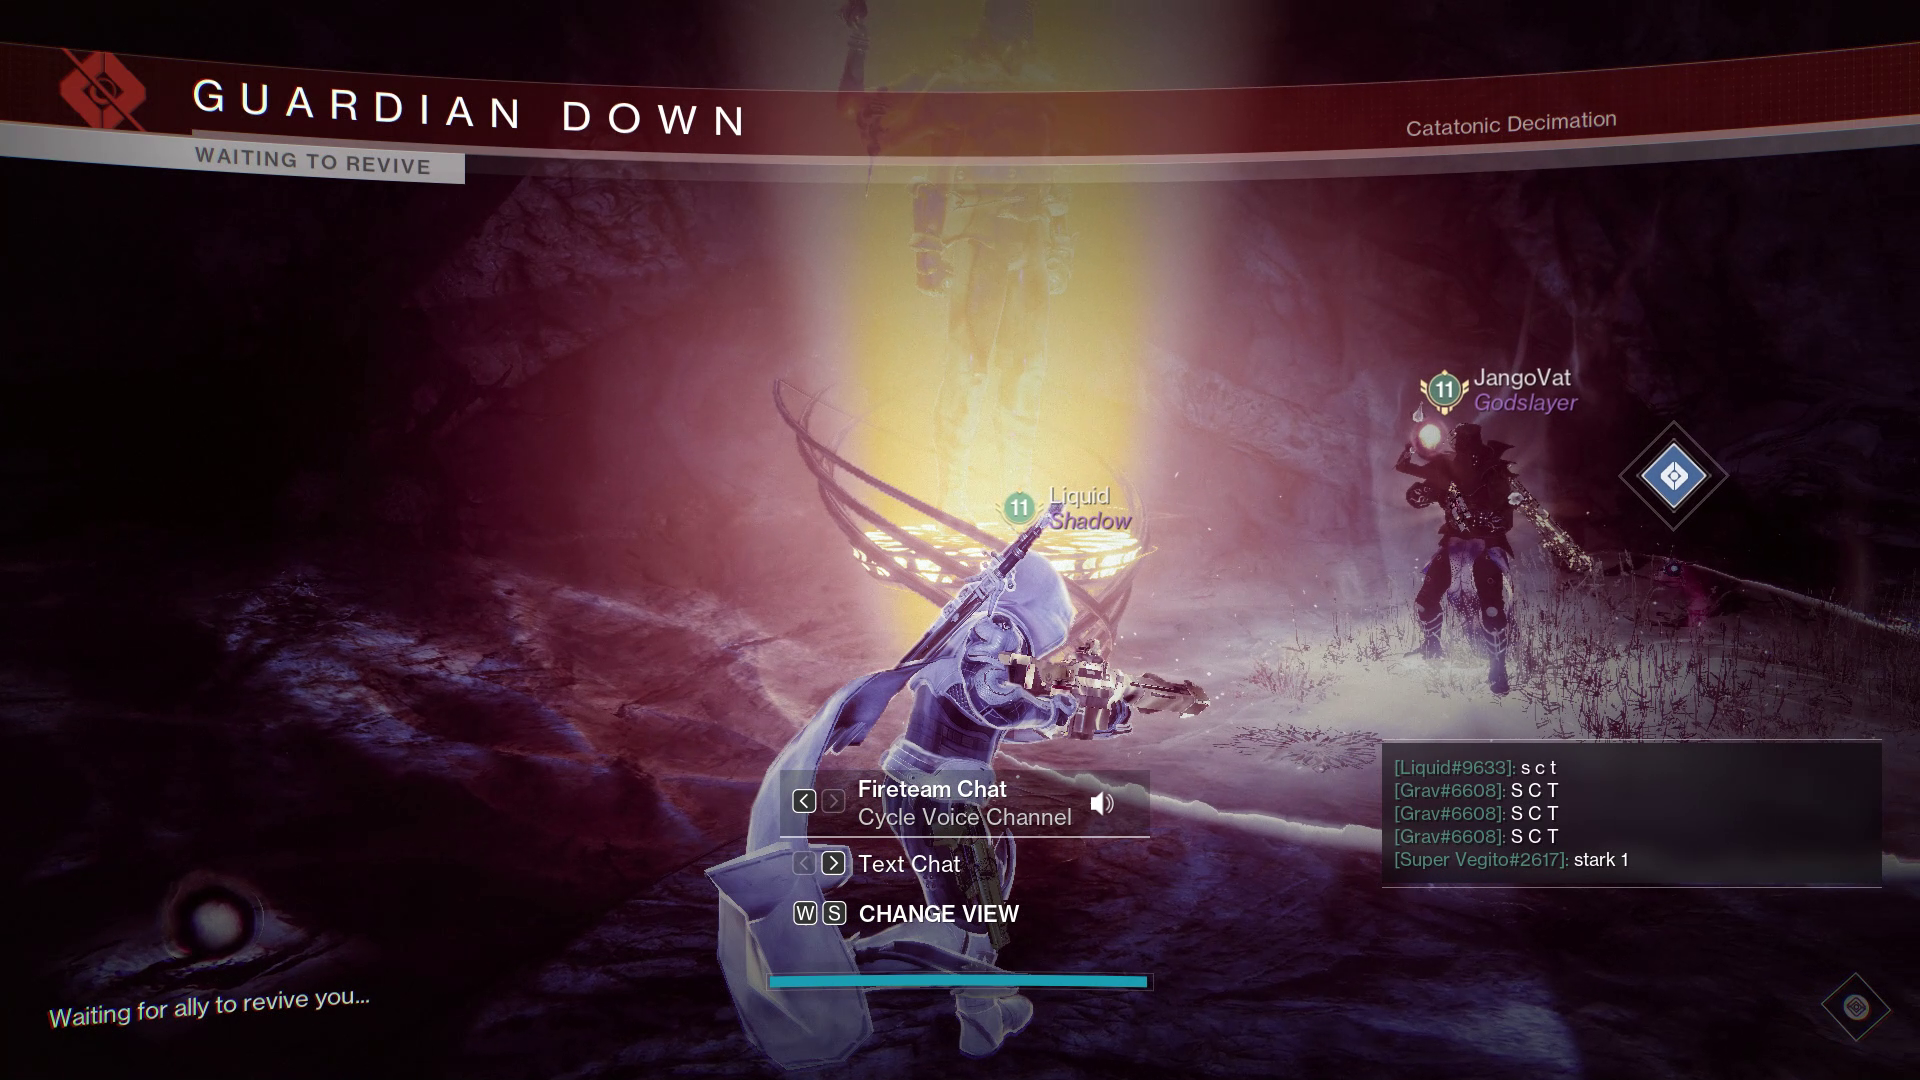
Phase 3
Once you have reached Phase 3, it's to finally form the "keys" to escape the Shadow Realm. It is pretty straight forward. Follow the steps:
- Ensure that on your wall, there are 2 shapes which are NOT the shapes your guardian statue is holding. In this case, since your guardian is holding a Sqaure, the shapes on your wall need to be a Triangle and a Circle.
- Start killing Knights and ensure you pick up one of each shape, in this case it is a Triangle and a Circle. Do not pick up the same shape twice, you will have essentially bricked yourself and the whole run.
- Wait for the Light Realm team to tell you that they have done their part of the puzzle. If everyone done their jobs correctly, the glass at the back of the Shadow Realm will shatter and allow the 3 guardians in it to exit and join the main team in the Light Realm.
- You are now ready to reverse Catatonic Decimation (Part 2) and extend Imminent End.
That is the end of the role as a Shadow Realm Guardian. While they are inside, the Light Realm guardians also doing their part of the puzzle. Shadow Realm guardians make the key, Light Realm guardians make the lock, let's see how they do it.
Light Realm Guardians: Dissecting 3D Shapes (Forming the Lock)
While the Shadow Realm guardians are doing their part in the Shadow Realm, the three players on the outside need to create the relevant 3D shapes (or locks) required to allow the people inside to escape. This is based on the symbol order called out by the people inside. To avoid confusion, you can have one person doing dissection, everyone else can ad-clear. Follow these steps:
- Once the Shadow Realm guardians are teleported in, they have to provide the outside team with the three shapes the guardian statues are holding from left to right. For example: TCS - Triangle, Circle, Square.
-
Based on the order called out, you must ensure the 3 statues have
3D shapes that are the combination of the 2 shapes that are
NOT in the order called. For example:
- The order is TCS: Triangle - Circle - Square. The 3 statues must be made to have a 3D shapes with the following combinations: (Square + Circle) - (Triangle + Square) - (Triangle + Circle). Which are named Cylinder - Prism - Cone.
- The following image shows the different combinations of shapes that make up the 3D shapes:
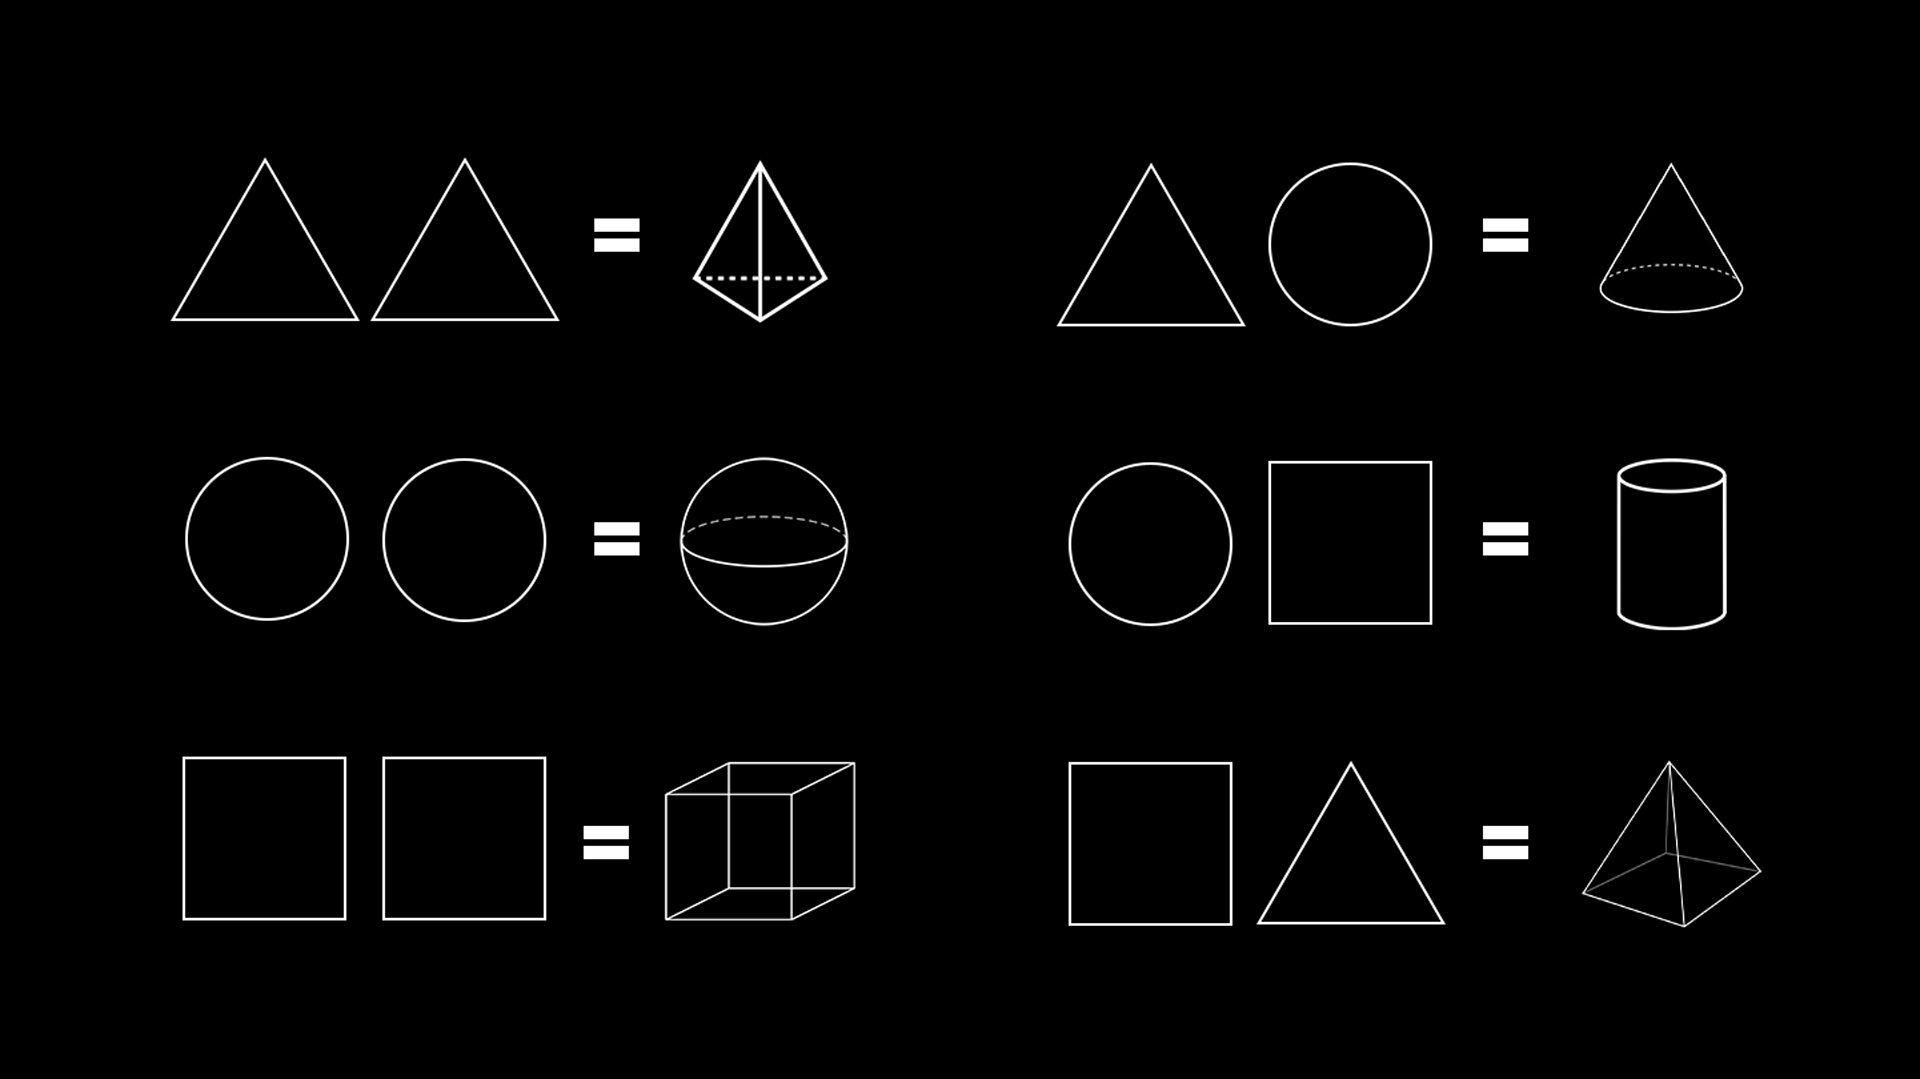
- Triangle + Triangle = Pyramid
- Circle + Circle = Sphere
- Square + Square = Cube
- Triangle + Circle = Cone
- Circle + Square = Cylinder
- Square + Triangle = Prism
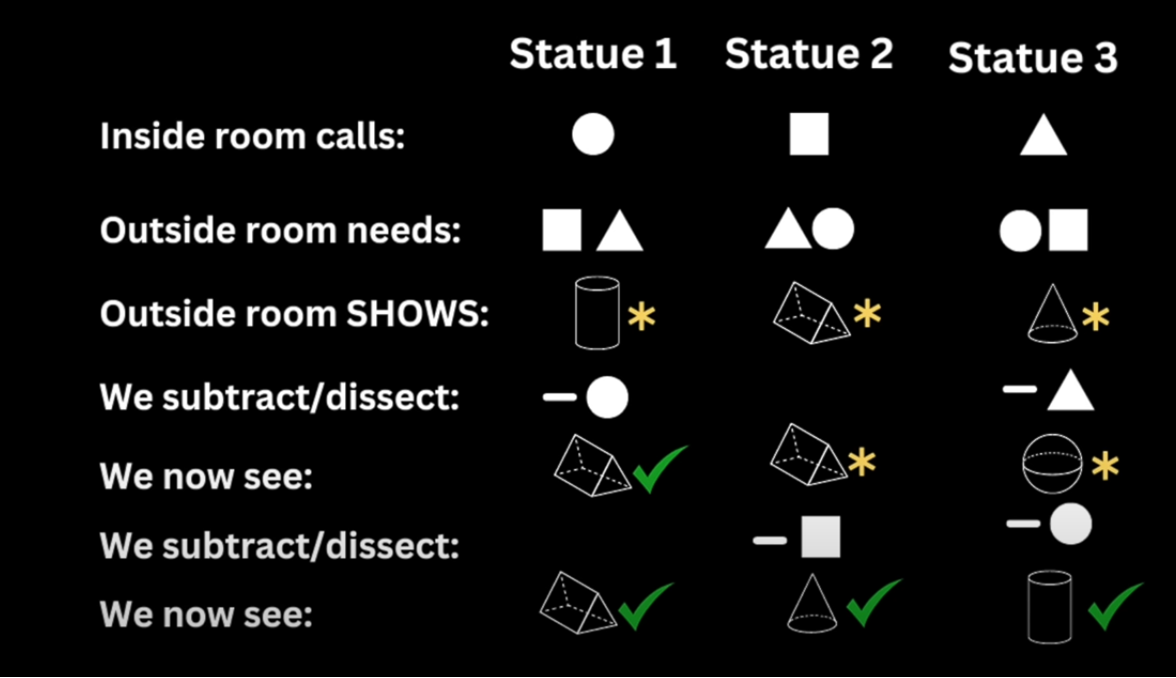
- Observe the three 3D objects currently present to see how they must be modified. Begin to modify shapes by dissecting the statue. the dissection process is as follows:
- Dunk the shape you wish to remove into a statue (that has that shape in its 3D object)
- Dunk the shape you wish to add to the first statue into a different statue that has the shape you wish to add to the first statue. This 2nd statue must have the shape you are dunking into it within its 3D object.
- The dissection process is complete. The shape you dunked into the first statue will be removed from the first statue and be replaced with the shape you dunked into the second statue. The second statue will have the shape you dunked into it removed and replaced with the statue you put into the first statue.
TLDR: Dissecting removes 1 shape from a statue and puts it into another statue, and removes the other shape from the 2nd statue and puts it into the first. Refer to the below picture as an example:
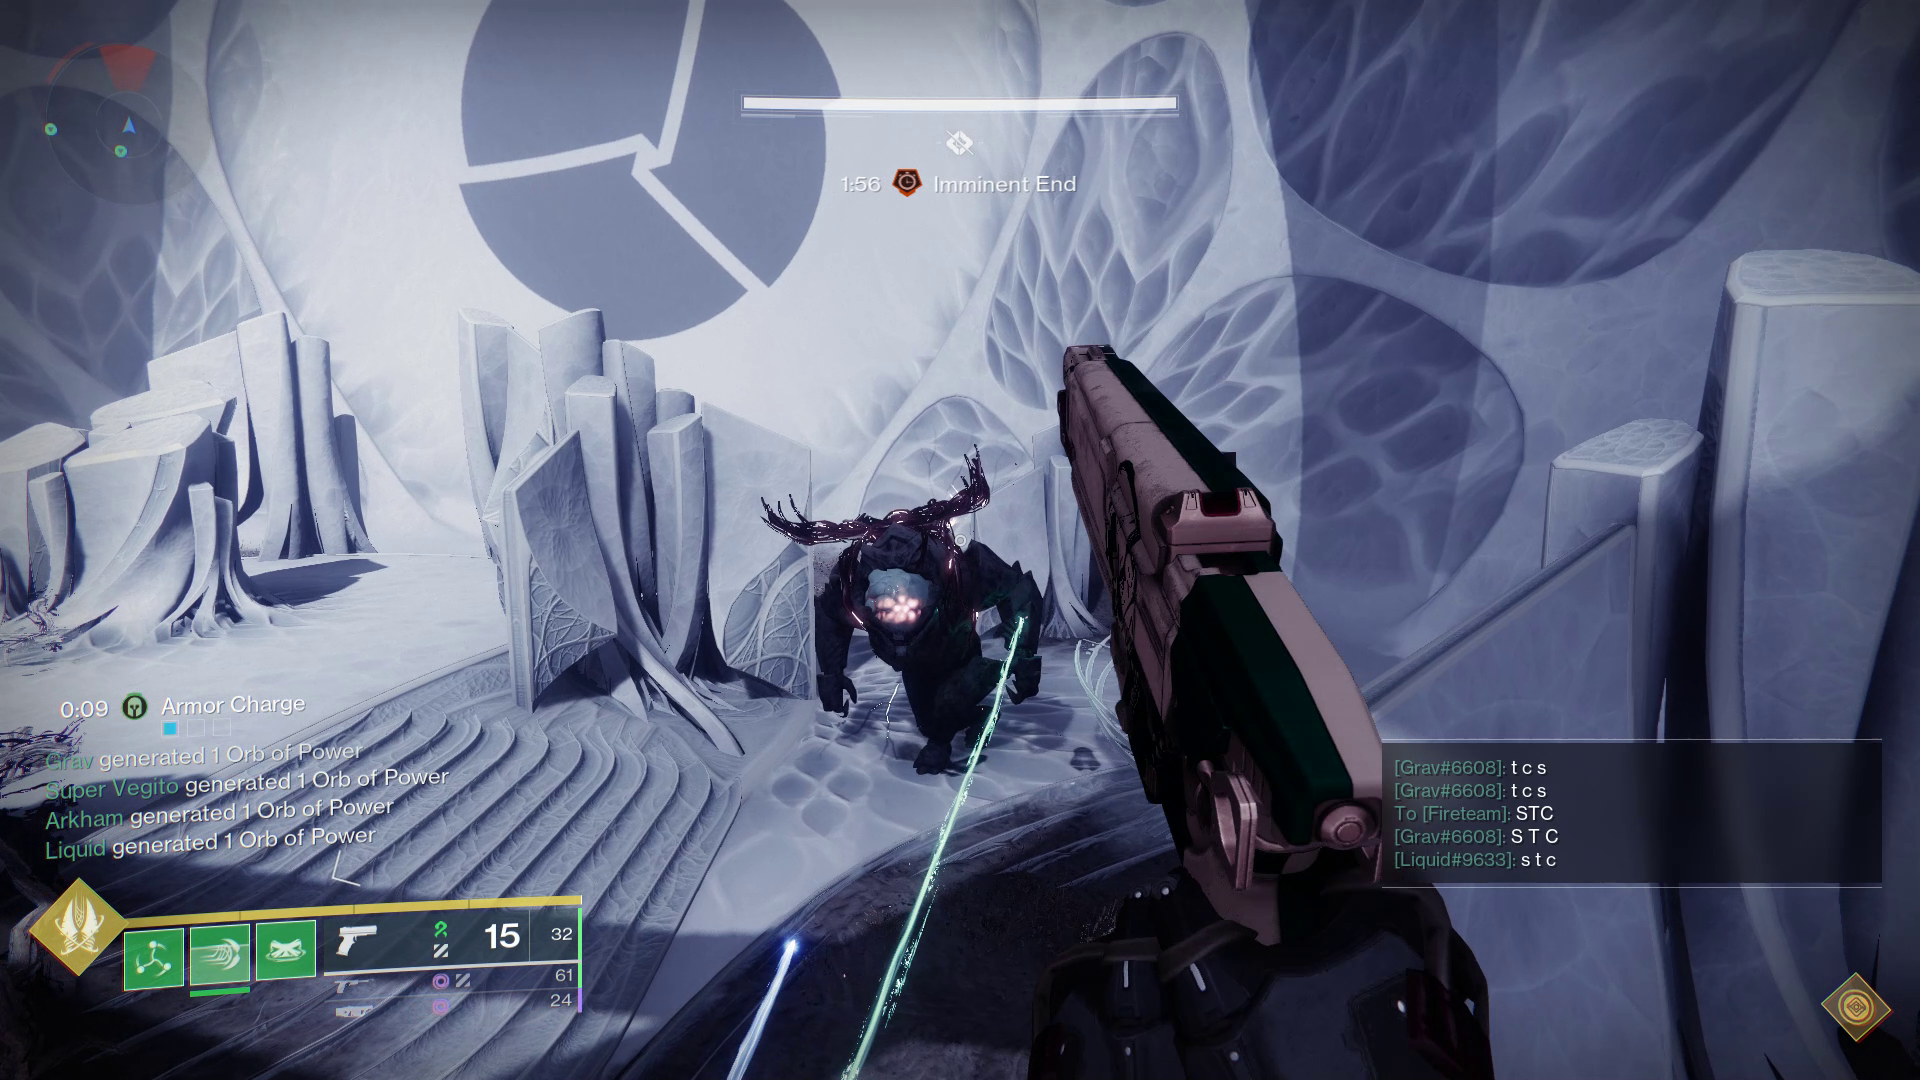 Kill the Champions to spawn the Knights that drop
shapes.
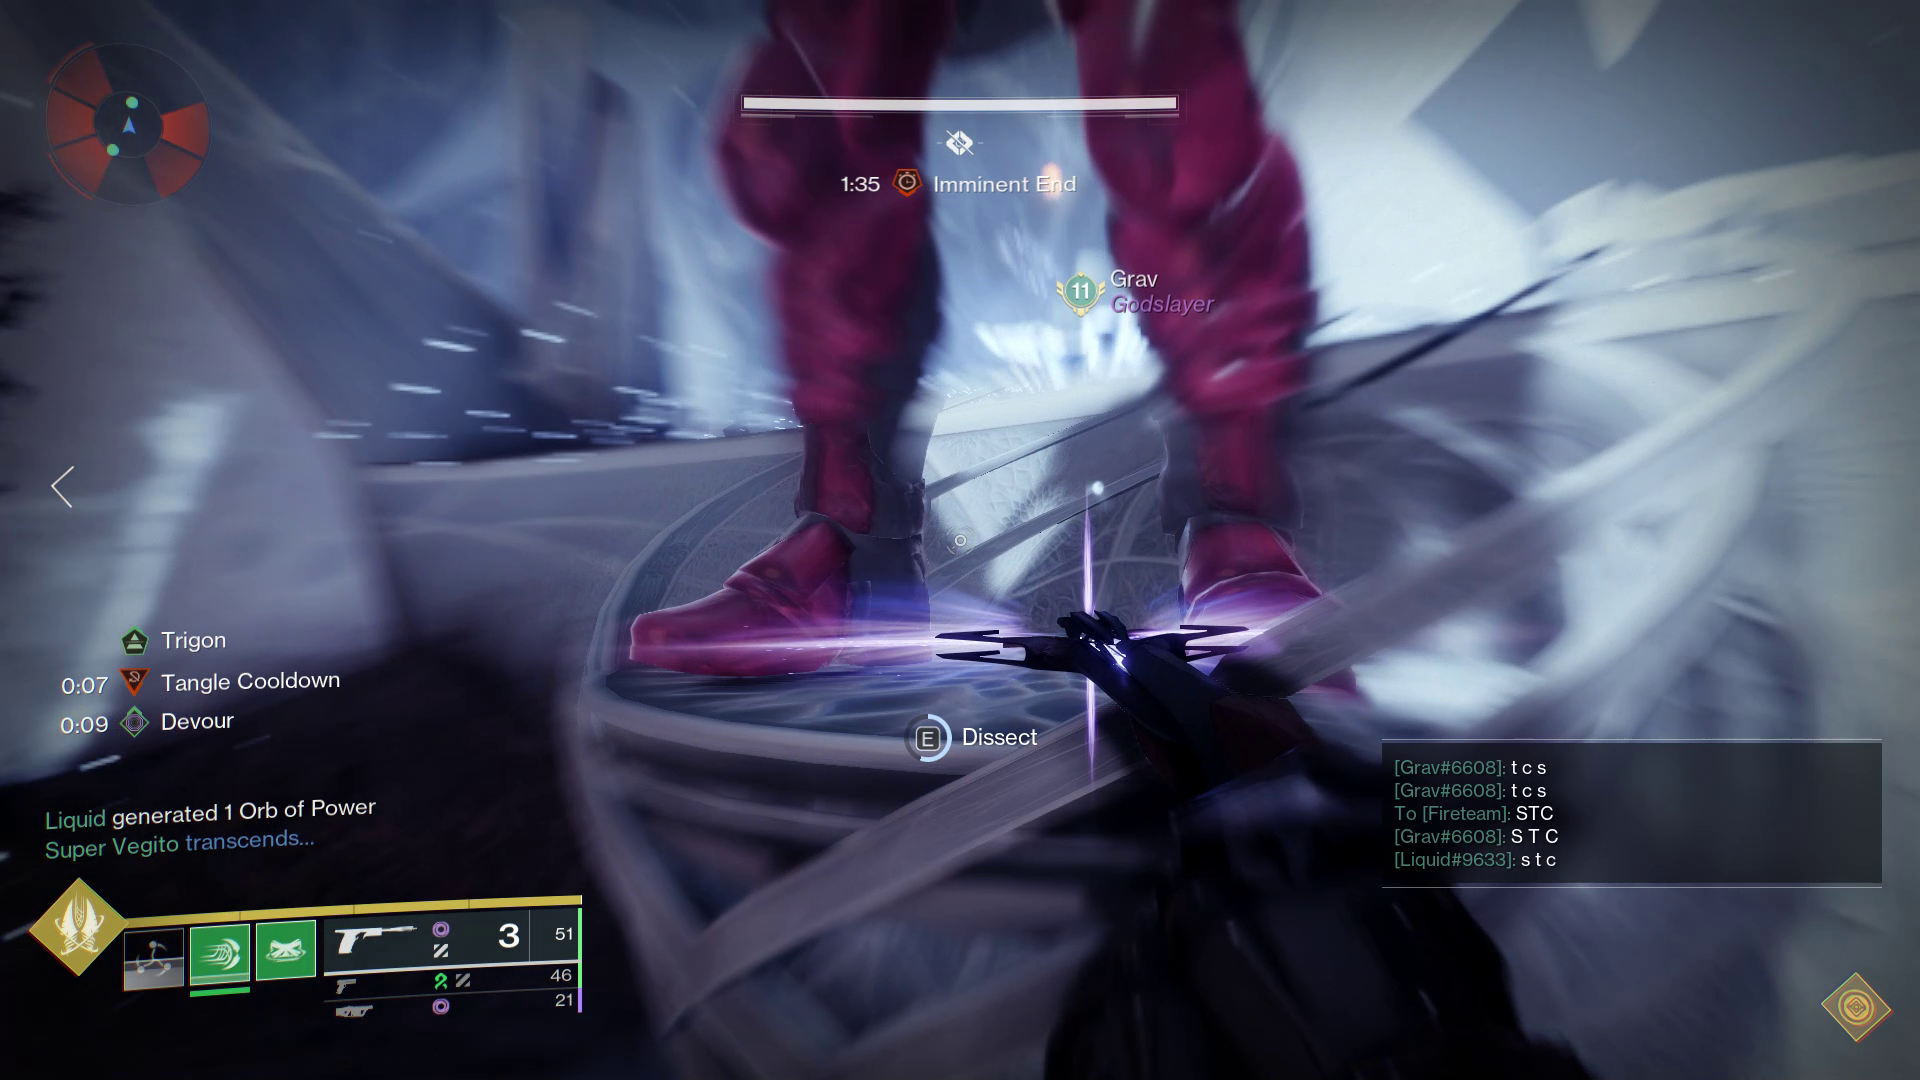 Go to the foot of the statue to dissect the shape on it.
- Keep moving the shapes around until the correct order is achieved. if it says "offering rejected" when you try to dunk, it means the 3D object on statue you are dunking on does not contain the shape you are trying to dunk.
- At some point, the flavour text "The Witness notices your efforts.." will appear, and the 3 Shadow Realm guardians are about to be "killed". You must then follow the instructions to reserve Catatonic Decimation (Part 1) and resurrect your teammates back in the Shadow Realm.
- Once you've resurrected your teammates back, continue with the puzzle if it is not completed. Once it is, you're done. Ad-clear and stay at the back of the room while the Shadow Realm guardians make their key to escape. If all goes well, they will escape and join you at the back of the room.
- The whole team is now ready to reverse Catatonic Decimation (Part 2) and extend Imminent End.
Reversing Catatonic Decimation (Part 2) and Extending Imminent End (Wipe Timer)
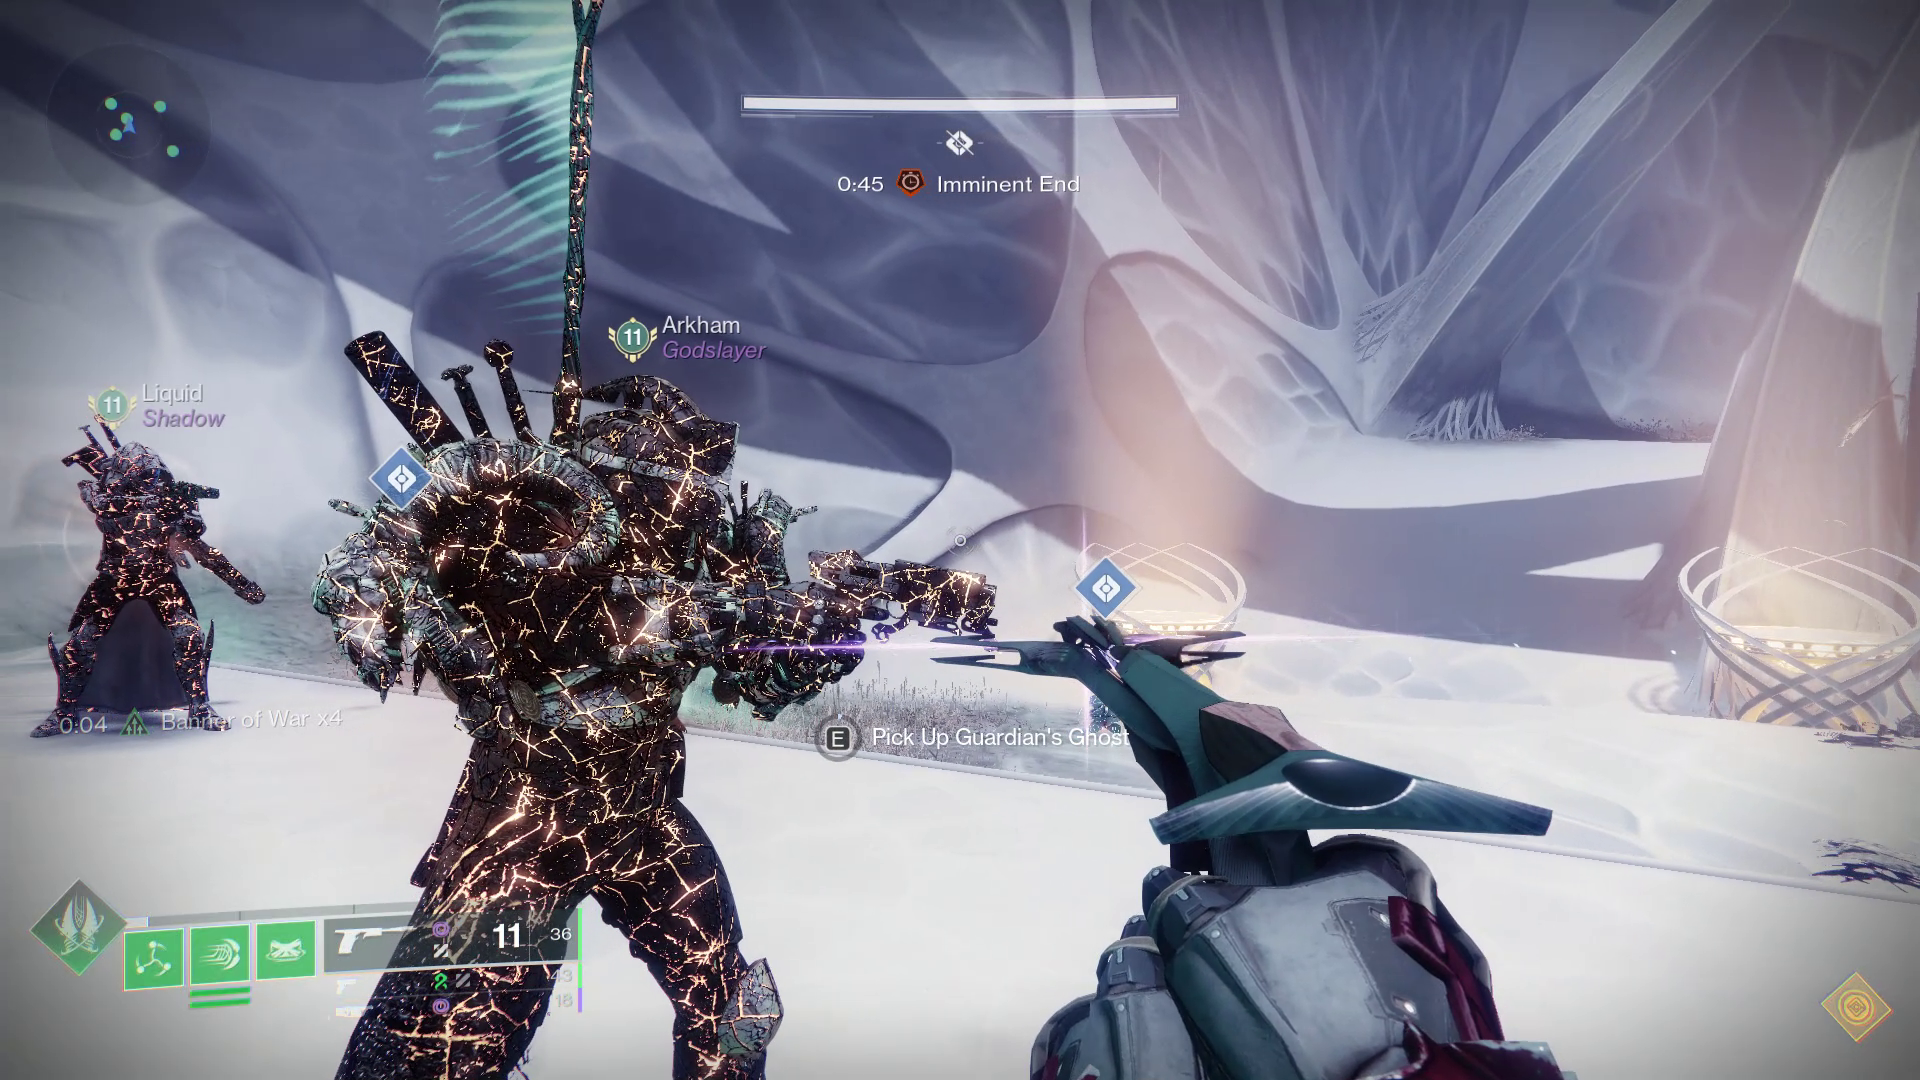
Once all 6 guardians are back in the Light Realm, the "Imminent End" wipe timer will stop and the team should kill the remaining ads. After that, the team will have to prepare to reverse Catatonic Decimation again.
However, the difference is that now The Witness will kill FIVE guardians, leaving one alive. The process is the same as Part 1, except you're resurrecting five guardians instead of three.
- You will know if you're the lone survivor if you do NOT see the cracks appearing on your screen and your guardian followed by your "death" (See picture).
Repeat what you did for the previous one, where the "dead" players spectate and call out which guardian is on which statue so the living player can dunk in the correct spot. Once you resurrect a guardian, they can help to collect another ghost shell and dunk as well. Once all guardians have been resurrected, the "Imminent End" wipe timer will be reset and 1 round is done.
This entire process is repeated 2 more times before the encounter is complete. Good luck.
Tips
The following websites have proven to be useful to help out in completing this encounter. Use them to make your lives easier.
- Recommended: Salvations Edge Verity (4th) Encounter Solver by Ninjachicken737.
- Destiny 2 - Salvation's Edge Verity Calculator by Yugnar and Swegmesterflex
- Verity Gear Viewer.
- Verity Simulator.
Encounter Triumph:
Equal Distribution - Complete the encounter without depositing on the same statue twice in a row.
Challenge Mode:
Varied Geometry - Each round cannot be solved with the same set of shapes.
Master Difficulty:
- Ogres in the shadow realm are now Unstoppable Champions.
- Hive Knights have arc shields.
The Witness
Loadouts:
- Hunters: Celestial Nighthawk Golden Gun + Still Hunt exotic sniper.
- Warlocks: One Well of Radiance, rest can go Nova Bomb (Paired with Inmost / Star-Eater exotic class item) or Needlestorm.
- Titans: Twilight Arsenal.
Weapons:
- Microcosm
- Snipers to deal extra DPS, take down glpyhs, shoot arms.
- Heavy hitting primary weapons to deal with hands easier.
- Linear Fusion Rifles (If you don't have Microcosm)
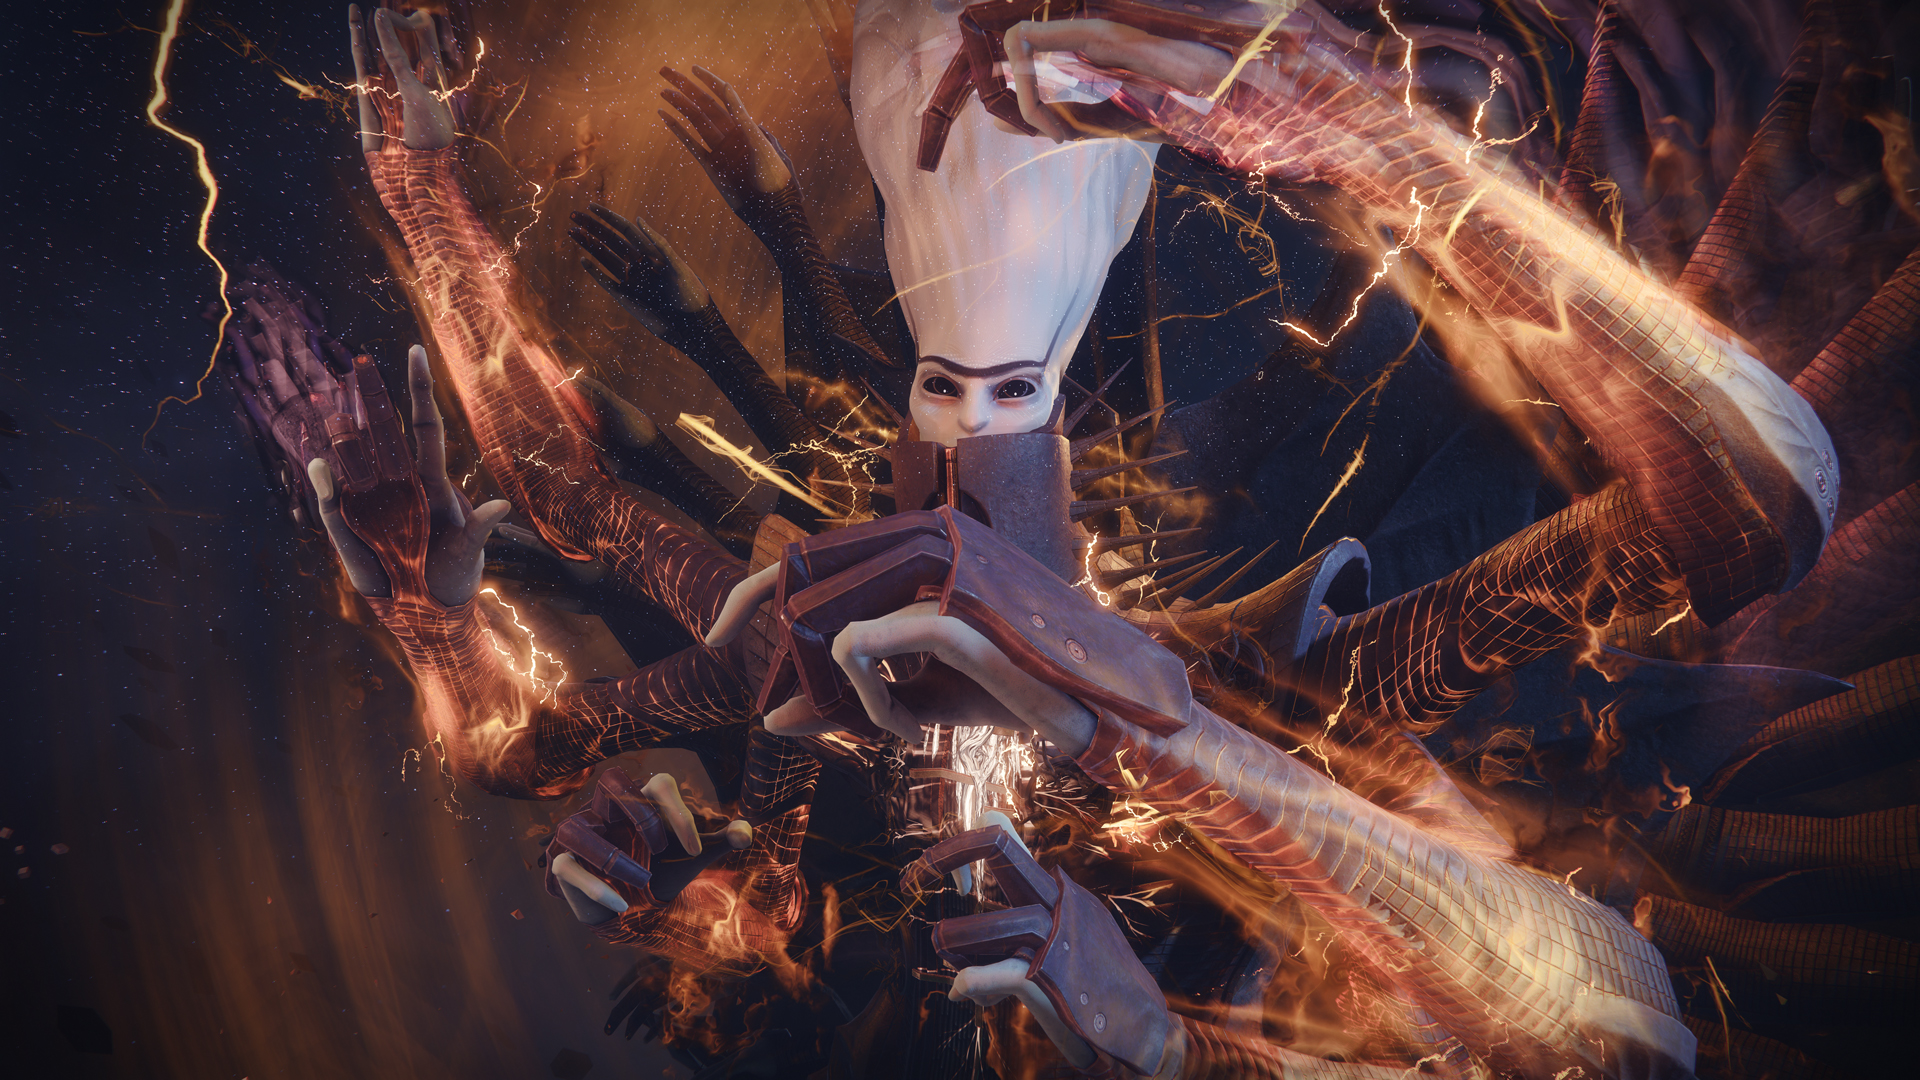
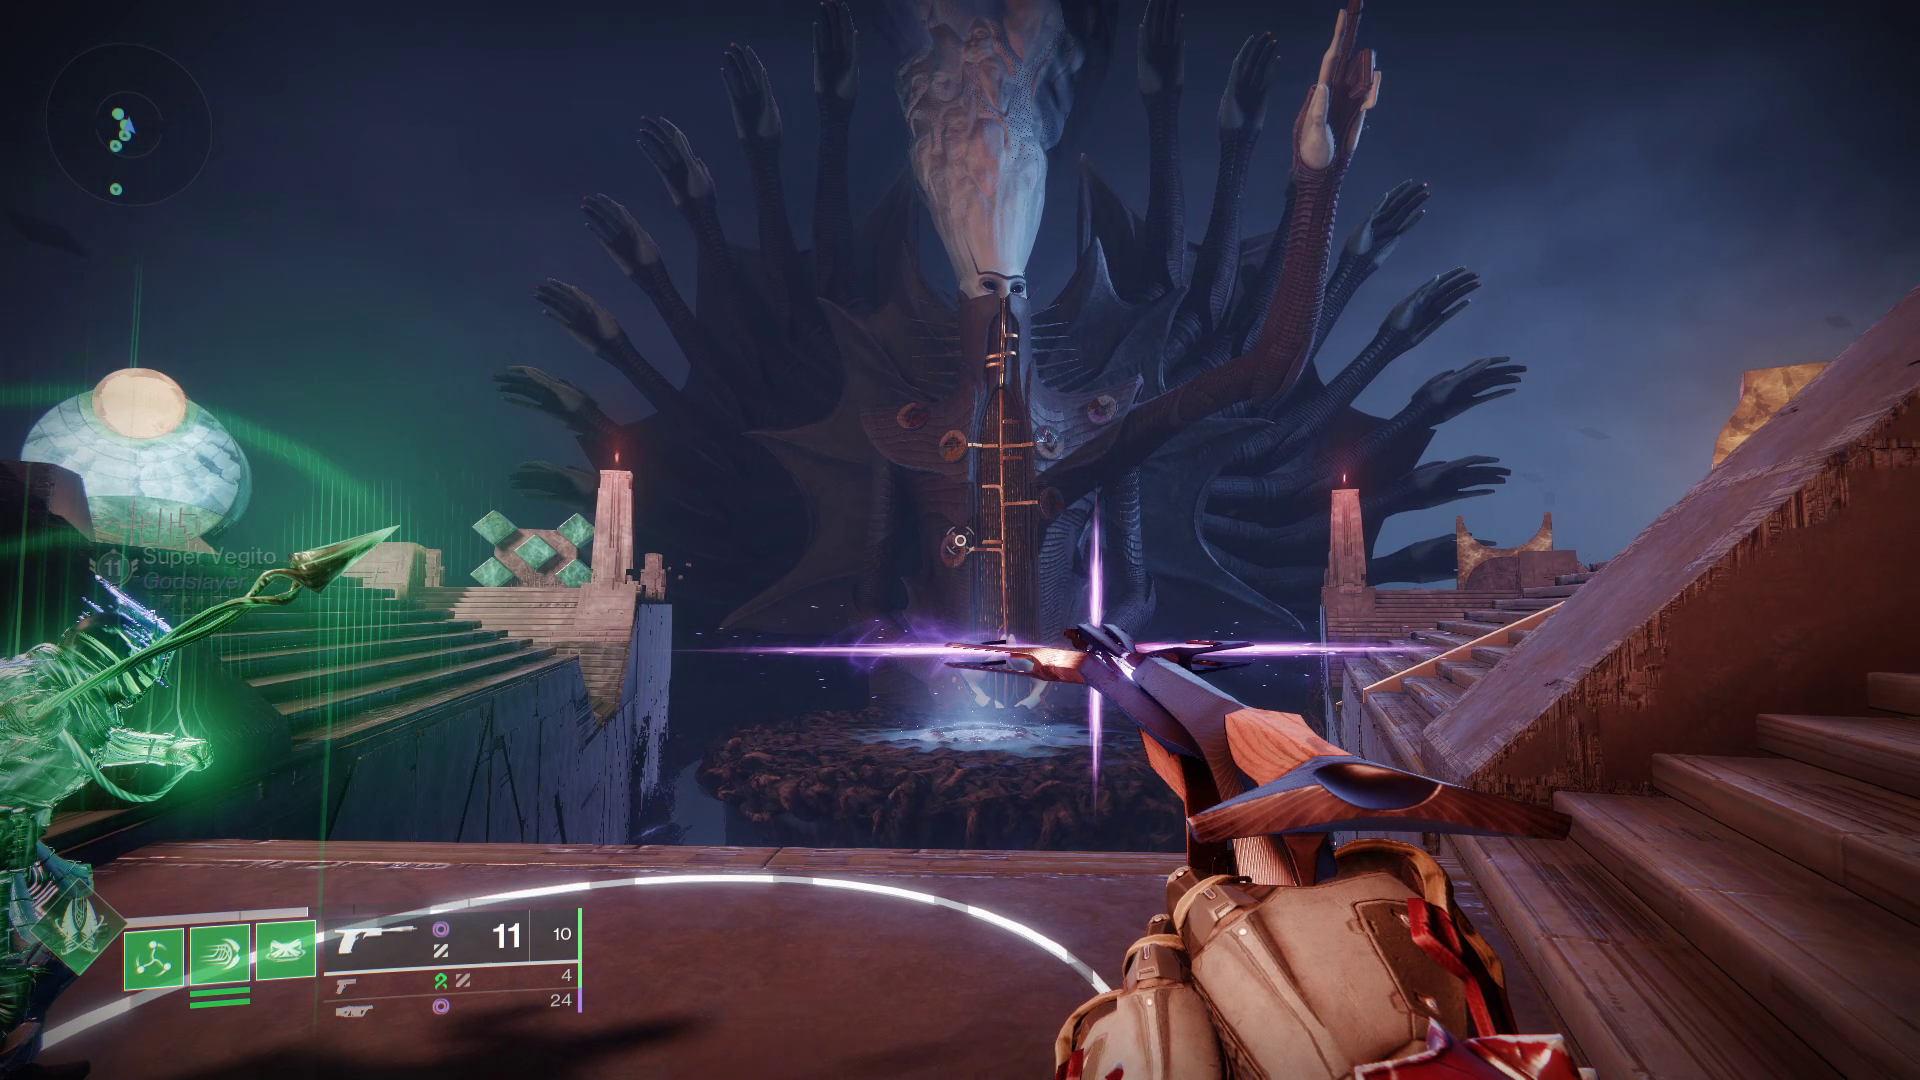
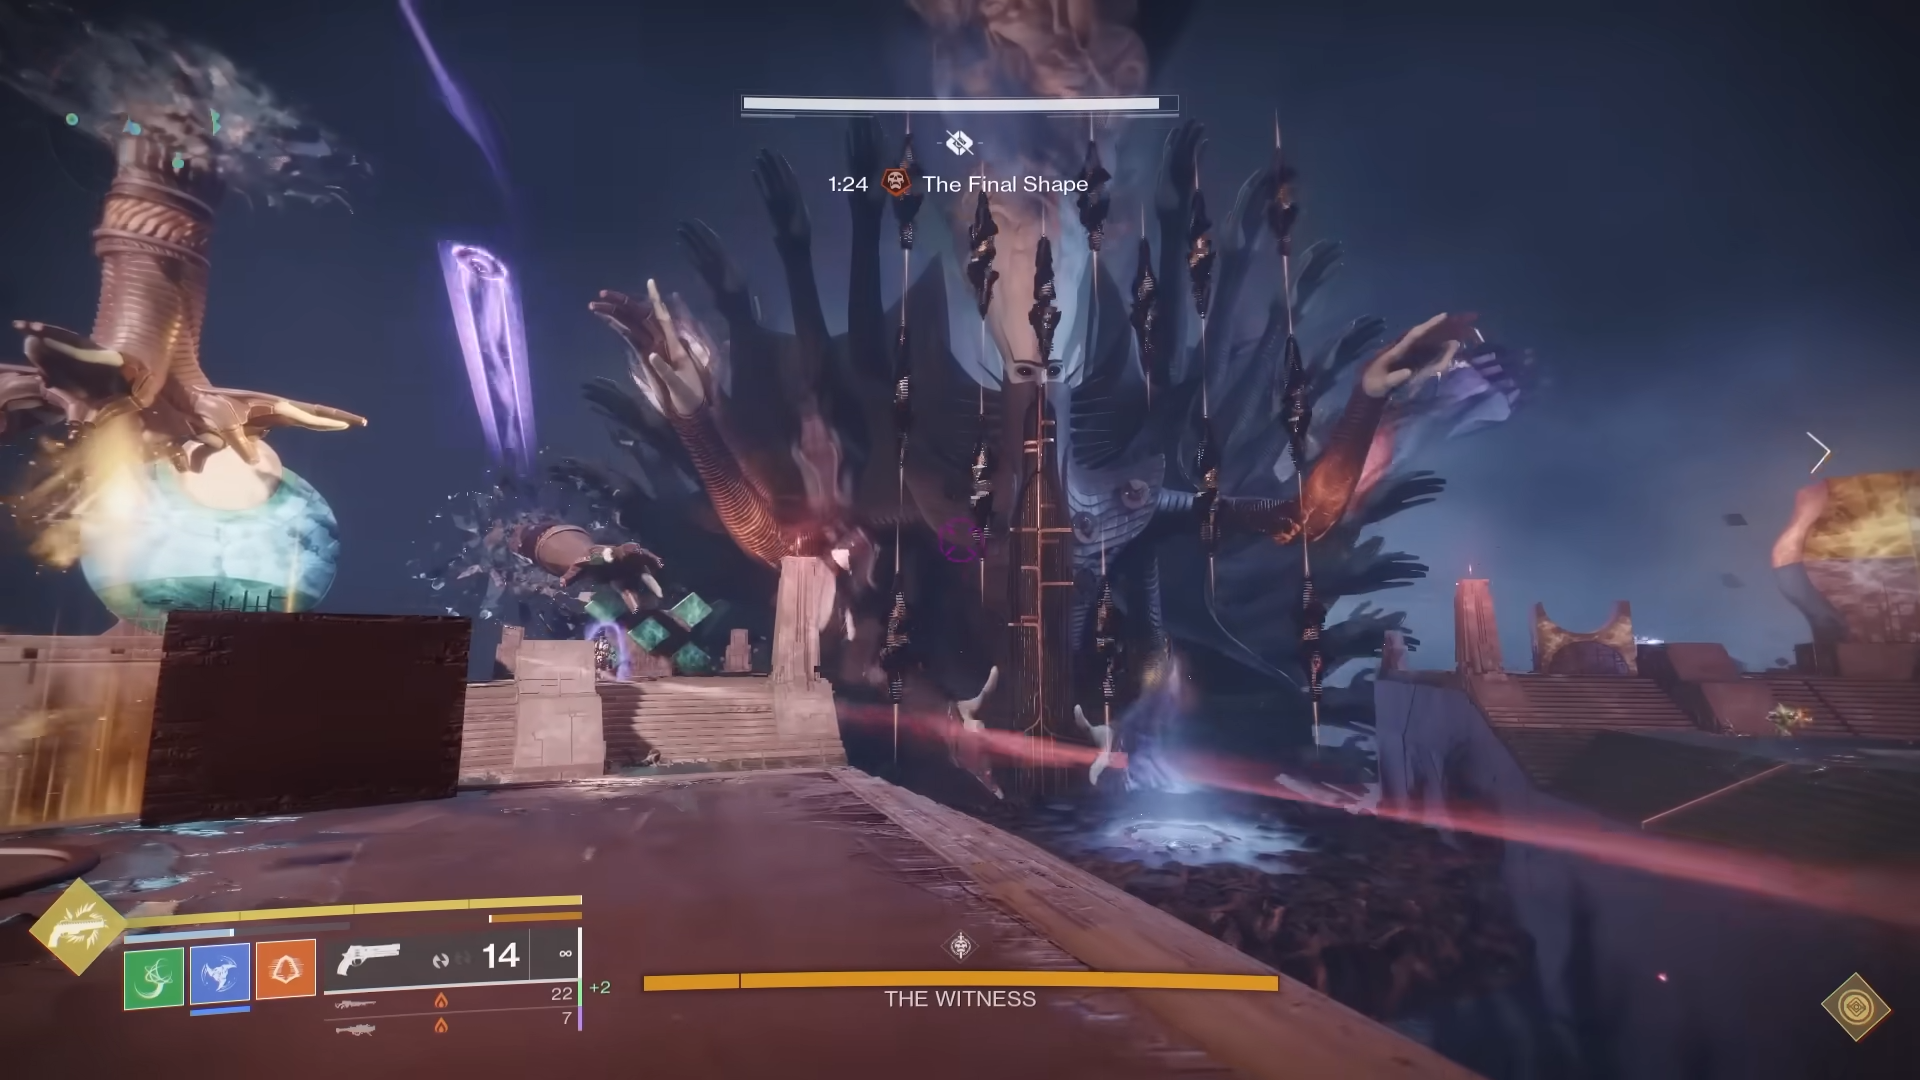
You will note that The Witness's chest has six tiny "buttons" as soon as the encounter begins (see picture). These are the defensive glyphs preventing its weak point from being exposed. You must destroy those glpyhs if you wish to harm The Witness. You will need the Glyphbreaker buff in order to destroy the glyphs. Players should first divide their team into two groups of three, 3 Glyphbreakers and 3 ad-clearers.
The ad-clearers should split up so that one is on the left, one is on the right, and the other alternates between the two as necessary. The Subjugators provide the biggest threat here, although they only spawn when a glyph is destroyed, so be ready for them. The more annoying enemy are the Screebs, who will leap explode in your face, which may cause a few deaths. While you wait for damage to begin, concentrate on maintaining the field free for your hand squad.
Glyphbreakers: Breaking The Witness's Glyphs
Glyphbreakers usually do not need to bother about ad-clearing unless they are experiencing a period of inactivity. Rather, your task is to deal with The Witness' numerous hands, which you have not been able to harm during the raid. It is now your chance to turn the tables on it and utilize its power against itself.
To keep things easy, you should assign each Glyphbreaker player to one of the three types of hands in this encounter:
- The "Down/Triangle/Green" hand, which descends from the ceiling, launches the triangular bomb from the first encounter and bestows the Pyramidal Resonance buff.
- The "Up/Circle/Yellow" hand, which rises from the floor like the second encounter launches a circlular airstrike and grants the Spherical Resonance buff.
- The Wall/Square/Red hand, which bursts out of the wall horizontally, sends a beam across the arena like the third encounter and offers the Hexahedron Resonance buff.
Once each glyphbreaker has been assigned a hand, follow these steps:
- Search and head to the attack your hand does.
- Triangle Hand: Look for the triangular glowing area on the floor.
- Circle Hand: Look for the circular glowing area on the floor.
- Square Hand: Look for the rectangular line that spans across the map. It is a long and thin area.
- Pre-aim the bangle on the hand. (See 1st image)
- Step into the glowing area and shoot the bangle and step out IMMEDIATELY.
- Reason being you do NOT want to get a stack of resonance from your own shape because it is useless and it uses up a stack of resonance. Remember you can only hold 3 stacks before you die.
- You will see the bangle glowing with a certain colour and shape. (See 2nd image.) It will never be its own shape or colour. Meaning:
- If you shoot a Triangle hand, it will only ever reveal a Red/Square or a Yellow/Circle colour and shape.
- If you shoot a Circle hand, it will only ever reveal a Red/Square or a Green/Triangle colour and shape.
- If you shoot a Square hand, it will only ever reveal a Green/Triangle or a Yellow/Circle colour and shape.
- Head to the attack area of the associated shape and colour, stand in the attack zone until you get the stack of its associated resonance. You do NOT need to shoot the hand of that area.
- For example, you shot the bangle of the Yellow/Circle hand, and it revealed a Green/Triangle shape and colour, you now find the triangle attack area on the floor and stand inside it until you get a stack of Pyramidal Resonance.
- Once you've gotten your associated resonance, head back too your hand, pre-aim the bangle, step into the attack zone, fire and get out. You should see the hand spasm and retreat to where it came from and despawn. You should now have the Glyphbreaker buff.
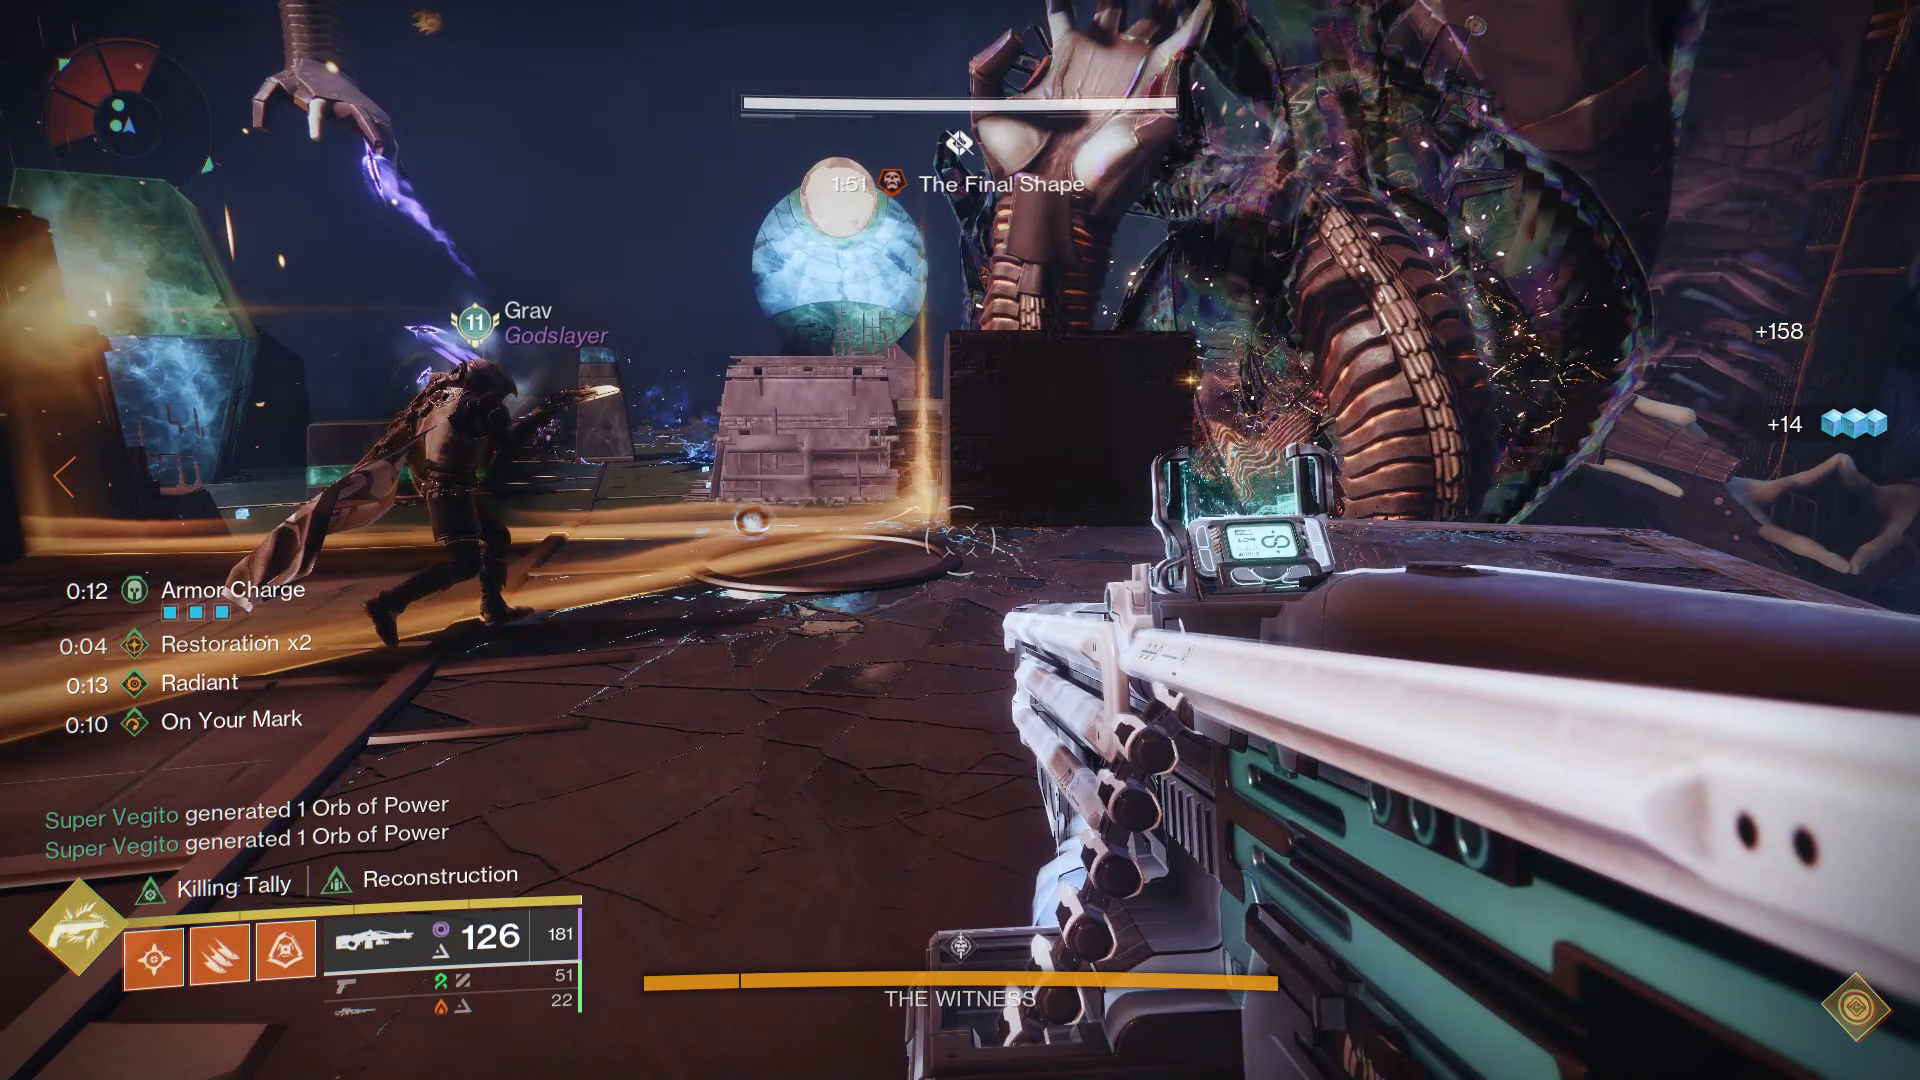
- Head to the center circular platform and shoot the glyphs till it's destroyed (see 3rd picture). If you use certain weapons like trace rifles or machine guns and time it right, you can destroy 2 glyphs with one buff, which reduces the effort to get to the DPS phase.
- The hand will respawn on another side of the map. Repeat all steps until all 6 glpyhs are destroyed, then the DPS phase will start.
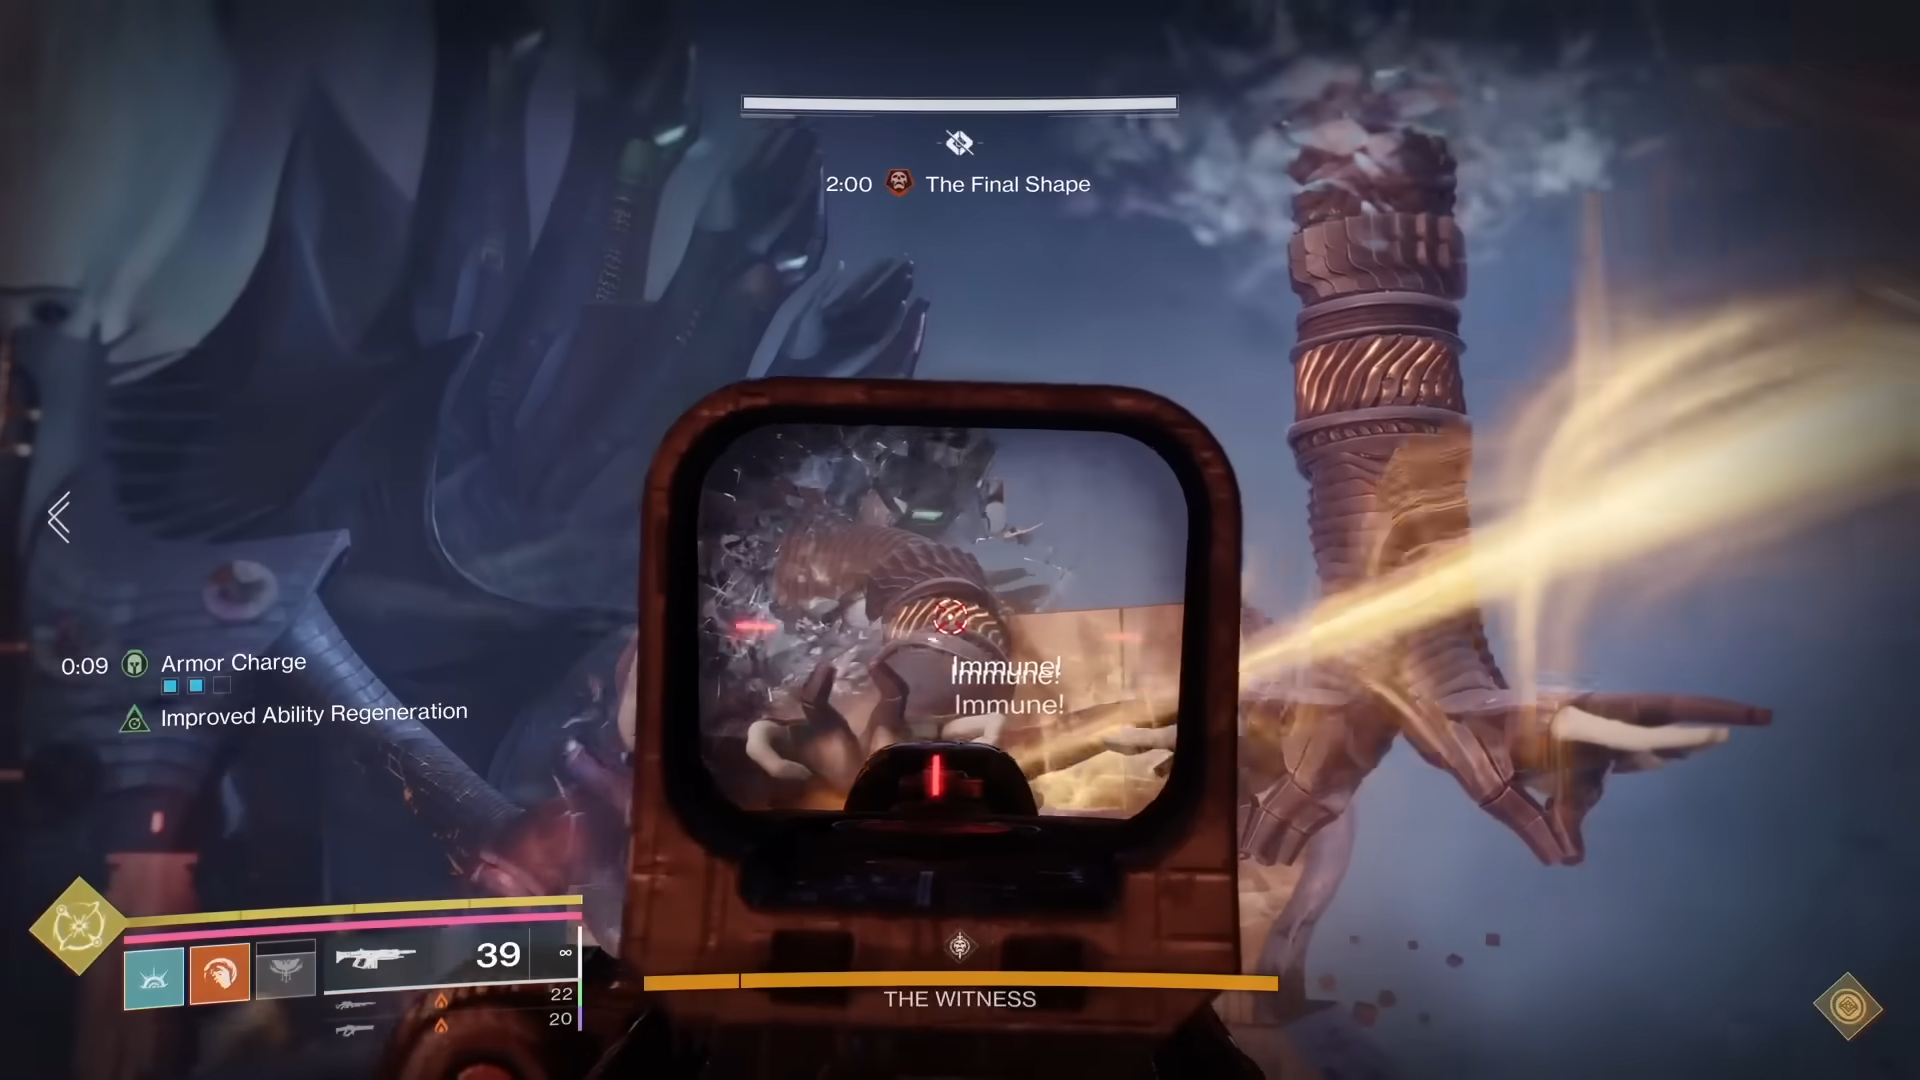
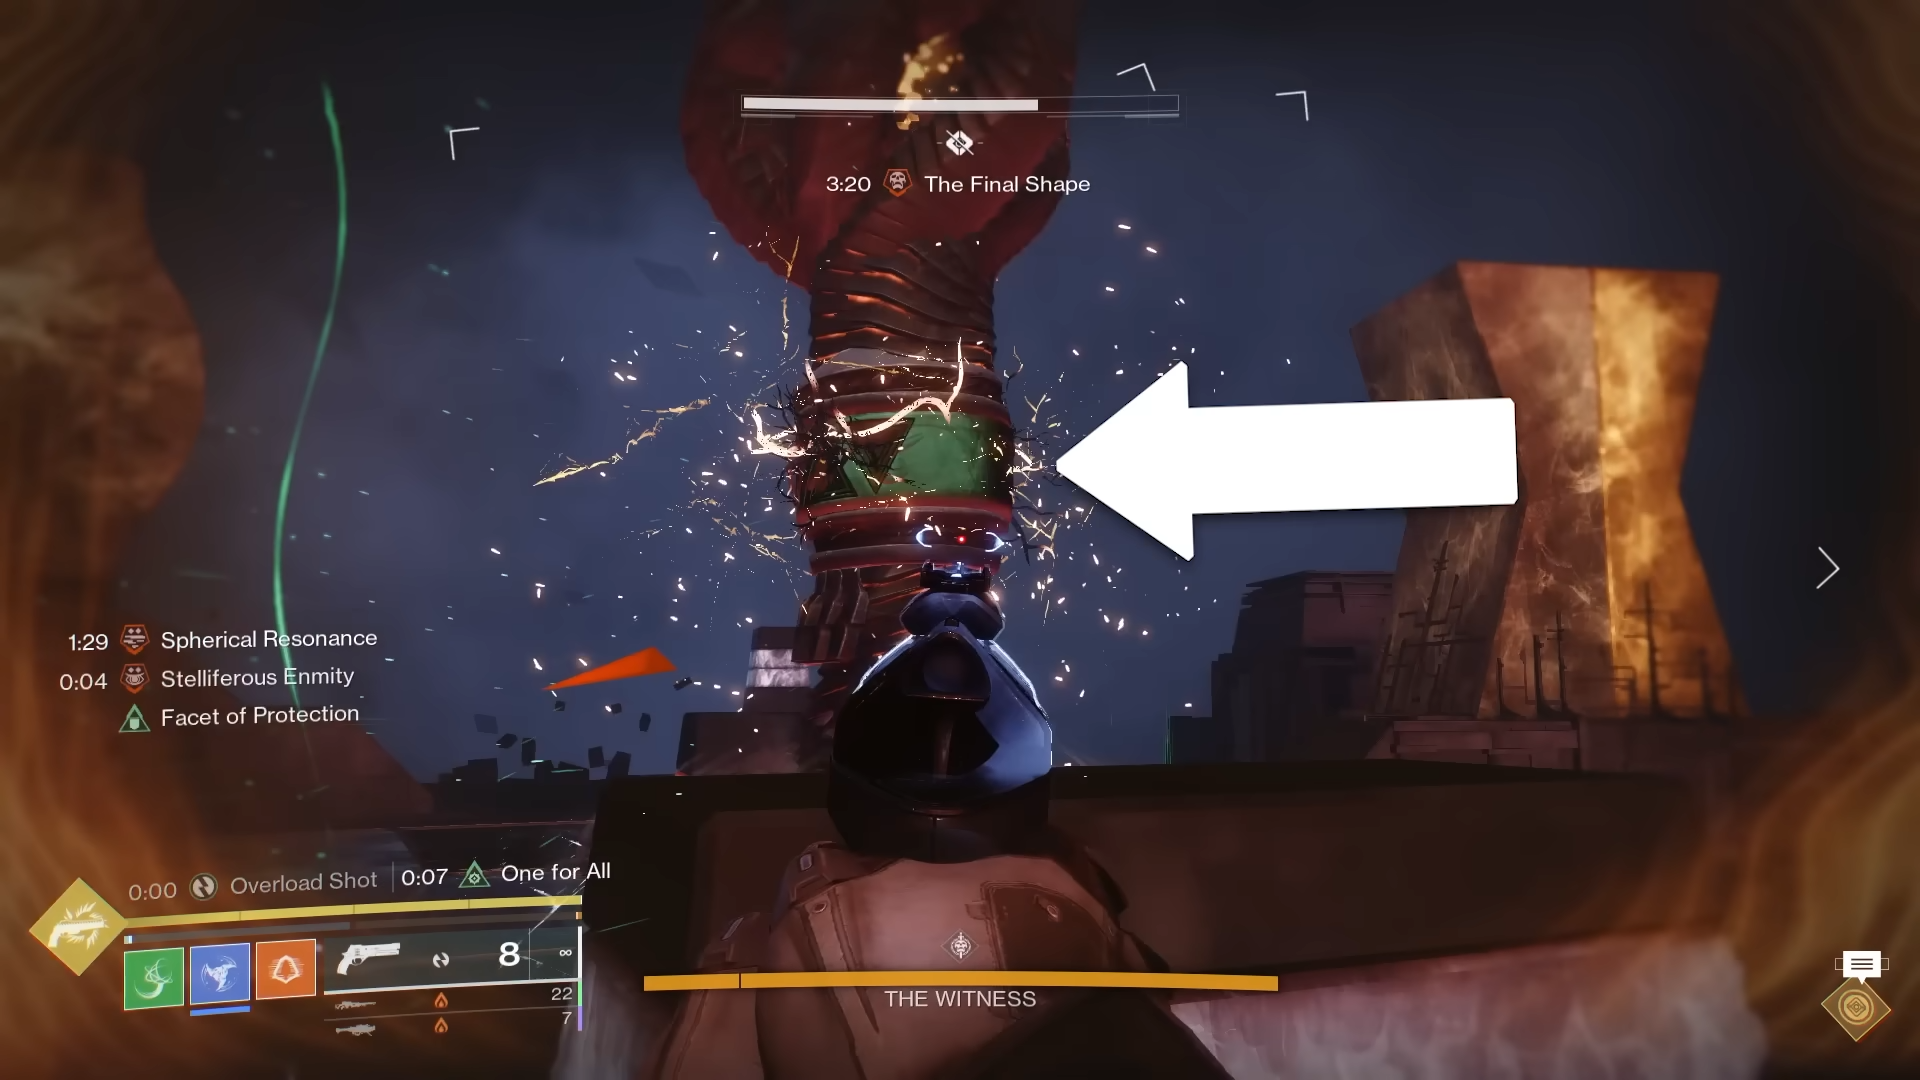
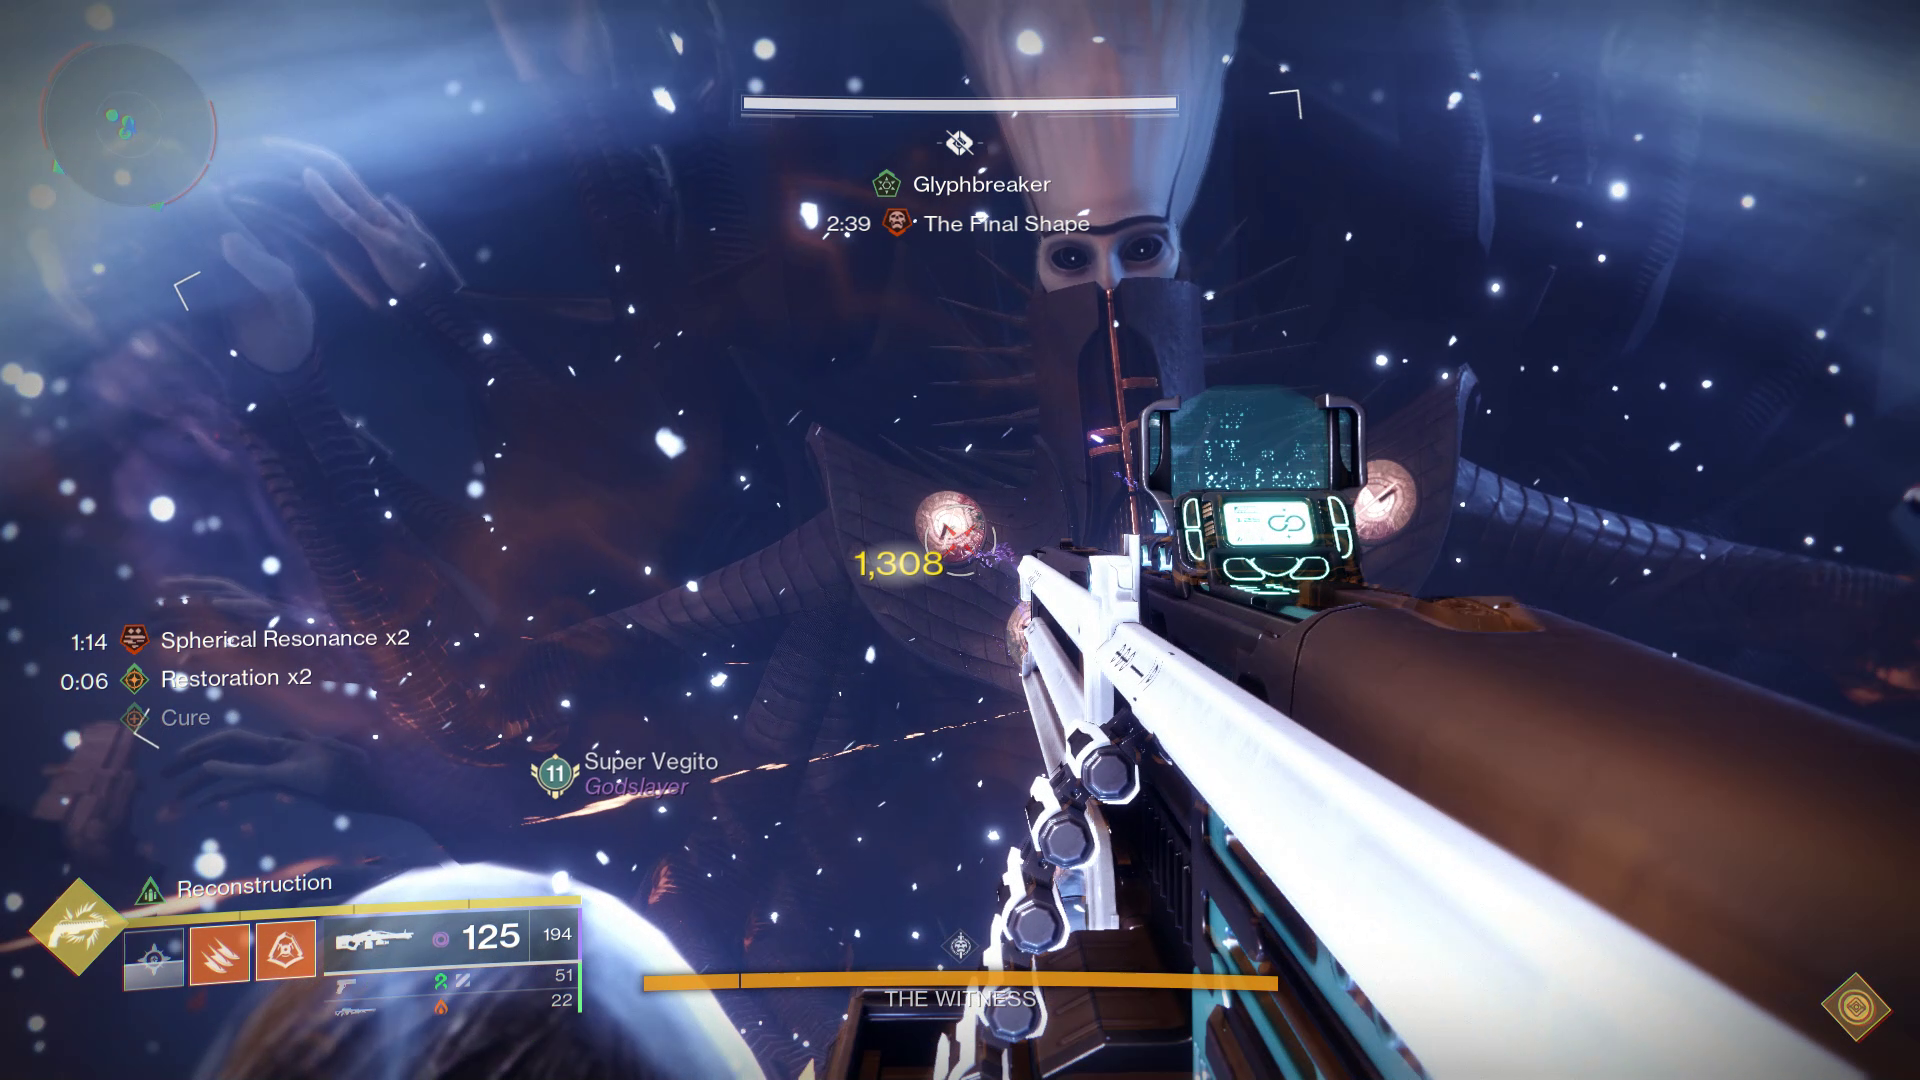
Surviving The Witness's Trap
Once per phase, The Witness will set up a trap for you when you shatter one of its hands. This cannot occur on a broken first or sixth hand. As soon as you break the hand, a prompt titled "The Witness tests you.." will appear. You must verify whether you received the prompt after popping a hand because the last hand that got destroyed is essential to stopping The Witness in this situation.
You can identify the hand which triggered the trap by looking at its destruction animation. The hand that triggers the trap will glow a bright yellow and produce a loud screeching sound when destroyed. Refer to the below pictures to notice the difference:
 Notice how when this hand gets destroyed, there is no glow. This
hand did not trigger the trap.
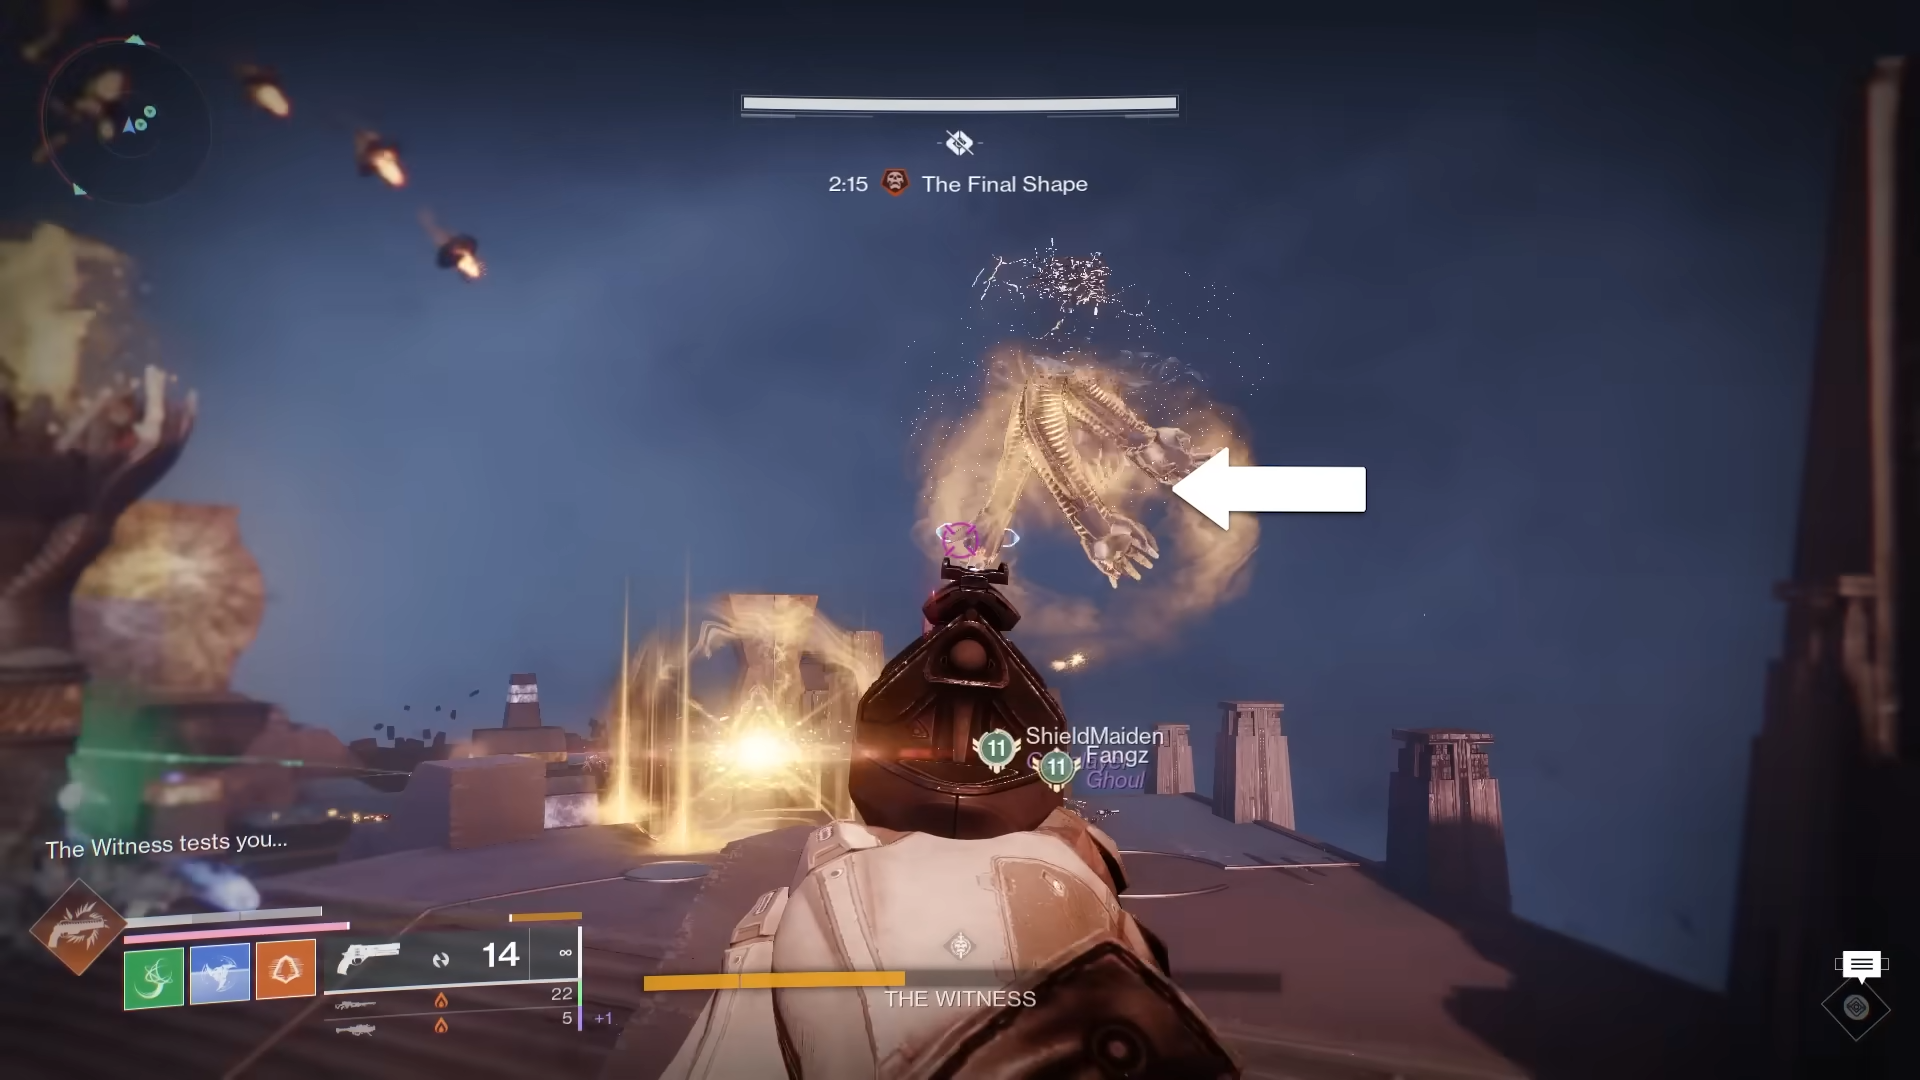 This hand started glowing when it is destroyed, so it started the
trap. Remember which type of hand triggered the attack. In this
case, it was a Triangle hand.
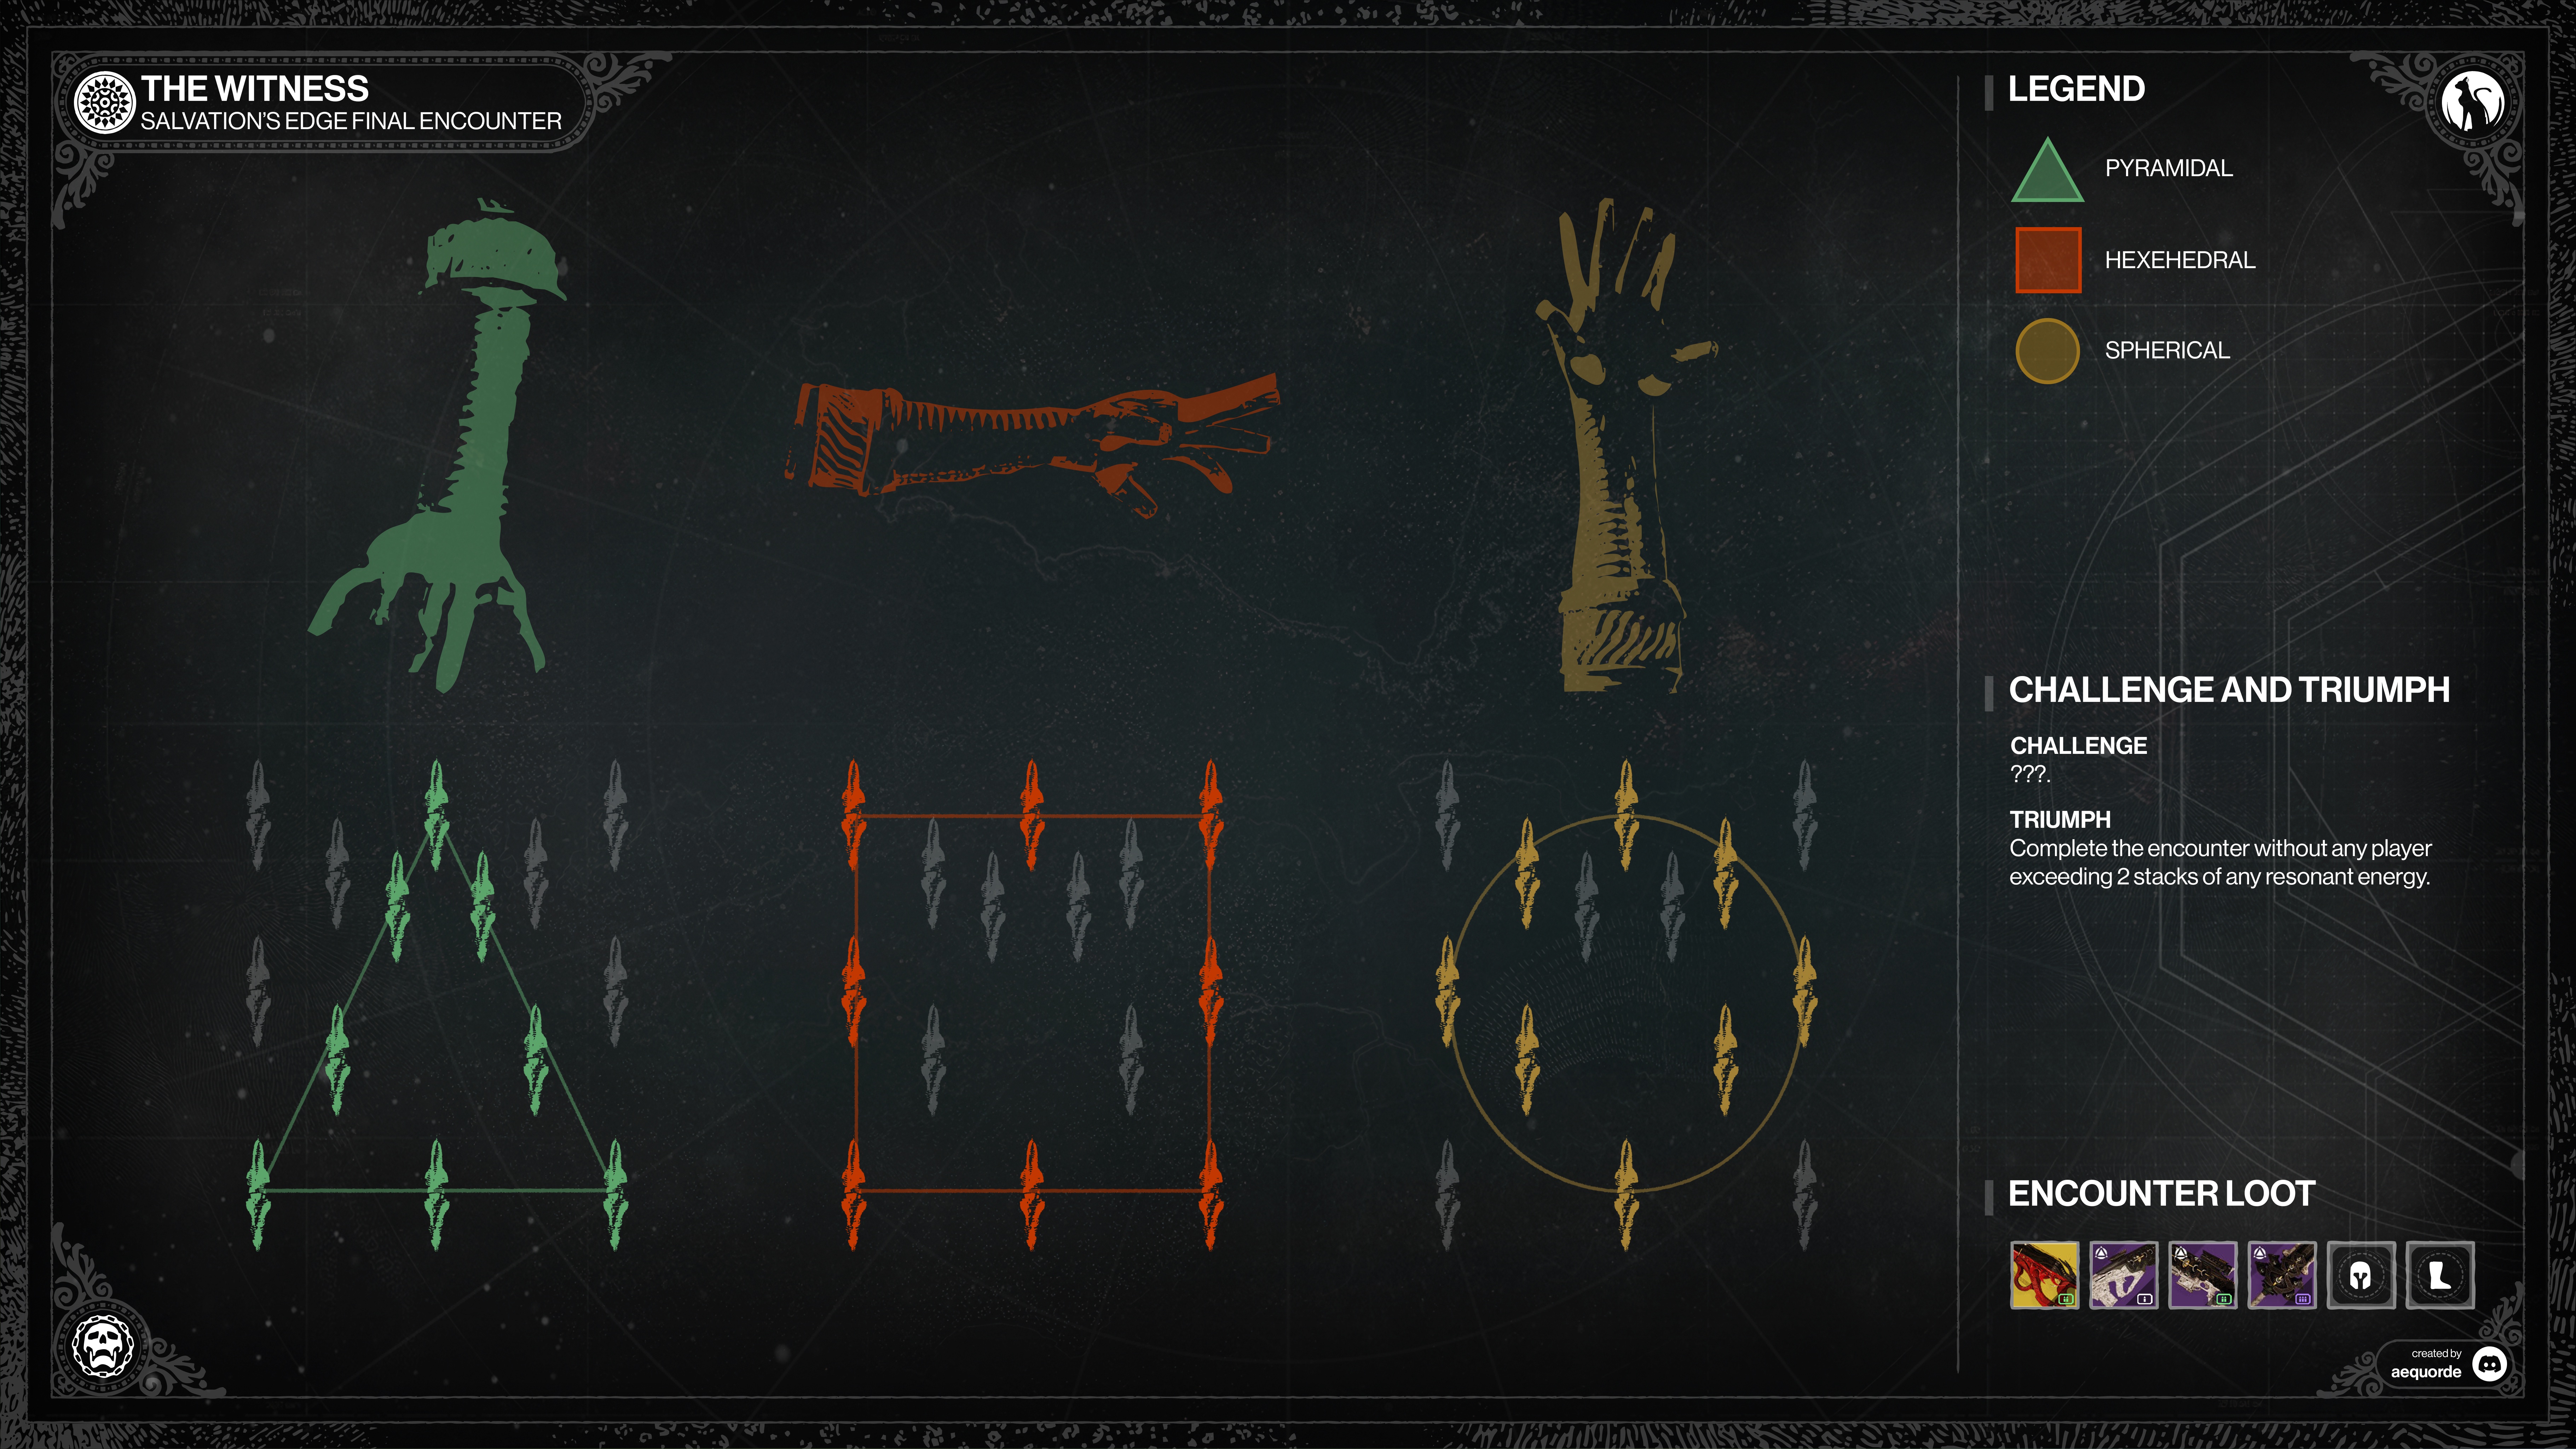
Once you know which shape and which hand triggered the attack, observe the center of the arena. A number of Resonance crystals will be summoned in midair in front of The Witness (See picture). The form you make with the crystals must match the type of hand that was just destroyed, whether it be a square, circular, or triangle.
In our example with the Triangle, All of the resonance crystals outside of the triangle shape must be destroyed. Be extremely cautious because you will be killed by the trap if you shoot any of the incorrect crystal. Leave the remaining crystals alone until they have taken on the shape of a triangle. The prompt "The Witness's trap is foiled." will appear if you get the right shape. You can refer to the diagram below to aid your team in shooting the right shape:
But avoiding The Witness's trap does not guarantee your safety. The Witness will rear back and thrust its hands forward when the trap is released, sending a shockwave across the whole arena. The entire fireteam must jump because the attack will kill anyone who touches the ground. The telltale signs are The Witness's glowing eyes and the sound of a sword being drawn. When you see that, jump, and wait for the attack to finish before touching the ground. Once that is done, return to destorying the glyphs on The Witness's chest until all of them are destroyed. You are now ready for DPS.
Damaging The Witness
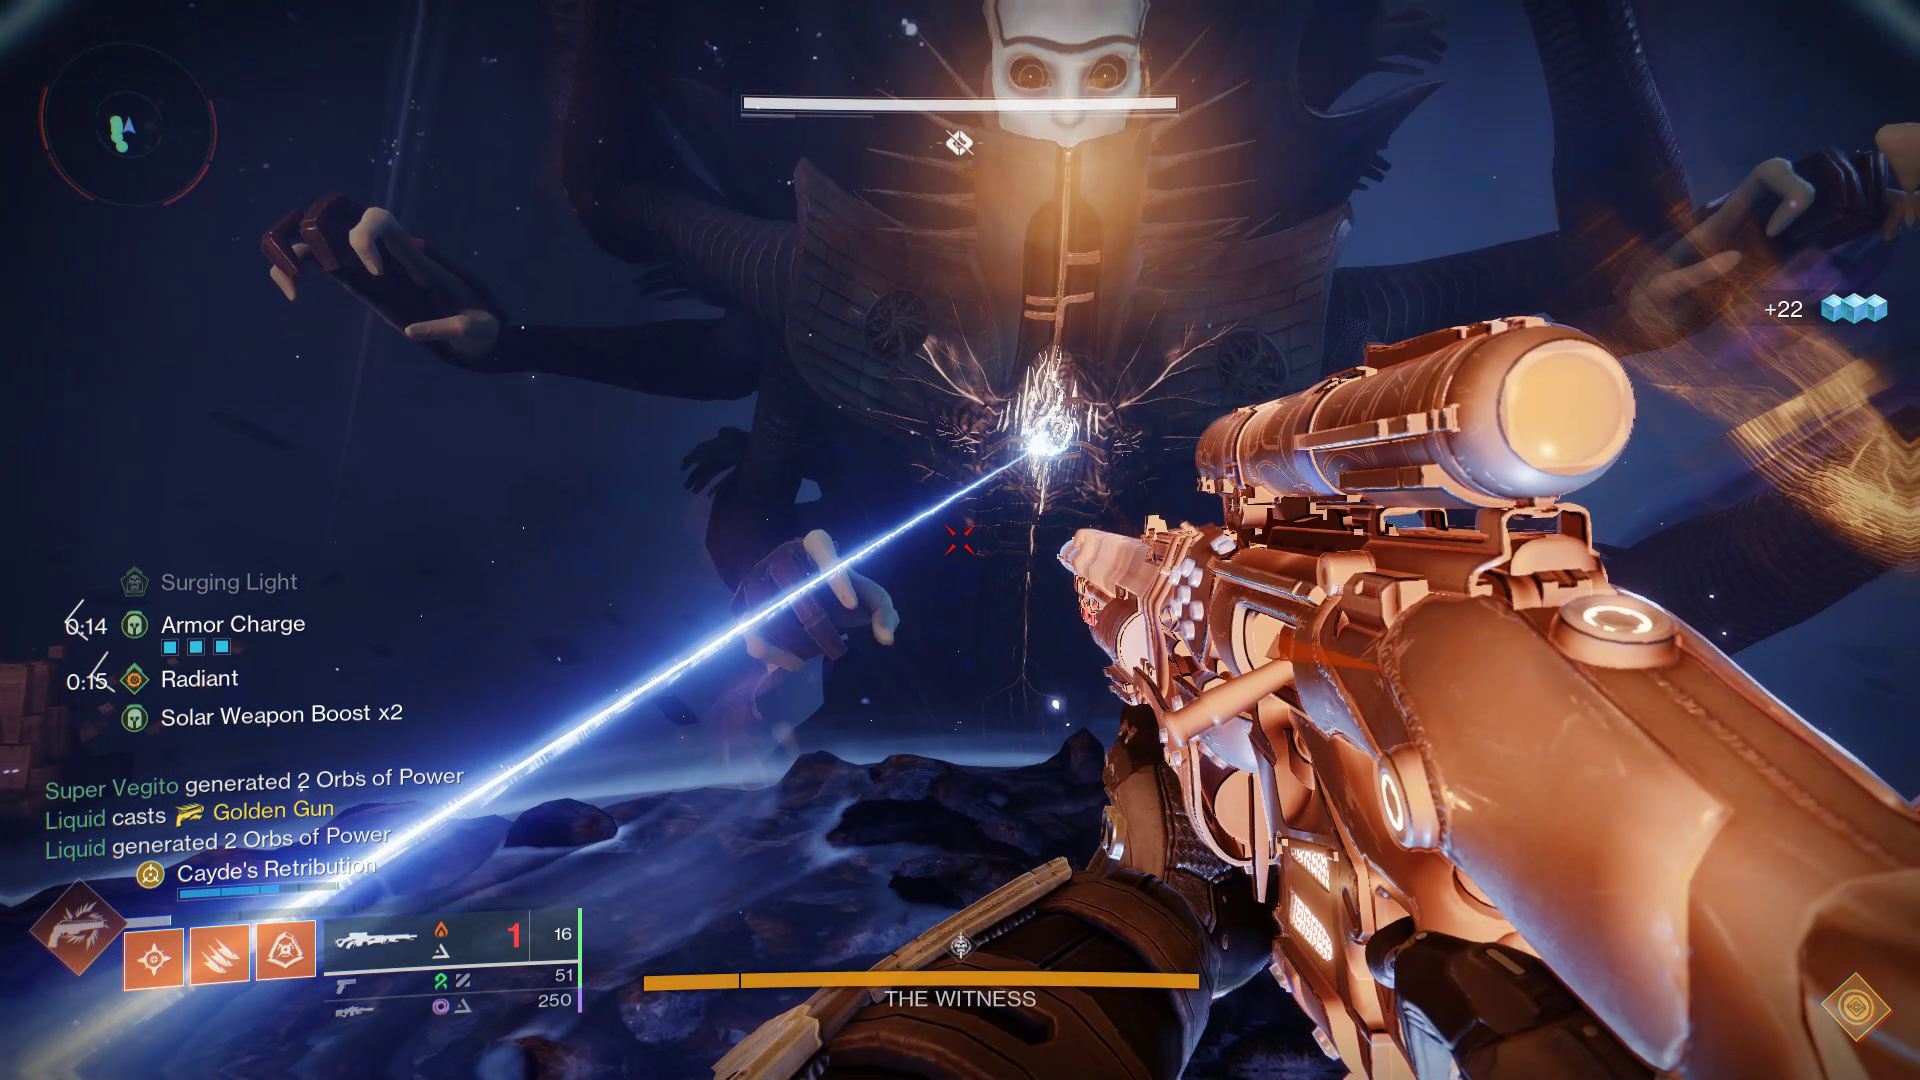
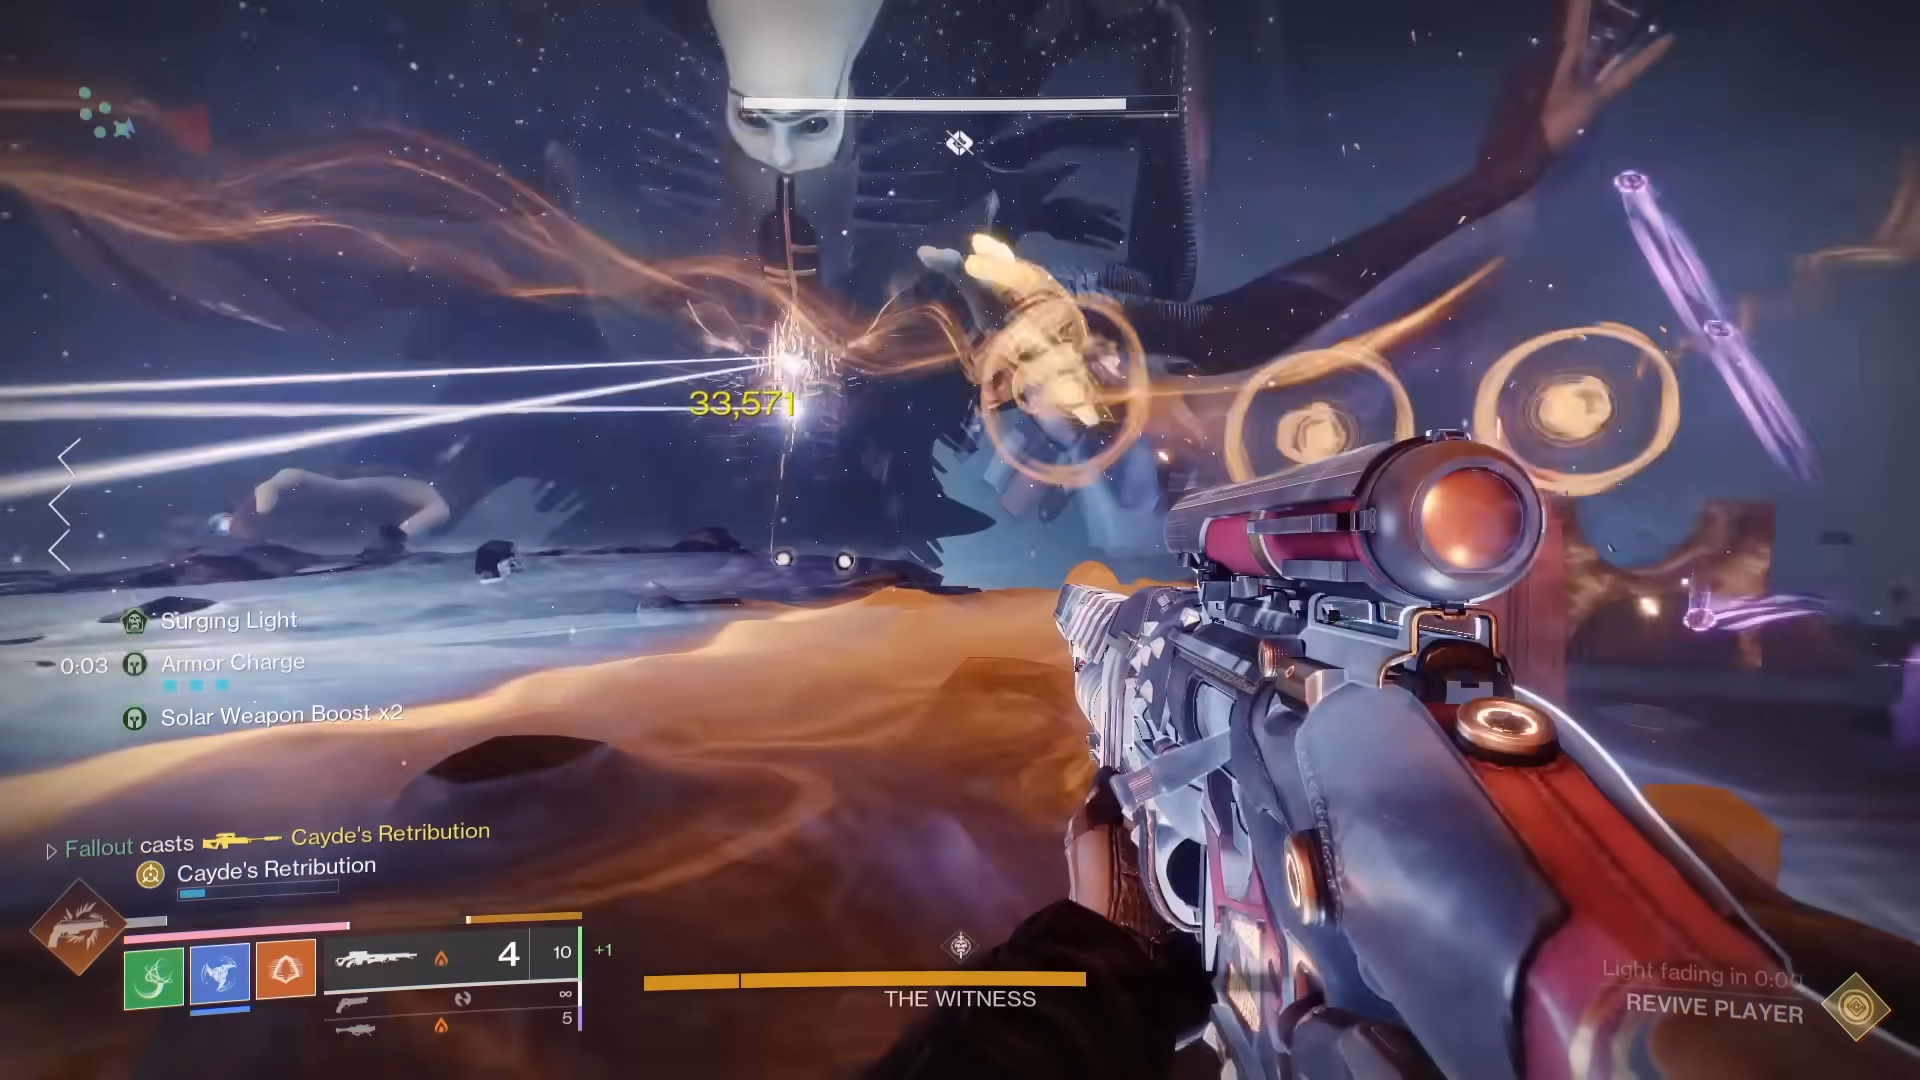
Head to the center once the last glyph has been destroyed, the center platform will raise upwards. The glowing slit in the Witness's chest is its critical spot, and it will open up when the platform reaches its maximum height. Start shooting as soon as it opens, but pay attention to The Witness's hands and eyes. You will have to move from left to right as it shoots enormous beams that can cover half of the platform at once. You will also need to be prepared to jump because it will also perform the wiping mechanism from the trap and shine its eyes. Sometimes it'll even do both at once, which is pretty tough to avoid. For this, healing grenades work incredibly well because you can toss one at your feet and still survive if a beam clips you.
After it attacks three or four times, the Witness will become exhausted for a short while. DPS as much as you can. The Witness will eventually get irritated and slowly turn around to slap the dish down. You must jump off the platform, otherwise The Witness will kill you. You have three phases to complete this, so you must strike hard when you have the opportunity. Repeat this entire procedure until you reach the final stand.
Final StandThe Witness will momentarily gain immunity in preparation for its last stand. It will continue to hurl attacks at you and its chest will open again, letting you deal more damage. Use all of your might and push as hard as you can because after 15 to 20 seconds, it will murder everyone unless you kill it first. A massive loot chest will be your reward if you are able to "kill" the Witness, which will retreat from the monolith.
Congratulations! You have completed the hardest raid in Destiny 2.
Encounter Triumph:
Careful Calculation - Complete the encounter without any player exceeding 2 stacks of any resonant energy.
Challenge Mode:
Coordinated Efforts - You must break all six of the Witness's Glyphs in 5 seconds.
Master Difficulty:
- Scorn Chieftains are now minibosses.
- Subjugators are not bosses.
